
 02-10-2016, 09:26 AM
Last edit by: IB Advertising
See related guides and technical advice from our community experts:
Browse all: Steering & Suspension Guides
- Toyota 4Runner 1984-1995 How to Replace Locking Hubs
Step by step instructions for do-it-yourself repairs
Browse all: Steering & Suspension Guides

Aisin Locking Hubs Tear Down/Build Up
11-07-2008, 01:54 PM
#1
Aisin Locking Hubs Tear Down/Build Up
okay, so i know that there are multiple write-ups on this forum, but being a person who relies more on visual instruction than written, i decided to make my own. DIAL UP BE WARNED!!! THERE ARE TONS OF PICS!!
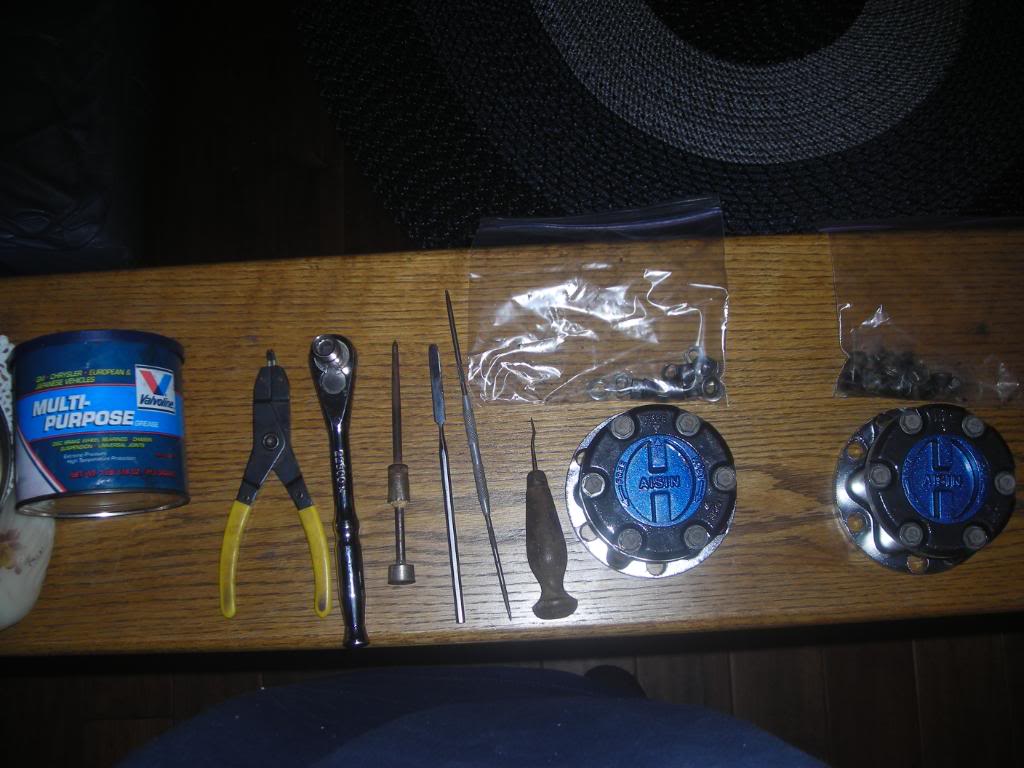
First off, supplies that i used.
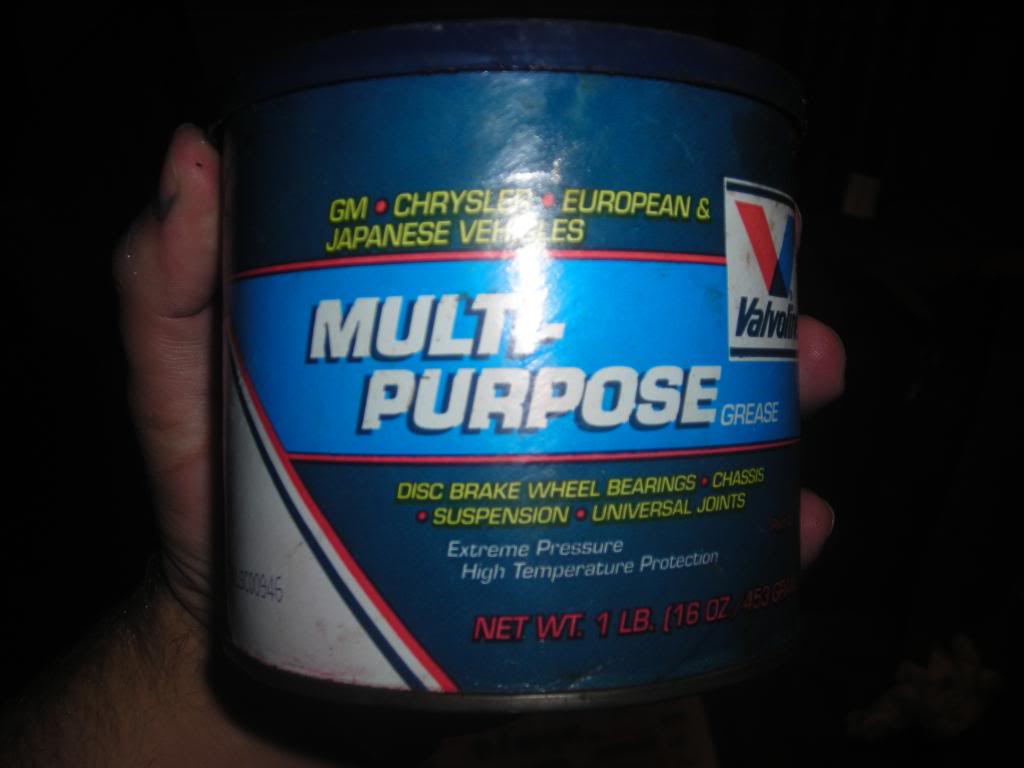
1) Valvoline Multi-Purpose Grease Part No. 614
2) snap ring pliers
3) 3 different sizes of metal picks
4) 1 flat bladed pick
5) 10mm socket and driver
6) 4 small plastic baggies(to seperate bolts)
7) 1 can of Rustoleum Hammertone Paint (Black)
8) 1 can of blue paint(i will edit this when i get the chance)
Also, Torque Specs
Hub body bolts = 23 lb-ft.
Gold bolt = 11 lb-ft.
Dial face bolts = 11lb-ft.
alright, now the build.
i started out with a set of hubs that came off an 87 SAS 4runner that was totaled, and it looked like it had never been washed. lol.
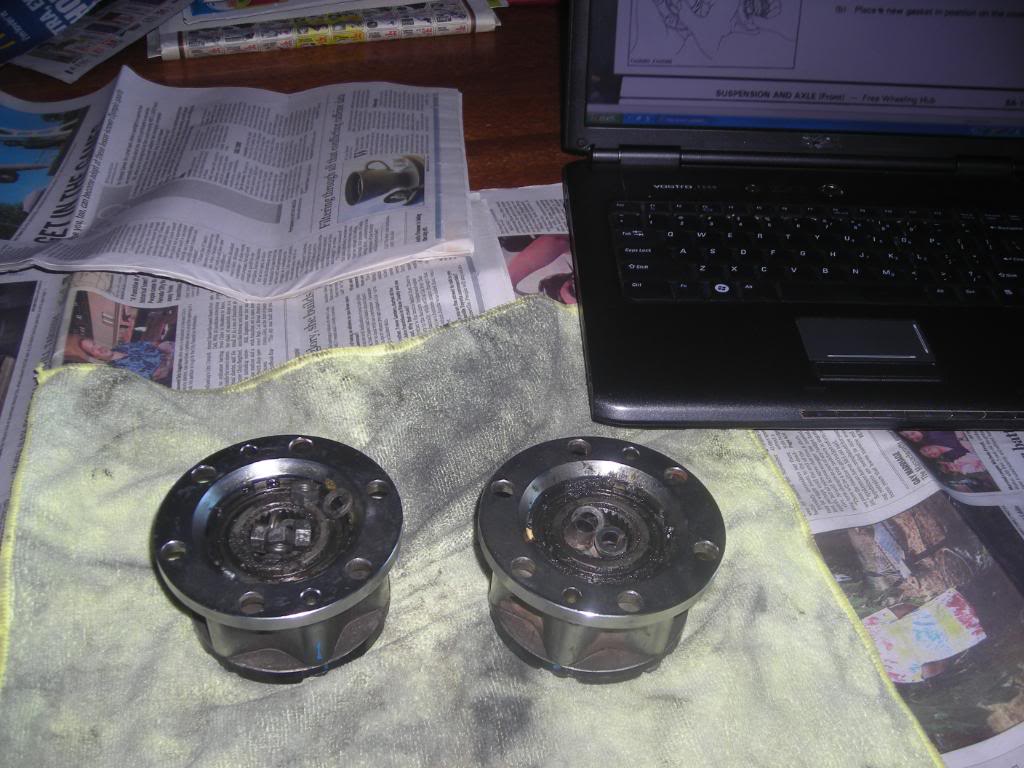
Okay, so, from now on, it will be mostly pics with me narrarating them.
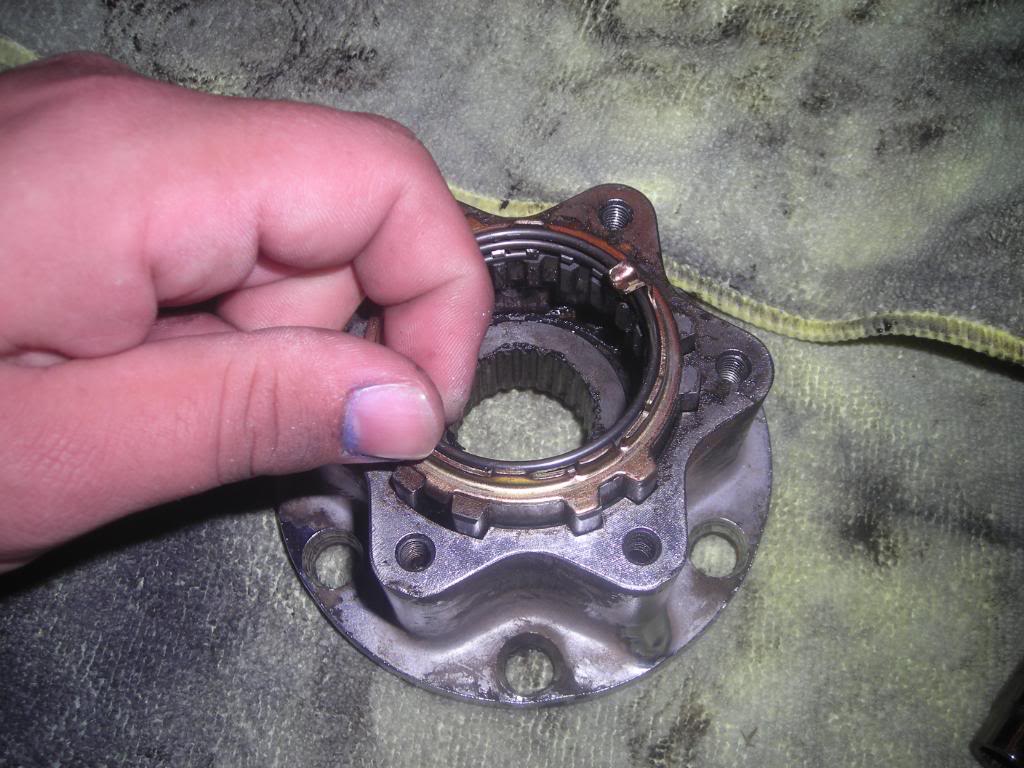
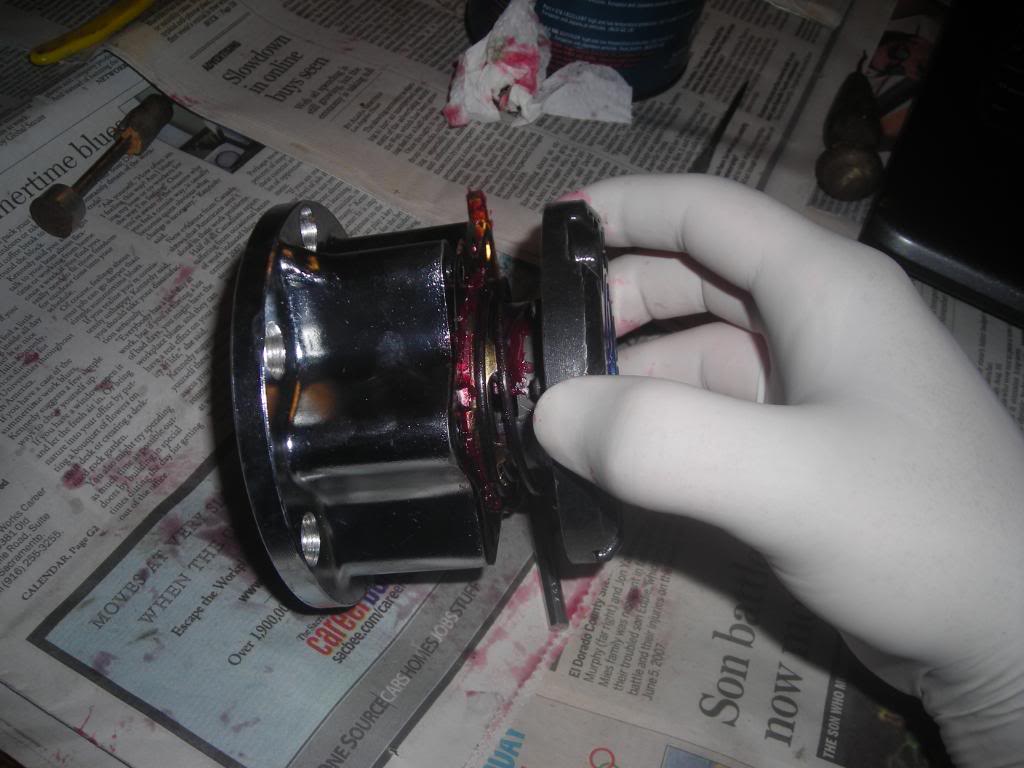
pulled off the 6 bolts on the face, and removed hub face.
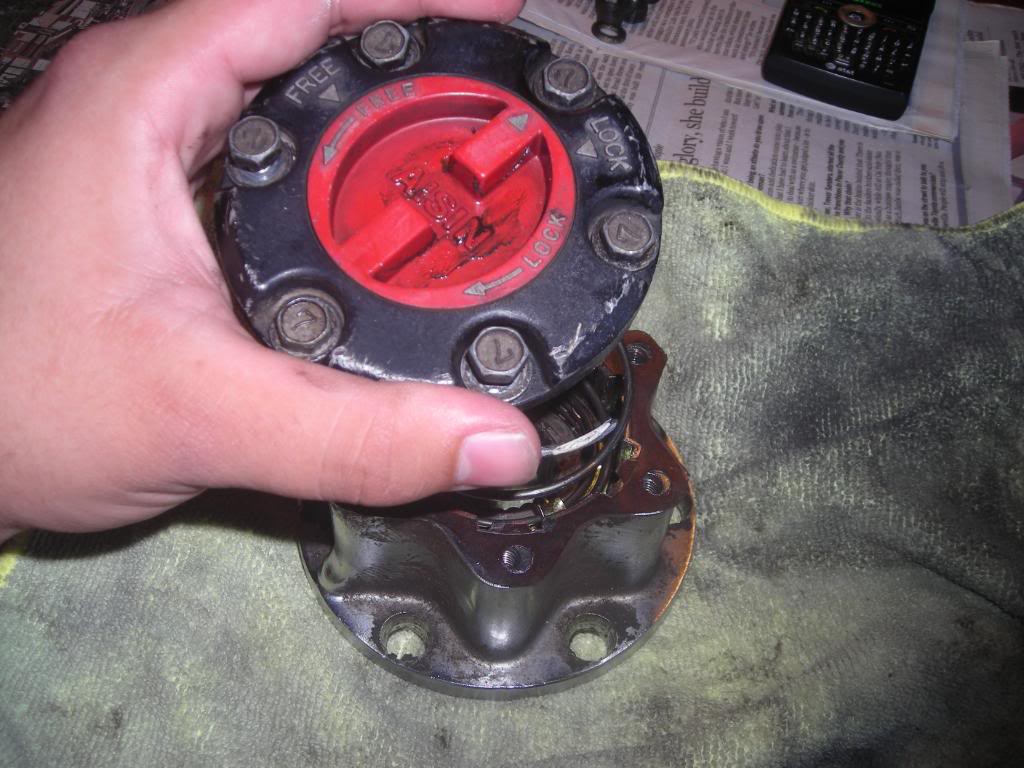
using the snapring pliers to remove the C-clip from the back of the hub dial.
be sure that when the dial is removed that you DONT lose the tiny ball bearing and tiny spring, i put them right into a plastic bag after cleaning. It can take a while to either find it or go buy a new one.
EDIT: a tip from member, rot

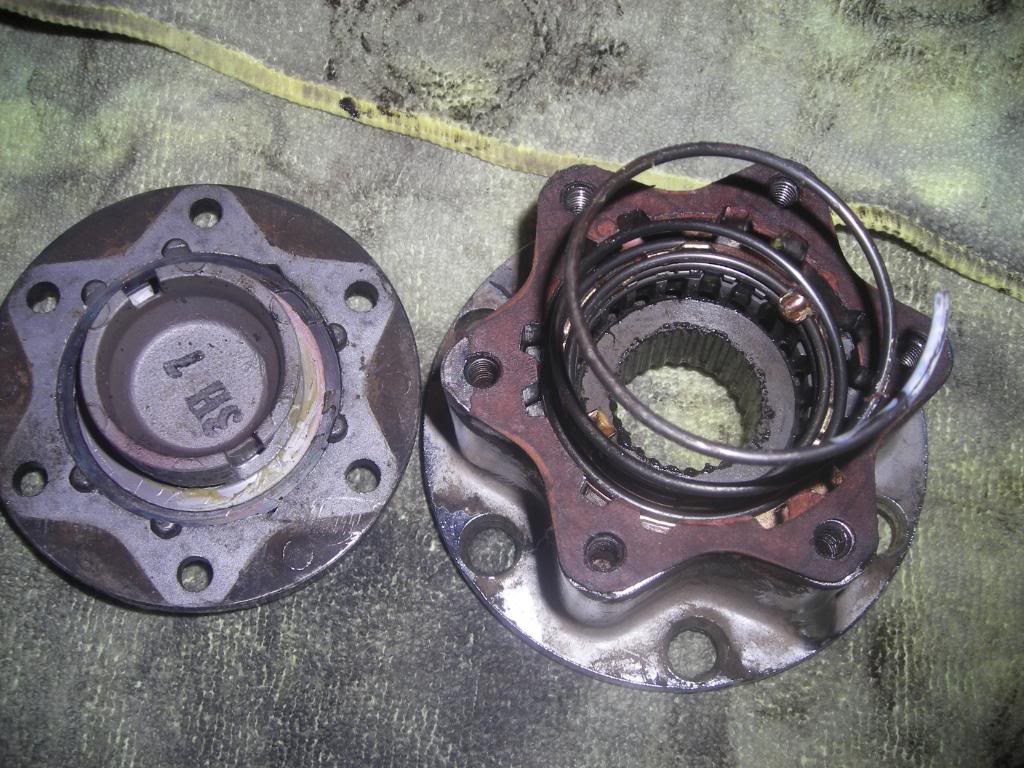
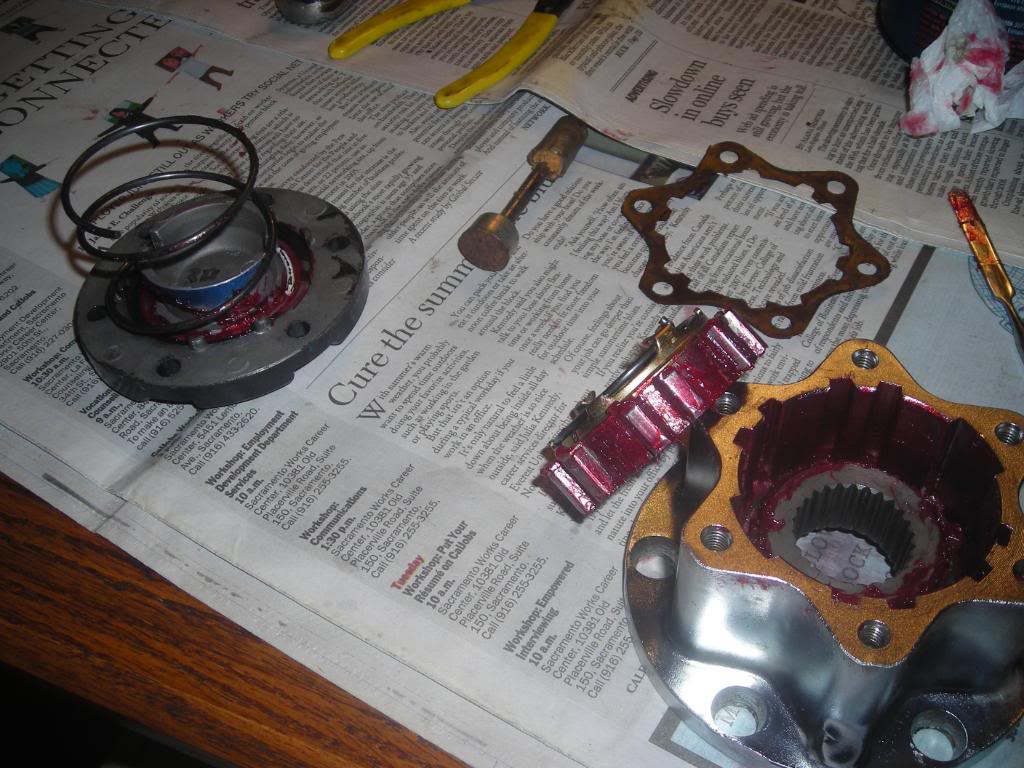
Pulling the guts.
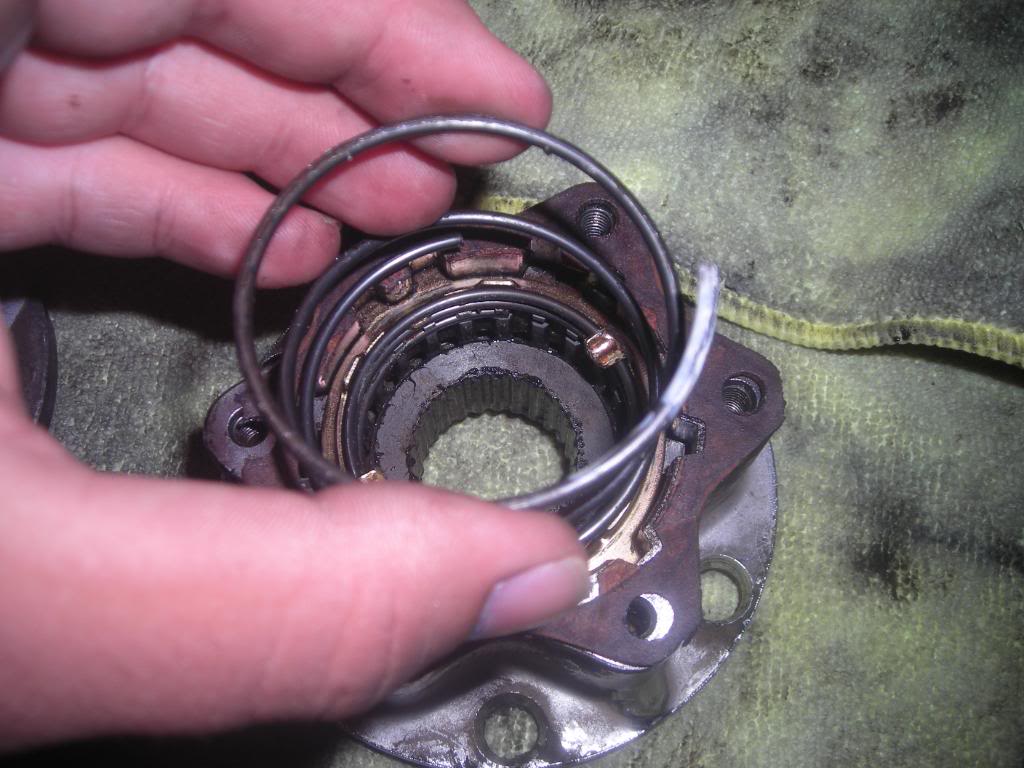
I used a sharp pic to remove the tension spring from the fowler pawl/clutch assembly.
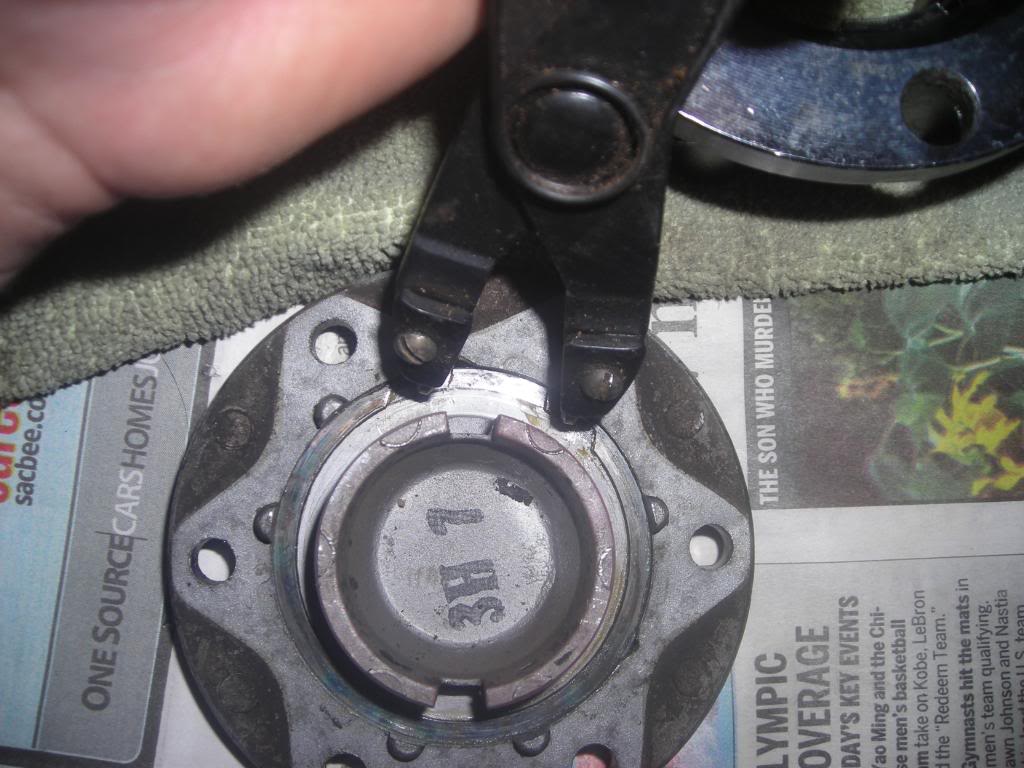
Next, i turned the hub body over and used a flat tip and a narrow tip pick to remove the C-clip from the hub body.

Once all the parts were removed, i took them into the garage to the parts cleaner.
I use a 3 gallon Big Red Jacks electric pump parts cleaner that my dad got at harbor freight a year ago for 50 bucks. its small, but it works!
There is also a way to clean the parts with brake cleaner and Mineral water for anyone who doesnt have access to a cleaner.
And by all the parts, i mean every part including all nuts, bolts and washers.
P.S. be careful, using the parts cleaner solvent for long periods of time can cause your hands to start burning and then go absolutely numb.
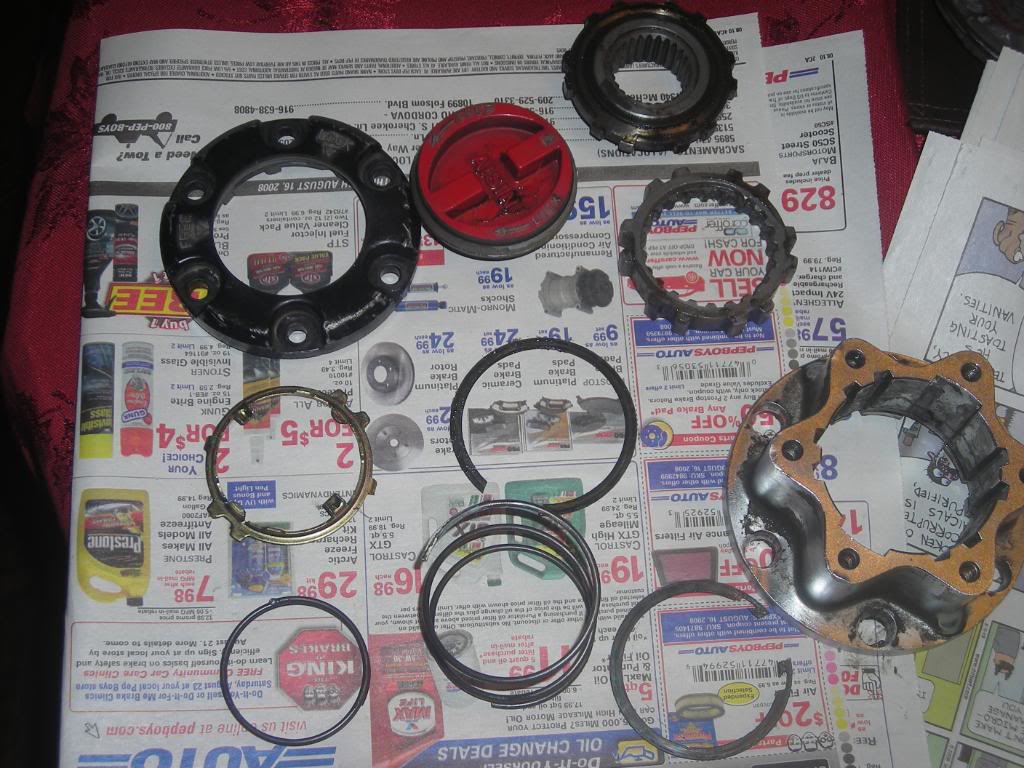
okay, all parts cleaned.
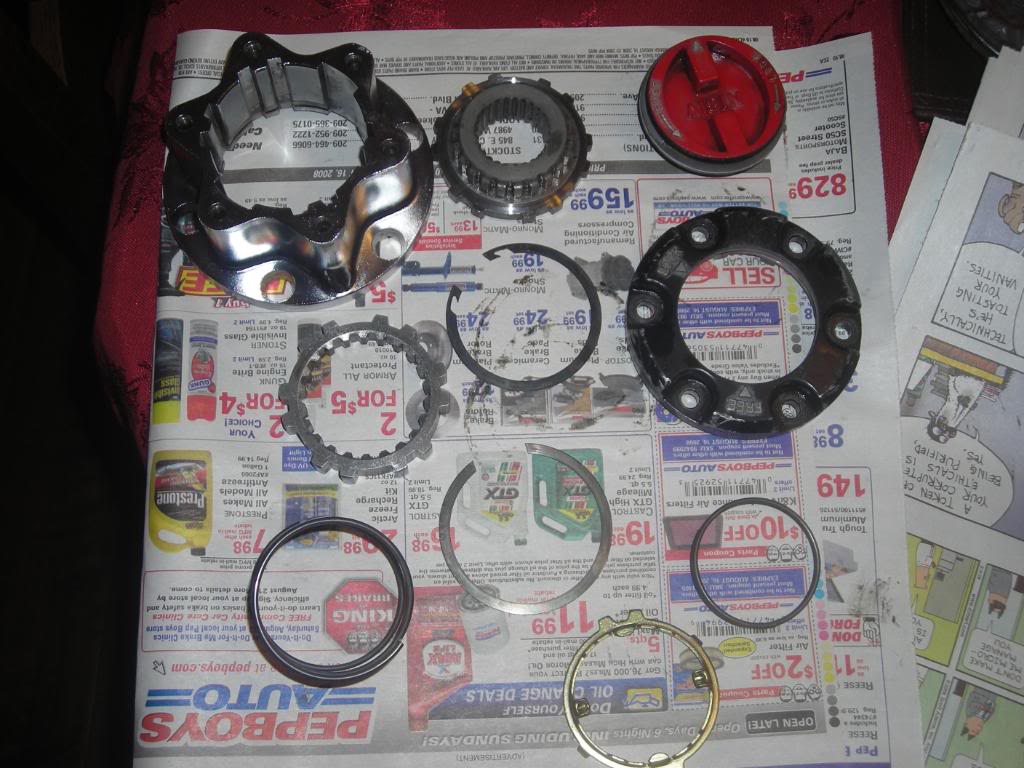
big difference cleaned vs unclean.

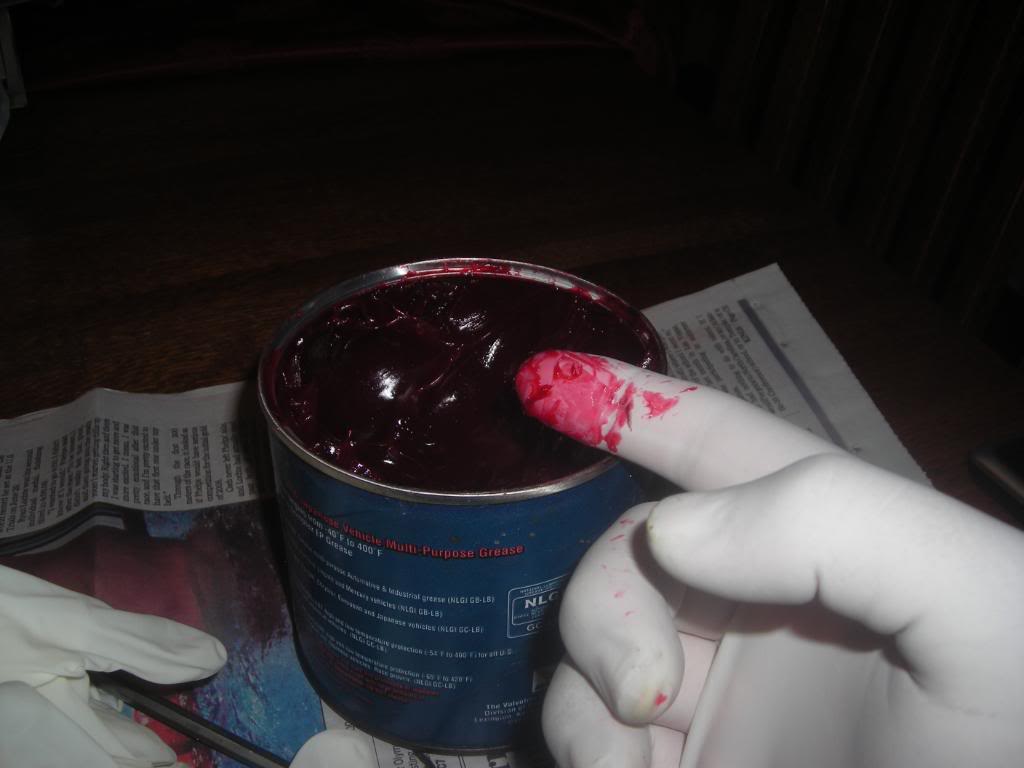
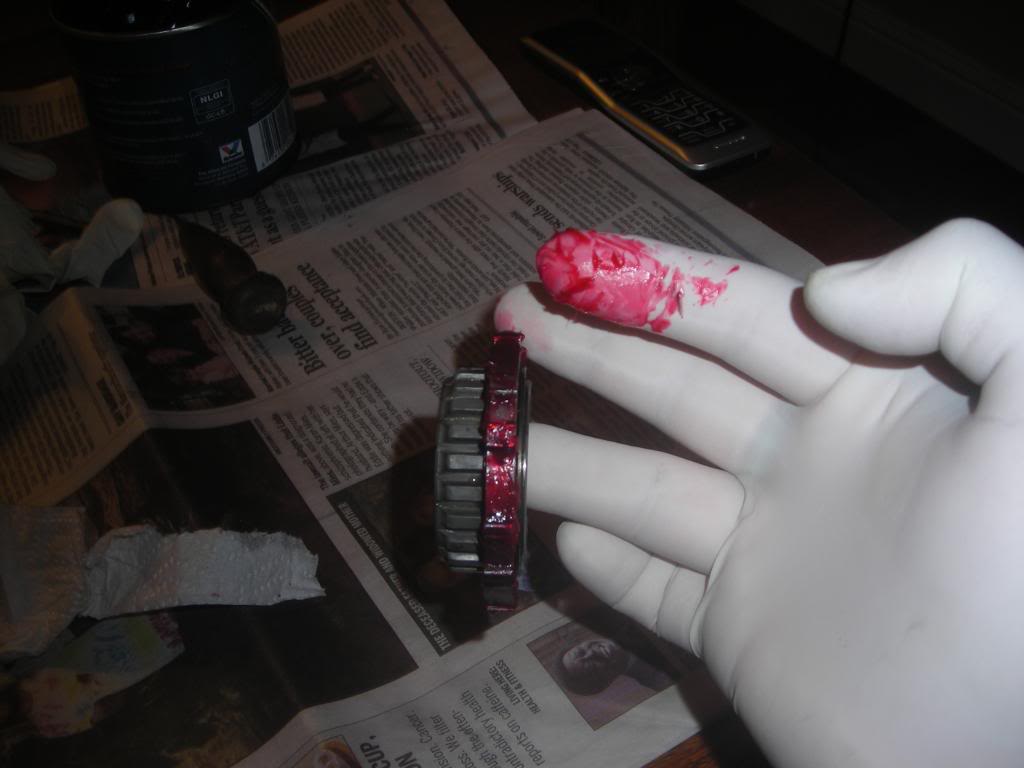
for re-assembly, i used Valvoline Multi-Purpose Grease Part No. 614
here is a collage of me lightly coating all moving/sliding parts in grease.

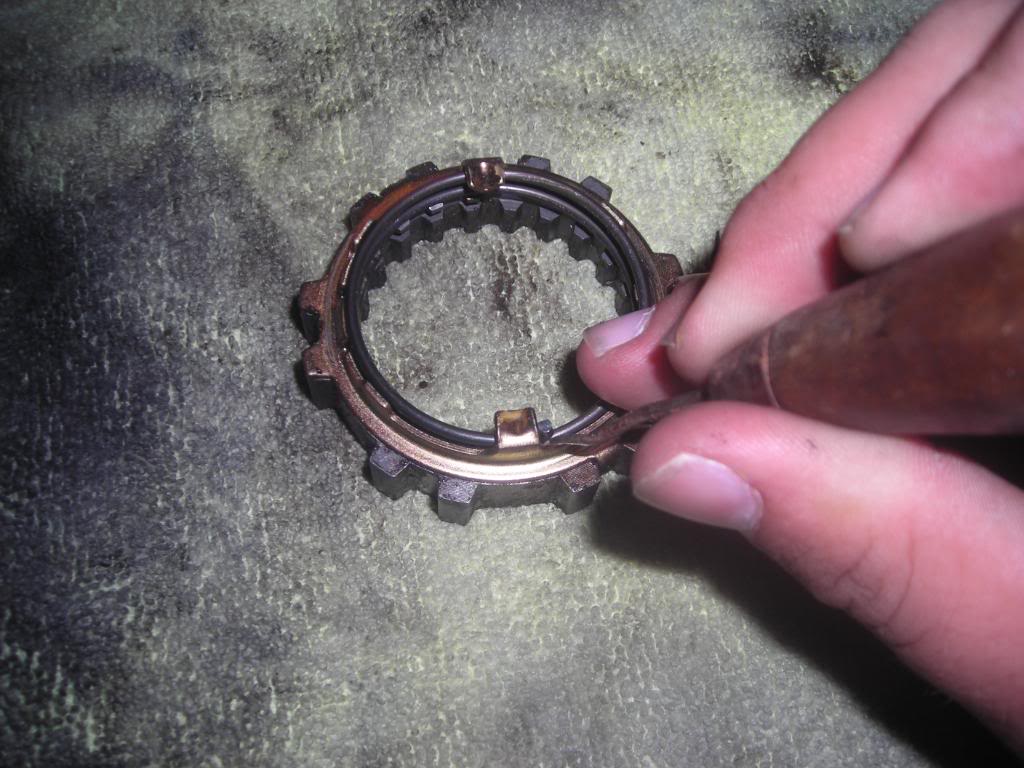
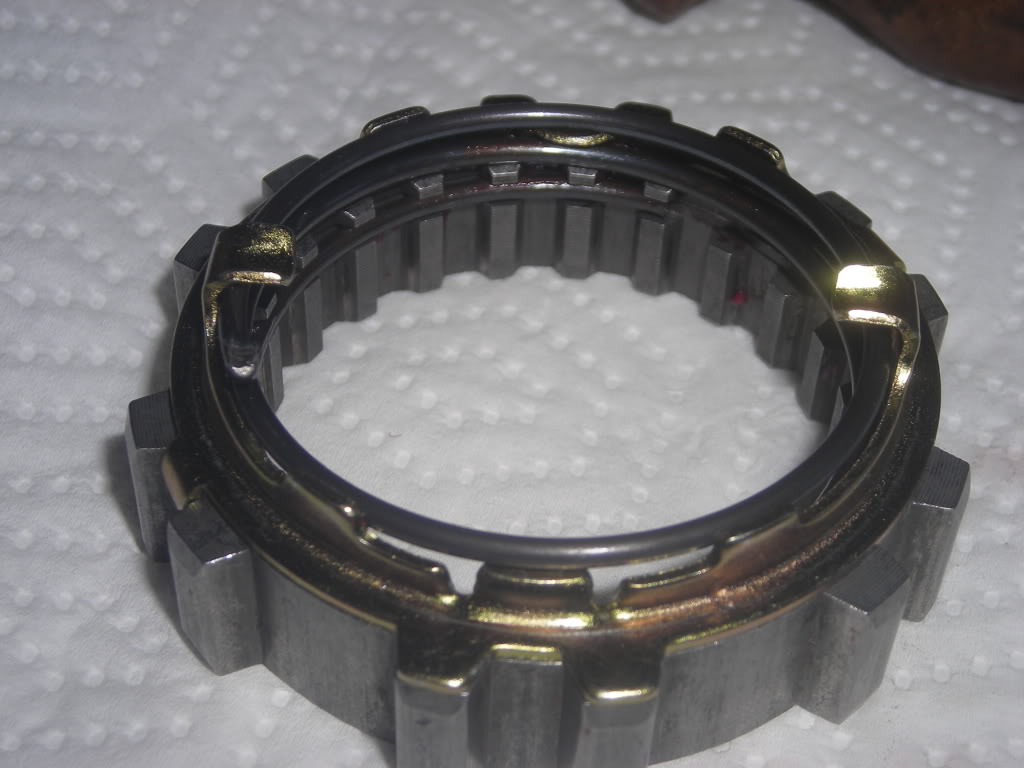
Then i re installed the c-clip to the hub body. then put the fowler pawl and tension spring back in place. make sure that the tension spring is placed as shown.
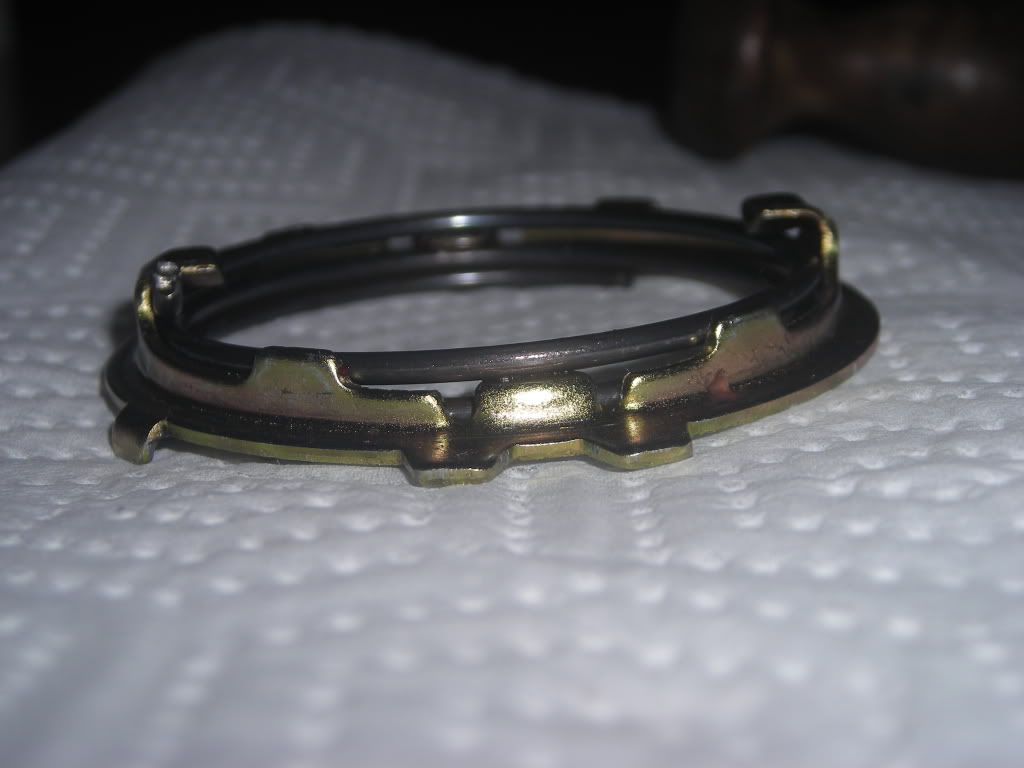
the tension spring MUST ride on top of the little ears and UNDER the taller ears.
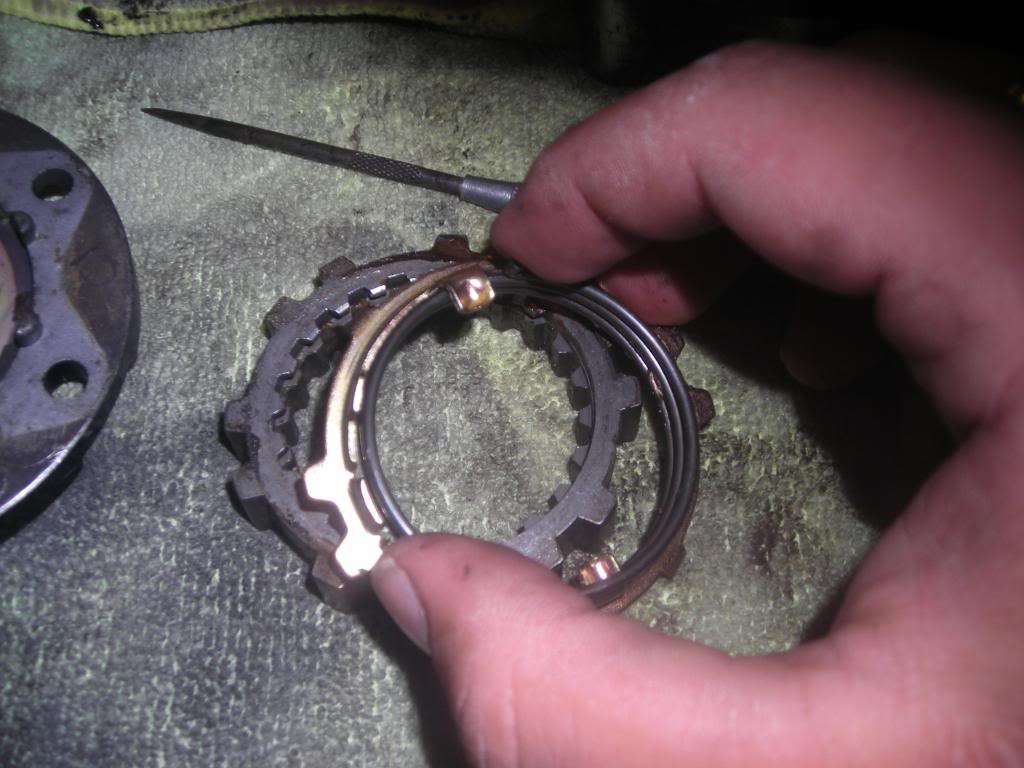
once the tension spring is on the fowler pawl, place it on top of the clutch as shown... the end of the spring must be lined up with the last spline on the clutch.
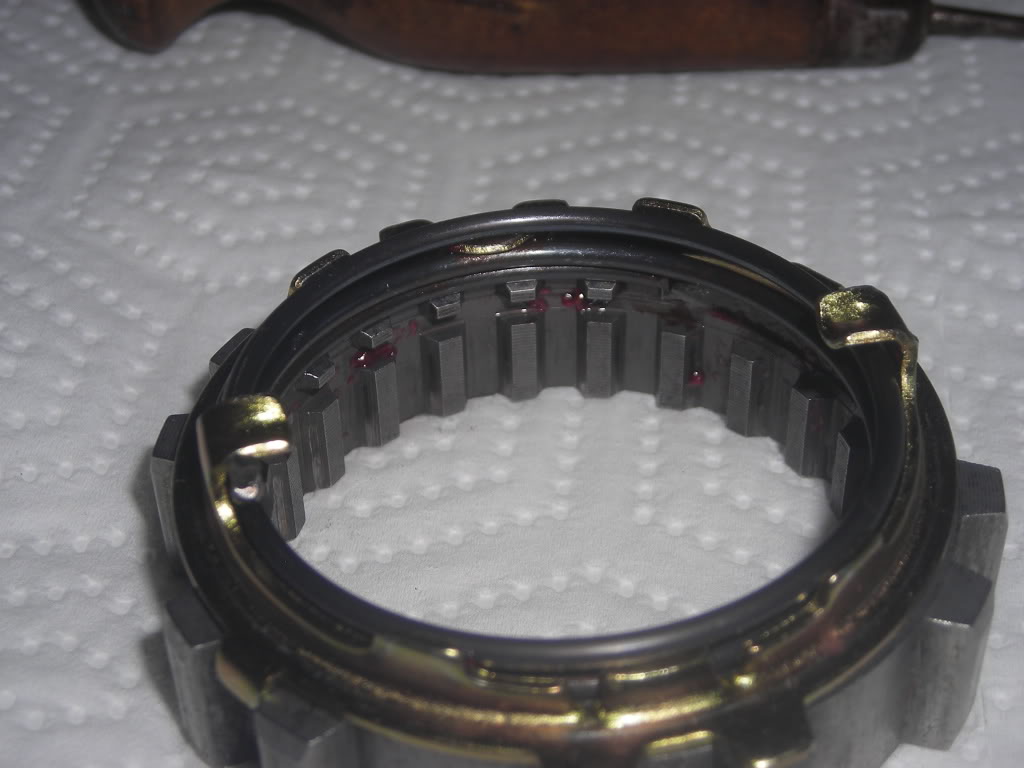
then take a pick and push the spring into the groove.

then you can re-install the dial into the hub face, and button the clutch and spring assembley back together. remember to replace the rubber gasket that goes around the dial face to protect the hub from contaminents. also, dont forget to re-install the tiny spring and ball bearing in the dial.
Make sure the hubs are in "FREE" and button it all back up with the 6 bolts on the hub face.
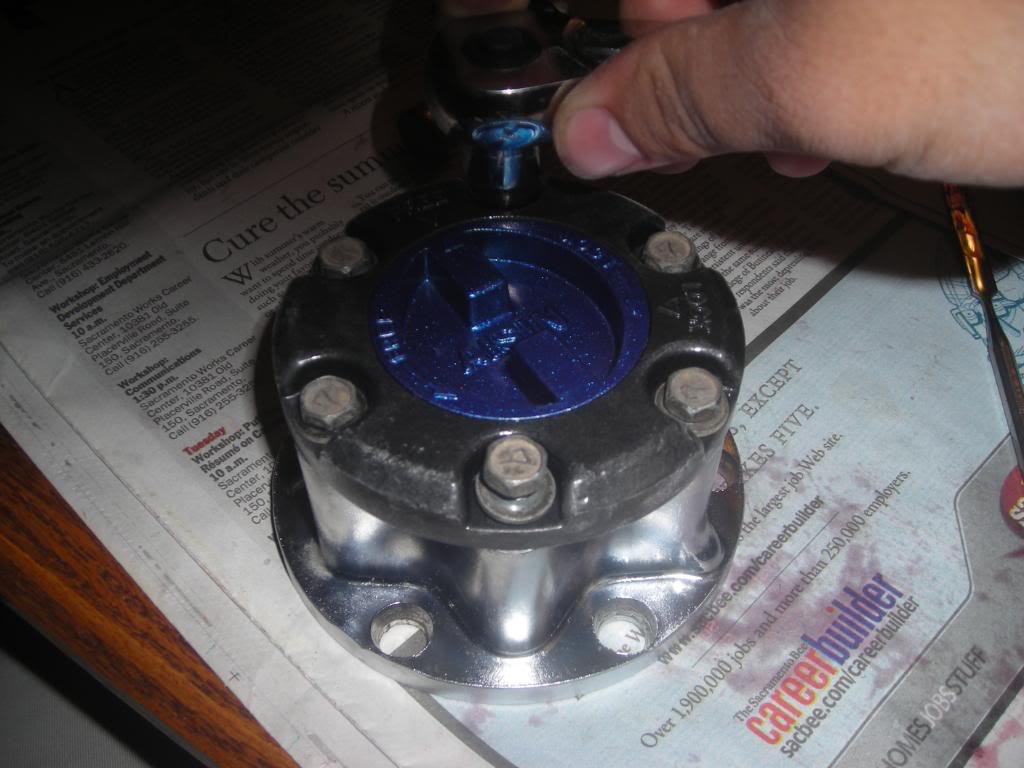
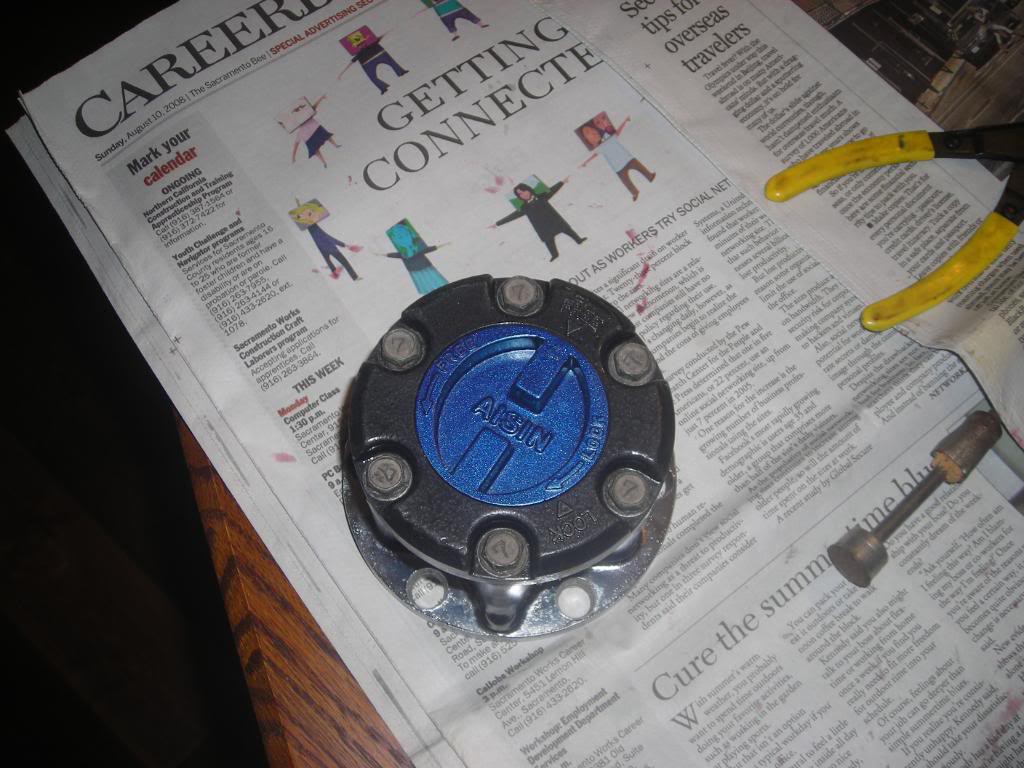
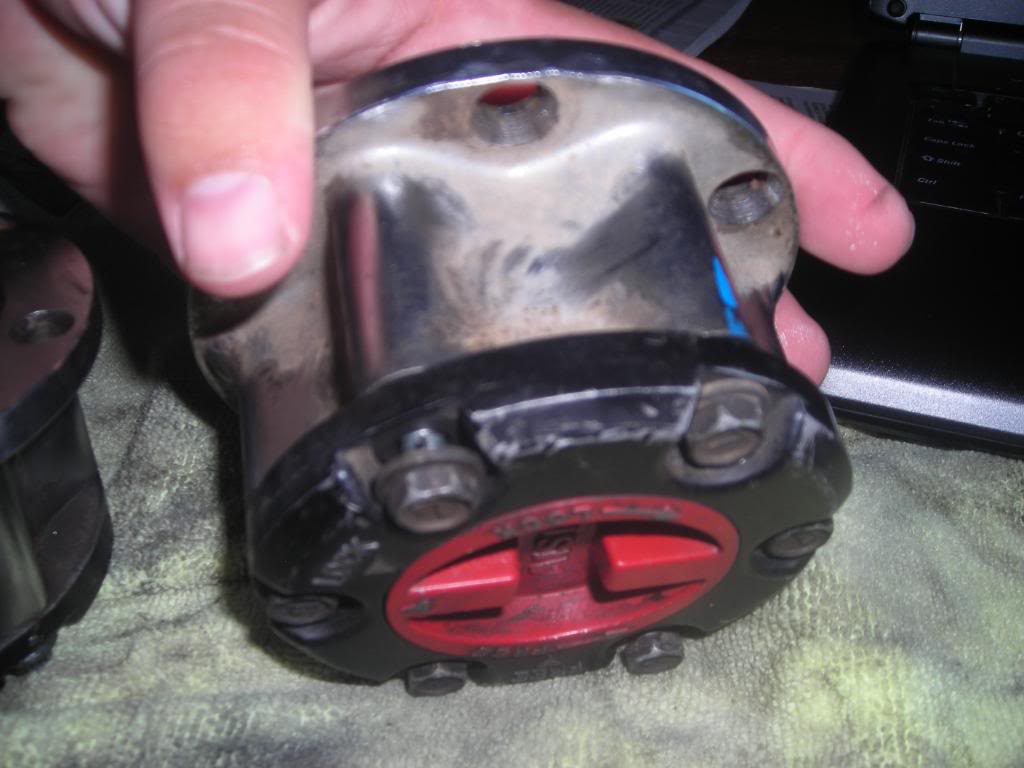
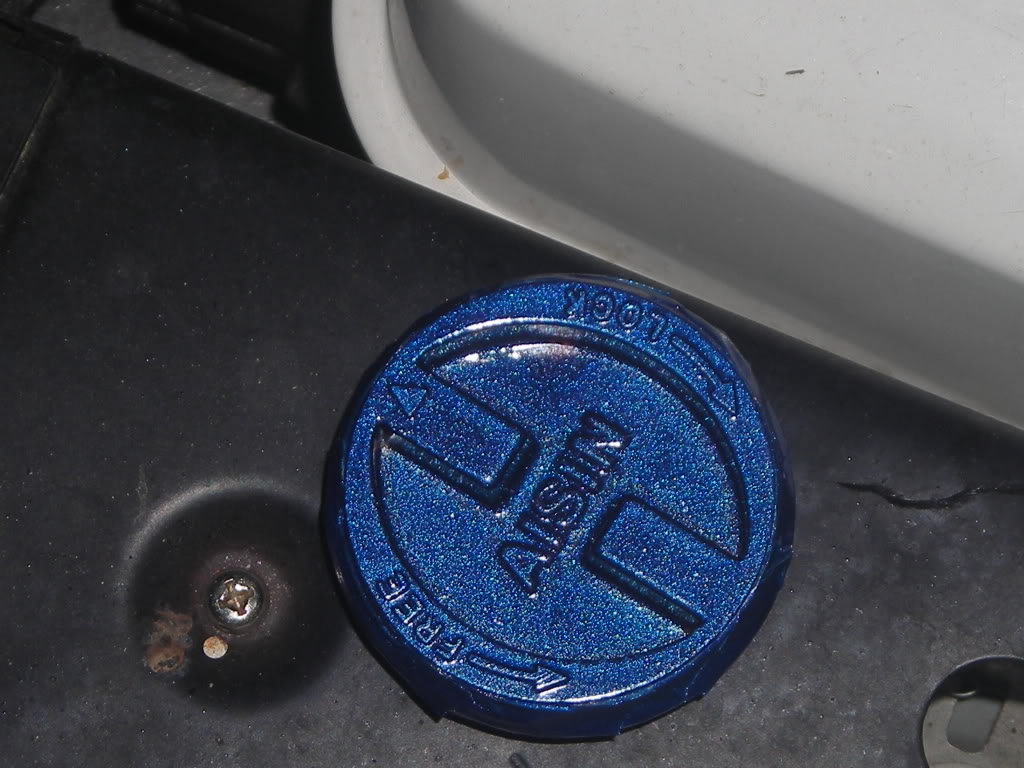
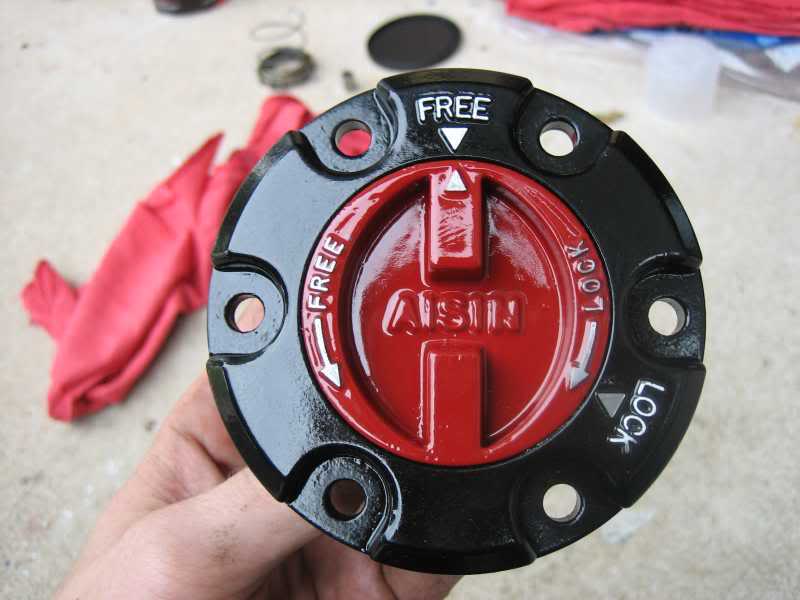
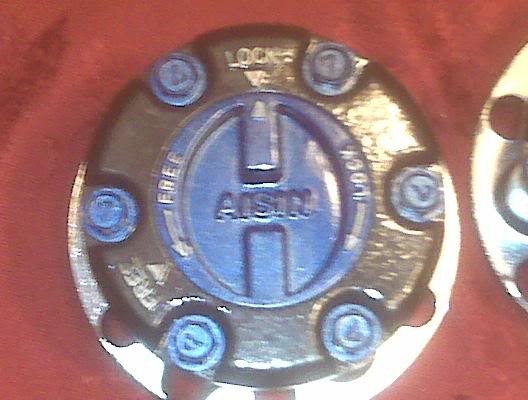
Painting, while not necessary, certainly does give a nice touch to the hubs. Standard color for these hubs are red and black, but i chose a metalic blue and hammertone black.
painting the hub face and dial.
REMOVING ADD FLANGE AND INSTALLING AISIN HUBS
Reall, other than some minor cleaning, and some really greasy hands, its really a straightforward job. i had it dont in about an hour if you dont count the run to the dealership for replacement bolts.
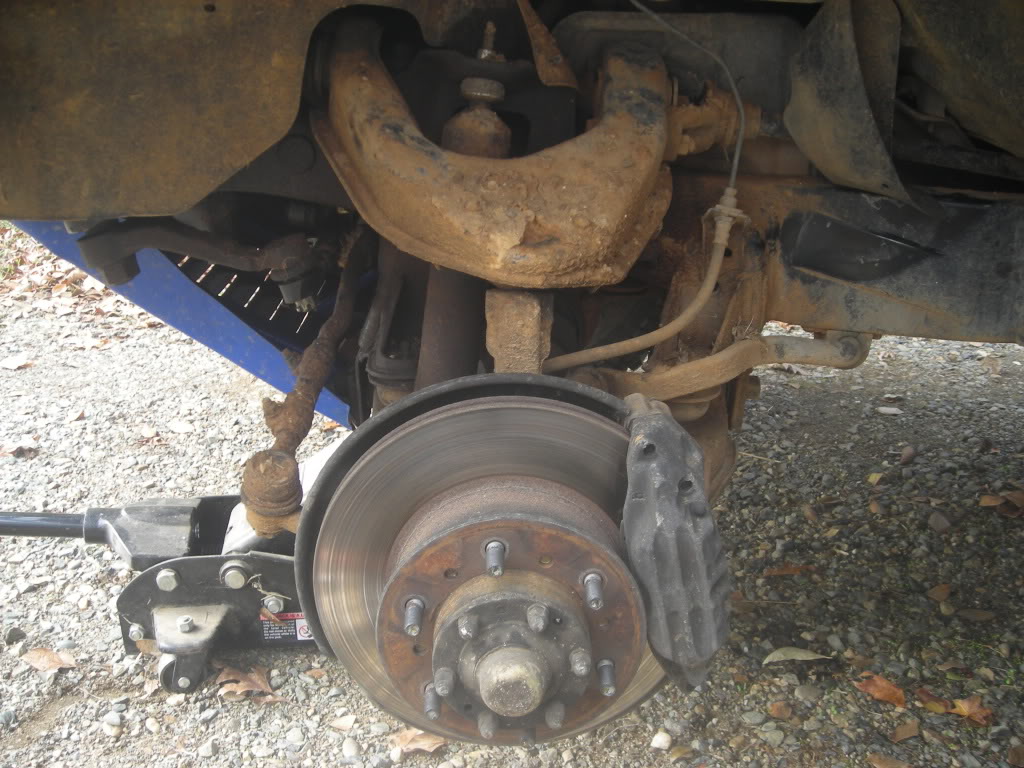
ok, so i started off getting stuff together for the swap, and yes, that is an old rug. gravel hurts my knees.
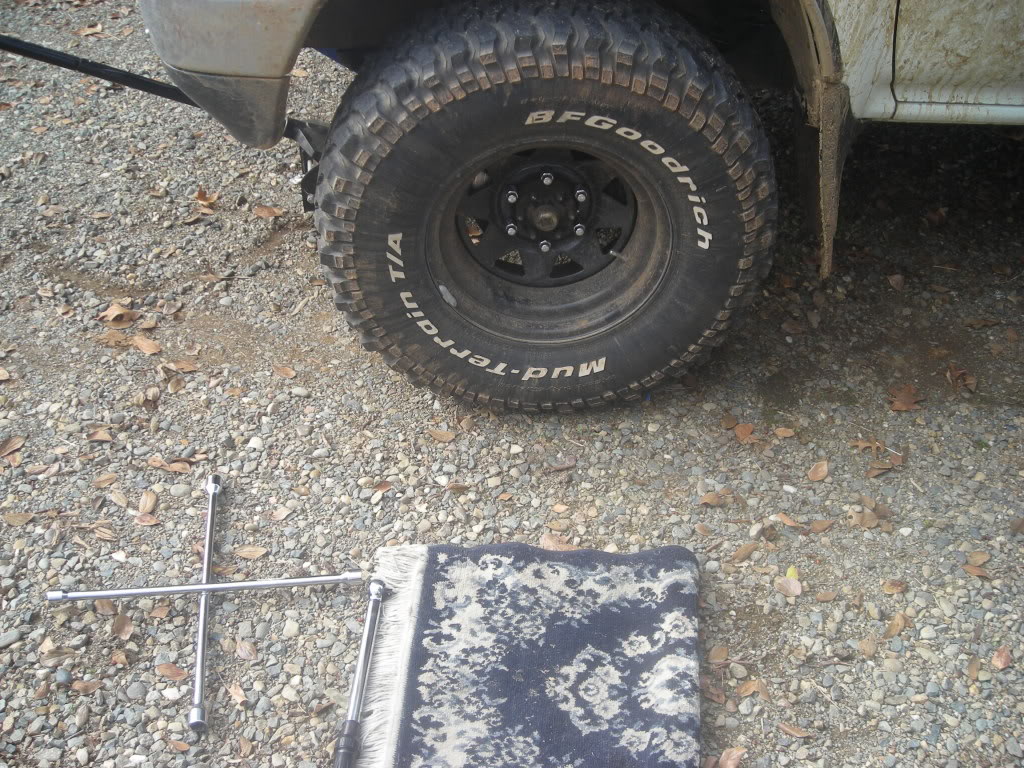
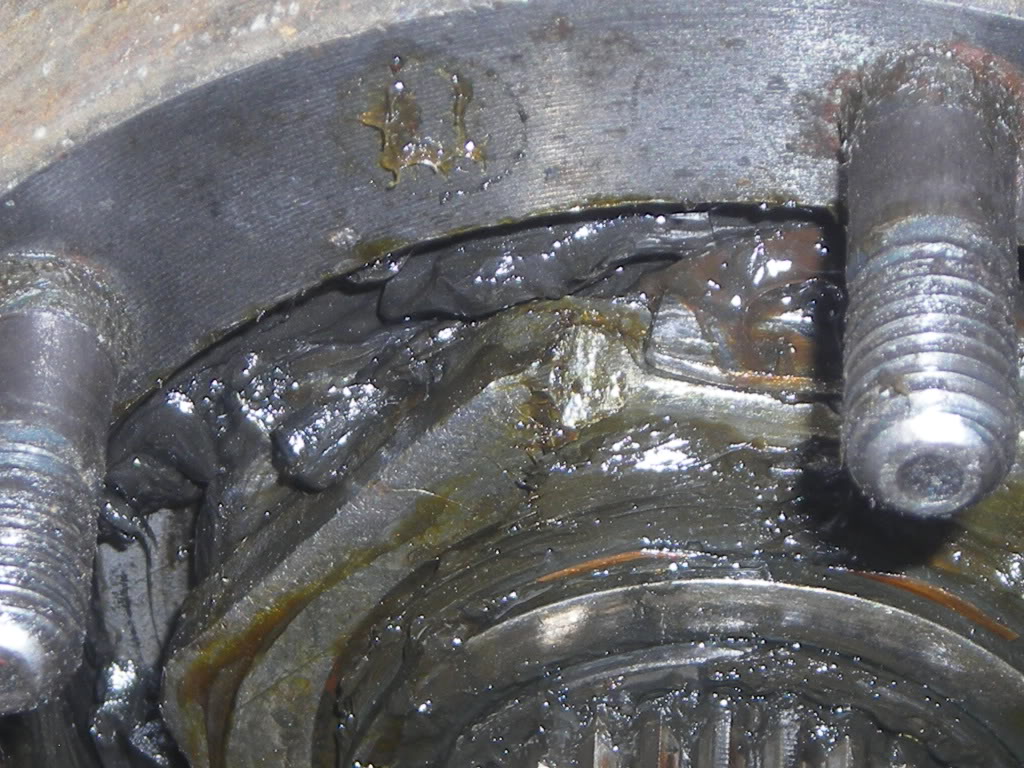
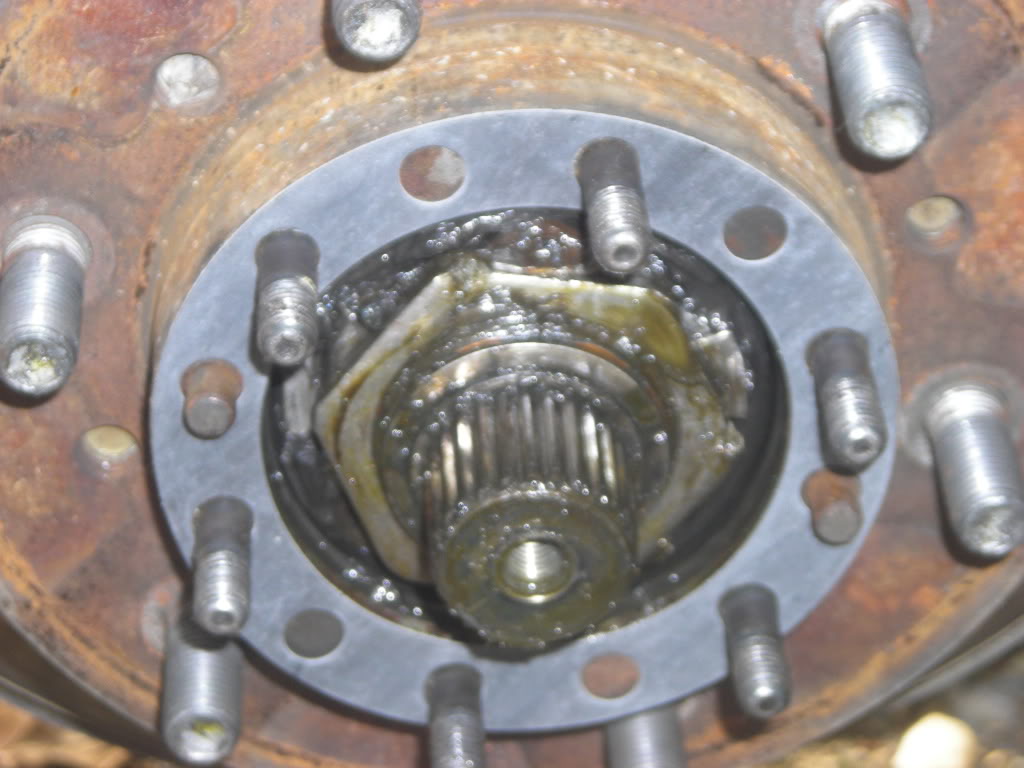
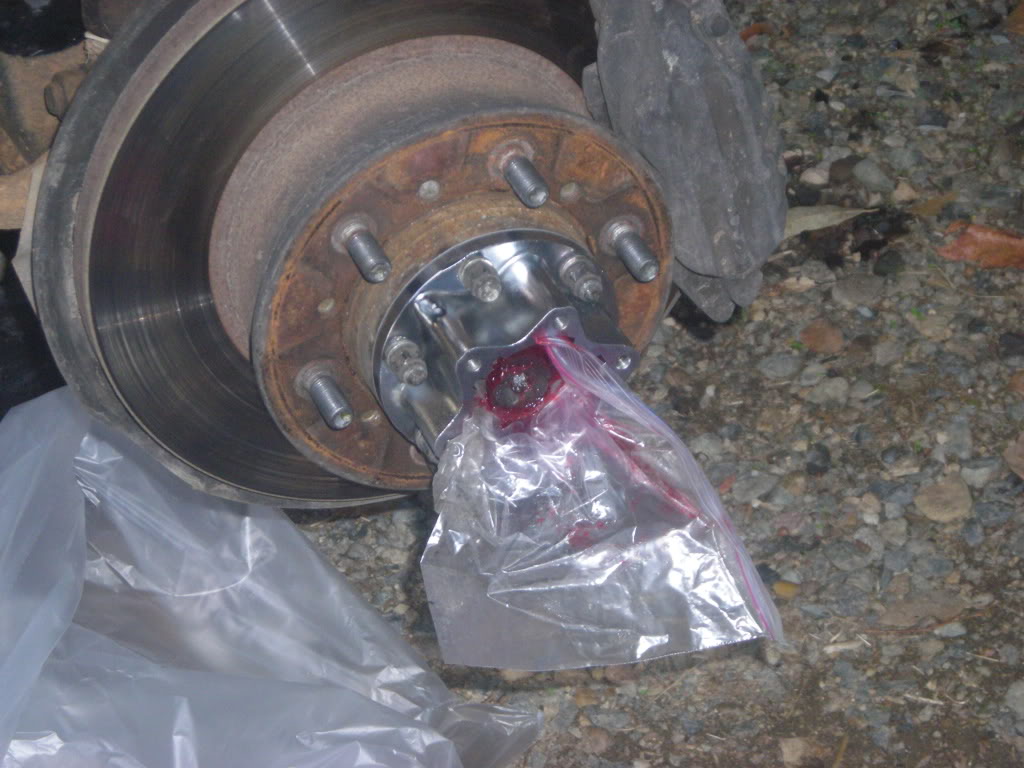
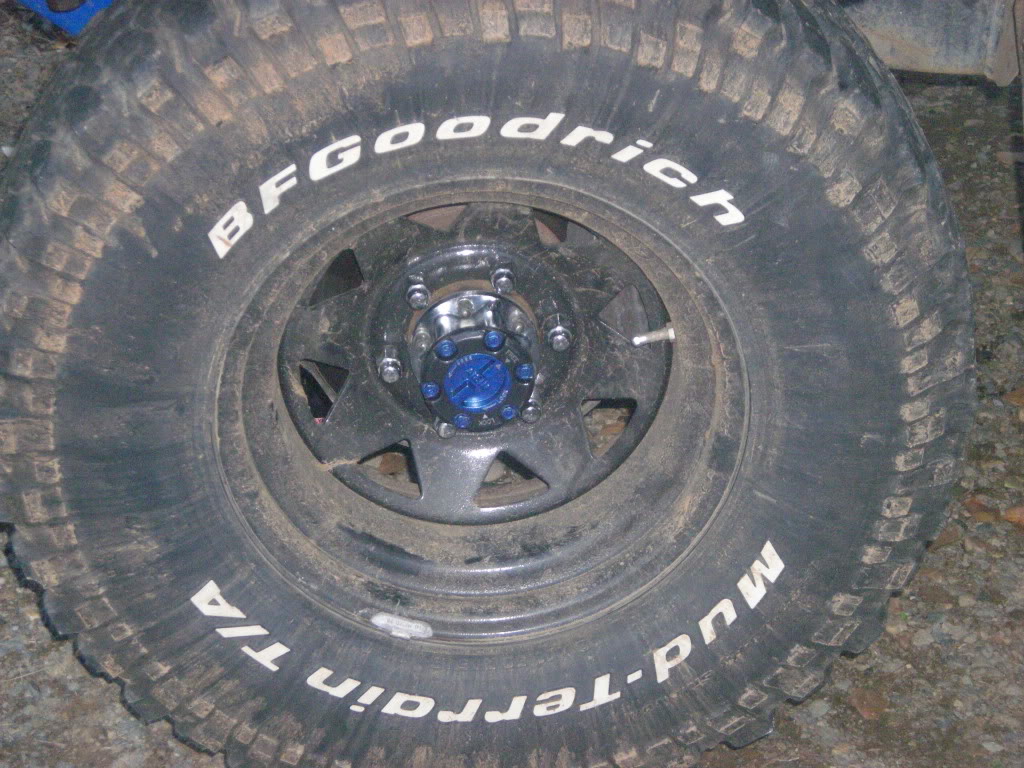
loosen all bolts and lugnuts before lifting the truck up. then remove the tire, and start to remove the 6 acorn nuts holding the add flange on. Also, remove the dust cap with a small flathead screwdriver, and remove the 12mm Gold Bolt.
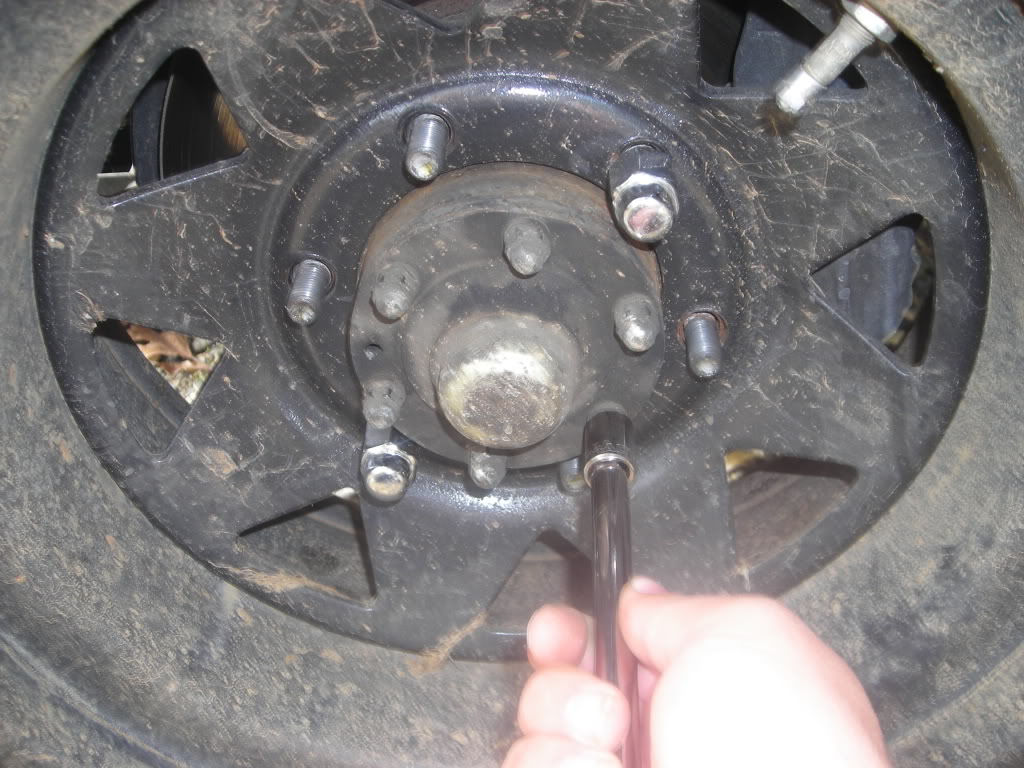
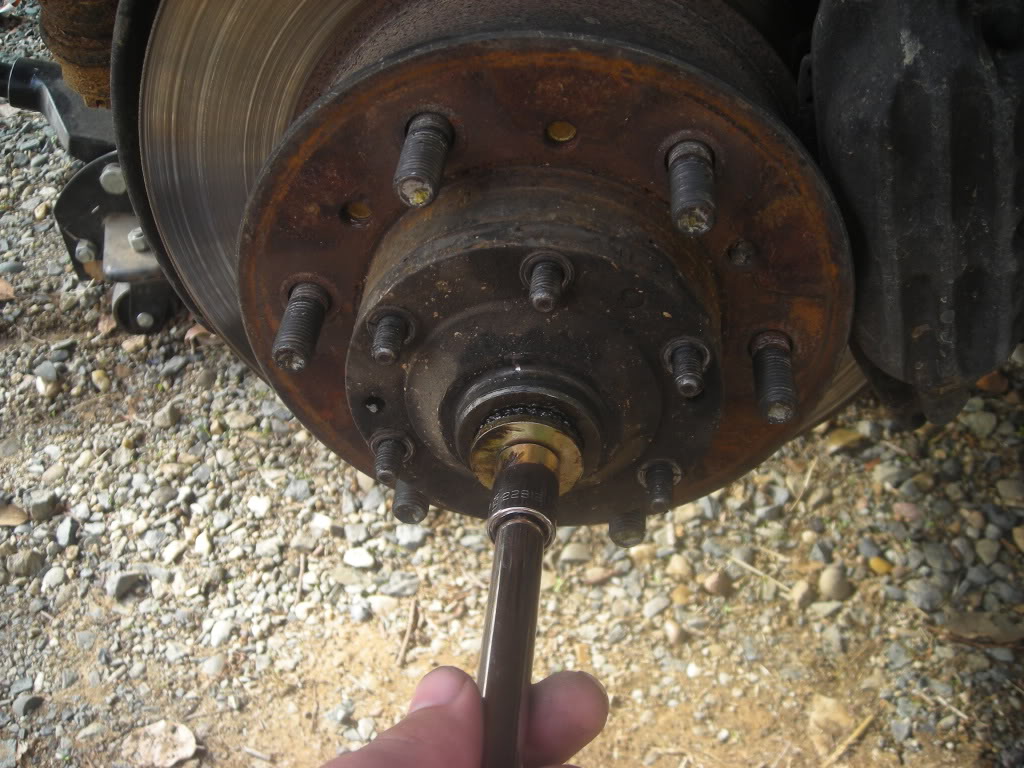
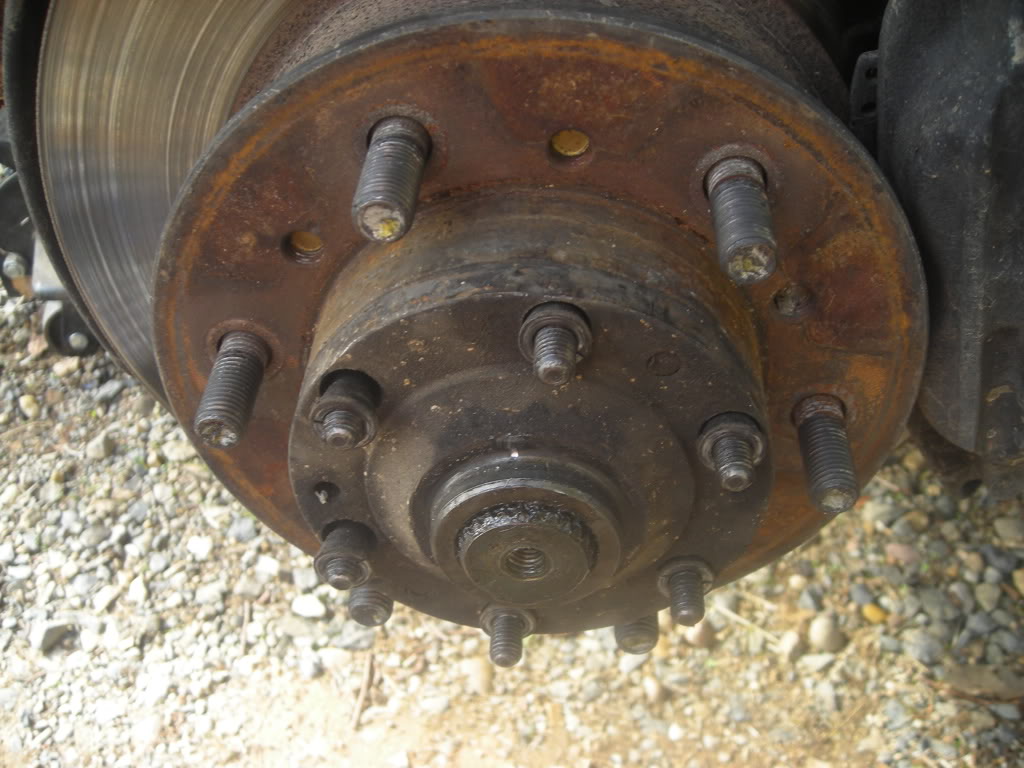
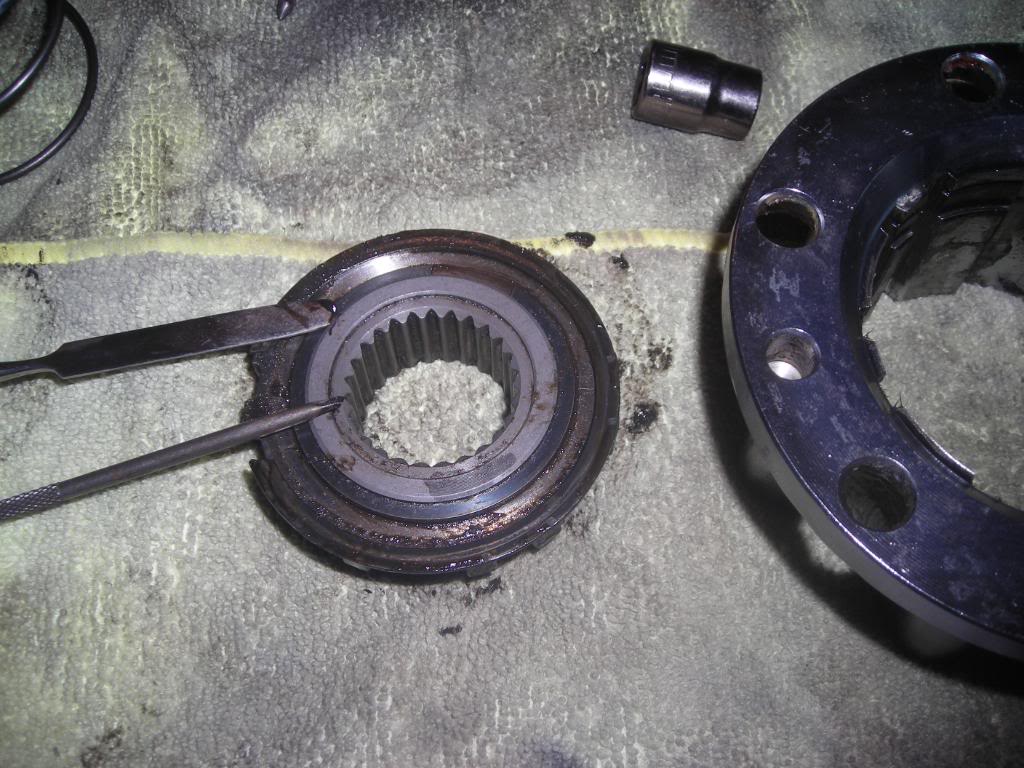
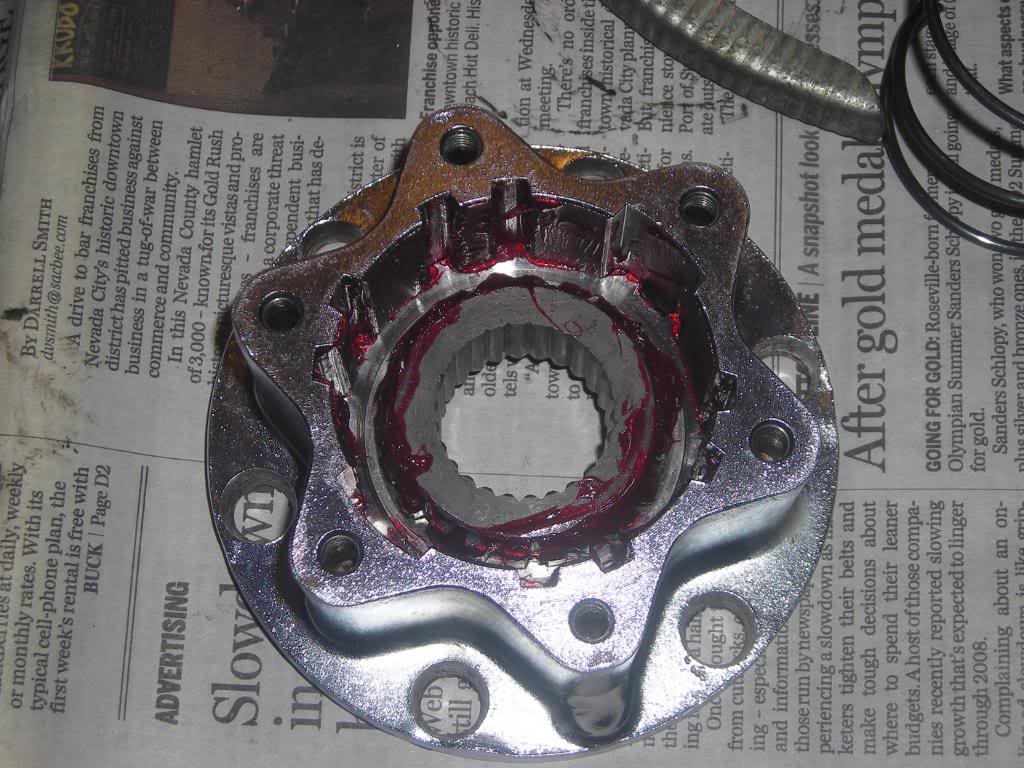
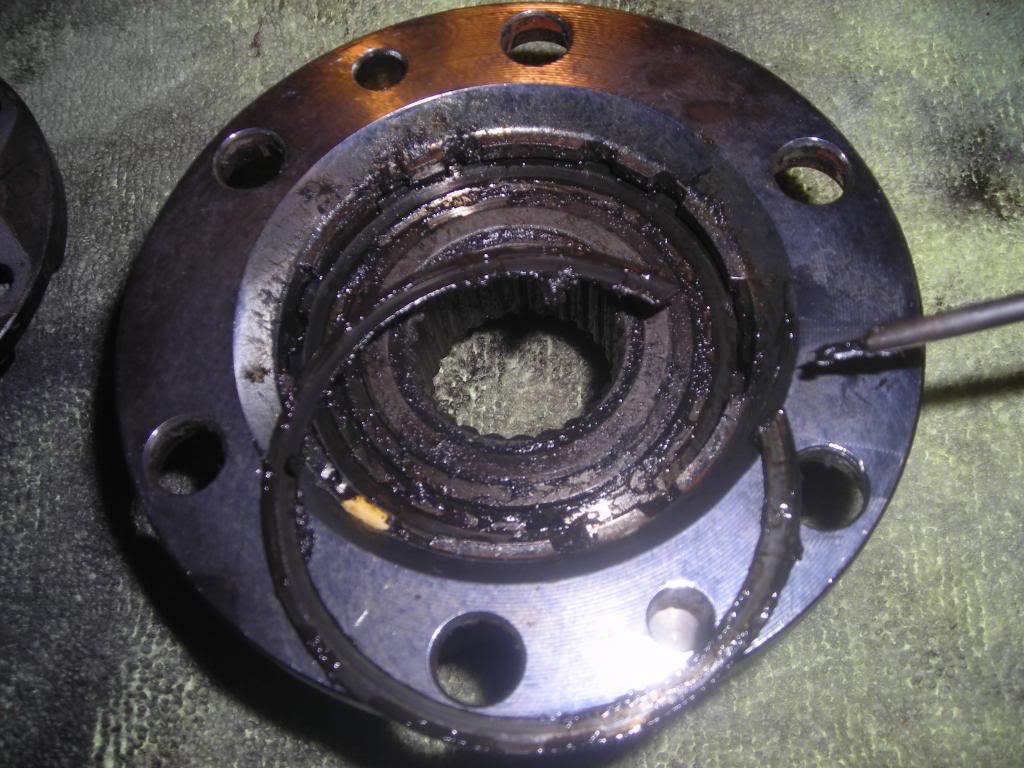
as you can see in the photo above, the cone washers didnt completely come off of the studs, so i had to use a hammer and just lightly pounded the outside ring of the ADD flange. they promptly popped off, and so did the flange. turns out that the flange is just a 1/4 inch steel plate; well, it is basically.
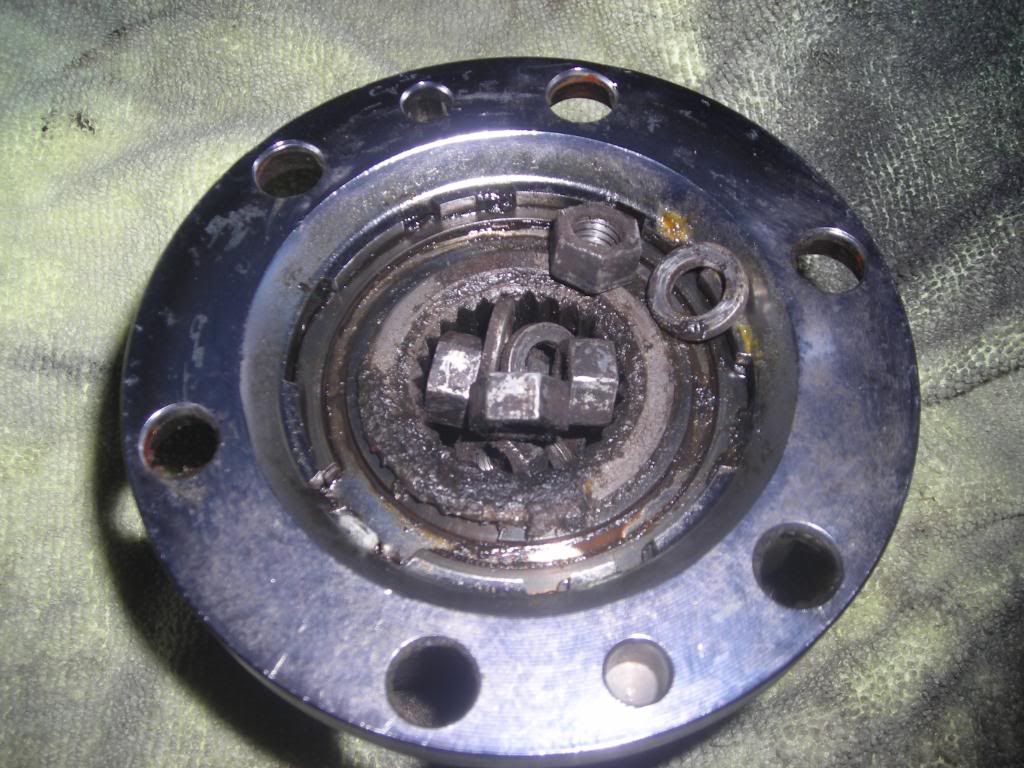
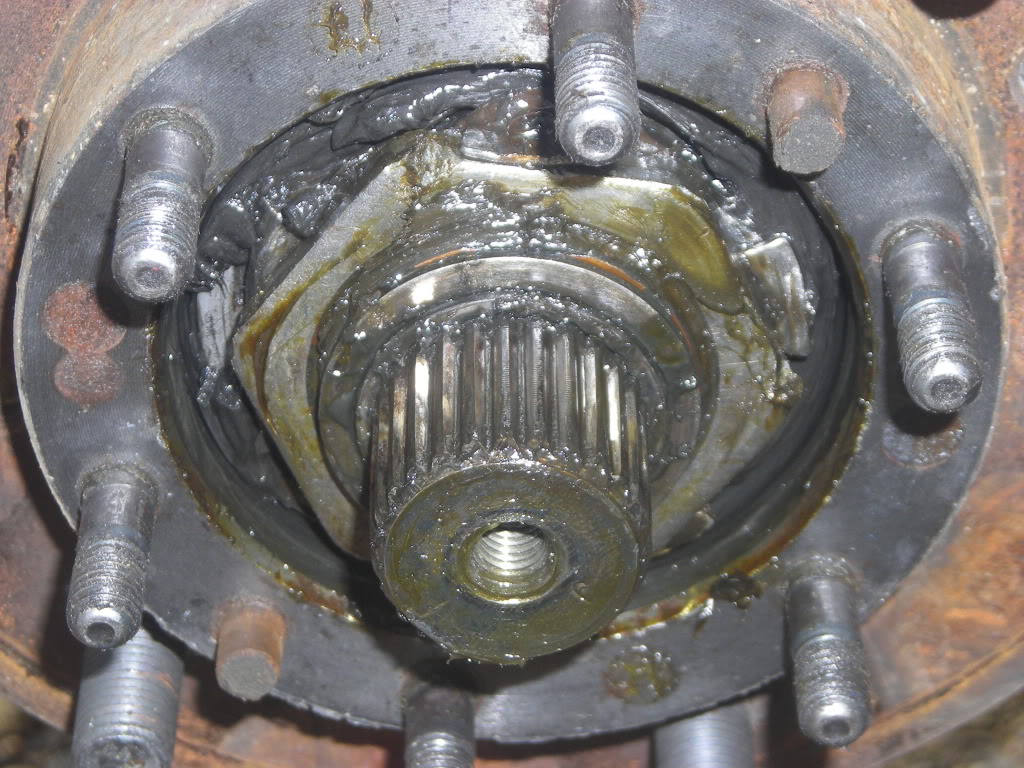
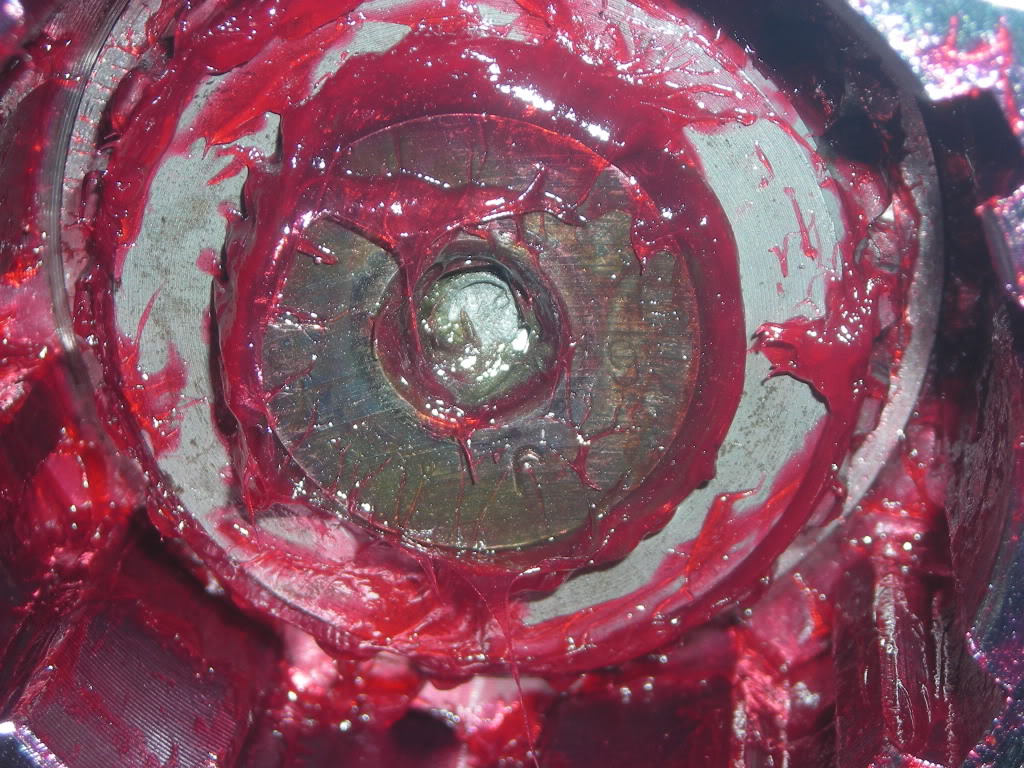
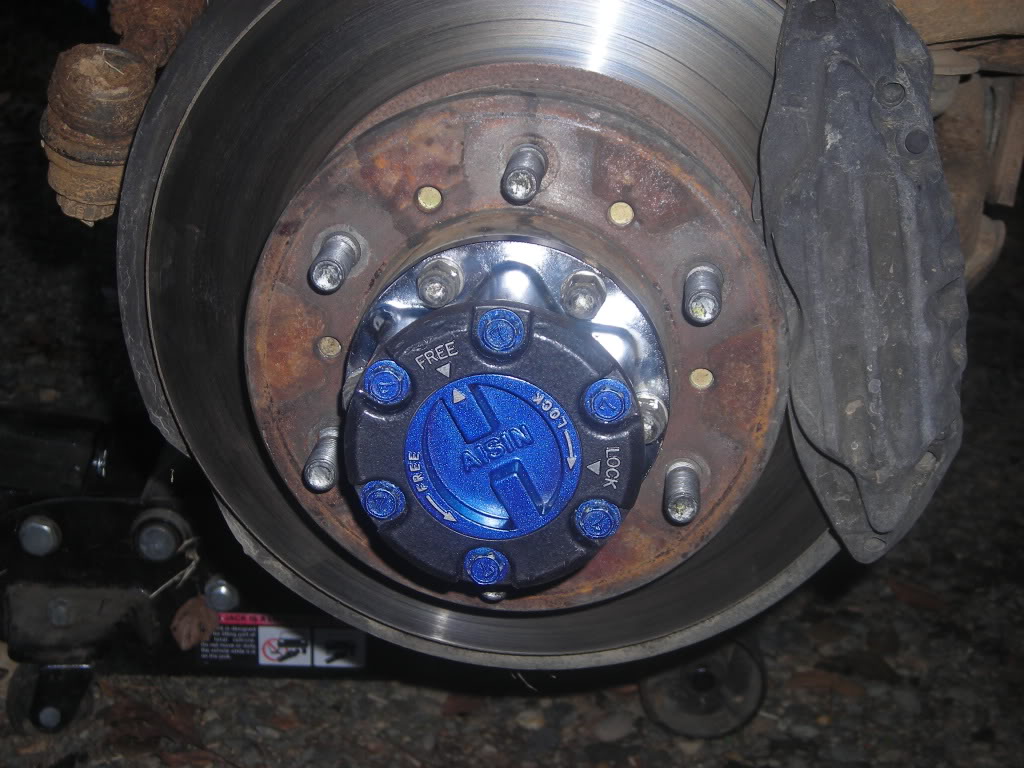
This is what you get to see afterwards. as you can see below my 54mm nut has been taken off by a hackjob mechanic with a chisel instead of a socket. i just cleaned up the surface and placed the new round gasket into position.
With the hub body in place. replace the cone washers, then the spring washers, and then the nuts, and tighten down to 23 lb-ft.
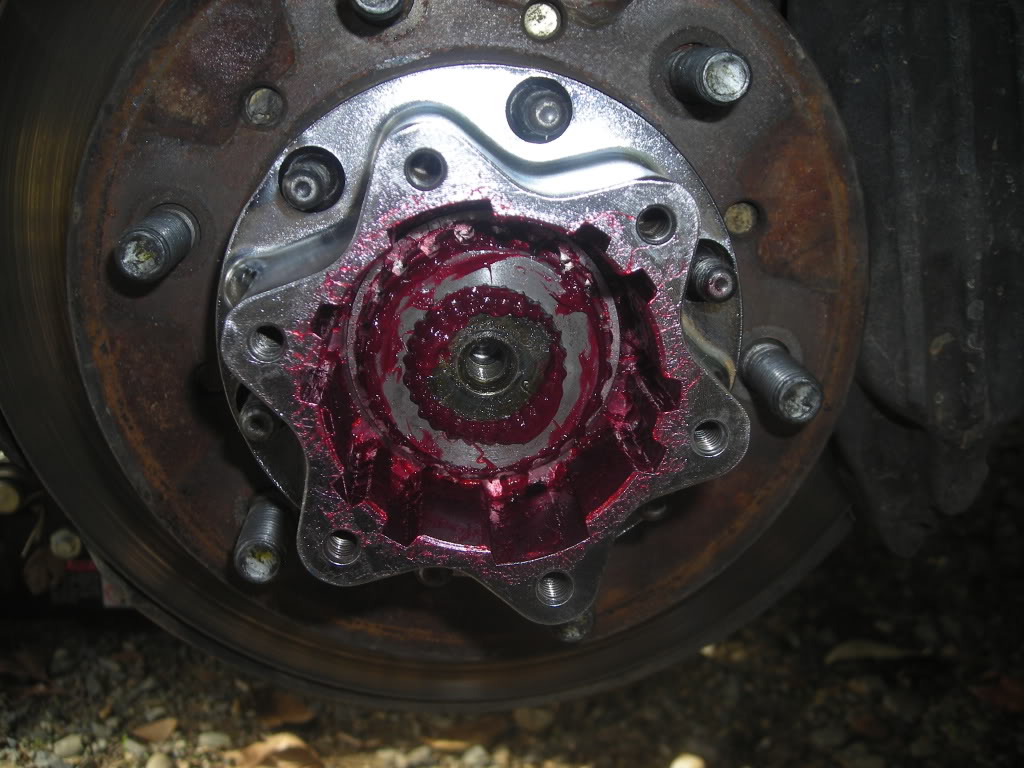
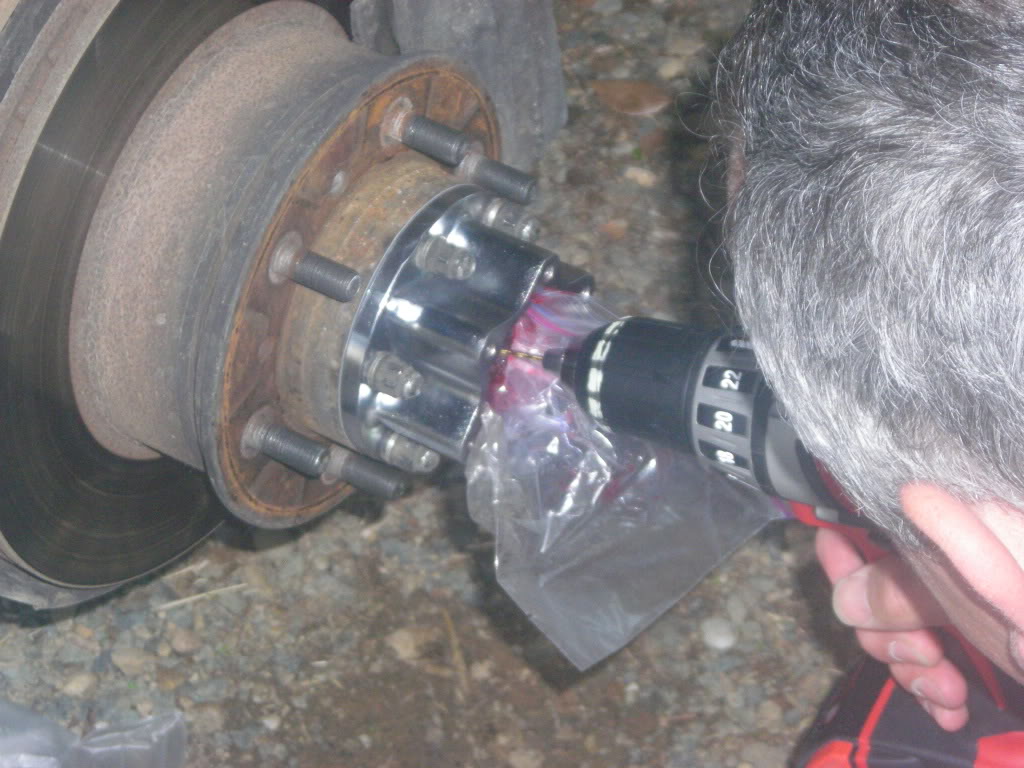
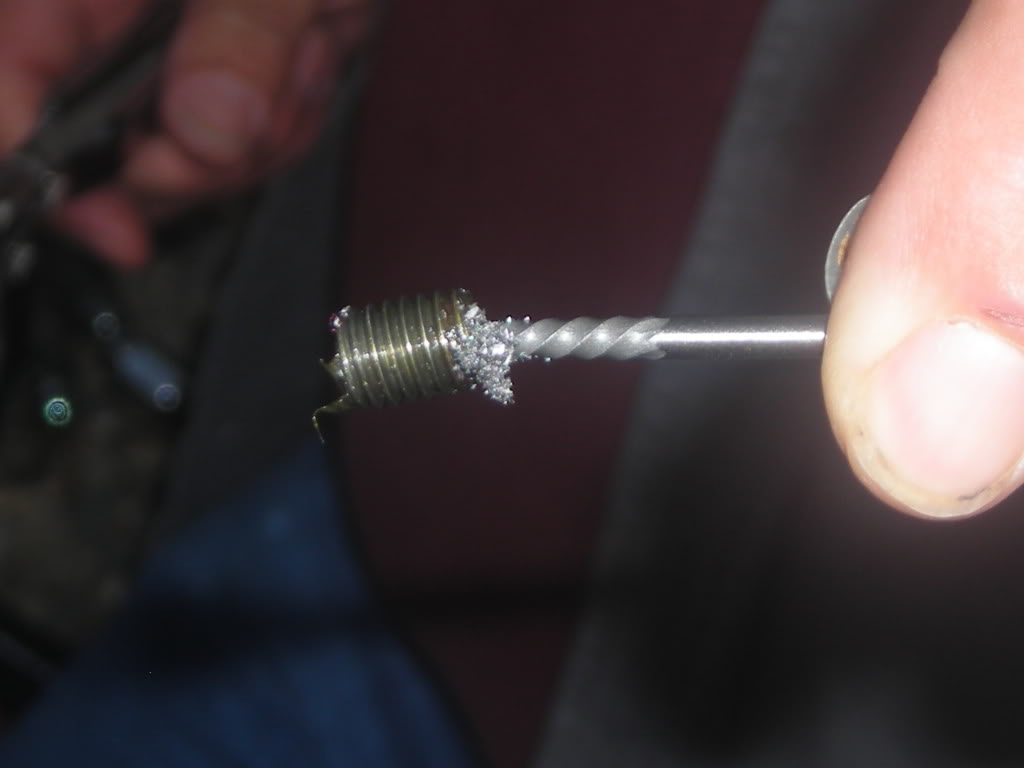
Next tighten the Gold Bolt down to 11 lb-ft. If you were like me and had some hack mechanic work on your rig by the PO, then you may have some broken gold bolts. this is where my trip into town came into play. hat to get a recovery bit too.
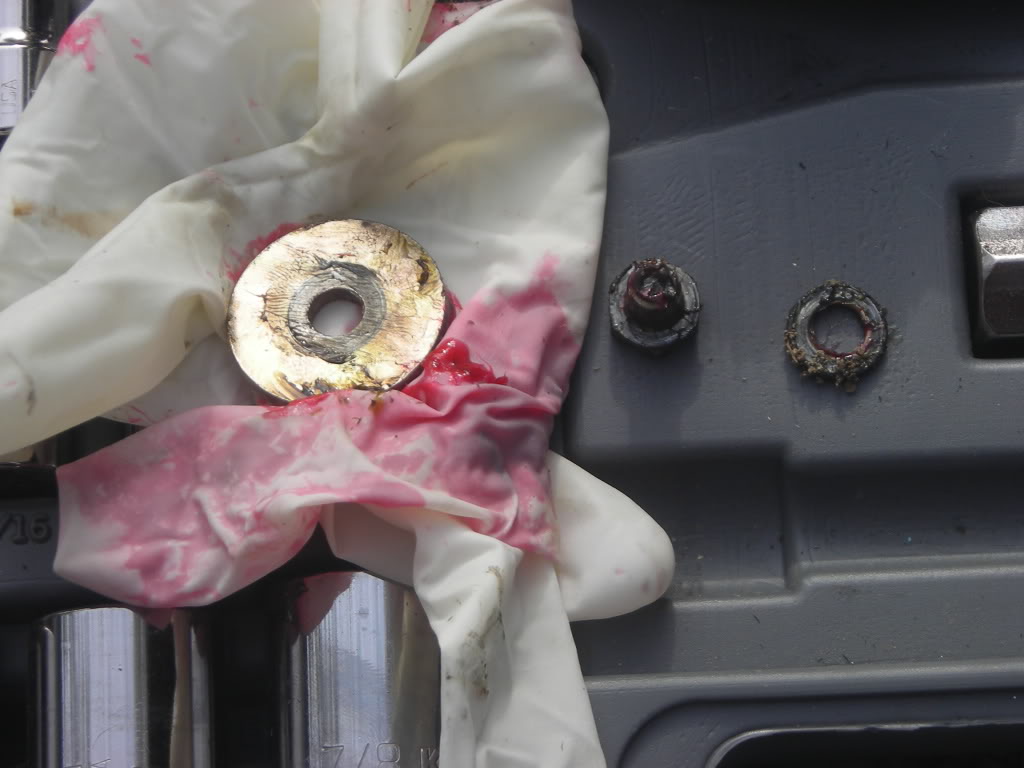
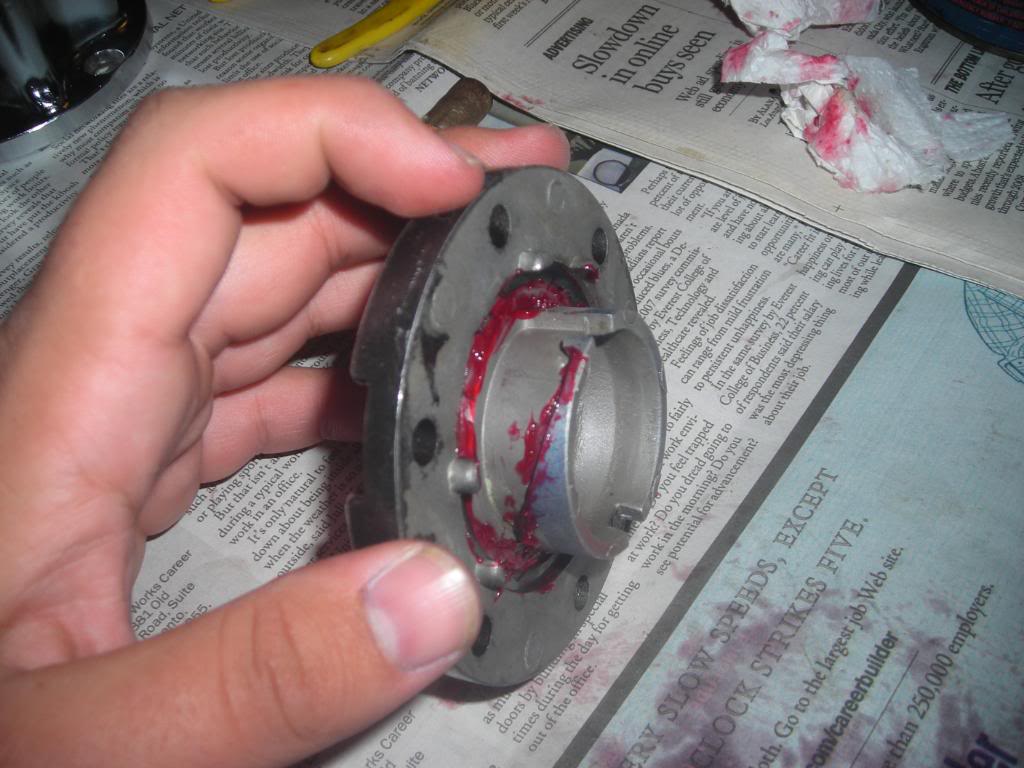
So, my dad showed me what to do to get the bolt out. basically drill a 5/64 round hole into the center of the broken bolt about 1/4 in deep, take the recovery bit and lightly tap it into place with a hammer and untwist the remaining portion. as you can see, i used a sandwich baggie to cover the inside of the hub body to protect from metal shavings. then i cleaned the inner hub body with brake cleaner jsut in case, and reapplied some lube.
btw, in order to tighten the Gold Bolt, you need to insert the clutch and fowler pawl, but not the dial. the splines will lock up so that the CV shaft wont spin while its being torqued. took me a while to figure that one out.
after that you just line up the tabs on the fowler pawl that stick past the gears on the clutch with the 2 WIDE slots on the hub body. it will slide in freely, but make sure that the dial face and clutch assembly are in the FREE position before doing so. then replace the 6 dial face bolts and torque down to 11 lb-ft. and your done.
All in all, this is a SIMPLE task that even the mechanically inept should be able to accomplish in about 3 hours start to finish. it is also very rewarding to see that you acomplished something that could save you hundreds of dollars in boots and axles in the future.
i just wanted to say, also, thanks to SCUBA for the late night advise on how to dis-assemble and re-assemble the hubs, and the clutch lock for the gold bolt trick.(i jsut about went crazy at 9'oclock at night!) Also, a big thanks to Wabbit. even though he offers hub rebuilding services through his business, he still offered great advice to me and informed me on the torque specs.
and thanks to all those who read, commented, and helped me with this!
Yotatech Rocks!
First off, supplies that i used.
1) Valvoline Multi-Purpose Grease Part No. 614
2) snap ring pliers
3) 3 different sizes of metal picks
4) 1 flat bladed pick
5) 10mm socket and driver
6) 4 small plastic baggies(to seperate bolts)
7) 1 can of Rustoleum Hammertone Paint (Black)
8) 1 can of blue paint(i will edit this when i get the chance)
Also, Torque Specs
Hub body bolts = 23 lb-ft.
Gold bolt = 11 lb-ft.
Dial face bolts = 11lb-ft.
alright, now the build.
i started out with a set of hubs that came off an 87 SAS 4runner that was totaled, and it looked like it had never been washed. lol.
Okay, so, from now on, it will be mostly pics with me narrarating them.
pulled off the 6 bolts on the face, and removed hub face.
using the snapring pliers to remove the C-clip from the back of the hub dial.
be sure that when the dial is removed that you DONT lose the tiny ball bearing and tiny spring, i put them right into a plastic bag after cleaning. It can take a while to either find it or go buy a new one.
EDIT: a tip from member, rot
Pulling the guts.
I used a sharp pic to remove the tension spring from the fowler pawl/clutch assembly.
Next, i turned the hub body over and used a flat tip and a narrow tip pick to remove the C-clip from the hub body.
Once all the parts were removed, i took them into the garage to the parts cleaner.
I use a 3 gallon Big Red Jacks electric pump parts cleaner that my dad got at harbor freight a year ago for 50 bucks. its small, but it works!
There is also a way to clean the parts with brake cleaner and Mineral water for anyone who doesnt have access to a cleaner.
And by all the parts, i mean every part including all nuts, bolts and washers.
P.S. be careful, using the parts cleaner solvent for long periods of time can cause your hands to start burning and then go absolutely numb.
okay, all parts cleaned.
big difference cleaned vs unclean.
for re-assembly, i used Valvoline Multi-Purpose Grease Part No. 614
here is a collage of me lightly coating all moving/sliding parts in grease.
Then i re installed the c-clip to the hub body. then put the fowler pawl and tension spring back in place. make sure that the tension spring is placed as shown.
the tension spring MUST ride on top of the little ears and UNDER the taller ears.
once the tension spring is on the fowler pawl, place it on top of the clutch as shown... the end of the spring must be lined up with the last spline on the clutch.
then take a pick and push the spring into the groove.
then you can re-install the dial into the hub face, and button the clutch and spring assembley back together. remember to replace the rubber gasket that goes around the dial face to protect the hub from contaminents. also, dont forget to re-install the tiny spring and ball bearing in the dial.
Make sure the hubs are in "FREE" and button it all back up with the 6 bolts on the hub face.
Painting, while not necessary, certainly does give a nice touch to the hubs. Standard color for these hubs are red and black, but i chose a metalic blue and hammertone black.
painting the hub face and dial.
REMOVING ADD FLANGE AND INSTALLING AISIN HUBS
Reall, other than some minor cleaning, and some really greasy hands, its really a straightforward job. i had it dont in about an hour if you dont count the run to the dealership for replacement bolts.
ok, so i started off getting stuff together for the swap, and yes, that is an old rug. gravel hurts my knees.
loosen all bolts and lugnuts before lifting the truck up. then remove the tire, and start to remove the 6 acorn nuts holding the add flange on. Also, remove the dust cap with a small flathead screwdriver, and remove the 12mm Gold Bolt.
as you can see in the photo above, the cone washers didnt completely come off of the studs, so i had to use a hammer and just lightly pounded the outside ring of the ADD flange. they promptly popped off, and so did the flange. turns out that the flange is just a 1/4 inch steel plate; well, it is basically.
This is what you get to see afterwards. as you can see below my 54mm nut has been taken off by a hackjob mechanic with a chisel instead of a socket. i just cleaned up the surface and placed the new round gasket into position.
With the hub body in place. replace the cone washers, then the spring washers, and then the nuts, and tighten down to 23 lb-ft.
Next tighten the Gold Bolt down to 11 lb-ft. If you were like me and had some hack mechanic work on your rig by the PO, then you may have some broken gold bolts. this is where my trip into town came into play. hat to get a recovery bit too.
So, my dad showed me what to do to get the bolt out. basically drill a 5/64 round hole into the center of the broken bolt about 1/4 in deep, take the recovery bit and lightly tap it into place with a hammer and untwist the remaining portion. as you can see, i used a sandwich baggie to cover the inside of the hub body to protect from metal shavings. then i cleaned the inner hub body with brake cleaner jsut in case, and reapplied some lube.
btw, in order to tighten the Gold Bolt, you need to insert the clutch and fowler pawl, but not the dial. the splines will lock up so that the CV shaft wont spin while its being torqued. took me a while to figure that one out.
after that you just line up the tabs on the fowler pawl that stick past the gears on the clutch with the 2 WIDE slots on the hub body. it will slide in freely, but make sure that the dial face and clutch assembly are in the FREE position before doing so. then replace the 6 dial face bolts and torque down to 11 lb-ft. and your done.
All in all, this is a SIMPLE task that even the mechanically inept should be able to accomplish in about 3 hours start to finish. it is also very rewarding to see that you acomplished something that could save you hundreds of dollars in boots and axles in the future.
i just wanted to say, also, thanks to SCUBA for the late night advise on how to dis-assemble and re-assemble the hubs, and the clutch lock for the gold bolt trick.(i jsut about went crazy at 9'oclock at night!) Also, a big thanks to Wabbit. even though he offers hub rebuilding services through his business, he still offered great advice to me and informed me on the torque specs.
and thanks to all those who read, commented, and helped me with this!
Yotatech Rocks!
Last edited by space-junk; 02-26-2009 at 05:33 PM.
 11-07-2008, 02:03 PM
#3
Registered User
Hey nice job!
Btw, if you do lose the ball and spring, it's not catastrophic. I think its there to help the dial move freer? Mine are gone dials still spin fine.
btw, nice laptop! Vostro! .... typing this on one right now =p
Btw, if you do lose the ball and spring, it's not catastrophic. I think its there to help the dial move freer? Mine are gone dials still spin fine.
btw, nice laptop! Vostro! .... typing this on one right now =p
11-07-2008, 02:10 PM
#4
Registered User
Teenie bit too much grease...But you should be fine...
Nice job...
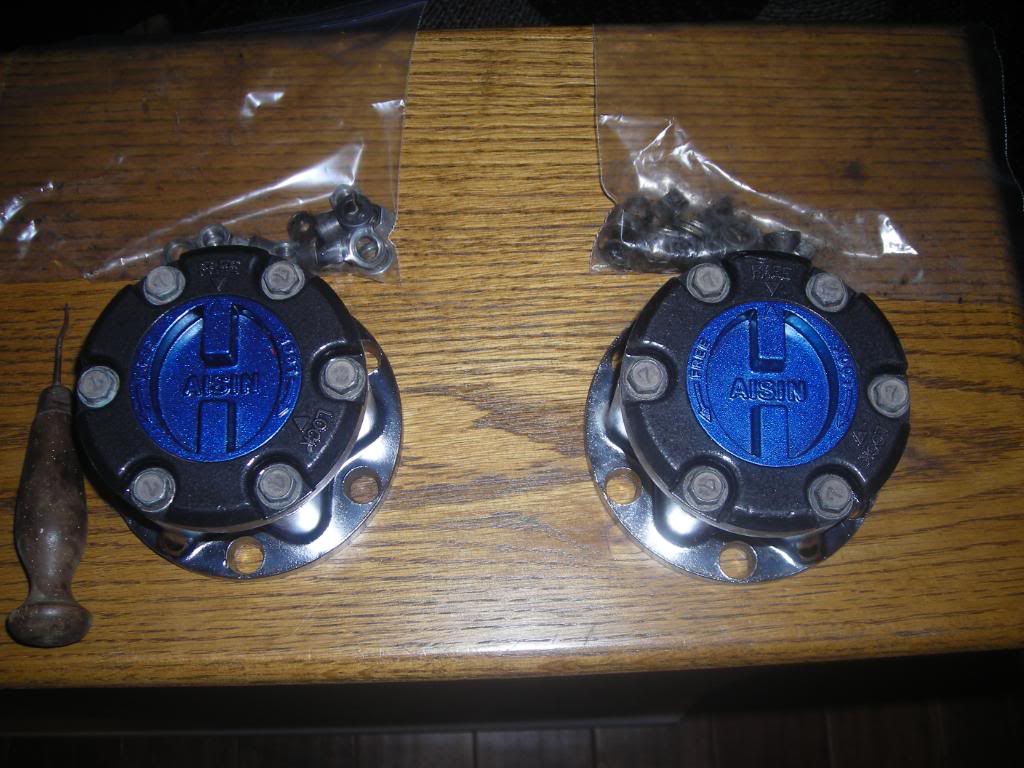
And T is right...If those came of a sold axle thats weird...The SA ones were blue to begin with, IFS were red...
Edit: Oh and it looks to me like your missing the 12mm bolt that holds the hub body to the wheel...Youll have to pull the hub face/dial to install if you do have those bolts..Idk if i would advise using the hubs w/o that bolt..

Nice job...
And T is right...If those came of a sold axle thats weird...The SA ones were blue to begin with, IFS were red...
Edit: Oh and it looks to me like your missing the 12mm bolt that holds the hub body to the wheel...Youll have to pull the hub face/dial to install if you do have those bolts..Idk if i would advise using the hubs w/o that bolt..
Last edited by scuba; 11-07-2008 at 02:13 PM.
11-07-2008, 02:38 PM
#6
Typically...IFS hubs have the flat dial handles and are 27 spline. SFA hubs have the curved dial handles (they stick out) and are 30 spline. Thing is that either dial will work in either hub, so the type of dial is not always an indicator of what you got.
I agree that you used a bit much grease. I "light" coating is all that is necessary.
I bothered to count and I saw 27 splines.

I agree that you used a bit much grease. I "light" coating is all that is necessary.
I bothered to count and I saw 27 splines.
Last edited by waskillywabbit; 11-07-2008 at 02:41 PM.
11-07-2008, 04:40 PM
#7
Contributing Member
great write-up man!
I wish it was around when I did my rebuild; very straight forward!
one option to painting though; when I rebuilt and painted mine, I sanded the paint off the raised lattering and arrows, then hit them with a few layers of clear coat; really makes the letters pop!
I wish it was around when I did my rebuild; very straight forward!
one option to painting though; when I rebuilt and painted mine, I sanded the paint off the raised lattering and arrows, then hit them with a few layers of clear coat; really makes the letters pop!
Last edited by iamsuperbleeder; 11-07-2008 at 04:42 PM.
Trending Topics
11-08-2008, 12:02 AM
#8
Thanks soooo much wabbit!!
one thing that i noticed when i went to the parts counter at toyota today, their computer shows a physically shorter hub body for the IFS than the straight axle... wonder why...
and superbleeder, those look great! im going to sand the letters off, but i just wanted to give it the full three days to cure... overkill, but oh well... maybe i will clear coat them too... lol...
anyways, thanks again wabbit... you are the best...
one thing that i noticed when i went to the parts counter at toyota today, their computer shows a physically shorter hub body for the IFS than the straight axle...
wonder why...and superbleeder, those look great! im going to sand the letters off, but i just wanted to give it the full three days to cure... overkill, but oh well... maybe i will clear coat them too... lol...
anyways, thanks again wabbit... you are the best...
Last edited by space-junk; 11-08-2008 at 12:05 AM.
11-08-2008, 12:13 AM
#9
and as for grease, when you told me in flashchat to use a LIGHT amount of grease, i compared it to how much grease they came with and went with a lighter coating...
i.e.
other than making it harder to turn the dials, it shouldnt have any adverse affect, should it?
11-08-2008, 08:01 AM
#10
Contributing Member
well, I think I shoved too much grease in mine, cause it didn't really make the dials a little harder to turn (the new dial O-rings did that), it holds back the ring in there from sliding easily, which appears to be maing it harder to slide against the hub body to the locked and unlocked positions. It still moves and locks and unlocks, but it does so really slowly; it takes about a half a turn of the wheel to get them to engauge and disengauge. But really no big deal; it's no problem to remove 6 bolts, pull the cover off, and wipe some grease off...
Last edited by iamsuperbleeder; 11-08-2008 at 08:03 AM.
11-09-2008, 12:42 AM
#11
okay, so i understand why to only put a LIGHT coating on... i was playing with the dials today and one of them flat out locked about 1/3 of the way thru the sweep... so i tore them apart, and wiped a lot of grease off, buttoned em up and they work like new... very smooth turning...
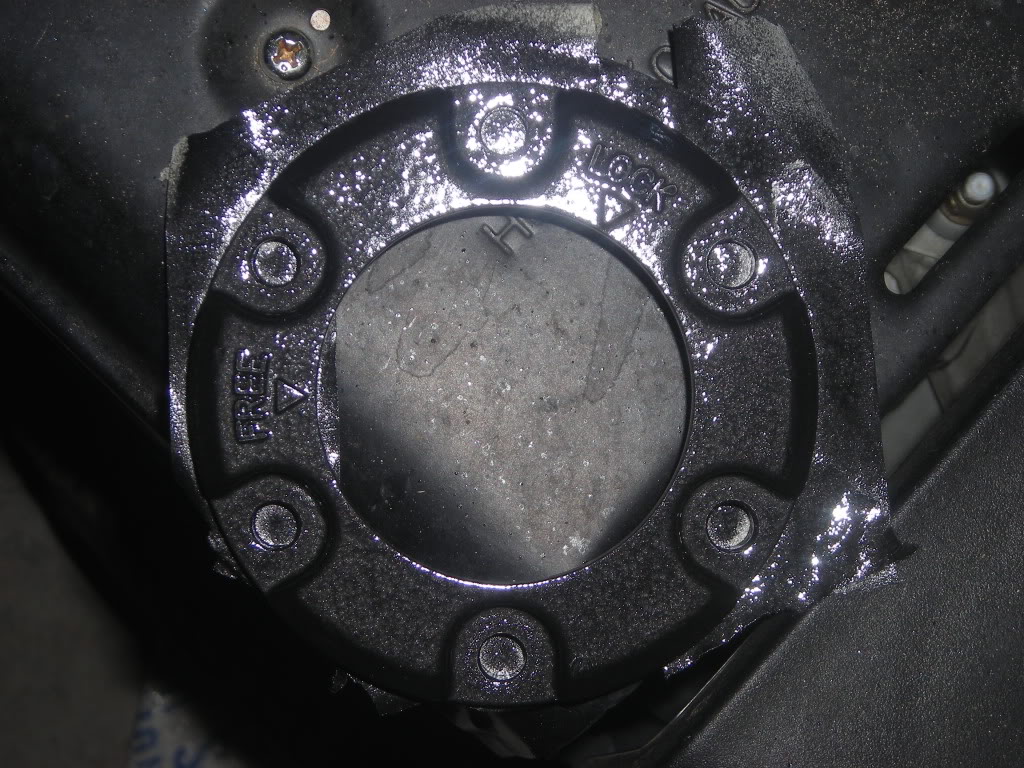
also, while i was down there, i went ahead and painted the 6 retaining bolts for the hub face... same blue as before...
sory for the crappy pic, but camera is in the truck, so i used my phone...
also, while i was down there, i went ahead and painted the 6 retaining bolts for the hub face... same blue as before...
sory for the crappy pic, but camera is in the truck, so i used my phone...
11-09-2008, 03:19 AM
#12
Registered User
okay, so i understand why to only put a LIGHT coating on... i was playing with the dials today and one of them flat out locked about 1/3 of the way thru the sweep... so i tore them apart, and wiped a lot of grease off, buttoned em up and they work like new... very smooth turning...
also, while i was down there, i went ahead and painted the 6 retaining bolts for the hub face... same blue as before...
sory for the crappy pic, but camera is in the truck, so i used my phone...

also, while i was down there, i went ahead and painted the 6 retaining bolts for the hub face... same blue as before...
sory for the crappy pic, but camera is in the truck, so i used my phone...
Dont say I told ya so
11-09-2008, 05:21 AM
#13
Registered User
Join Date: Oct 2006
Location: Greeley Colorado
Posts: 746
Likes: 0
Received 0 Likes
on
0 Posts
wow good write up and with pics is the way to go showing the parts and work like you did was outstanding, it really helped my daughter see what is in the hub when i have her lock them
11-09-2008, 06:06 AM
#17
Registered User
Join Date: Feb 2006
Location: Barrie, Ontario CANADA
Posts: 1,730
Likes: 0
Received 0 Likes
on
0 Posts
if you live anywhere cold you will know the problems of to much grease. In Canadian winter, -30C try turning a hub with lots of grease with snow gloves on..............
I don't think you used to much though. To much is when it is packed like a wheel bearing.
I don't think you used to much though. To much is when it is packed like a wheel bearing.
11-10-2008, 06:46 PM
#18
Registered User
I am bookmarking this thank you so much for a picture detailed write up. You should post this over in the staging area of the tech section if there isn't a write up on this already.
11-10-2008, 08:23 PM
#19
Registered User
Nice writeup and pictures.
Here's another source that I used when I rebuilt my hubs. http://www.pirate4x4.com/forum/showthread.php?t=281879
It shows the exact placement of the springs in the clutch gear and pawl which is crictical when putting them back together.
Here's another source that I used when I rebuilt my hubs. http://www.pirate4x4.com/forum/showthread.php?t=281879
It shows the exact placement of the springs in the clutch gear and pawl which is crictical when putting them back together.
11-10-2008, 09:10 PM
#20
thank you very much for the link! i was not aware that the tension spring had to ride on the fowler pawl/clutch assebly like that... i shall tear into it again tomorrow... besides, somehow both the gold bolts were broken in the CV shafts, so im going by toyota tomorrow to pick those up...
i will edit my writeup with more pics and my redo of the fowler pawl/clutch tension spring...
also thinking about linking my aisin hubs folder in my photobucket account here so whoever needs it has access to ALL of my pictures...
i will edit my writeup with more pics and my redo of the fowler pawl/clutch tension spring...
also thinking about linking my aisin hubs folder in my photobucket account here so whoever needs it has access to ALL of my pictures...


