
3vze head gasket replacement : my turn


 05-12-2007, 07:51 AM
#23
Registered User
Thread Starter
Join Date: Mar 2007
Location: Orange, CA
Posts: 318
Likes: 0
Received 0 Likes
on
0 Posts
And, to answer a question, it's true....it doesn't matter if the new timing belt has marks on it. But, when you go to install it, make sure when you have the cam gears and crank pulley all lined up on the compression stroke at cyl. #1 that you get as much slack out of the belt as possible while you're laying the belt notches across the cam gears. Start by pulling the belt up from the crank, then over the right hand (driver side) cam, under the idler pulley, then stretching over the land hand cam. Then, the tensioner will take up the rest of the slack on the remaining portion. Then, make some marks at that point so you have a reference IF the belt happens to slip a tooth in the whole process. Hope you followed that.
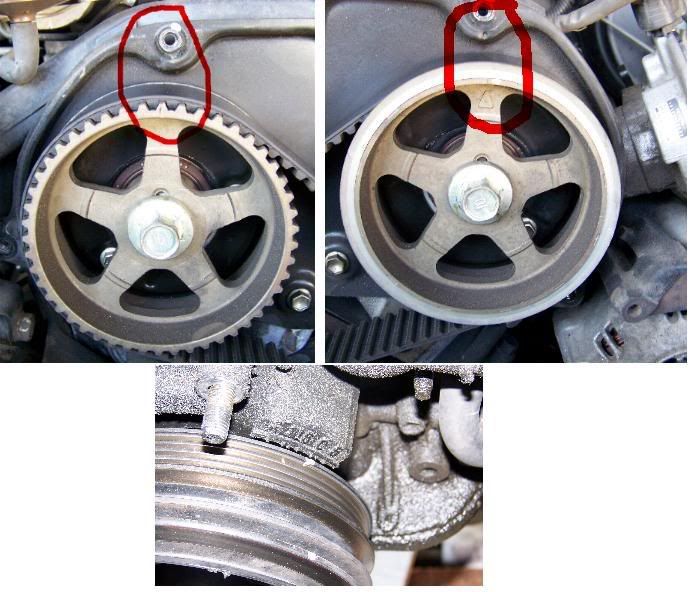
the prior installer must not have paid attention to the marks because when cyl #1 is @ TDC, both cam sprocket indicators point to their marks on the backing plate but the timing belt marks are nowhere to be seen.
in the below pic you'll see I put the crank pulley at zero and the cam sprockets line up with their corresponding backing plate notches. the rotor on the distributor is also pointing to the #1 cyl. I'm all set for disassembly, right?
 05-12-2007, 08:28 AM
#24
Registered User
Yep, tear 'er down bubba.

Here's a tip...
To get the cam gears off, if you don't have the SST, there are two things you can do. The easiest is to break them loose with the old belt still on and a breaker bar with a 19mm socket on the crank locked on against the bottom of the frame. The other way, although a little trickier, is to fit a 10mm socket on a long extension over one of the little backing plate bolts behind the cam gears. Use it as leverage against the gear to keep it from turning. That's the way I did it until I realized I could do it the first and easier way.
05-19-2007, 09:12 AM
#26
Registered User
Thread Starter
Join Date: Mar 2007
Location: Orange, CA
Posts: 318
Likes: 0
Received 0 Likes
on
0 Posts
well, i'm at the point to remove the cam sprockets and broke my cheapo Harbor Freight breaker bar doing so:
I think i'm going to try and make a tool similar to what i saw someone else here make (square tubing with a couple bolts at the end) to hold that sprocket in place. the wrench-on-the-crank-bolt-leveraged-on-the-frame-rail didn't work and neither did my impact wrench.
also, 5 of 6 fuel injector connector clips broke:

hopefully they'll stay put with a zip tie or something
I think i'm going to try and make a tool similar to what i saw someone else here make (square tubing with a couple bolts at the end) to hold that sprocket in place. the wrench-on-the-crank-bolt-leveraged-on-the-frame-rail didn't work and neither did my impact wrench.
also, 5 of 6 fuel injector connector clips broke:
hopefully they'll stay put with a zip tie or something
05-19-2007, 11:16 AM
#27
Contributing Member
Join Date: Apr 2006
Location: TENN Native Languishing in Virginia
Posts: 4,787
Likes: 0
Received 34 Likes
on
14 Posts
You're going to need a torque wrench to put it all back together anyway so just go to Sears & pick one up. You can use it in place of a breaker bar.
OR, you could pick up an ELECTRIC impact wrench...
OR, you could pick up an ELECTRIC impact wrench...
05-26-2007, 08:26 AM
#28
Registered User
Thread Starter
Join Date: Mar 2007
Location: Orange, CA
Posts: 318
Likes: 0
Received 0 Likes
on
0 Posts
Cam Sprockets = laying to waste many tools
not a whole lot of progress has been made due to the cam sprocket bolts refusing to cooperate. three more tools have been eaten up
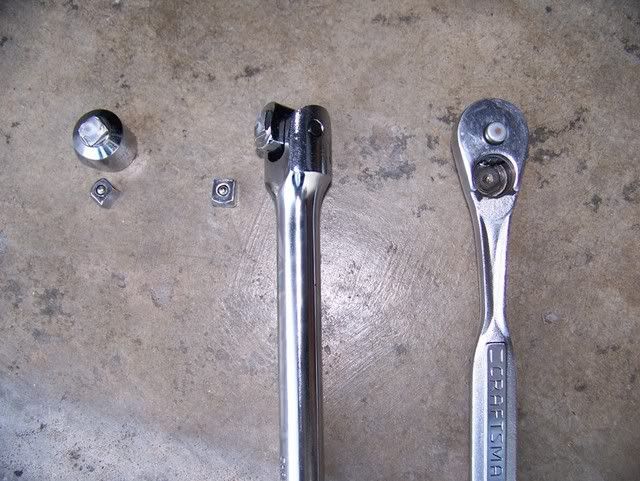
i don't care so much about the breaker bar or the adapter but the ratchet was one of the first tools i have ever owned and i can only hope Sears will replace it with something identical.
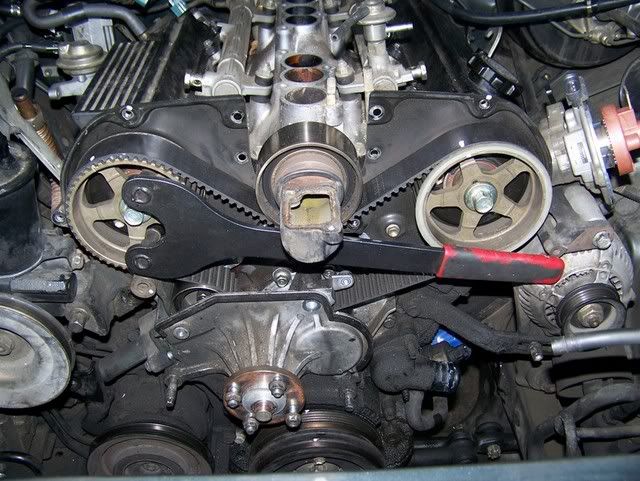
one cool thing is a local Toyota repair shop loaned me a Matco cam sprocket holding tool. this thing is tough as nails and works great when leveraged against the upper pulley water inlet. I tried every method that other members have used to hold that pulley in place and they've failed, this thing is a life saver.
i don't care so much about the breaker bar or the adapter but the ratchet was one of the first tools i have ever owned and i can only hope Sears will replace it with something identical.
one cool thing is a local Toyota repair shop loaned me a Matco cam sprocket holding tool. this thing is tough as nails and works great when leveraged against the upper pulley water inlet. I tried every method that other members have used to hold that pulley in place and they've failed, this thing is a life saver.
05-26-2007, 11:49 AM
#29
Registered User
Join Date: Jul 2004
Location: Gilroy, CA
Posts: 55
Likes: 0
Received 0 Likes
on
0 Posts
I recently had to take off my cam sprockets and had a tough time. I could not find a cam sprocket holder tool like the one you're now using. Rather, I ended up buying a $30 chain wrench. The chain wrench can damage the sprockets though, I had to put a peice of old timing belt and some rags between the sprocket and the pinch point of the chain wrench. I had to strap the chain wrench handle to the frame to hold it when torquing on the damn thing. I used an old torque wrench/breaker bar with a 1/2" drive. Finally, they broke loose. I didnt want to leave the timing belt on because it only had 5K miles and didnt want to take the chance that I'd damage it.
05-26-2007, 02:23 PM
#30
Registered User
Thread Starter
Join Date: Mar 2007
Location: Orange, CA
Posts: 318
Likes: 0
Received 0 Likes
on
0 Posts
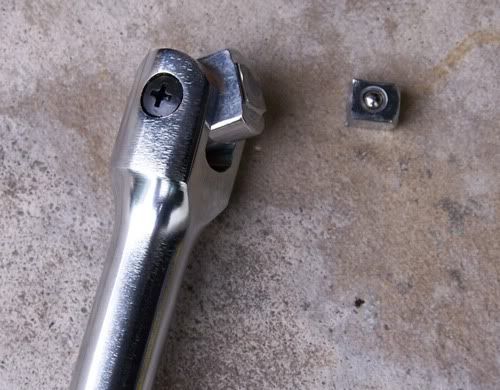
Tool #5.
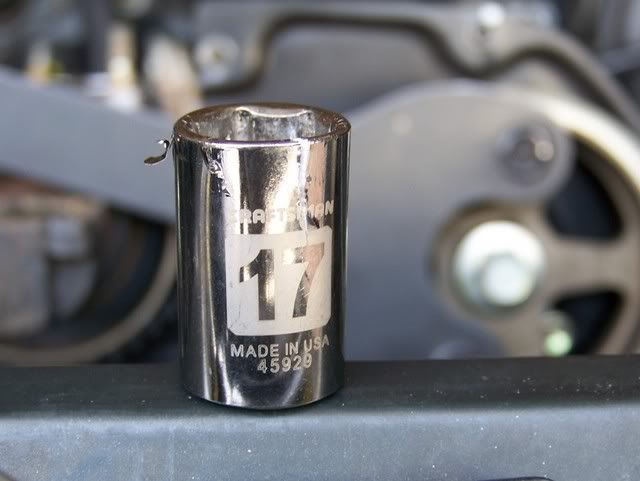
this guy helped me get off the passenger-side bolt then just couldn't hold together for the driver side. it slightly rounded the driver-side bolt when it broke, hopefully that won't get worse once i replace this socket and give it another go.
this guy helped me get off the passenger-side bolt then just couldn't hold together for the driver side. it slightly rounded the driver-side bolt when it broke, hopefully that won't get worse once i replace this socket and give it another go.
06-04-2007, 10:33 AM
#31
Registered User
Thread Starter
Join Date: Mar 2007
Location: Orange, CA
Posts: 318
Likes: 0
Received 0 Likes
on
0 Posts
Ok, the intake is out and the valley between the heads is about 1-2" deep in oil/coolant. Can this be indicative of a leak in the intake gasket and not the head. I couldn't find any indications of where the leak is coming from (HG or intake gasket) so I'm just throwing this question out there to see what you think.
06-04-2007, 03:41 PM
#32
Registered User

Join Date: Dec 2006
Location: Oregon, Seaside
Posts: 28
Likes: 0
Received 0 Likes
on
0 Posts
Ok, the intake is out and the valley between the heads is about 1-2" deep in oil/coolant. Can this be indicative of a leak in the intake gasket and not the head. I couldn't find any indications of where the leak is coming from (HG or intake gasket) so I'm just throwing this question out there to see what you think.
Not so much, there aren't any oil or coolant paths through the intake manifold. Once you have the heads off you can probably see where the head gasket failed.
 06-04-2007, 07:34 PM
#35
Registered User
Thread Starter
Join Date: Mar 2007
Location: Orange, CA
Posts: 318
Likes: 0
Received 0 Likes
on
0 Posts
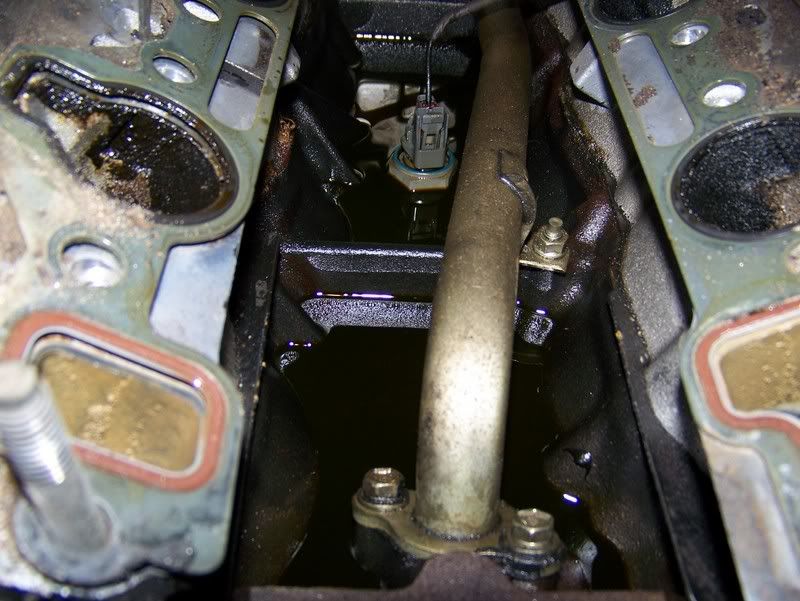
i looked again and can't see any cracks in the head/block. there aren't any external coolant leaks so i'll have to hope the leak occurred on the inside part of the seal.
06-10-2007, 08:33 AM
#37
Registered User
Thread Starter
Join Date: Mar 2007
Location: Orange, CA
Posts: 318
Likes: 0
Received 0 Likes
on
0 Posts
spent yesterday afternoon wrestling with the exhaust bolts, was unsuccessful. my problem is i had to chain together like 4 different extensions to reach the bolts from underneath the truck. they all bound up and none of the torque transferred to the bolt. hopefully some overnight Liquid Wrench soakage will help me out.
oh, here's what was drained out of the oil pan. yummy.
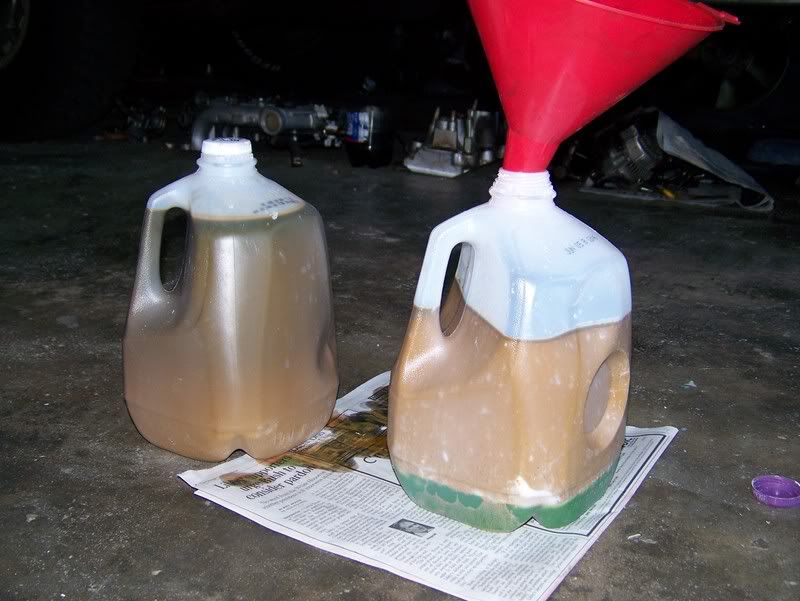
oh, here's what was drained out of the oil pan. yummy.
06-10-2007, 08:38 AM
#38
Contributing Member
Join Date: Apr 2006
Location: TENN Native Languishing in Virginia
Posts: 4,787
Likes: 0
Received 34 Likes
on
14 Posts
spent yesterday afternoon wrestling with the exhaust bolts, was unsuccessful. my problem is i had to chain together like 4 different extensions to reach the bolts from underneath the truck. they all bound up and none of the torque transferred to the bolt. hopefully some overnight Liquid Wrench soakage will help me out.
06-10-2007, 09:04 AM
#39
Registered User
Thread Starter
Join Date: Mar 2007
Location: Orange, CA
Posts: 318
Likes: 0
Received 0 Likes
on
0 Posts
yeah i wanted to use my impact wrench too but as evidenced earlier in this thread, i broke my 1/2" to 3/8" adapter. i should pick one up today.
Rabbit, did you take your heads out with the exhaust manifolds and crossover still attached? without cutting my crossover or lifting the motor, i see no other way.
Rabbit, did you take your heads out with the exhaust manifolds and crossover still attached? without cutting my crossover or lifting the motor, i see no other way.
06-10-2007, 10:06 AM
#40
Contributing Member
Join Date: Apr 2006
Location: TENN Native Languishing in Virginia
Posts: 4,787
Likes: 0
Received 34 Likes
on
14 Posts
yeah i wanted to use my impact wrench too but as evidenced earlier in this thread, i broke my 1/2" to 3/8" adapter. i should pick one up today.
Rabbit, did you take your heads out with the exhaust manifolds and crossover still attached? without cutting my crossover or lifting the motor, i see no other way.
Rabbit, did you take your heads out with the exhaust manifolds and crossover still attached? without cutting my crossover or lifting the motor, i see no other way.


