
22RE timing cover - all bolts out, breaking it loose?
 04-14-2014, 11:10 PM
#41
Registered User
Thread Starter
Join Date: Feb 2014
Posts: 173
Likes: 0
Received 0 Likes
on
0 Posts
Hmm...lol I don't even remember seeing an o-ring on that distributor! I'll have to double check. Wouldn't be a bad o-ring to get, along with that idle screw adjustment o-ring. Gotta start a parts list!
 04-16-2014, 08:14 PM
#42
Registered User

I think I got it fixed. Problem was a bad install job (me) on the o-ring for the oil pump. I'm happy it was fairly easy to find once I had everything out of the way, but I'm happier I didn't have to take the entire cover off again.
The arrangement under the hood that worked best for inspection was unbolting the power steering bracket and laying it off to the side just enough to keep it out of the alternator/water pump belt. That and the previous fan delete I posted earlier. You have to pull the distributor to get the power steering off, but whatev I'm getting good at it now.
First, I got it running and everything up top stayed dry and clean. Then it died when it came off of high idle, so I had to hook the AFM back up to the intake - kind of in my way but still workable. Then I started seeing some oil dripping. With no fan blowing, it stayed put a lot better and was clearly all around the oil pump.
Passenger side of oil pump looked a little weepy, but mostly dry. And the sealed bolt area appeared dry.
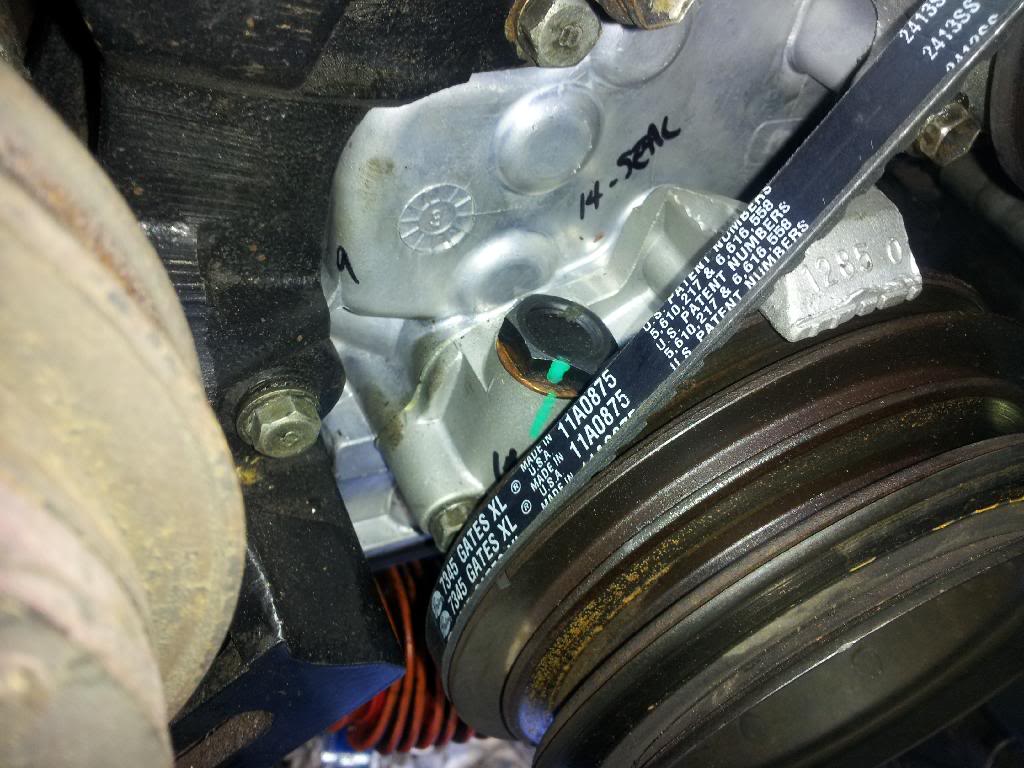
Driver's side was starting to show signs of leakage
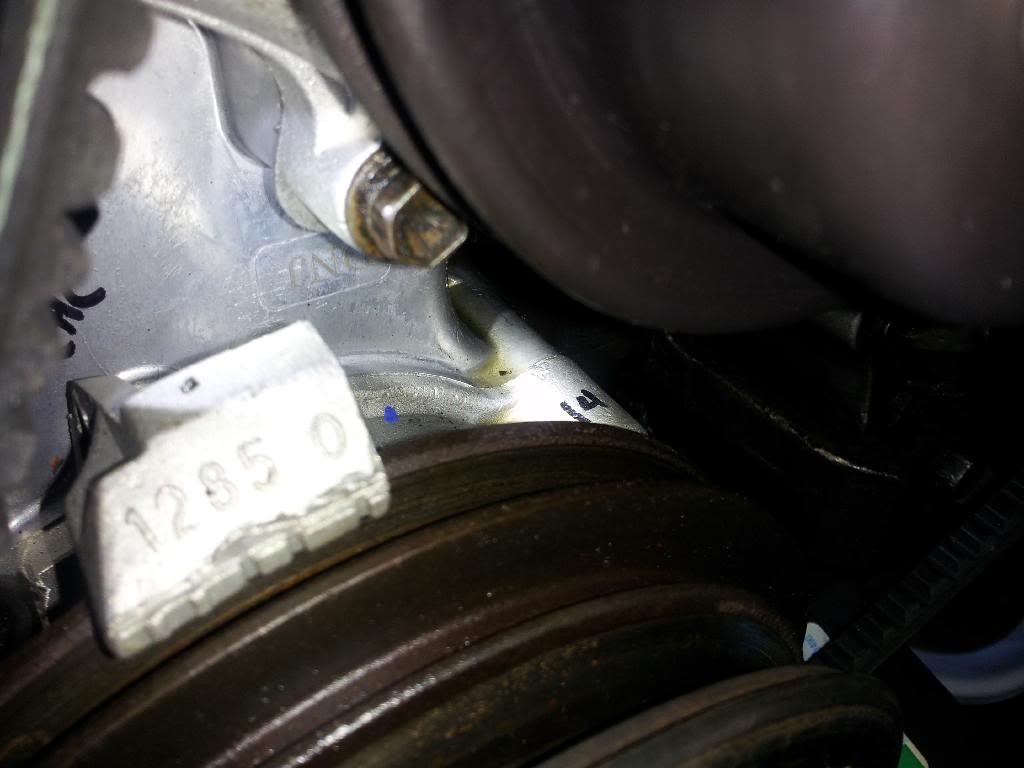
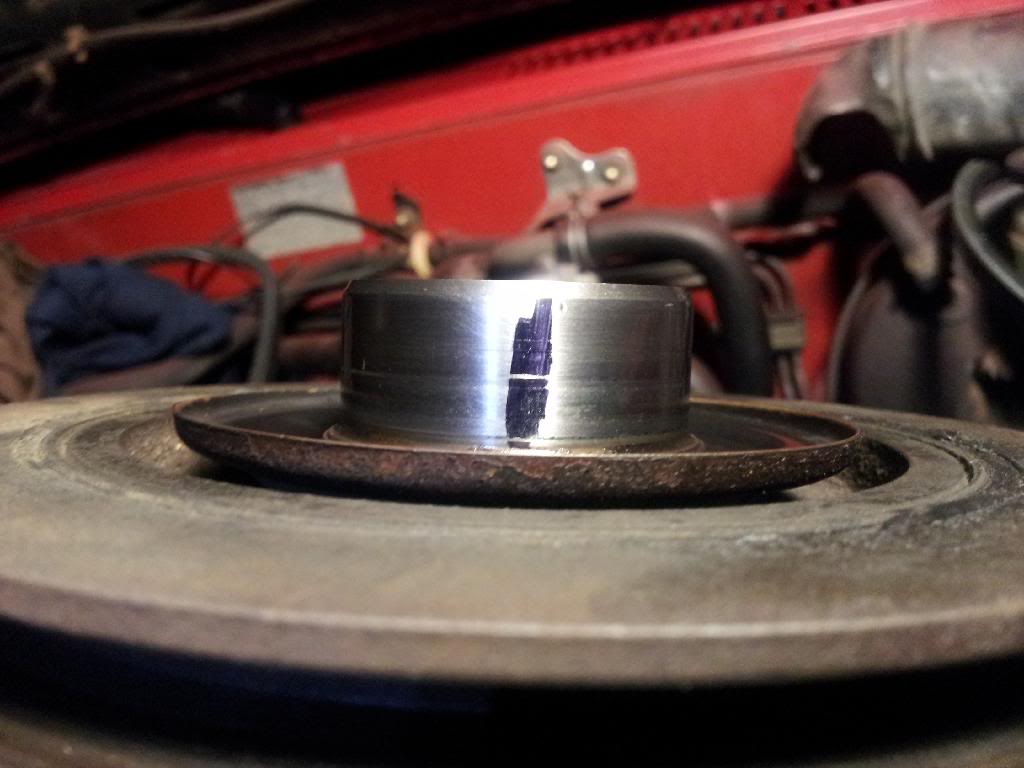
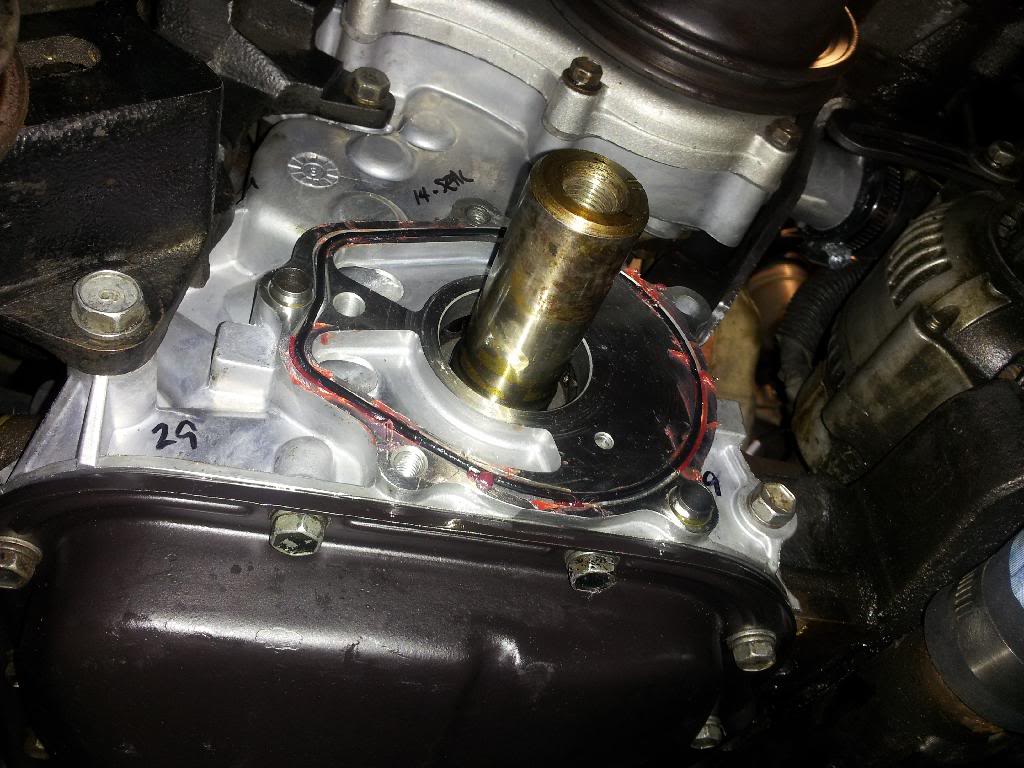
So it's looking like front main seal or o-ring. Double checked the seal clearance - still good to go even after adding gaskets and torquing it all down:
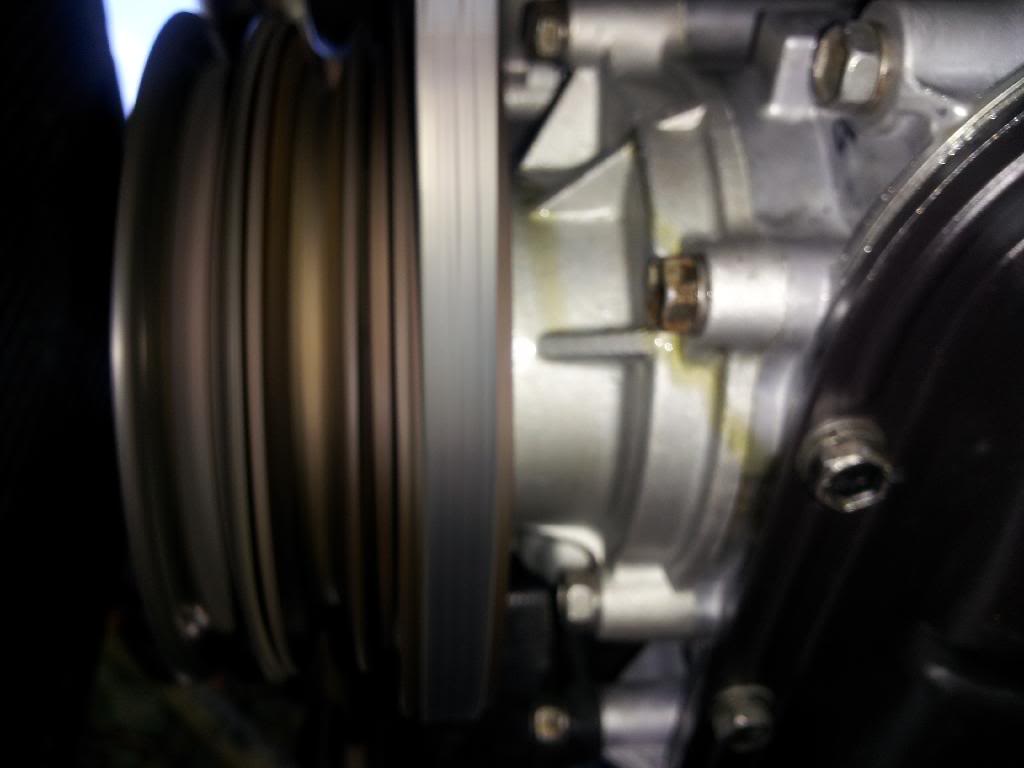
Time to pull the pump. Bam, that don't look right

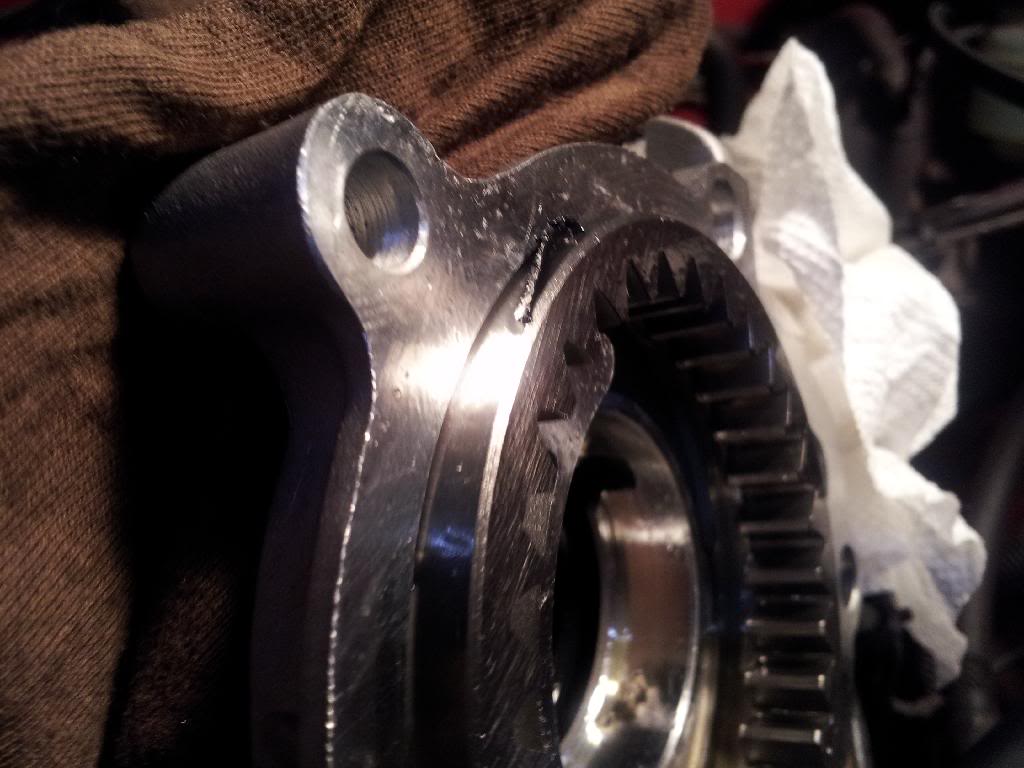
Clearly I pinched the o-ring while installing. I installed it onto the cover while it was out of the truck just to avoid that. No dice I guess. Not only was it pinched but it was jamming in the outer ring of the oil pump - I'm lucky I had oil pressure and I'm really lucky I decided not to drive it despite the leak:
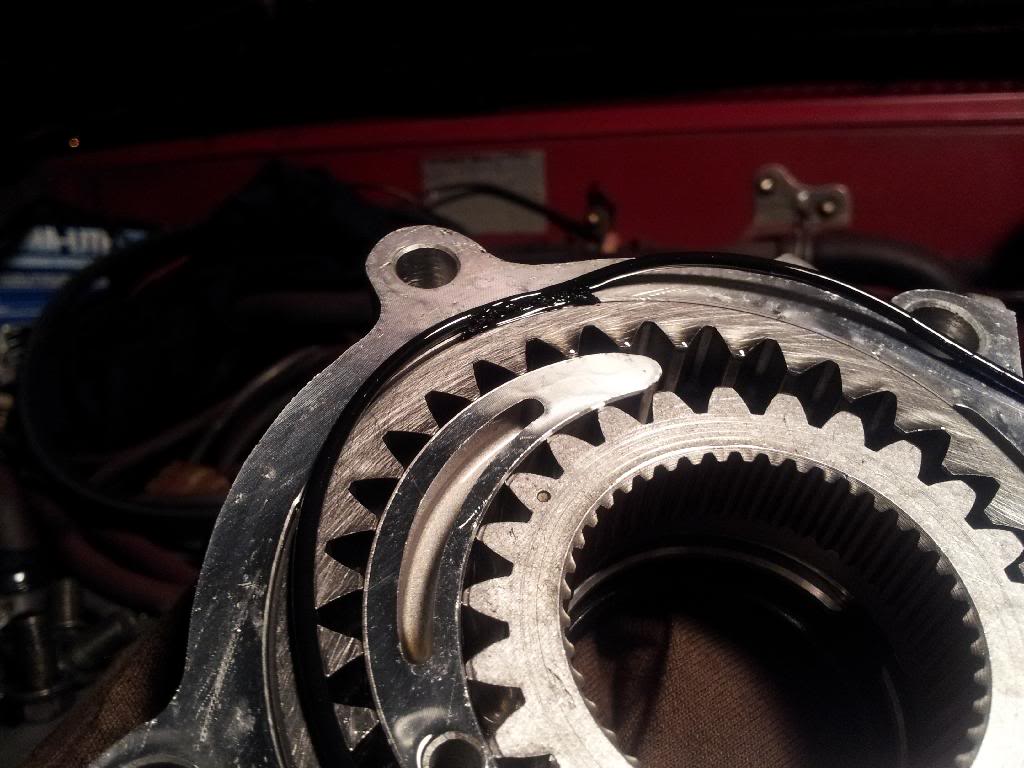
Now I have to install a new o-ring. There is an extra in the ENGNBLDR kit, and I just picked up a Fel-pro timing set kit just in case and there was one in there too. I went with the Fel-pro, it looked to have less "flashing" - the thin fin of material left over at the seams during manufacture. I opted to hold it in place with sticky axle grease:
Got it torqued back down, restarted and ran long enough for it to come up to operating temp all with no more leaking. So I went ahead and spent the extra time to put the rest of the truck back together so I can FINALLY drive it to work tomorrow, first time in nearly 5 weeks.
The arrangement under the hood that worked best for inspection was unbolting the power steering bracket and laying it off to the side just enough to keep it out of the alternator/water pump belt. That and the previous fan delete I posted earlier. You have to pull the distributor to get the power steering off, but whatev I'm getting good at it now.
First, I got it running and everything up top stayed dry and clean. Then it died when it came off of high idle, so I had to hook the AFM back up to the intake - kind of in my way but still workable. Then I started seeing some oil dripping. With no fan blowing, it stayed put a lot better and was clearly all around the oil pump.
Passenger side of oil pump looked a little weepy, but mostly dry. And the sealed bolt area appeared dry.
Driver's side was starting to show signs of leakage
So it's looking like front main seal or o-ring. Double checked the seal clearance - still good to go even after adding gaskets and torquing it all down:
Time to pull the pump. Bam, that don't look right
Clearly I pinched the o-ring while installing. I installed it onto the cover while it was out of the truck just to avoid that. No dice I guess. Not only was it pinched but it was jamming in the outer ring of the oil pump - I'm lucky I had oil pressure and I'm really lucky I decided not to drive it despite the leak:
Now I have to install a new o-ring. There is an extra in the ENGNBLDR kit, and I just picked up a Fel-pro timing set kit just in case and there was one in there too. I went with the Fel-pro, it looked to have less "flashing" - the thin fin of material left over at the seams during manufacture. I opted to hold it in place with sticky axle grease:
Got it torqued back down, restarted and ran long enough for it to come up to operating temp all with no more leaking. So I went ahead and spent the extra time to put the rest of the truck back together so I can FINALLY drive it to work tomorrow, first time in nearly 5 weeks.
04-17-2014, 04:54 AM
#43
Registered User
Thread Starter
Join Date: Feb 2014
Posts: 173
Likes: 0
Received 0 Likes
on
0 Posts
You win! 
Great job! I'm glad to hear that the oil leak was a smaller issue, even more glad to hear that the pinched o-ring didn't cause a bigger issue.
Good tip on the grease - I will use some to hold the o-ring in place on mine as well. I'm hoping to get things nearly buttoned up out there this weekend. Although I might not have the truck back together - I kind of want to take my time and clean up the surrounding sheet metal and frame and make it all pretty
04-17-2014, 06:06 AM
#44
Registered User
Well I hope I win. I've gone to the parking lot to check it twice, I have a drop or 2 of oil up front, sounds OK to me. Out back I have several drops coming out of the bellhousing, so I think that's either rear main seal or rear half-moon on the valve cover - either way it was pre-exisiting and probably not too big of a deal.
So far, it's looking like I won. Here's to hoping I got it right!
Oh and I don't KNOW if sticky grease is the best way to hold that in place. I know silicone, like dilectric grease, is good for rubber but I didn't find it to be sticky enough to really hold the o-ring in the TC groove. Silicone is what I used the first time, maybe just not enough of it.
04-17-2014, 06:14 AM
#45
Registered User
Thread Starter
Join Date: Feb 2014
Posts: 173
Likes: 0
Received 0 Likes
on
0 Posts
Well I hope I win. I've gone to the parking lot to check it twice, I have a drop or 2 of oil up front, sounds OK to me. Out back I have several drops coming out of the bellhousing, so I think that's either rear main seal or rear half-moon on the valve cover - either way it was pre-exisiting and probably not too big of a deal.
So far, it's looking like I won. Here's to hoping I got it right!
Oh and I don't KNOW if sticky grease is the best way to hold that in place. I know silicone, like dilectric grease, is good for rubber but I didn't find it to be sticky enough to really hold the o-ring in the TC groove. Silicone is what I used the first time, maybe just not enough of it.
So far, it's looking like I won. Here's to hoping I got it right!
Oh and I don't KNOW if sticky grease is the best way to hold that in place. I know silicone, like dilectric grease, is good for rubber but I didn't find it to be sticky enough to really hold the o-ring in the TC groove. Silicone is what I used the first time, maybe just not enough of it.
04-17-2014, 06:23 AM
#46
Registered User
It's not harder to put the TC on with the oil pump in place, as long as you do not yet have the oil pump drive spline installed on the crank. Leave that spline out, cover+oil pump+water pump all installs on the block as usual, THEN put the spline in. The oil pump gears will move around a little to let you install the spline thingy.
But if you're installing the oil pump to the TC on the bench, you either get the o-ring nicely in place using gravity but then have the oil pump gears falling out because of gravity, or the other way around. I think I laid the TC flat, laid the o-ring in (with not enough sticky stuff) reached inside the oil pump to hold the gears in place, and lowered it on to the TC. Since I still ended up pinching my o-ring, I must not have done this carefully enough, or didn't see when my o-ring popped out, or torqued my oil pump bolts in a really bad sequence.
But if you're installing the oil pump to the TC on the bench, you either get the o-ring nicely in place using gravity but then have the oil pump gears falling out because of gravity, or the other way around. I think I laid the TC flat, laid the o-ring in (with not enough sticky stuff) reached inside the oil pump to hold the gears in place, and lowered it on to the TC. Since I still ended up pinching my o-ring, I must not have done this carefully enough, or didn't see when my o-ring popped out, or torqued my oil pump bolts in a really bad sequence.
04-17-2014, 09:40 AM
#47
Registered User
Thread Starter
Join Date: Feb 2014
Posts: 173
Likes: 0
Received 0 Likes
on
0 Posts
Gotcha. I might measure the o-ring cutout on both the timing cover and the oil pump - the looked about the same, but if one is deeper than the other, that may aid in retention.
Not sure how I'll do it. I'll cross that bridge when I get there. First things first, I need to take care of that gasket and get it clean and get some spray sealant.
Keep your fingers crossed for me - this weekend!
Not sure how I'll do it. I'll cross that bridge when I get there. First things first, I need to take care of that gasket and get it clean and get some spray sealant.
Keep your fingers crossed for me - this weekend!
04-17-2014, 09:46 AM
#48
Registered User
I can solve that for you right now - the timing cover has a groove for the o-ring and the oil pump doesn't, just a flat face that pushes against the o-ring. The above pic where the o-ring is destroyed is the oil pump side of the TC/oil pump interface - smooth face.
But yeah best of luck cleaning and sealing up, I bet you'll get it knocked out in a way that will hold nicely for years to come.
But yeah best of luck cleaning and sealing up, I bet you'll get it knocked out in a way that will hold nicely for years to come.
04-17-2014, 09:52 AM
#49
Registered User
Thread Starter
Join Date: Feb 2014
Posts: 173
Likes: 0
Received 0 Likes
on
0 Posts
I can solve that for you right now - the timing cover has a groove for the o-ring and the oil pump doesn't, just a flat face that pushes against the o-ring. The above pic where the o-ring is destroyed is the oil pump side of the TC/oil pump interface - smooth face.
But yeah best of luck cleaning and sealing up, I bet you'll get it knocked out in a way that will hold nicely for years to come.
But yeah best of luck cleaning and sealing up, I bet you'll get it knocked out in a way that will hold nicely for years to come.
04-18-2014, 06:37 PM
#50
Registered User
Thread Starter
Join Date: Feb 2014
Posts: 173
Likes: 0
Received 0 Likes
on
0 Posts
So, quick question folks...
There are punch marks on both gears of the oil pump. So...do they mean anything? I'm not really sure what they are relative to. I'm even having a hard time seeing how they are relative to even each other, as a tooth on both of them has a punch mark, meaning they'll never line up. Anyone know why they heck those marks are there and what they are for?
Stealing an image from FGZ...
Also, I assume the marks face the block and not towards the radiator?
Thanks!
p.s. hoping to get that timing cover on tonight.
FGZ...did you just do a line of RTV on the gaskets and pressed them on, or did you put some on and smear it flat first?
Last edited by Red Leader; 04-18-2014 at 06:38 PM.
04-18-2014, 06:55 PM
#51
Registered User
I had to look up the oil pump alignment myself. Someone said just make sure the dimples both face the same direction. ENGNBLDR today told me the inner gear can only install one way because part of it will stick out if you get it backwards, and that the outer ring can be in either way with no effect.
So face the dimples to the block and go for it.
For the gaskets, I ended up coating both sides in a very slight smear of RTV. I did it by putting RTV between thumb and index finger and "fingerprinting" both sides of each gasket at the same time. It worked, but it made me feel rushed with the whole 5 minute limit. It sure held the gaskets in place nicely, so I think I would do it the same way again. And, it worked for me - dry seams so far.
I mentioned talking to ENGNBLDR, it's because I have an odd gear whine noise after my timing set work. The kind of gear whine you'd hear if you had a gear-driven timing set. He gave me a few things to check on, but we talked about the oil pump and it sounds like you can't mess it up much...as long as you get the o-ring in there right lol. He approved of my axle grease method, said he uses RTV in a few spots to hold it in place, but grease works too.
Go get 'em!
04-18-2014, 07:22 PM
#52
Registered User
Thread Starter
Join Date: Feb 2014
Posts: 173
Likes: 0
Received 0 Likes
on
0 Posts

I just creased one of the timing cover gaskets! Arrggggggg!
It straightened out okay but has a little tearing across one side of it. Shoot.
Now I either rtv it up and hope for the best or wait until frickin Monday and pay $$ at dealer for the gasket.
EDIT: reading up on this I think I'm gonna stop by the stealership and pick up the gaskets and maybe some Toyota FIPG for peace of mind.
Last edited by Red Leader; 04-18-2014 at 07:55 PM.
04-19-2014, 10:40 AM
#53
Registered User
Maybe you're right not to RTV it just in case. I got a Fel-pro timing gasket kit on hand, for when I (hopefully don't) have to redo my timing cover job, so you have other options than going to the dealer for 1 gasket. And with so many folks successfully using Permatex grey or black, I don't think you're stuck with Toyota's FIPG either. Up to you, of course.
04-19-2014, 07:09 PM
#54
Registered User
Hey if you get a minute can you take picture of the new cam sprocket for me? I need a side profile pic specifically. The one possible explanation for my strange noise would be if I installed that cam sprocket backwards. I didn't know it could be installed backwards, Tod says it can. He said I'll see a definite gap on the cam side if I did it wrong, I haven't pulled my valve cover yet to check, I'm still not sure how worried I am about this new noise as opposed to all the other odd noises and leaks I have.
04-20-2014, 06:45 PM
#55
Registered User
Thread Starter
Join Date: Feb 2014
Posts: 173
Likes: 0
Received 0 Likes
on
0 Posts
FGZ,
Just saw your post. Sure thing. I'll take pictures tonight after wifey goes to bed. Did you remember seeing the 'dot' on the sprocket? I'm fairly certain that there wouldn't be a dot on both sides. I'll get a few different angles for you.
-Dave
Just saw your post. Sure thing. I'll take pictures tonight after wifey goes to bed. Did you remember seeing the 'dot' on the sprocket? I'm fairly certain that there wouldn't be a dot on both sides. I'll get a few different angles for you.
-Dave
04-20-2014, 06:54 PM
#56
Registered User
The dot, of course! Hold off on that picture, I have a pic of the top sprocket lined up with my the timing chain bright link somewhere, that will show the dot which proves I installed it right.
I knew there was a reason I threw everything together so fast, the dots and bright links guided that part.
EDIT: Here's that pic, I don't have the sprocket on backwards
I knew there was a reason I threw everything together so fast, the dots and bright links guided that part.
EDIT: Here's that pic, I don't have the sprocket on backwards
Last edited by FGZ; 04-20-2014 at 07:30 PM.
04-21-2014, 07:45 AM
#57
Registered User
Thread Starter
Join Date: Feb 2014
Posts: 173
Likes: 0
Received 0 Likes
on
0 Posts
Haha, yep the dot!
Let me know if there are any other measurements I can take for ya. I still have the timing cover off (DANGIT haha) so I can take any detailed pictures you need or measure stuff.
Hoping to get those gaskets today and not fubar them up!
Let me know if there are any other measurements I can take for ya. I still have the timing cover off (DANGIT
haha) so I can take any detailed pictures you need or measure stuff.Hoping to get those gaskets today and not fubar them up!
04-21-2014, 06:25 PM
#58
Registered User
Thread Starter
Join Date: Feb 2014
Posts: 173
Likes: 0
Received 0 Likes
on
0 Posts
Well, won't be able to do anything for at least a couple days. Went to the dealership to get the timing cover gaskets and they didn't have them in stock. Apparently the closest dealer that stocks them is in Missouri!!! (I'm in Colorado).
I guess they are just not a stocked part. Should be in sometime on Wednesday. Dealer also wants around $18 for thermostat. Thinking of going the 3rd party route on the rest of the OEM stuff. The distributor o-ring cost almost $6! My fault for paying it I suppose
I guess they are just not a stocked part. Should be in sometime on Wednesday. Dealer also wants around $18 for thermostat. Thinking of going the 3rd party route on the rest of the OEM stuff. The distributor o-ring cost almost $6! My fault for paying it I suppose
04-22-2014, 03:24 AM
#59
Registered User
I should have thrown that advice out earlier - always call ahead to the dealer. Really, to anyone where you need a not-as-common part. But my HUGE local dealer still had to order anything I've looked for, so I call ahead and pick up next day. I think it's a function of how old our motors are.
$18 for a thermostat isn't nearly as bad as the $45 unit I went with from LCE. Dealer wanted about the same, didn't have it in stock either. It's the super special dual stage that cured my spiking temps when the weather got colder, so I'm not complaining too much.
$18 for a thermostat isn't nearly as bad as the $45 unit I went with from LCE. Dealer wanted about the same, didn't have it in stock either. It's the super special dual stage that cured my spiking temps when the weather got colder, so I'm not complaining too much.
04-22-2014, 06:52 AM
#60
Registered User
Thread Starter
Join Date: Feb 2014
Posts: 173
Likes: 0
Received 0 Likes
on
0 Posts
Hmm...tell me more about the LCE unit. How is the design different? That's interesting that it solved some issues for you where the OE t-stat did not. Curious about that. Is it a 180 degree unit? I haven't picked up a new t-stat yet but I'm going to need one and wondering if the LCE might be the way to go?
Hopefully gaskets are in tomorrow and then we'll get rolling. I just need to not be an idiot when putting some ultra grey on there and mash up another gasket lol. I splurged and went all OEM on the gaskets (2x timing cover, water pump).
Hopefully gaskets are in tomorrow and then we'll get rolling. I just need to not be an idiot when putting some ultra grey on there and mash up another gasket lol. I splurged and went all OEM on the gaskets (2x timing cover, water pump).


