
22RE overheated - head gasket replacement thread [lots of pics]
 10-16-2012, 08:13 AM
#1
Registered User
Thread Starter
22RE overheated - head gasket replacement thread [lots of pics]
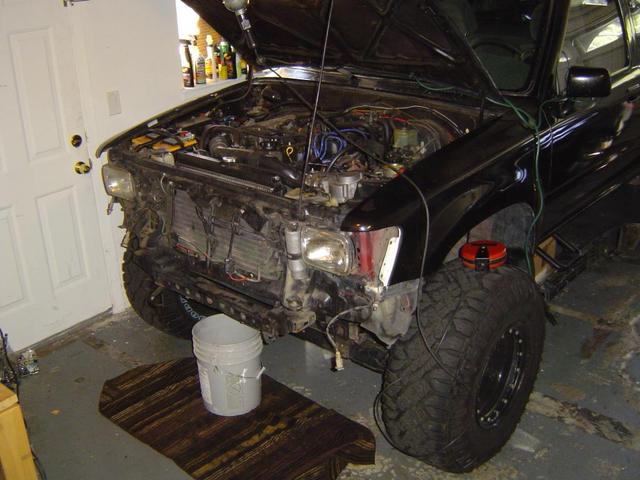
While driving back from Yosemite after a camping trip, I was driving my truck a bit hard and keeping a low gear while revving high on the mountains. I didnt keep a tab on the temperature gauge until I suddenly noticed my truck steaming from under the hood. Pulled over immediately and later noticed that the coolant overflow tank is steaming coolant all over the place.  I thought it just overheated but I was wrong because after we started it up again a while later, it overheated immediately and white smoke from the tailpipe ... opened the oil cap and there is a milky circle ..uggh
Anyhow, got the truck towed home and first I wasnt sure if I should undertake a headgasket replacement as I have I dont know the first thing about taking an engine apart. But after talking to a member on the board and reading some thread, I have decided to do this myself with lots of help!
Prior to the headgasket going out, I didnt really notice anything that would cause this.
Started with draining the coolant & oil followed by removing the belts. I also took my front bumper off for ease of working on the truck.
Drain Coolant
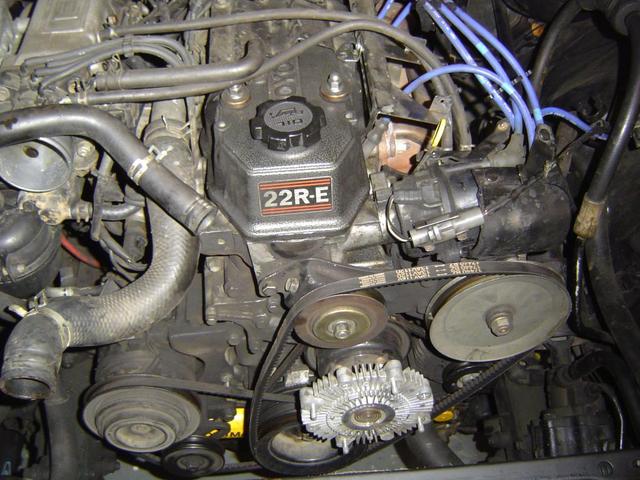
Took the belts off
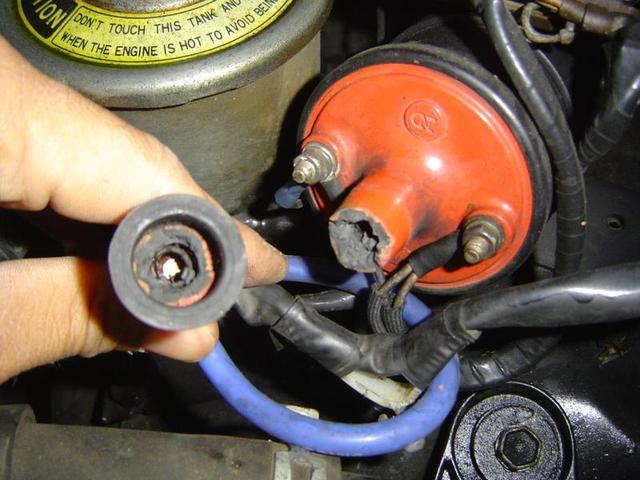
While removing the ignition coil, it just broke ... seemed burnt .. not a good sign
Removed all spark wire and religiously marked everything on the distributer
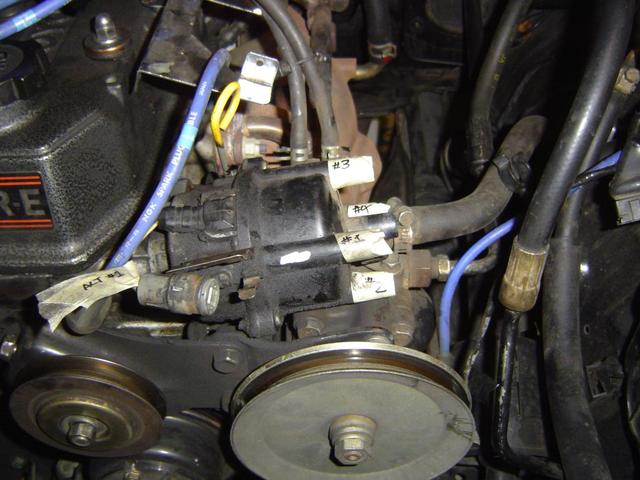
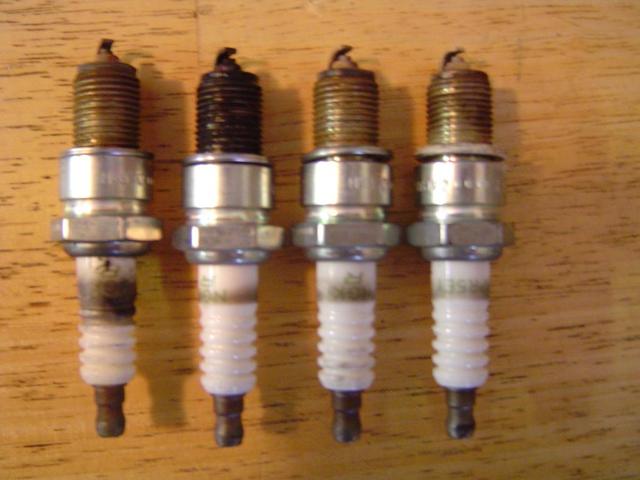
Spark plugs are out in order {cylinder #1->4}. Plug #2 has oil on it .. other three are dry.
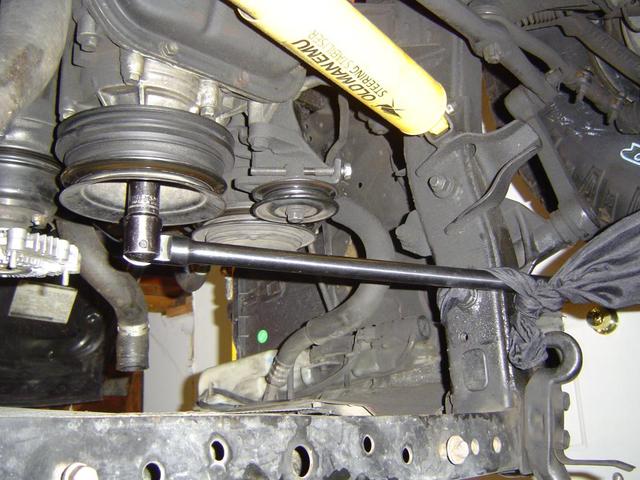
Note sure why I did this but I removed the crank bolt at this time before setting the battery aside. This trick always works for me and removes the crank bolt.
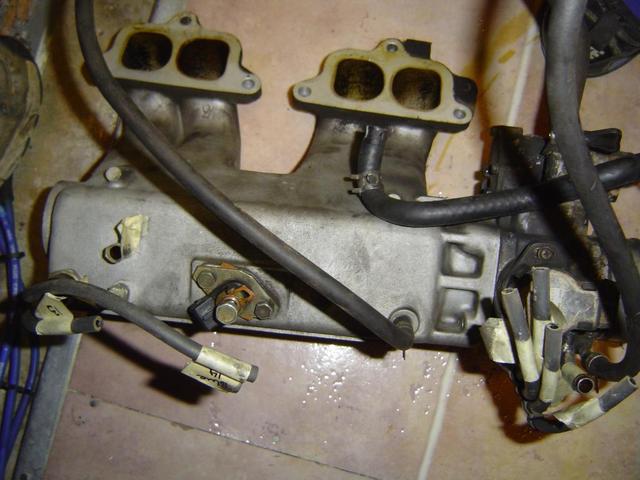
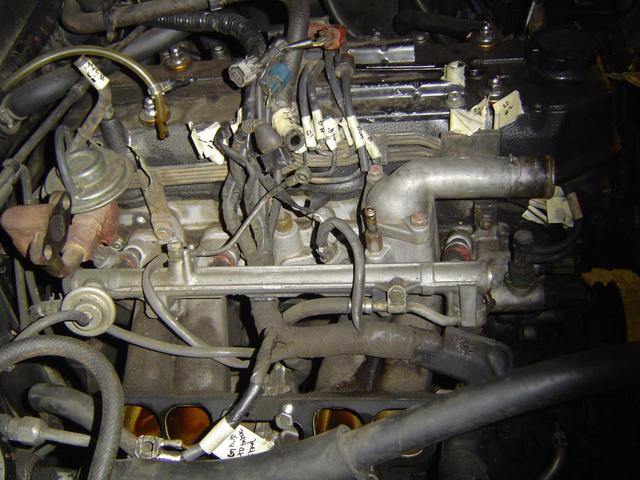
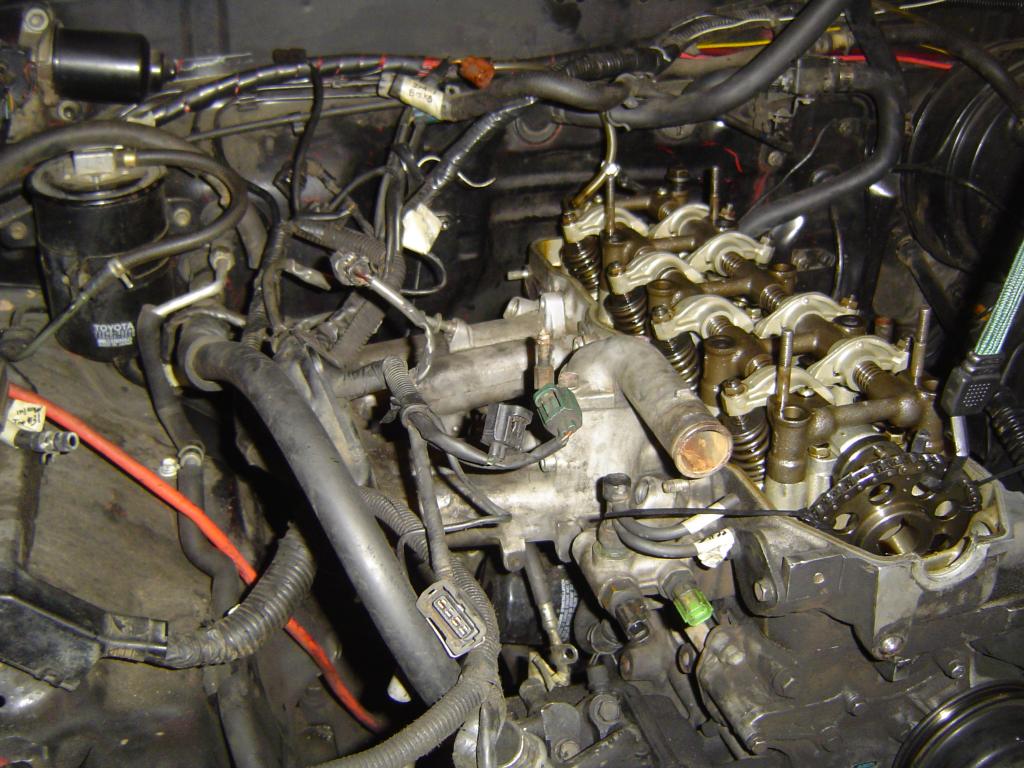
Then, I just started taking my all the vacuum hoses out and marking everything and taking tons of pictures. Upper intake is out
--
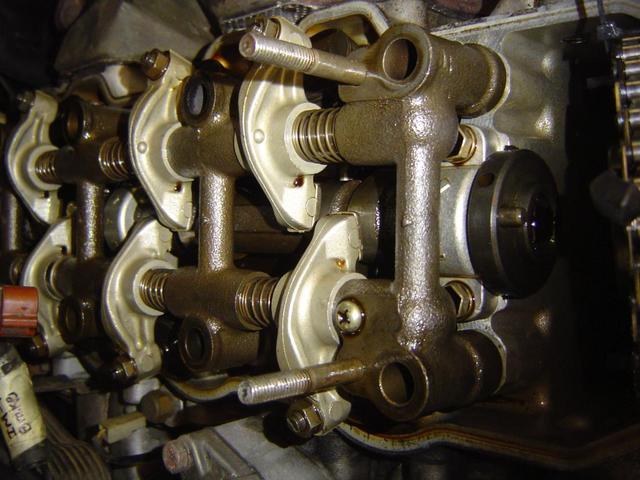
Removed my valve cover at this point
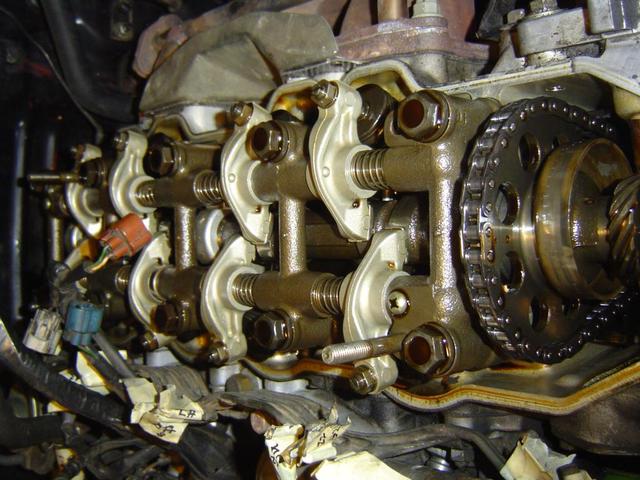
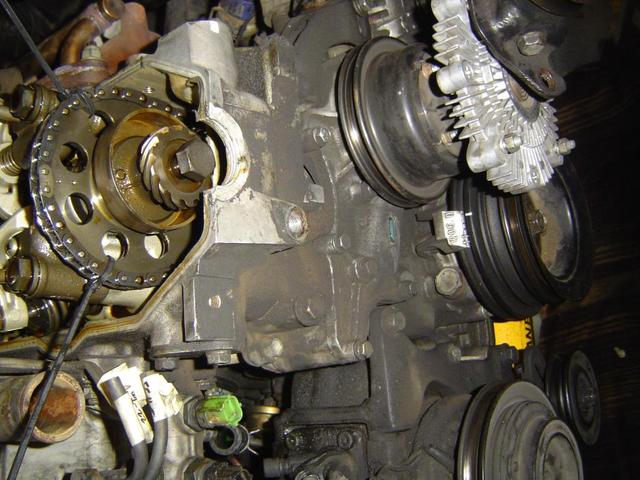
We are in TDC .. distributer at 11am, Crank at 0Deg and Camshaft dimple is somewhat 12.
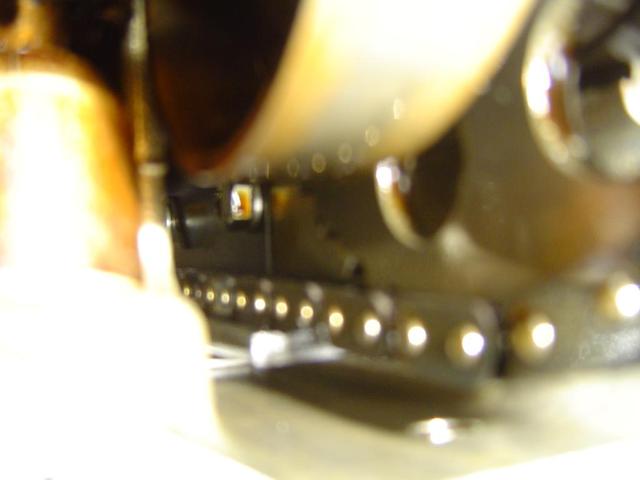
Next, I was expecting my timing chain guides to broken, but to my surprise I have metal backed guides .. seems like the PO has replaced them in the past. The driver side guide doesnt budge at all and is sturdy. The only thing I want to point out is that the chain is very close to the guide on the driver side and that the metal guide has chain grooves as it seems to have been rubbing against it. Is this normal? Does the chain have this much slack? Here is the pic of the grooves:
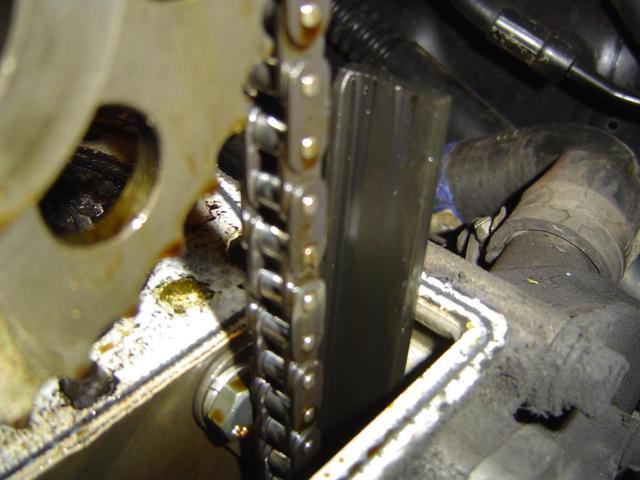
Driver Side (out of focus pic):
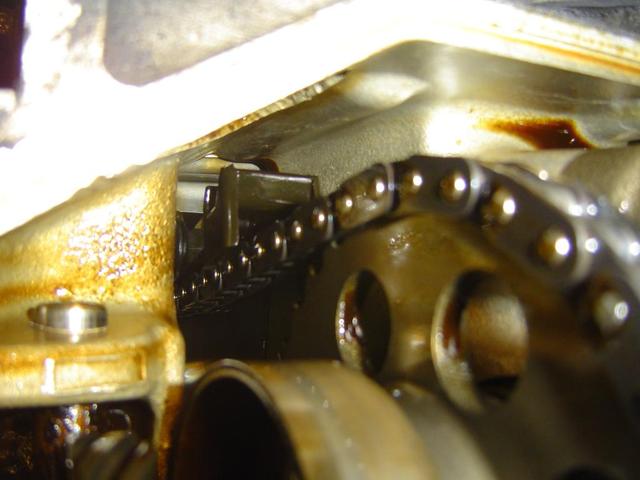
Passenger Side:
I took some other stuck like PowerSteering pulley, injector rails, etc at this point as well. Basically following the FSM as much as I could.
Next, I take the distributor out. Now, this is where things start going a bit a ...not so smooth ... I wasnt sure if I should take out the exhaust or intake manifold out but I decided to stick to FSM which point out that you take the head out with the two manifolds attached. This isnt a great idea as the engine harness goes through the lower intake manifold and later I found out that when the head is coming off you are stuck with the intake manifold being held by wires... I so felt like just snapping the wiring .. but I took my time and removed all the wiring going to trans, oxygen sensor, speed sensor, oil pressure (uugh!).
Next thing I did was to try removing the camshaft retaining bolt but this didnt go as smooth either. As soon I put a wrench on the bolt and tried to turn it, the camshaft/crank also moves. So, I put back in TDC and then I held the crank with breaker bar on the frame rail and then another breaker bar on the cambolt and try to remove it in the following manner:
When I was taking the cambolt out, the cam sproket moved a bit from 12"clock to 11"clock and then held there and the bolt came loose while the crank is stil at 0Deg. Not sure why cam moved out of sync with the crank, is there any slack in the timing chain? Did I mess something up here?
Once I got the bolt loose, I tried to bring the cam back to ~12" and it moved again without the crank moving. {not sure what i was thinking but I was trying to undo the movement, out-of-sync thing that happened earlier}
I put zip ties on it on the cam.
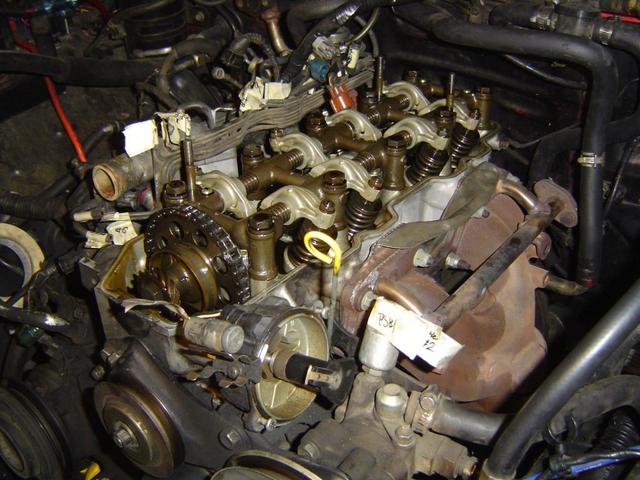
Cam sproket removed
Next, I undid the head bolts in the proper sequence and tried to remove the head but I see the wiring in my way on the intake side. Next, I finally decided to go against FSM and remove the exhaust manifold. Removed the studs and all the nuts off the exhaust
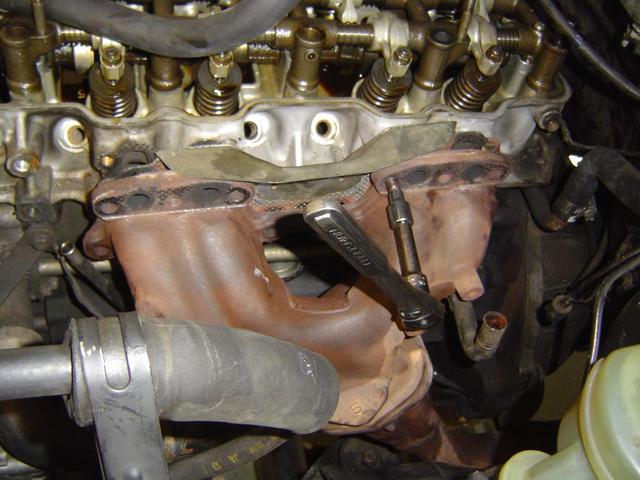
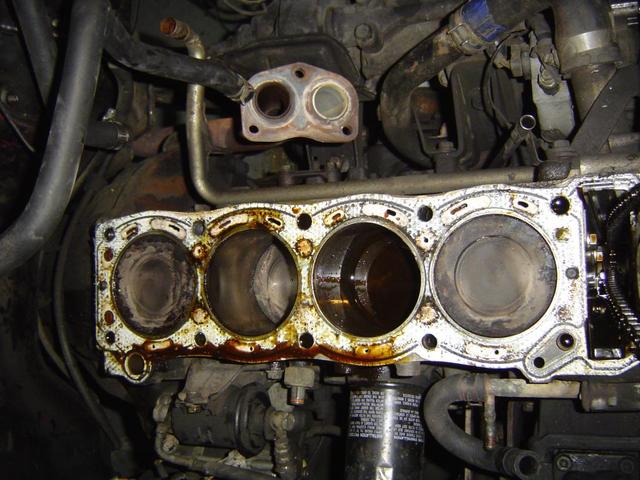
Exhaust removed .. cylinder #2 looks odd without any carbon
Next onto the intake side, I couldnt get the intake off as the head had already came loose. So, I had no other option than to remove the intake with the head at this point. So, I traced the wring in the middle and unplugged everything and removed the wiring out of the way.
Wiring in the middle:

Wiring removed and intake is free:
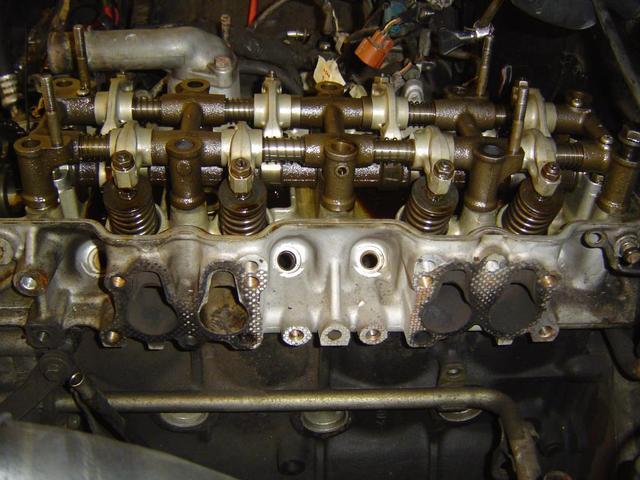
Finally after alot of trouble, the head comes off
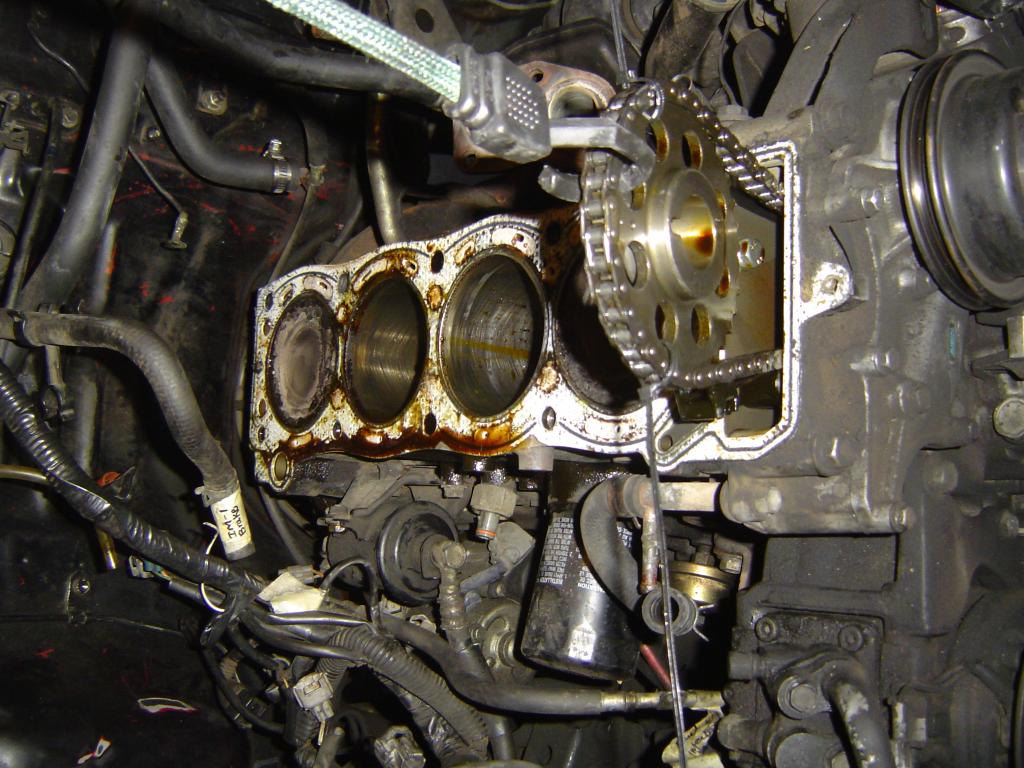

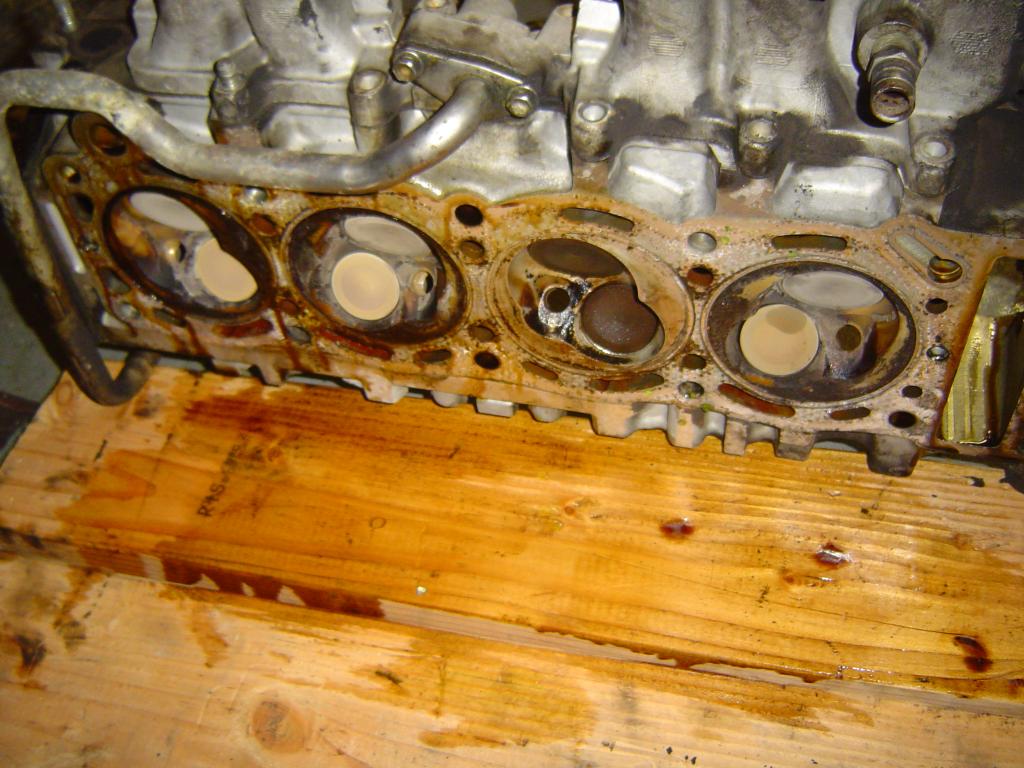
Underneath the head:
This is where I stopped for the day. I really need some input on the next steps as this is my first time see internals of an engine.
Now, the main questions I have is that I did overheat the truck pretty bad, I will get the head checked or replaced but Im not sure how to check if the short block is OK.
Not sure what to do with the timing chain, replace it or is fine. Is the slack normal and what about the camsproket moving out of sync with crank for a tiny bit.
As for the headgasket, Im definitely going OEM only. I will be getting the full gasket kit from ENGBLDR for rest of the gasket. I know I need to replace ignition coil (got burnt), sparkplugs, pcv valve incl. gourmet, injector cleaning service.
I thought it just overheated but I was wrong because after we started it up again a while later, it overheated immediately and white smoke from the tailpipe ... opened the oil cap and there is a milky circle ..ugghAnyhow, got the truck towed home and first I wasnt sure if I should undertake a headgasket replacement as I have I dont know the first thing about taking an engine apart. But after talking to a member on the board and reading some thread, I have decided to do this myself with lots of help!
Prior to the headgasket going out, I didnt really notice anything that would cause this.
Started with draining the coolant & oil followed by removing the belts. I also took my front bumper off for ease of working on the truck.
Drain Coolant
Took the belts off
While removing the ignition coil, it just broke ... seemed burnt .. not a good sign
Removed all spark wire and religiously marked everything on the distributer
Spark plugs are out in order {cylinder #1->4}. Plug #2 has oil on it .. other three are dry.
Note sure why I did this but I removed the crank bolt at this time before setting the battery aside. This trick always works for me and removes the crank bolt.
Then, I just started taking my all the vacuum hoses out and marking everything and taking tons of pictures. Upper intake is out
--
Removed my valve cover at this point
We are in TDC .. distributer at 11am, Crank at 0Deg and Camshaft dimple is somewhat 12.
Next, I was expecting my timing chain guides to broken, but to my surprise I have metal backed guides .. seems like the PO has replaced them in the past. The driver side guide doesnt budge at all and is sturdy. The only thing I want to point out is that the chain is very close to the guide on the driver side and that the metal guide has chain grooves as it seems to have been rubbing against it. Is this normal? Does the chain have this much slack? Here is the pic of the grooves:
Driver Side (out of focus pic):
Passenger Side:
I took some other stuck like PowerSteering pulley, injector rails, etc at this point as well. Basically following the FSM as much as I could.
Next, I take the distributor out. Now, this is where things start going a bit a ...not so smooth ... I wasnt sure if I should take out the exhaust or intake manifold out but I decided to stick to FSM which point out that you take the head out with the two manifolds attached. This isnt a great idea as the engine harness goes through the lower intake manifold and later I found out that when the head is coming off you are stuck with the intake manifold being held by wires... I so felt like just snapping the wiring .. but I took my time and removed all the wiring going to trans, oxygen sensor, speed sensor, oil pressure (uugh!).
Next thing I did was to try removing the camshaft retaining bolt but this didnt go as smooth either. As soon I put a wrench on the bolt and tried to turn it, the camshaft/crank also moves. So, I put back in TDC and then I held the crank with breaker bar on the frame rail and then another breaker bar on the cambolt and try to remove it in the following manner:
When I was taking the cambolt out, the cam sproket moved a bit from 12"clock to 11"clock and then held there and the bolt came loose while the crank is stil at 0Deg. Not sure why cam moved out of sync with the crank, is there any slack in the timing chain? Did I mess something up here?
Once I got the bolt loose, I tried to bring the cam back to ~12" and it moved again without the crank moving. {not sure what i was thinking but I was trying to undo the movement, out-of-sync thing that happened earlier}
I put zip ties on it on the cam.
Cam sproket removed
Next, I undid the head bolts in the proper sequence and tried to remove the head but I see the wiring in my way on the intake side. Next, I finally decided to go against FSM and remove the exhaust manifold. Removed the studs and all the nuts off the exhaust
Exhaust removed .. cylinder #2 looks odd without any carbon
Next onto the intake side, I couldnt get the intake off as the head had already came loose. So, I had no other option than to remove the intake with the head at this point. So, I traced the wring in the middle and unplugged everything and removed the wiring out of the way.
Wiring in the middle:
Wiring removed and intake is free:
Finally after alot of trouble, the head comes off
Underneath the head:
This is where I stopped for the day. I really need some input on the next steps as this is my first time see internals of an engine.
Now, the main questions I have is that I did overheat the truck pretty bad, I will get the head checked or replaced but Im not sure how to check if the short block is OK.
Not sure what to do with the timing chain, replace it or is fine. Is the slack normal and what about the camsproket moving out of sync with crank for a tiny bit.
As for the headgasket, Im definitely going OEM only. I will be getting the full gasket kit from ENGBLDR for rest of the gasket. I know I need to replace ignition coil (got burnt), sparkplugs, pcv valve incl. gourmet, injector cleaning service.
Last edited by hgill; 10-22-2012 at 07:44 AM.
 10-16-2012, 11:21 AM
#2
Registered User
iTrader: (2)
Join Date: Dec 2009
Location: Pleasanton, CA - SF Bay Area
Posts: 2,159
Likes: 0
Received 7 Likes
on
5 Posts
Hey Harbir - great write up thus far and sorry for the bad news. I've never done the head but have done a lot of what you did for the timing chain. Your slack in the chain may be due to a bad tensioner - I'd say remove the timing cover while you're in there and take a look. Based on your description I don't think your moving the cam sprocket (and then back) did anything bad, as long as you are at TDC and you line up the bright link on the chain at the 12:00 on the cam sprocket.
I'm no expert on reading internals so I'll let others chime in. The lack of carbon/ sooty plug on #2 is definintely interesting but I can't imagine related to overheating?
I'll be following and chime in where I think I can help. If you need help wrenching let me know.
Phil
I'm no expert on reading internals so I'll let others chime in. The lack of carbon/ sooty plug on #2 is definintely interesting but I can't imagine related to overheating?
I'll be following and chime in where I think I can help. If you need help wrenching let me know.
Phil
10-16-2012, 07:47 PM
#3
Registered User
Thread Starter
Thanks Phil. Im also leaning towards a possible bad tensioner? Im wondering if the grooves on the driver side guide suggest too much slack?
When I took the valve cover off, the timing chain was sticking close to driver guide. Not sure if that is normal.
Also, I noticed a lot of carbon on the pistons, how do I clean them up and what I should do to the block in terms of cleaning before I put the head back on.
Hoping that experts can chim in as Im completely new to this.
10-17-2012, 03:06 AM
#4
YotaTech Milestone-Two Millionth Post
hey...just saw this.
good luck on the re-do, looks like you have a good bit of work behind you.
as far as the piston tops and the block cleaning....acetone and some delicate scraping...especially on the block (no sand paper. I used a delicate touch with a razor blade). you need to get that oil off. as far as WHY there is oil inside that , not sure.
as much as a PITA it is, I would say, pull the timing cover and oil pan and do the whole thing. Those metal guides are not OEM someone fiddled in there at some point....wonder if they never dropped the pan to clean out the old guides and your pickup tube screen is clogged. see my ''THREAD B" for a similar problem.
10-22-2012, 07:22 AM
#5
Registered User
Thread Starter
Thanks 92TOY for the acetone tip; I will give that a try. So, I decided to remove the timing chain while I was at it and take a peek the tensioner and oil pan. But, first I decided to overhaul my motor mounts, I have been getting some vibrations a while back and had bought new motor mounts but never got a chance to install them. So, I took some time to replace them before removing the timing chain.
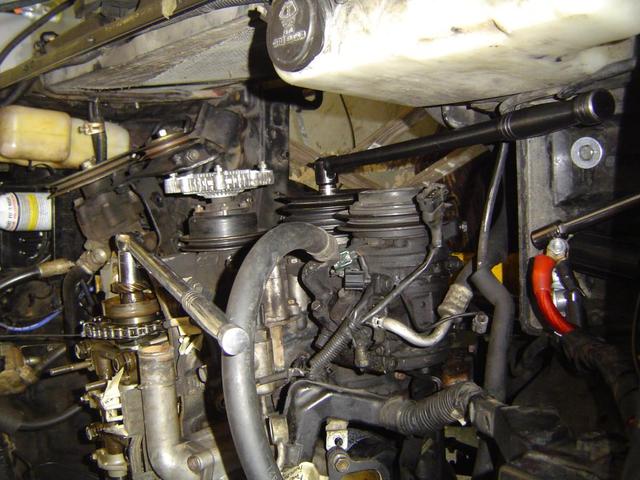
Supported the motor using a bottle jack n some wood before taking off passenger side motor mount
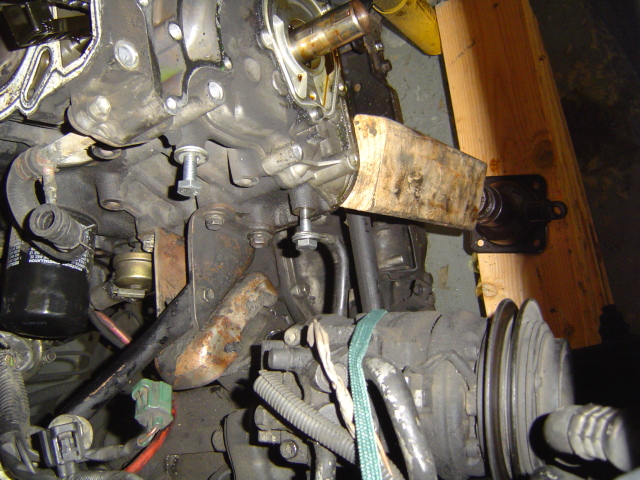
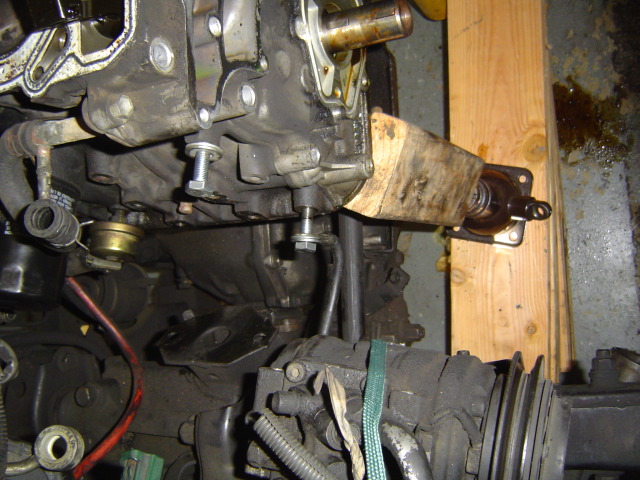
Passenger motor mount assembly and new motor mount

Repainted and it was put back in .... one thing to note is the the new motor mounts were slightly higher than the ones I replaced, not sure if the older ones compressed over time or these aftermarket ones were longer? Anyhow, I bought these motor mounts from lowrangeoffroad a while back.

Did the same thing on the driver side which was PITA as the alternator needed to removed and lots of aligning and lifting to get them in.
Next thing was to remove the timing chain cover and oil pan. Removed all the waterpump, oil pump, etc.
As suggested, I put all my timing cover bolts onto a cardboard .. which worked out great (the water pump bolts arent there but they are all the same)

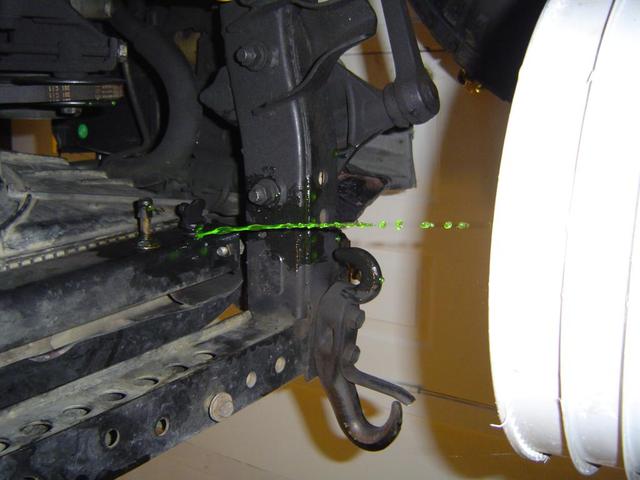
Removed the oil pan bolts but I couldnt get that thing to move for hours! It was stuck on like glue .. I tried putting a jack underneath it to put pressure on it and bounce the truck a couple of times, hammer'ed it with a mallet .. I googled online and someone suggested out a bottle jack against frame and pushing it (bad idea and it didnt work) here is a pic:
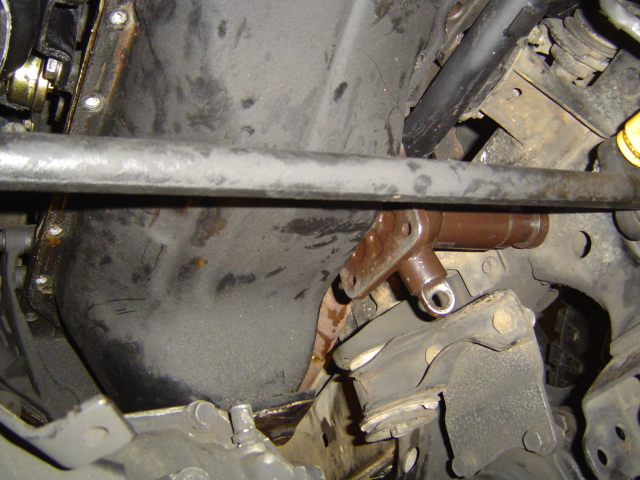
In the end, I read the FSM and it suggested putting a putty knife kind of tool and going around, I did that and it went slowly around the oil pan and the seal finally broke .... aaah! If I had just read the FSM in the first place, I would have not wasted so many hours The oil pan had very small metal shavings but no other surprise parts or anything like that.
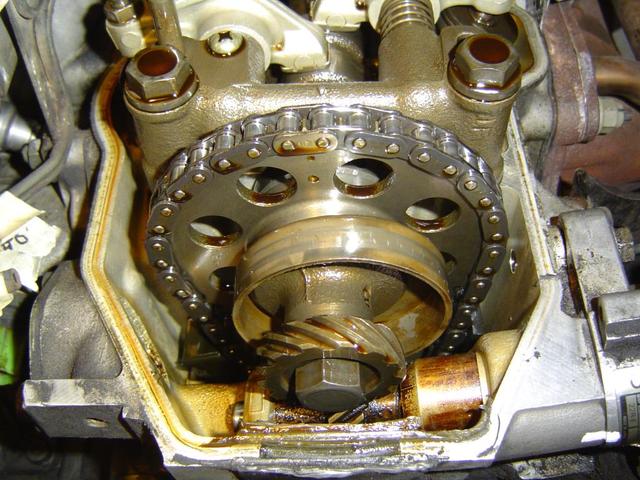
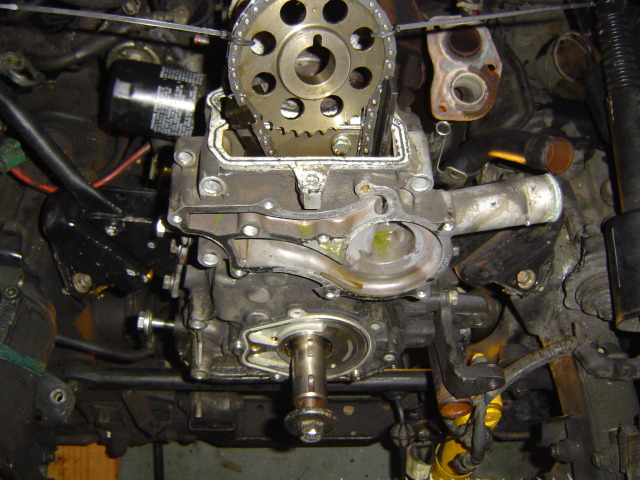
Timing cover came off shortly after and here is how it looks:
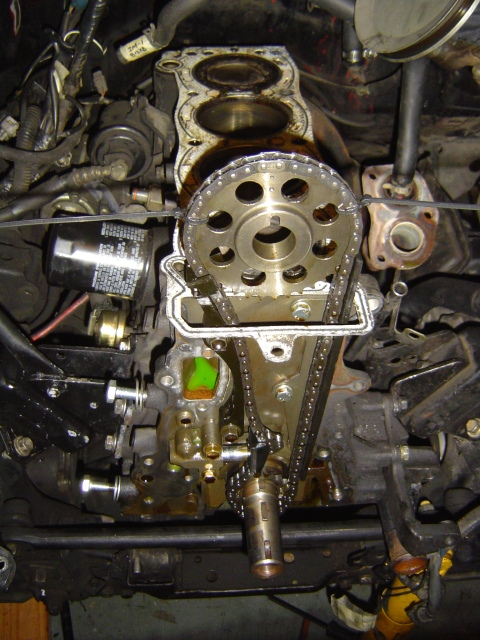
The above picture doesnt show how the chain is completely inside the tensioner ... but it seems like my tensioner is completely eaten through? Chain should be riding on the tensioner, correct?

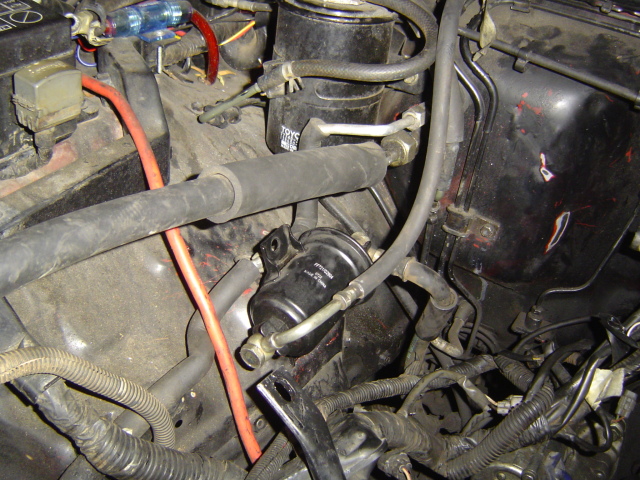
Aside project: At this time, I was looking into ideas on relocating the fuel filter for easy replacing in future.
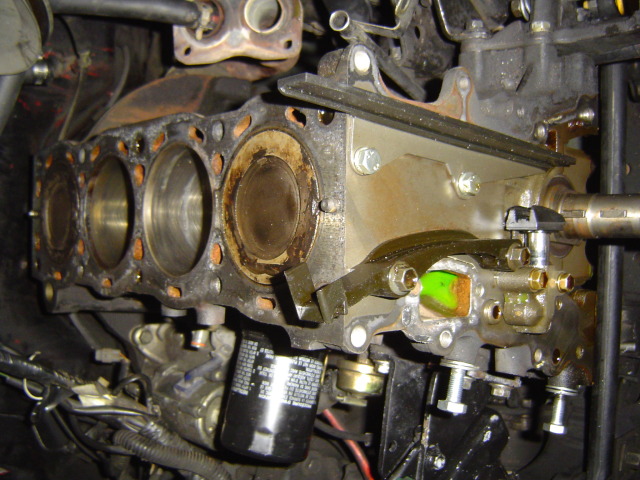
Next, I started to clean the pistons and noticed it says "0.50" which means that my block is 0.020 bored over? Over the week, I will continue cleaning the block and parts while I wait for my parts to arrive to put it back all together. Its going slow and Im taking my time.
Supported the motor using a bottle jack n some wood before taking off passenger side motor mount
Passenger motor mount assembly and new motor mount
Repainted and it was put back in .... one thing to note is the the new motor mounts were slightly higher than the ones I replaced, not sure if the older ones compressed over time or these aftermarket ones were longer? Anyhow, I bought these motor mounts from lowrangeoffroad a while back.
Did the same thing on the driver side which was PITA as the alternator needed to removed and lots of aligning and lifting to get them in.
Next thing was to remove the timing chain cover and oil pan. Removed all the waterpump, oil pump, etc.
As suggested, I put all my timing cover bolts onto a cardboard .. which worked out great
(the water pump bolts arent there but they are all the same)Removed the oil pan bolts but I couldnt get that thing to move for hours! It was stuck on like glue .. I tried putting a jack underneath it to put pressure on it and bounce the truck a couple of times, hammer'ed it with a mallet .. I googled online and someone suggested out a bottle jack against frame and pushing it (bad idea and it didnt work) here is a pic:
In the end, I read the FSM and it suggested putting a putty knife kind of tool and going around, I did that and it went slowly around the oil pan and the seal finally broke .... aaah! If I had just read the FSM in the first place, I would have not wasted so many hours
The oil pan had very small metal shavings but no other surprise parts or anything like that. Timing cover came off shortly after and here is how it looks:
The above picture doesnt show how the chain is completely inside the tensioner ... but it seems like my tensioner is completely eaten through? Chain should be riding on the tensioner, correct?
Aside project: At this time, I was looking into ideas on relocating the fuel filter for easy replacing in future.
Next, I started to clean the pistons and noticed it says "0.50" which means that my block is 0.020 bored over? Over the week, I will continue cleaning the block and parts while I wait for my parts to arrive to put it back all together. Its going slow and Im taking my time.
Trending Topics
10-22-2012, 08:05 AM
#9
Registered User
Thread Starter
Thanks Grego92. I had a feeling that didnt look normal. That explains the slack on the chain as well!
Not sure on the history on the tensioner but it looks to be replaced at some point as the timing chain/guide are all not original. When I remove it, I will take a look if there is a OSK stamp on it. But the crank gear read OSK - Made in Japan on it.
Not sure on the history on the tensioner but it looks to be replaced at some point as the timing chain/guide are all not original. When I remove it, I will take a look if there is a OSK stamp on it. But the crank gear read OSK - Made in Japan on it.
10-22-2012, 08:27 AM
#10
Registered User
iTrader: (2)
Join Date: Dec 2009
Location: Pleasanton, CA - SF Bay Area
Posts: 2,159
Likes: 0
Received 7 Likes
on
5 Posts
I was looking at this earlier today on my phone and am now at a PC....WOW that this is gone, yes!
Surpised you didn't have more issues stemming from this (maybe a jumped tooth, messed up valves, etc).
Keep it coming!
Surpised you didn't have more issues stemming from this (maybe a jumped tooth, messed up valves, etc).
Keep it coming!
10-22-2012, 08:28 AM
#11
Registered User

Join Date: Sep 2007
Location: San Francisco East Bay
Posts: 8,254
Likes: 0
Received 822 Likes
on
649 Posts
Excellent work -- you'll end up with a great engine.
My $0.02: Labeling each line is very good. Putting the bolts into cardboard is very good. But those labels don't stick well to oil, and what happens if you drop the cardboard? As an additional layer of "defense," I recommend a simple pad of paper. For instance, before you send your head off to the shop, you'll be removing fasteners on 4 sides. Just draw yourself a picture and list all the sizes (and put the fasteners into a zip-loc bag).
I see you used the "starter" trick to remove the crank bolt. Okay, how are you going to put it back on? I think the torque is about 124 ft-lbs (its 181 for the 3VZE). You're going to need some sort of tool to hold the crank; there's no (sensible) way around it.
Good luck!
10-22-2012, 11:31 AM
#12
Registered User
iTrader: (2)
Join Date: Dec 2009
Location: Pleasanton, CA - SF Bay Area
Posts: 2,159
Likes: 0
Received 7 Likes
on
5 Posts
Scope, for the crank bolt, it doesn't need to be torqued until the very end right? Conceivably you could assemble everything, and at the end torque it down, right? That's what I did with my timing chain job. I don't think Harbir is planing to ship the motor off to get done?
10-22-2012, 12:02 PM
#13
Registered User
Thread Starter
Correct, I will be torquing the crank bolt in the end once everything is assembled. Put it high gear, choke the wheels and torque to spec. I have done it before when I was servicing the front main seal in oil pump.
10-22-2012, 12:19 PM
#14
Registered User
Someone has definitely had it apart before, you have the fuel pump cam on the nose of the camshaft. Might as well do all the timing related bits, you're in there now.
10-25-2012, 04:35 PM
#17
Registered User
Thread Starter
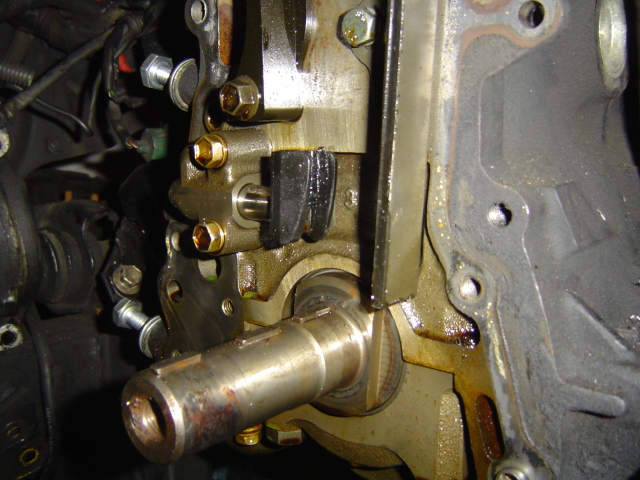
combatcarl, by the fuel pump cam you mean this thing?

So, its not original? and Im going to replace the chain and put this "fuel pump cam" back I guess. Is there any advantages of having this?
So, its not original? and Im going to replace the chain and put this "fuel pump cam" back I guess. Is there any advantages of having this?
10-25-2012, 05:32 PM
#18
Registered User
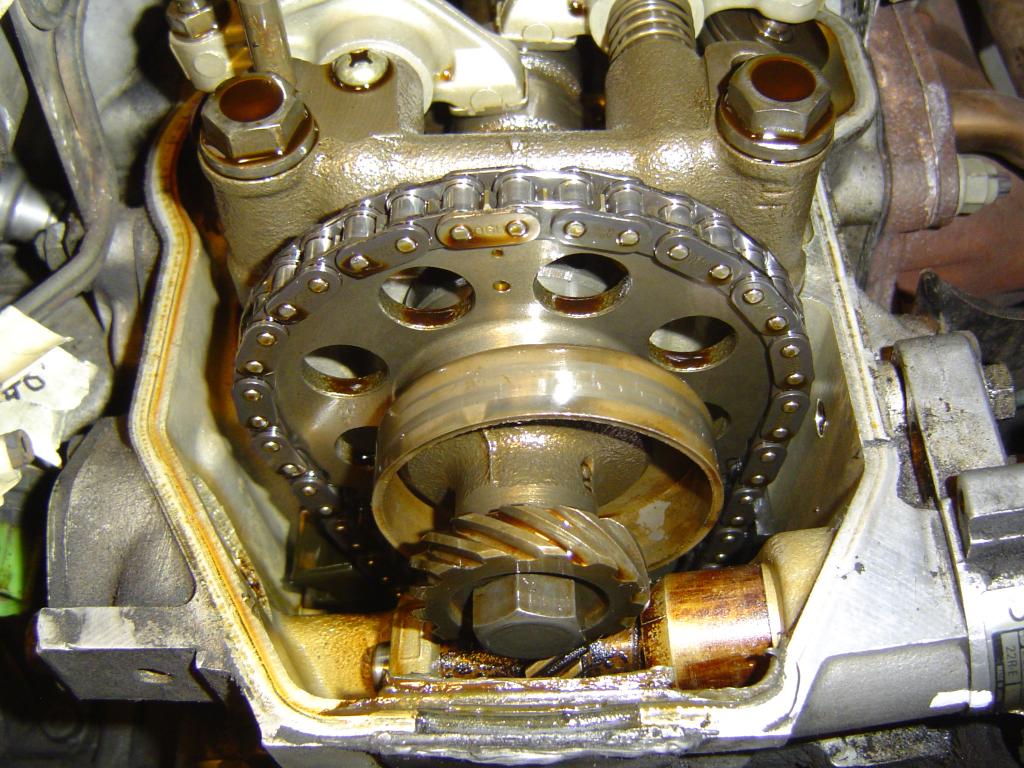
stole your pic. The ring in front of cam sprocket, yes. That's a cam for a 22R fuel pump. Fuel pump hangs on the outside, with a follower that rides the eccentric. No advantage or disadvantage to having it, 22RE's have a washer there, as its electronically fueled. But I'll bet its not the original engine. Somebody swapped, at some point. How long have you had it?
Last edited by combatcarl; 10-25-2012 at 05:35 PM.
10-26-2012, 10:31 AM
#19
Registered User
Thread Starter
>>But I'll bet its not the original engine. Somebody swapped, at some point. How long have you had it?
The truck has quiet a bit of history it seems like it. I'm discovering new things as i take it apart like its been bored 0.020 over and engine seems to have been rebuild at some point. I have had it for about 3 years and its ticking 250K miles on the chassis and the last PO didn't give me much info.
Im just hoping to build it right and it keeps running forever as they are meant to. The truck needs some fixing or tinkering around few months since I have owned it.
I'm just trying to fix it before the SKI season starts, its my Tahoe truck
01-20-2020, 10:14 PM
#20
Registered User

Join Date: Jan 2020
Posts: 4
Likes: 0
Received 0 Likes
on
0 Posts


