
22r-22re conversion (84-88)
 03-20-2014, 07:53 AM
#1
Super Moderator
Staff
Thread Starter
iTrader: (1)
Join Date: Aug 2008
Location: Anderson Missouri
Posts: 11,788
Likes: 0
Received 21 Likes
on
19 Posts
22r-22re conversion (84-88)
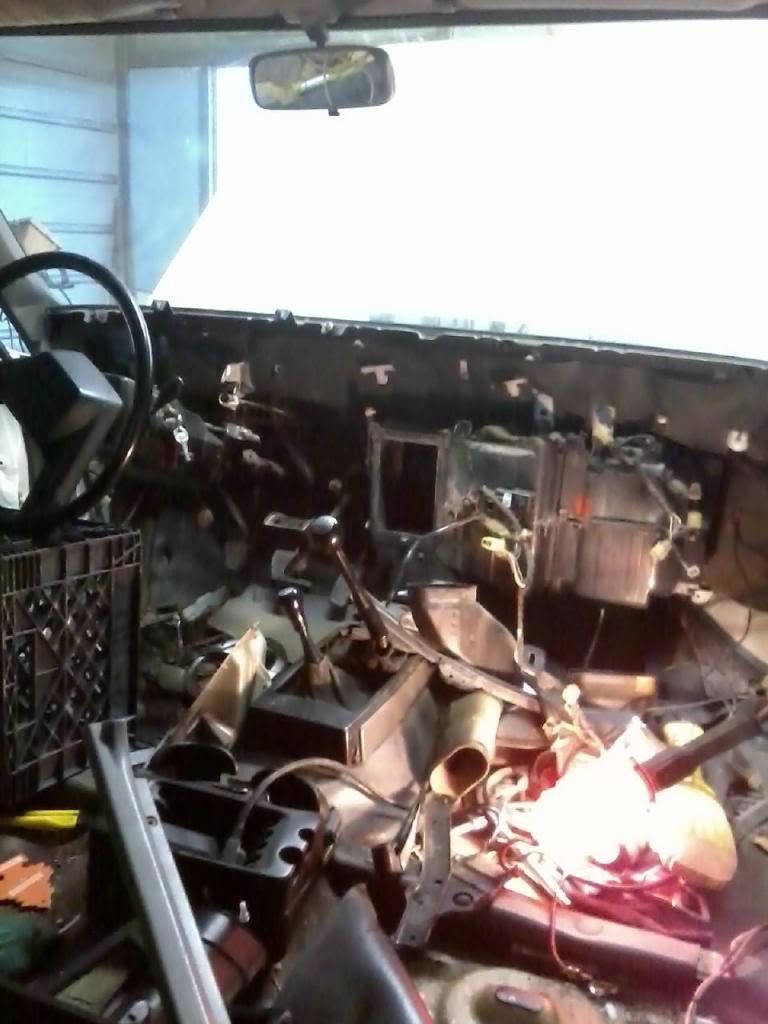
I am making a step by step method of doing the conversion. Most applies to the 89 and newer. Can be used for heater core replacement and other things as well. Currently doing one and will add more as I go. I suggest having a donor truck as there are several parts needed. I suggest having a minimum of 40 working hours time to do it.
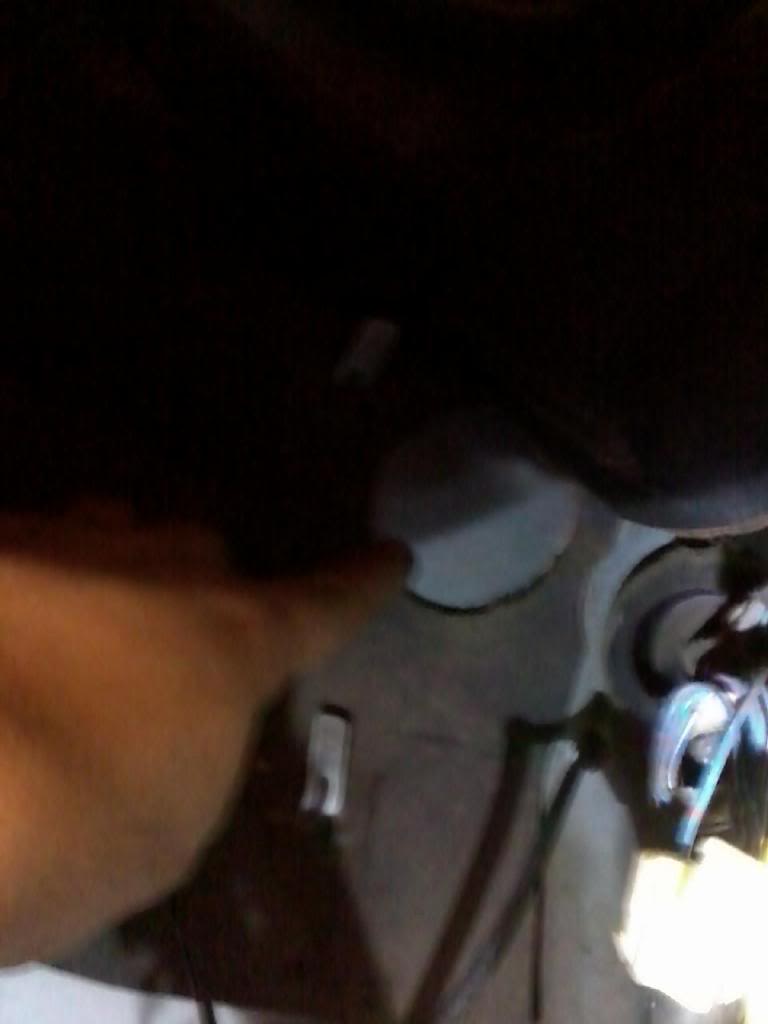
Remove the piece below the Steering Column. 6 Screws if I recall right. Disconnect the 2 plugs.
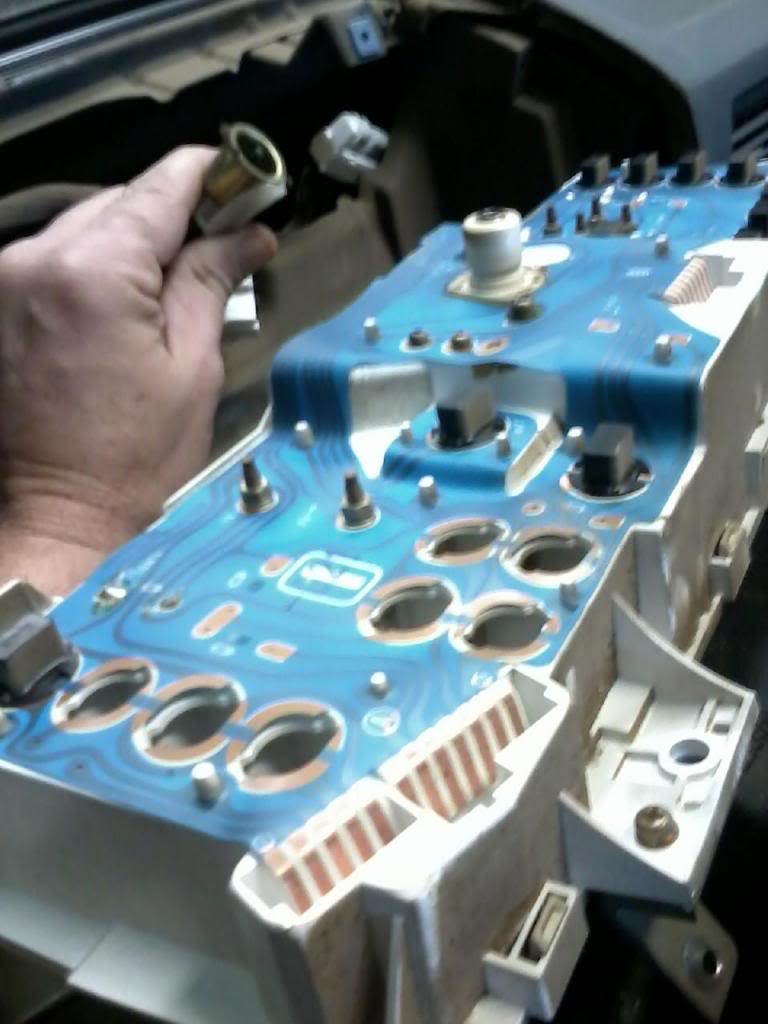
Remove the Speedo Bezel. Remove 2 screws above the gauge closet to the firewall. The plug in my hand to the Cancel Switch, lift up on tab to disconnect it.
Remove 4 screws holding speedometer.

Under the hood on the firewall, remove cable from the clamp holding the cable. This will give slack to pull the speedo out further in cab.
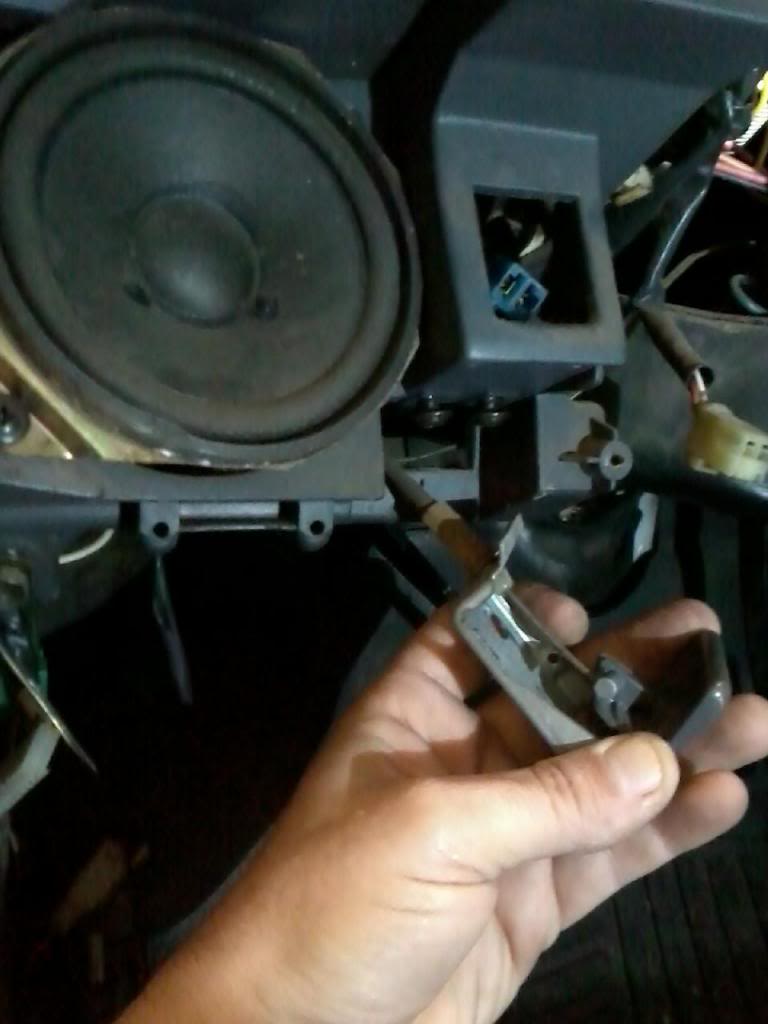
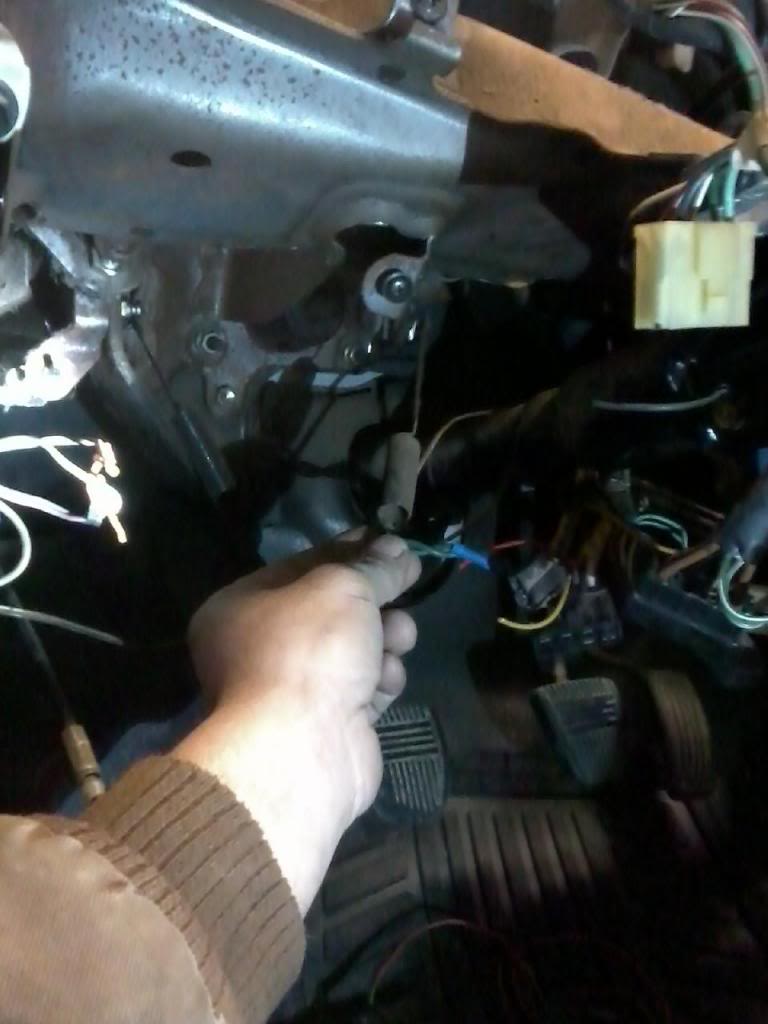
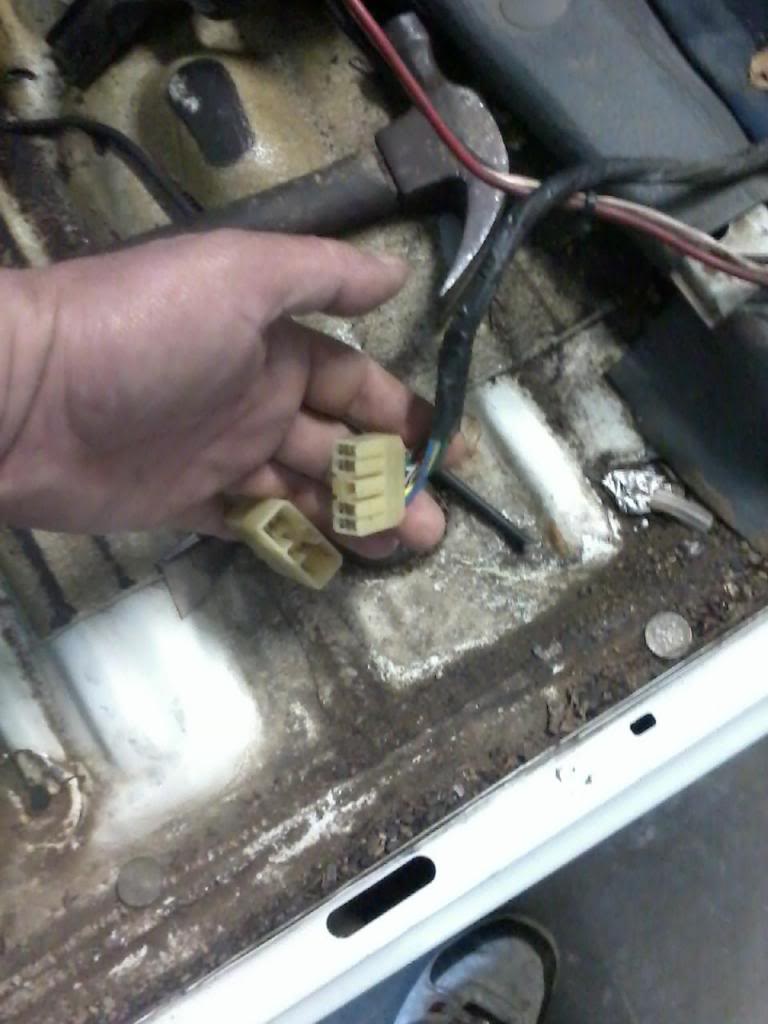
Disconnect 3 electrical plugs. The tab I am holding with my thumb, you just squeeze to release. It can be stubborn. Here is where loosening the cable under the hood makes it so much easier. If you need more room, you can loosen the cable more under the frame.
Remove speaker and hood latch screws. The cable is released by extending the cable and tilting the cable to align with slot to get the slug out. In different pictures, you will see I put the screws back in place. Takes a little longer now but save trouble later on.
Remove the three 10mm bolts. 2 in speaker well and 1 up at top by blue plug.
Remove the bolt with ratchet and nut that holds dash pad on. On a 84-88, I work from driver side to passenger side.
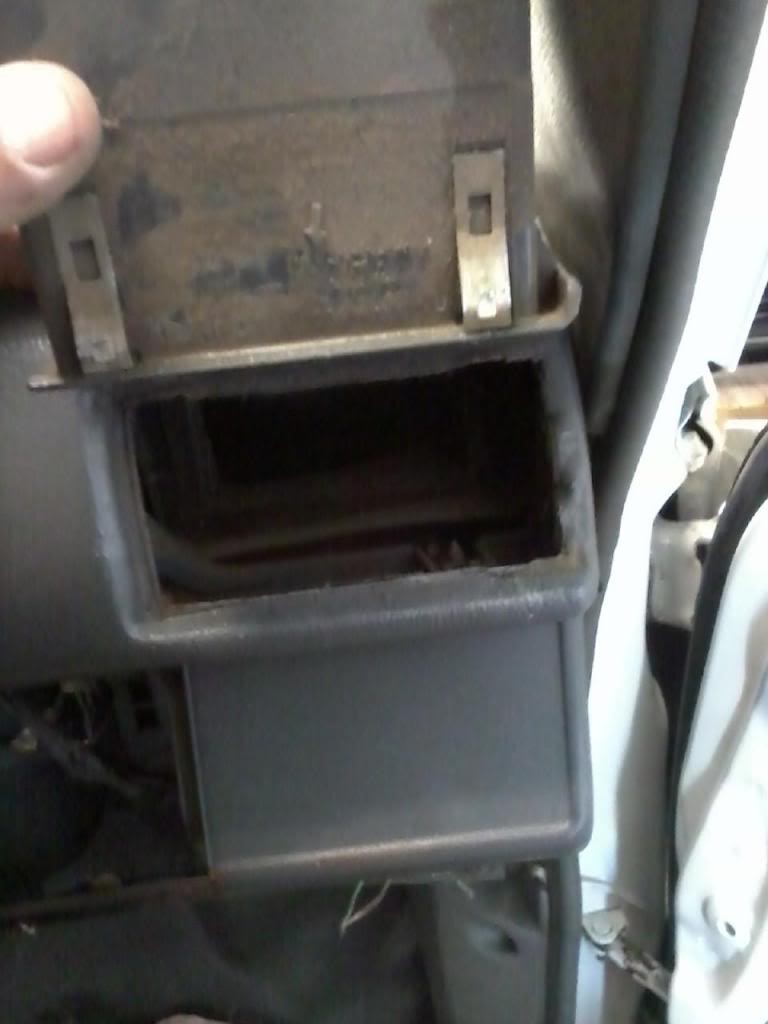
Remove these 2 screws and 3 screws that hold ash tray assembly. One of the ashtray screws is on top at an angle.
Angle in the ashtray assembly I am talking about.
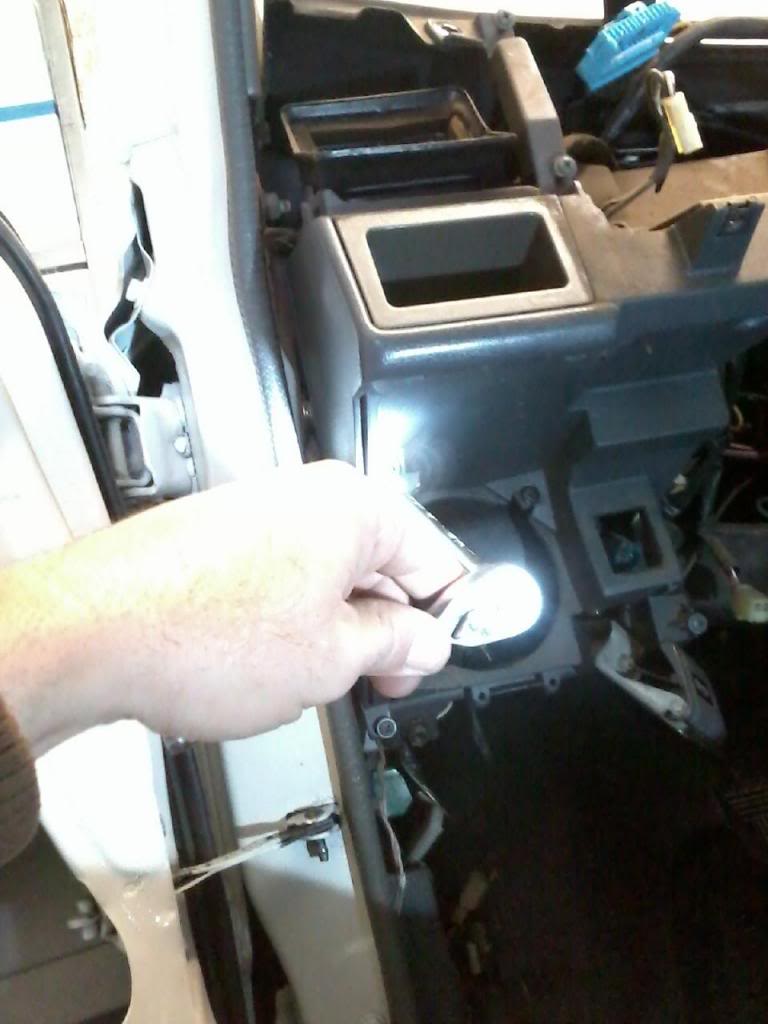
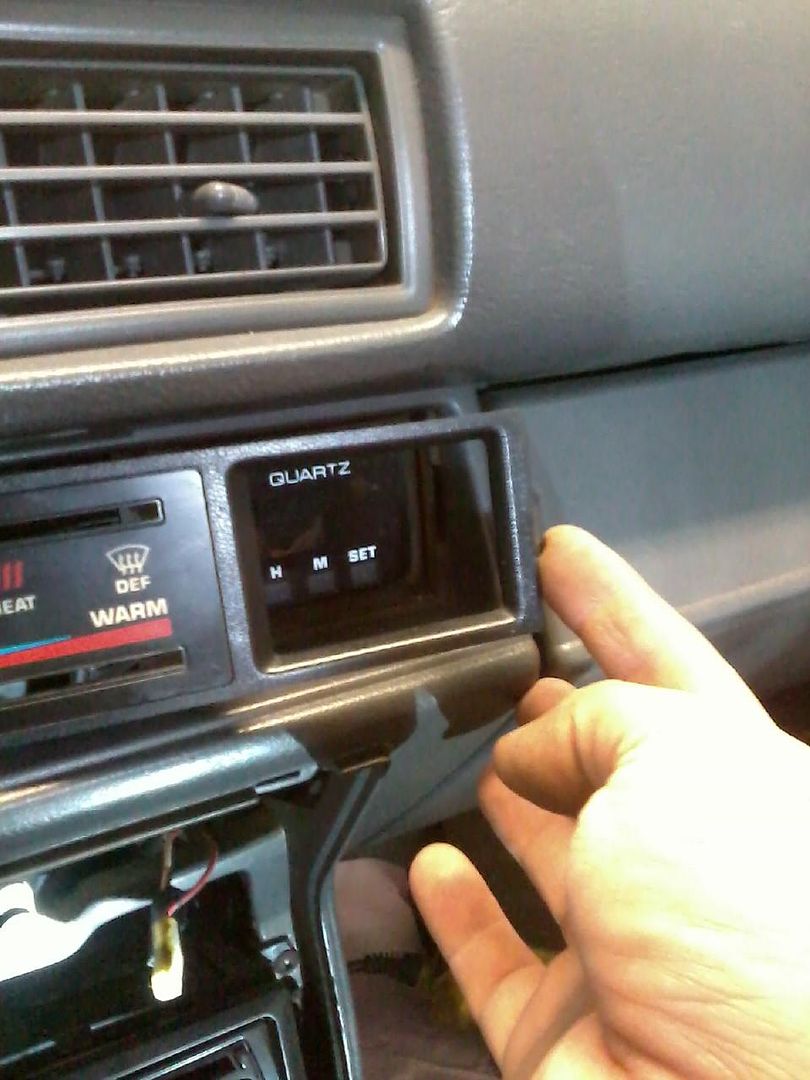
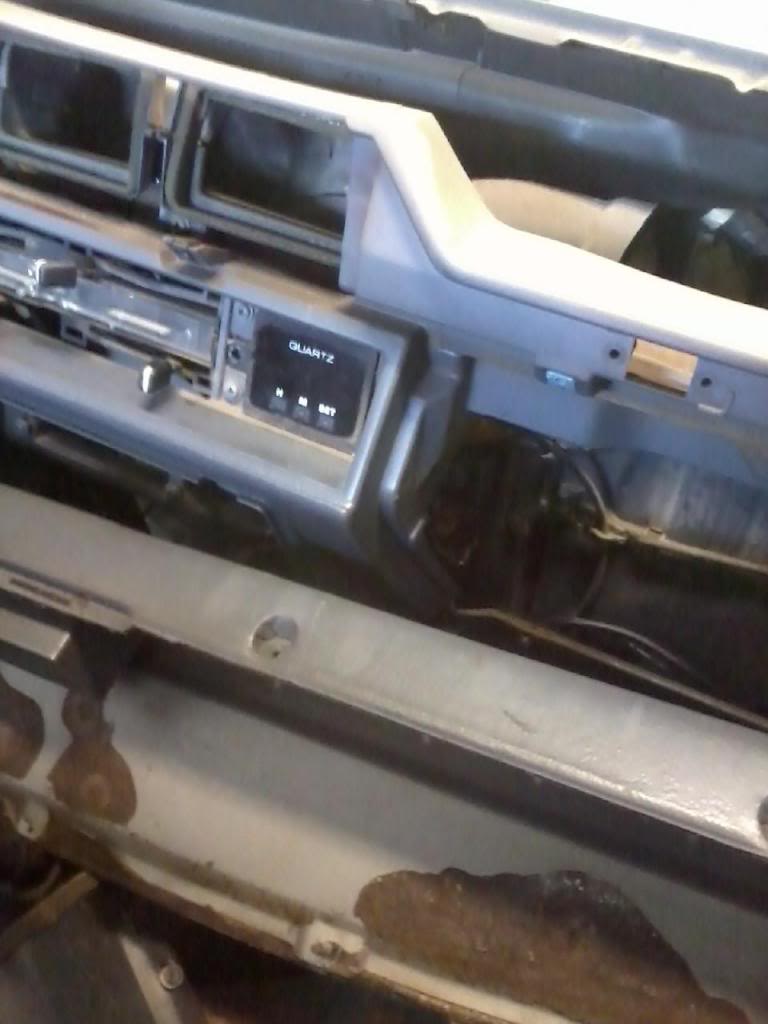
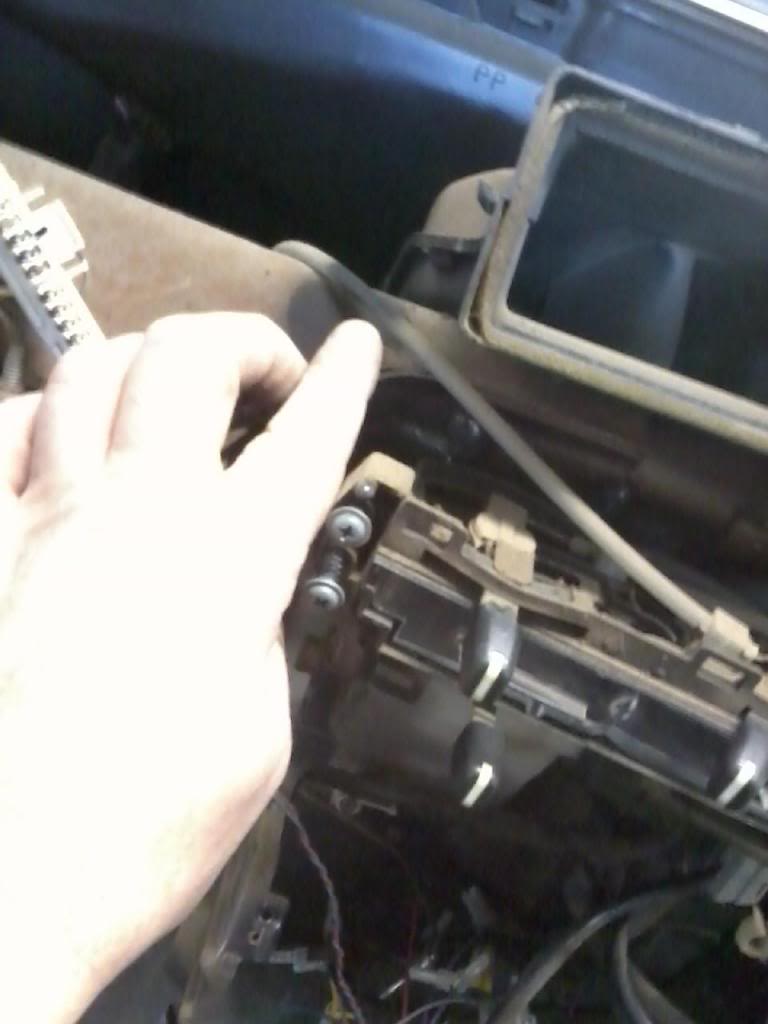
Remove heater contol knobs. Where my finger is at, pull gently and slide to the left. It should have a small bow in the middle. If you have the orange and red panel, it will be brittle and will want to crack. Be gentle on that color of panel.
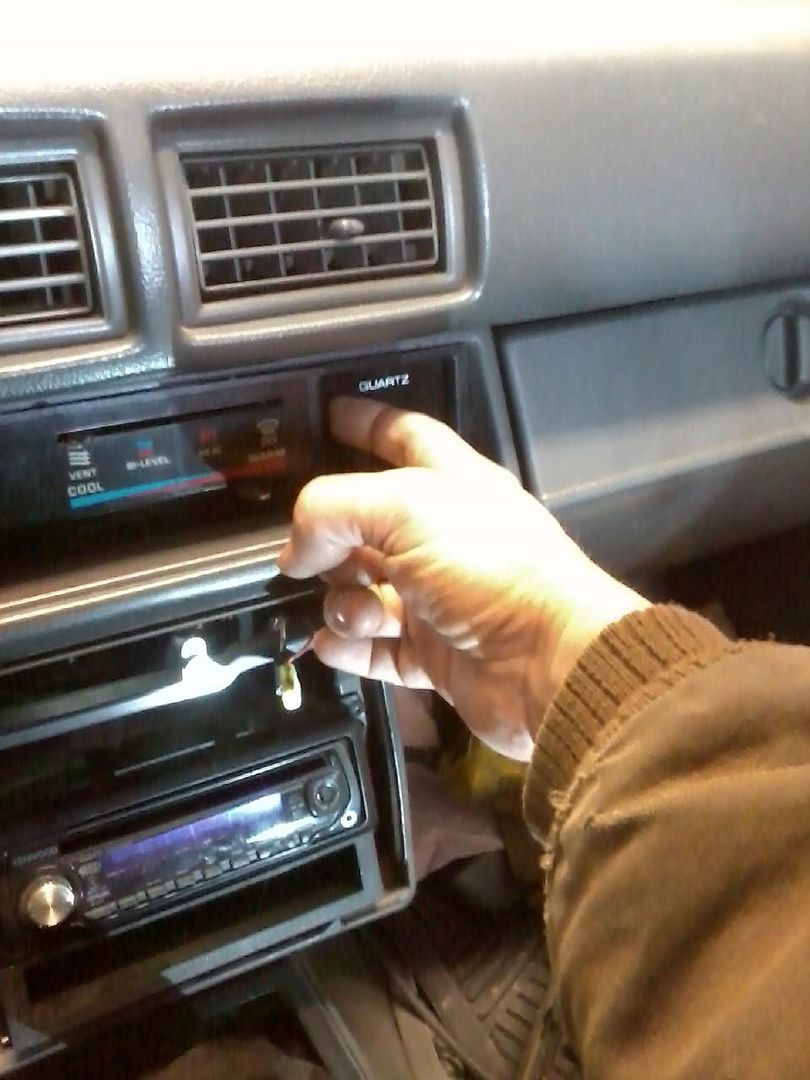
Once it is to the left and the tab my finger is at is free. Slide the whole assembly to the right to remove the panel.
Here I removed the stereo. The PO hardwired in the stereo. Get a kit to install a stereo right. This is a common source of electrical problems on these trucks. Wal Mart sells the kit I think.
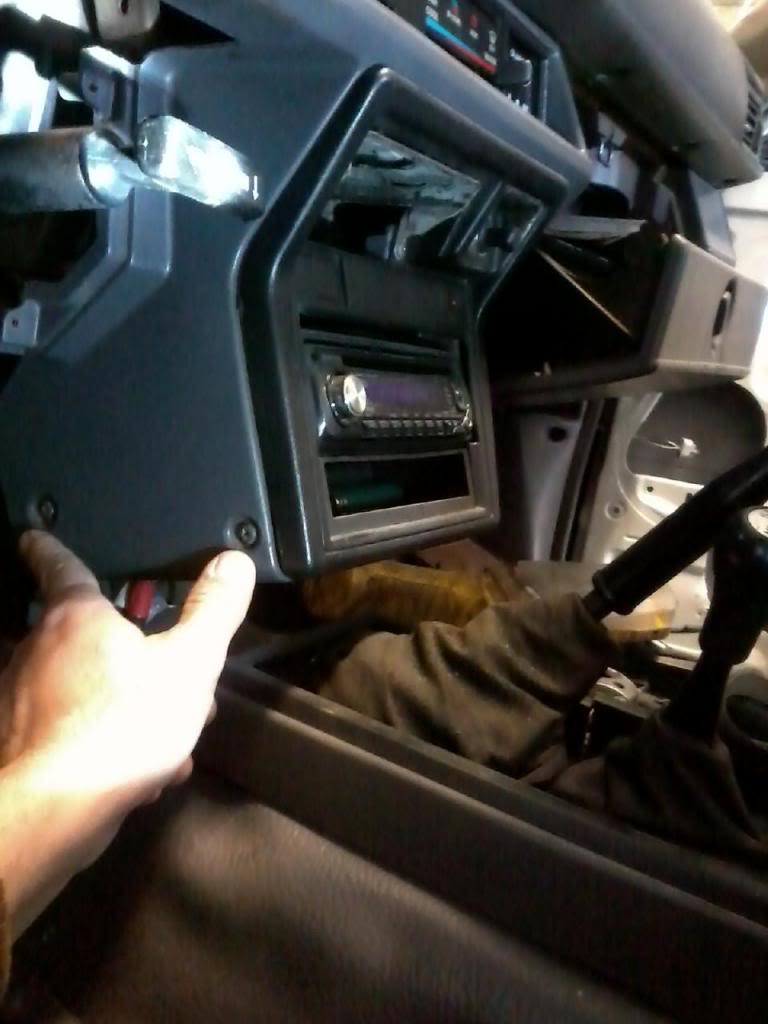
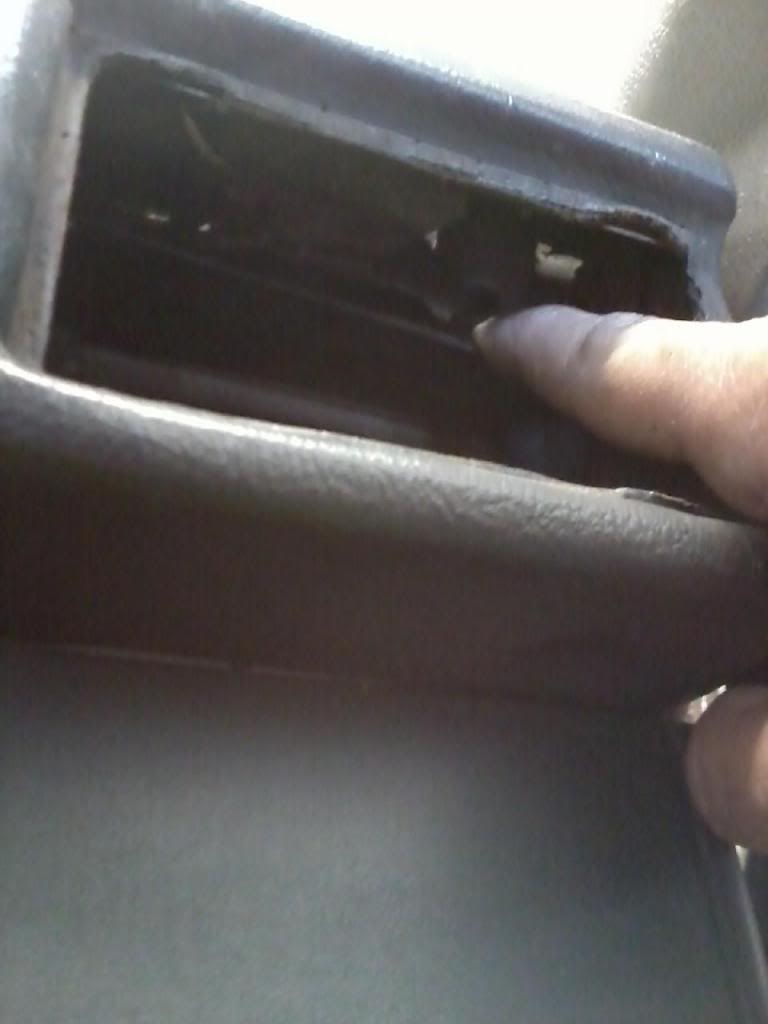
Remove glove box. 2 Screws at bottom. Once the glovebox is out. To get the cover of the glovebox, use a flatblade screw driver at these arrows and it will get the cover out. It hides the PE ppe that you will need to remove in the next few steps.
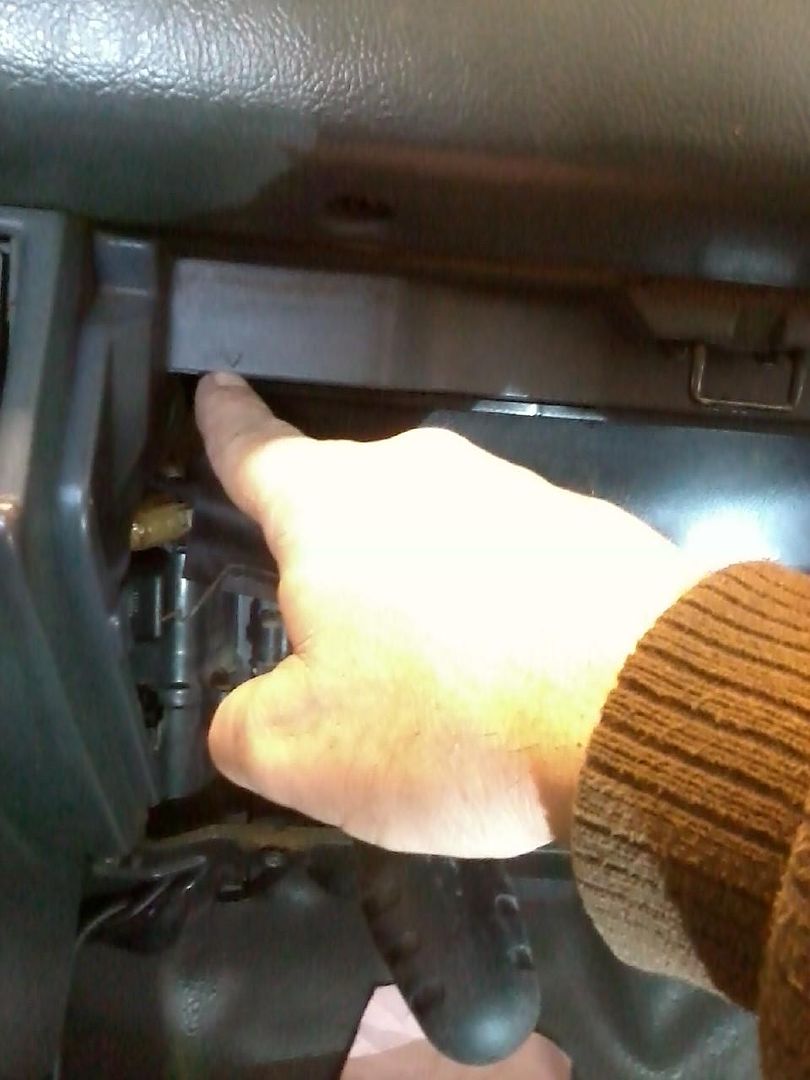
Screw that holds the PE pipe. You need the PE pipe out of the way to access a nut that holds the center of the dashpad on.
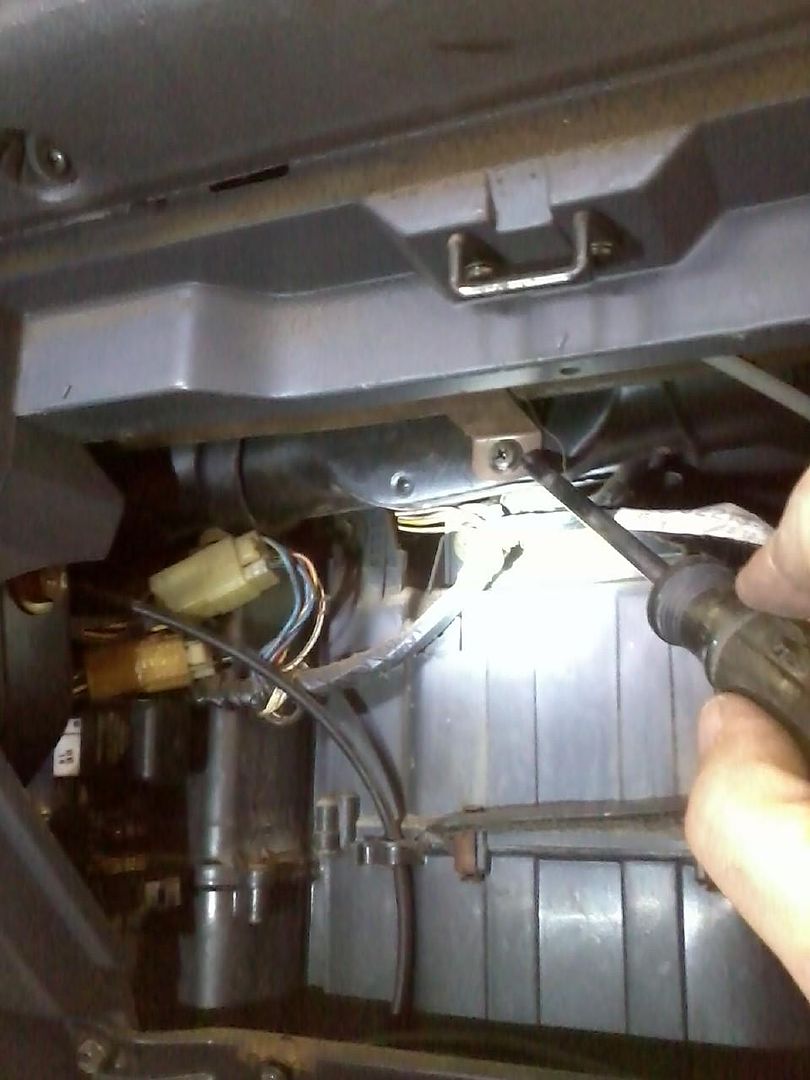
With screw out, slide the PE pipe to the right and tilt down and then slide to the left and downward to get the pipe out. The foam on these can get worn out and cause poor ventilation. I also put the screw back in its hole to help keep up with all the screws. have got most screws back in there spots along the way.
About here, using a 10mm socket and a foot long extention, to get to the nut that holds the dash pad on. It is the only nut that you can see if looking up at it. ot able to get a picture of it at this time.
Video I made to get the passenger vent out.
Remove the piece below the Steering Column. 6 Screws if I recall right. Disconnect the 2 plugs.

Remove the Speedo Bezel. Remove 2 screws above the gauge closet to the firewall. The plug in my hand to the Cancel Switch, lift up on tab to disconnect it.

Remove 4 screws holding speedometer.

Under the hood on the firewall, remove cable from the clamp holding the cable. This will give slack to pull the speedo out further in cab.

Disconnect 3 electrical plugs. The tab I am holding with my thumb, you just squeeze to release. It can be stubborn. Here is where loosening the cable under the hood makes it so much easier. If you need more room, you can loosen the cable more under the frame.

Remove speaker and hood latch screws. The cable is released by extending the cable and tilting the cable to align with slot to get the slug out. In different pictures, you will see I put the screws back in place. Takes a little longer now but save trouble later on.

Remove the three 10mm bolts. 2 in speaker well and 1 up at top by blue plug.

Remove the bolt with ratchet and nut that holds dash pad on. On a 84-88, I work from driver side to passenger side.

Remove these 2 screws and 3 screws that hold ash tray assembly. One of the ashtray screws is on top at an angle.

Angle in the ashtray assembly I am talking about.

Remove heater contol knobs. Where my finger is at, pull gently and slide to the left. It should have a small bow in the middle. If you have the orange and red panel, it will be brittle and will want to crack. Be gentle on that color of panel.

Once it is to the left and the tab my finger is at is free. Slide the whole assembly to the right to remove the panel.

Here I removed the stereo. The PO hardwired in the stereo. Get a kit to install a stereo right. This is a common source of electrical problems on these trucks. Wal Mart sells the kit I think.

Remove glove box. 2 Screws at bottom. Once the glovebox is out. To get the cover of the glovebox, use a flatblade screw driver at these arrows and it will get the cover out. It hides the PE ppe that you will need to remove in the next few steps.

Screw that holds the PE pipe. You need the PE pipe out of the way to access a nut that holds the center of the dashpad on.

With screw out, slide the PE pipe to the right and tilt down and then slide to the left and downward to get the pipe out. The foam on these can get worn out and cause poor ventilation. I also put the screw back in its hole to help keep up with all the screws. have got most screws back in there spots along the way.

About here, using a 10mm socket and a foot long extention, to get to the nut that holds the dash pad on. It is the only nut that you can see if looking up at it. ot able to get a picture of it at this time.

Video I made to get the passenger vent out.
Last edited by Terrys87; 03-20-2014 at 08:13 AM.
 03-20-2014, 07:53 AM
#2
Super Moderator
Staff
Thread Starter
iTrader: (1)
Join Date: Aug 2008
Location: Anderson Missouri
Posts: 11,788
Likes: 0
Received 21 Likes
on
19 Posts
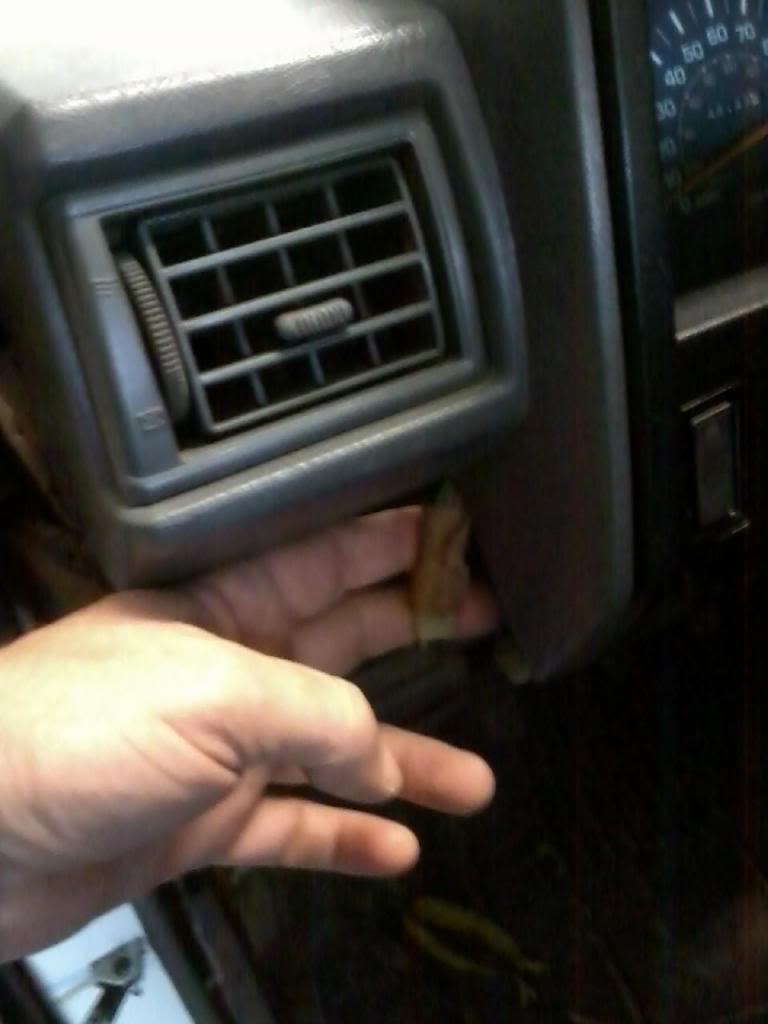
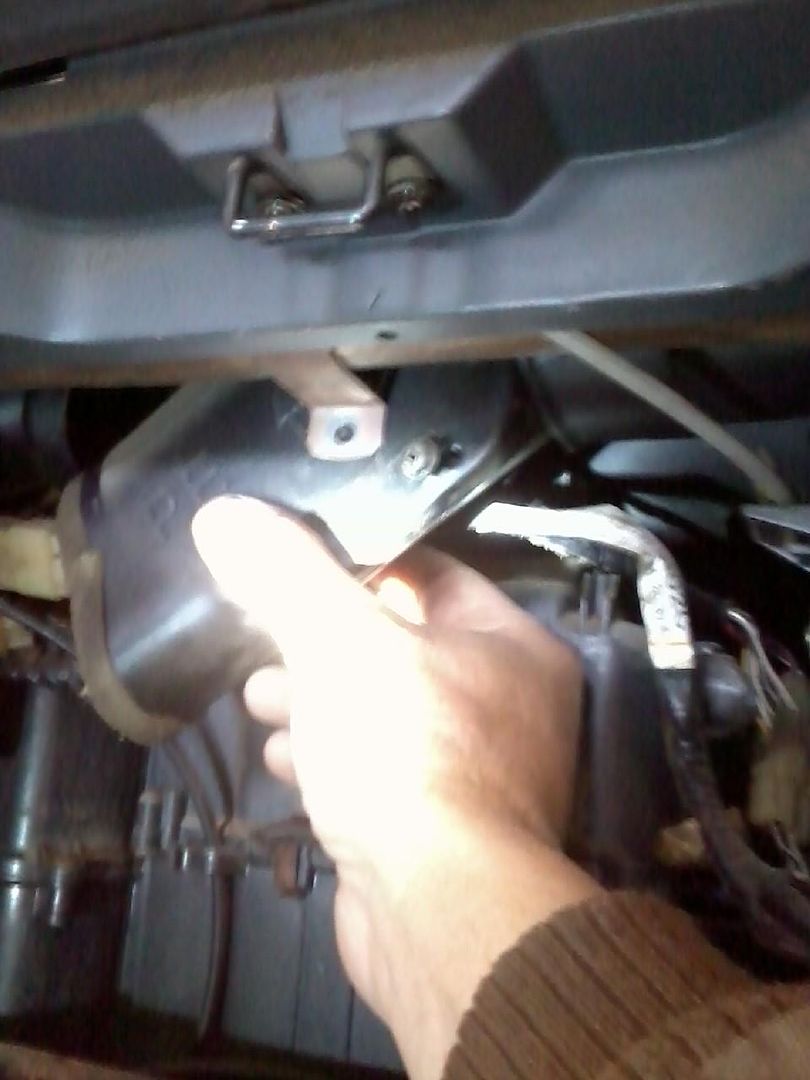
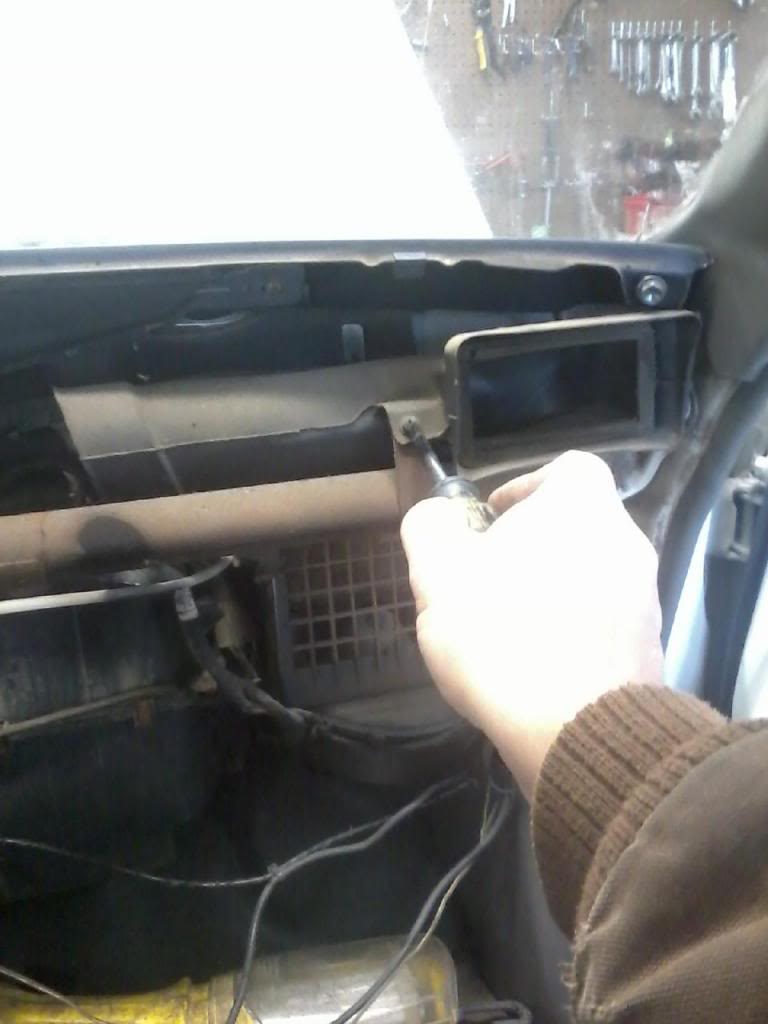
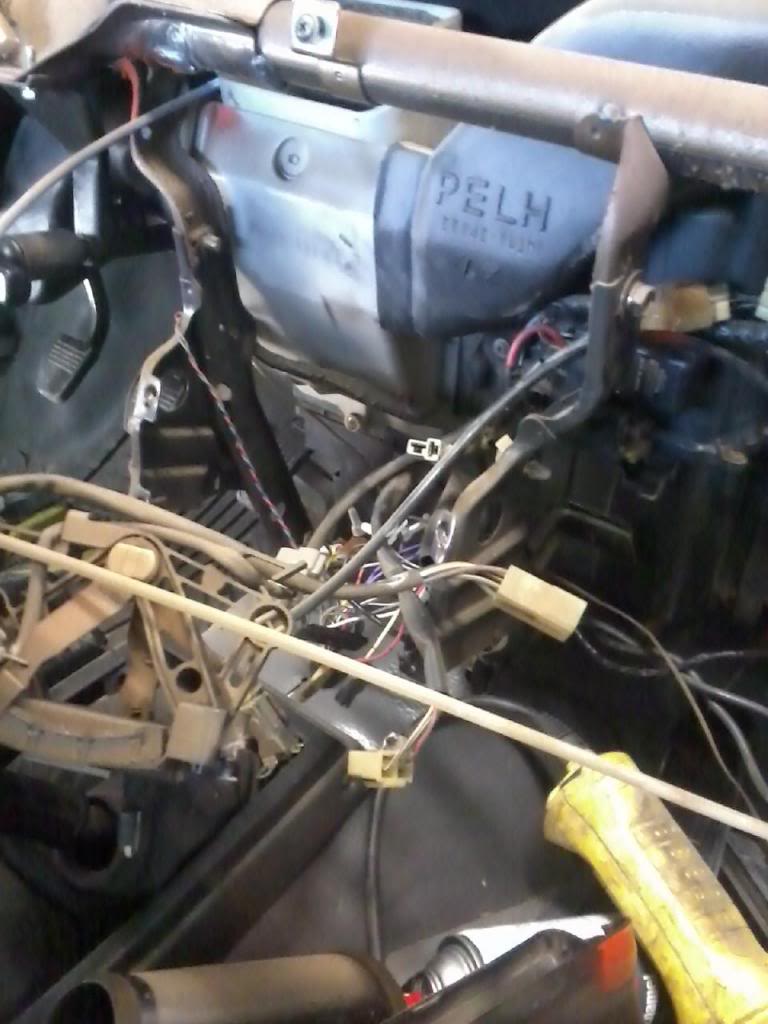
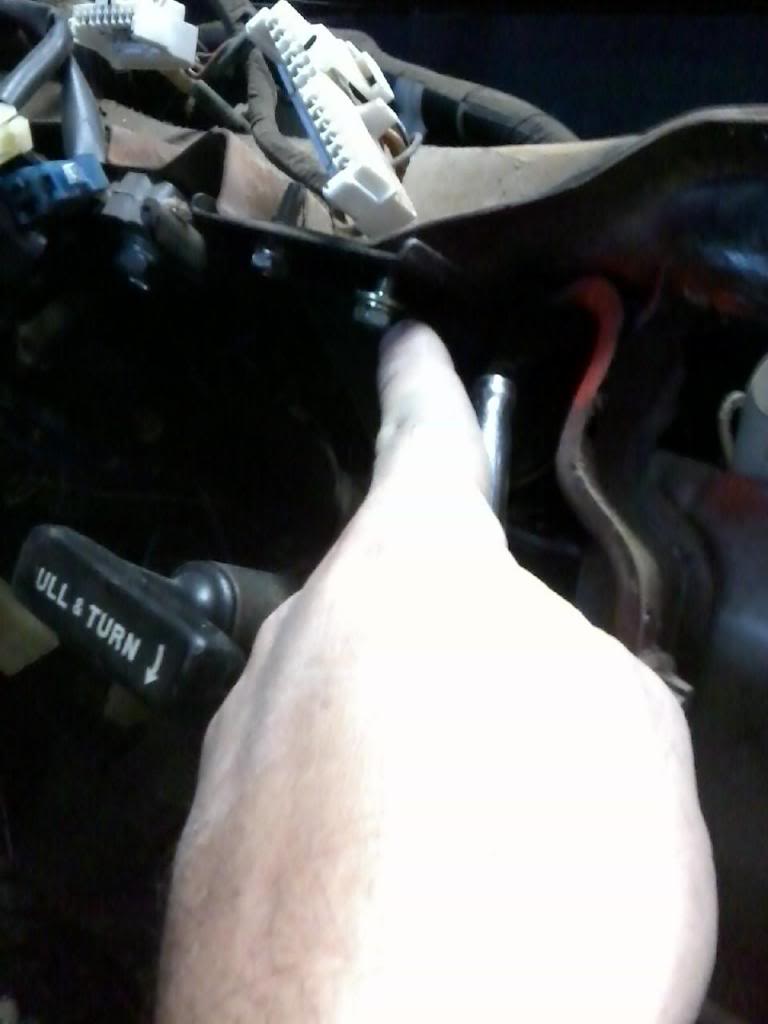
You need to remove the far passenger vent to get to the bolt that holds it in. Getting the vent out is something that I spent about 15 minutes gently working out to keep from cracking. I have a video I will add to this later and the FSM on how to get it out. These can crack easily. I have a 50/50 chance of getting one out and have done several and know how they come out. If you get one out without cracking, this is a cause for celebration.
Here is where the bolt is that holds the top one on. There are 5 or 6 screws on the bottom of the pad that need to be removed as well.
Showing the stud that the nut goes on to at bottom of picture to get the pad off. Also you can see where the screws are located at as well.
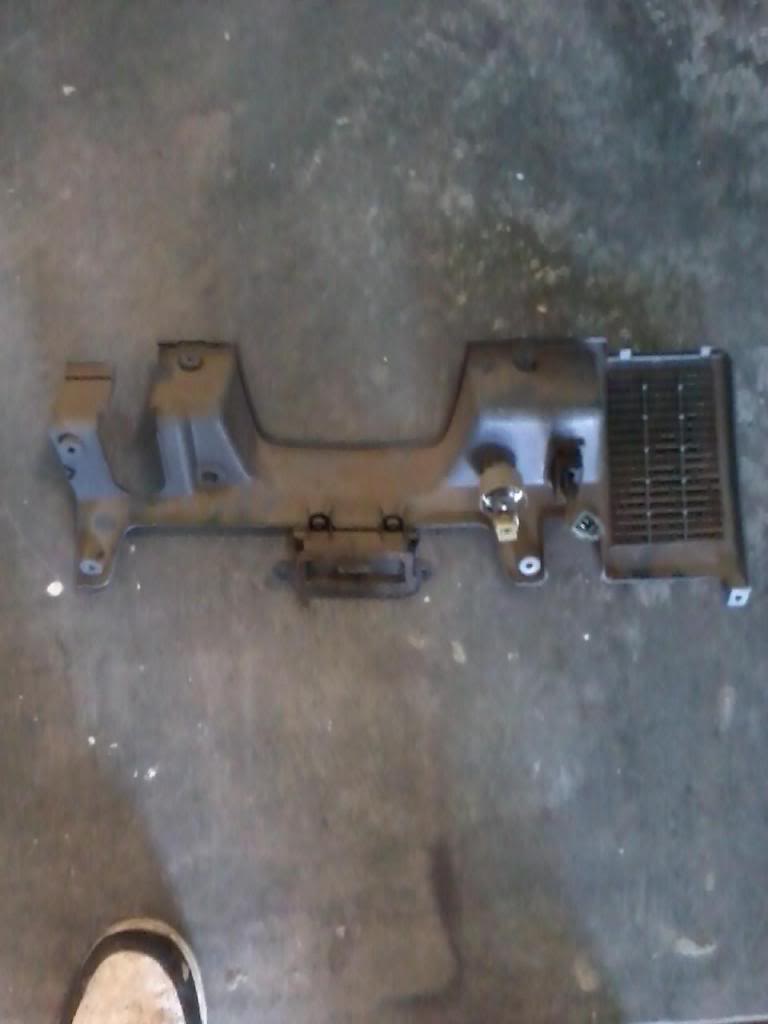
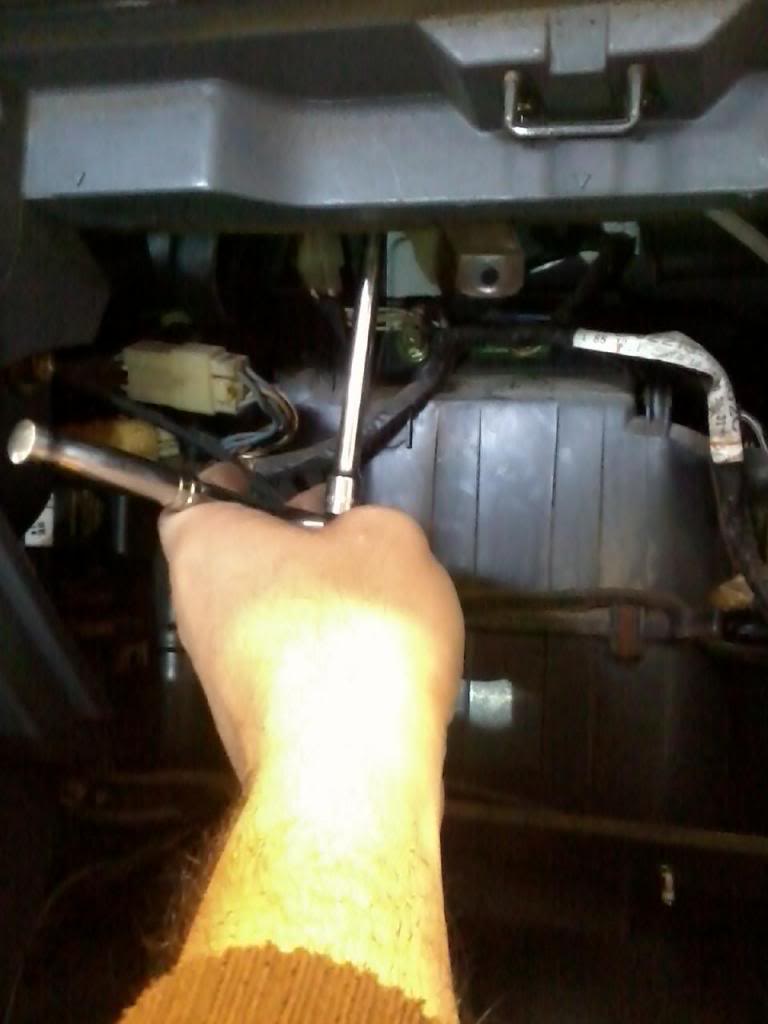
Remove these 2 bolts and 1 near the stereo to remove the Main Dash Support.
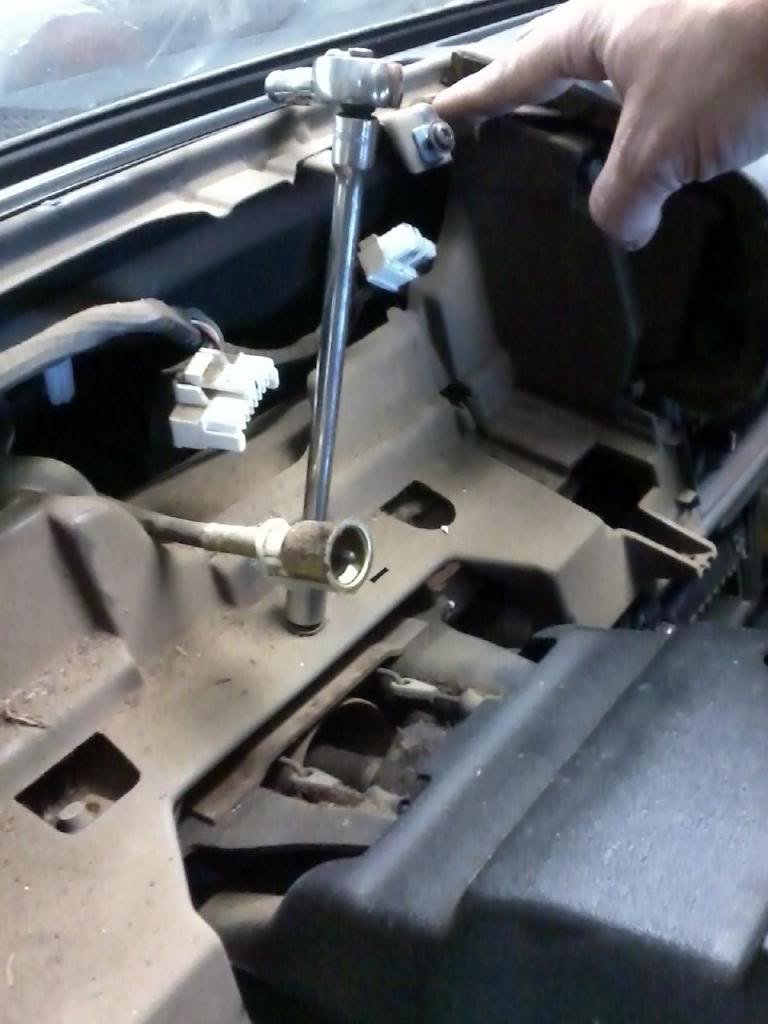
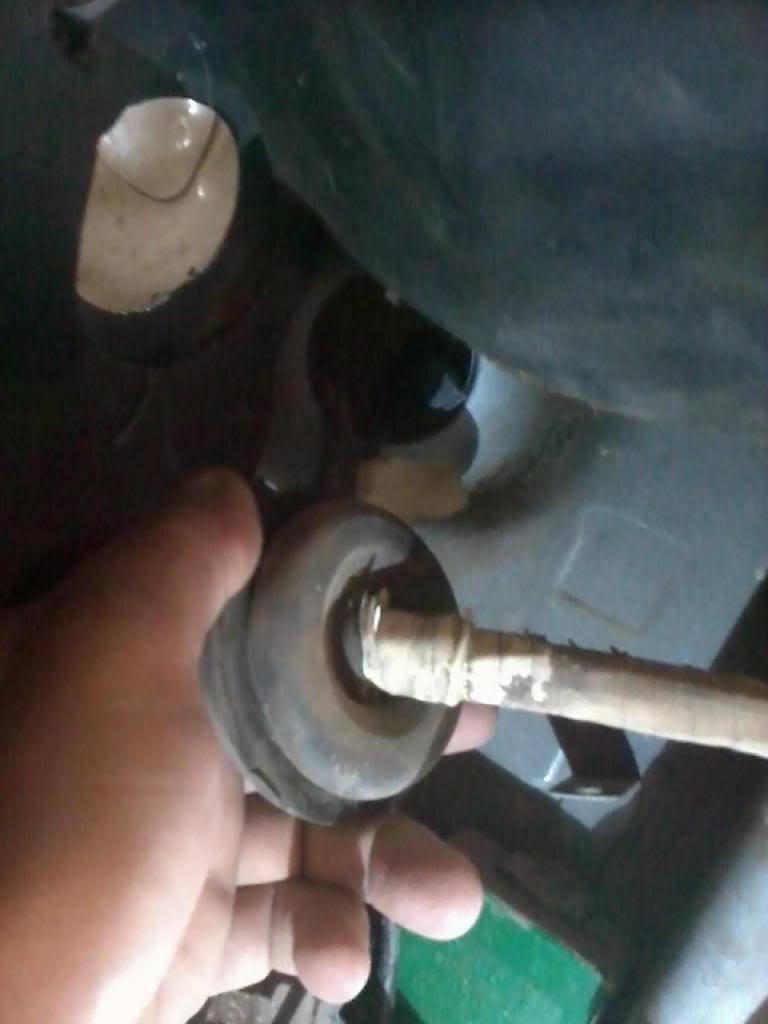
I went to remove the Main Dash Support and for got to get the Hood Release Cable freed. Remove it by sliding it off of the nipple and thru the slot.
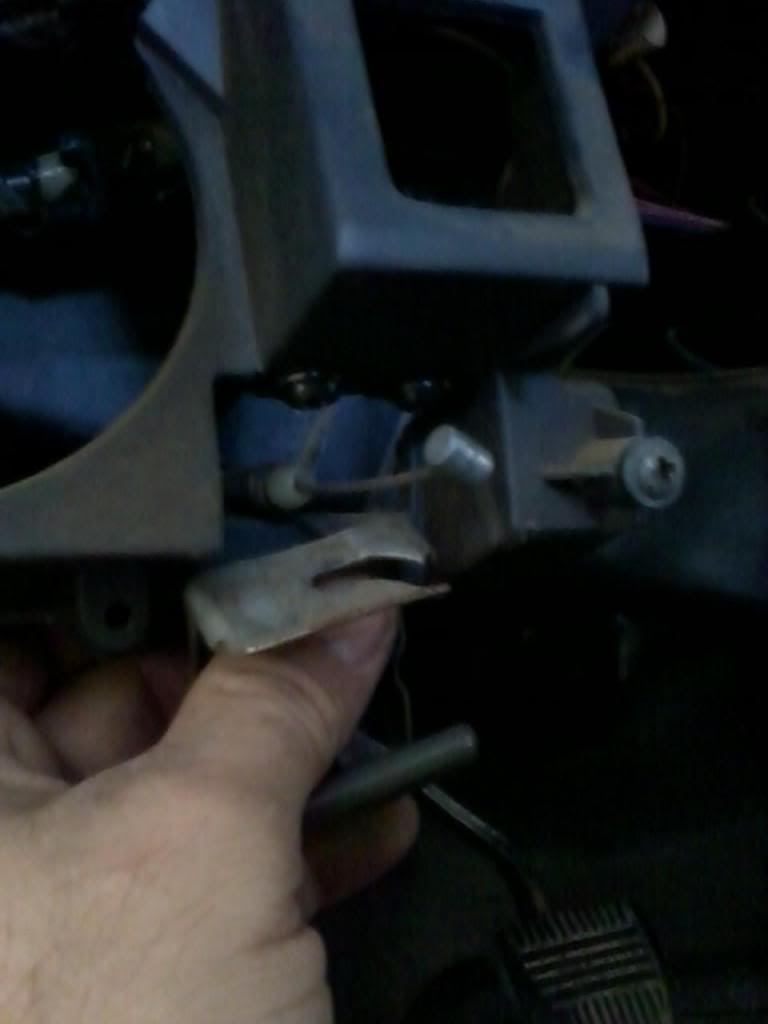
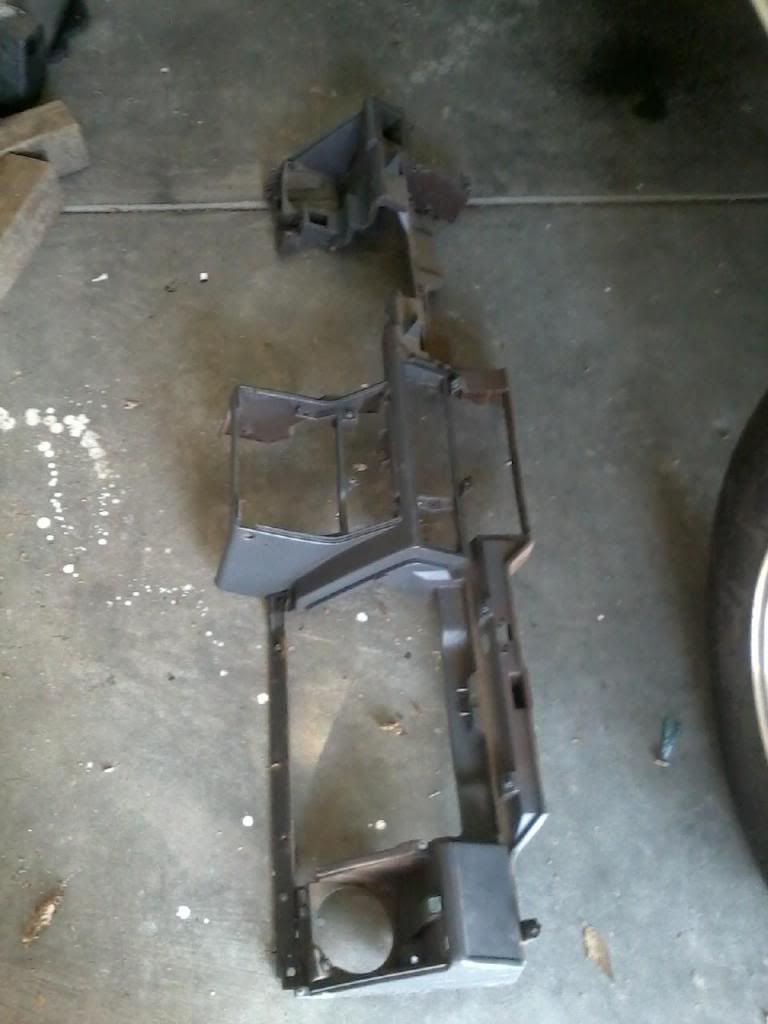
Main Supoort out.
I left the Heater Control Assembly in when I took out the Main Dash. Here I spray some paint on the cables and where they route when I put it back to gether. This is top passenger side. I got black on top and orange for the bottom ones. This will help when putting Heater Controls back in and is probably the most difficult part.
Drivers Top.
Passenger Bottom. I can touch up with black paint after install, but it should not show anyways when done.

Orange is Drivers Bottom.

Here is where the bolt is that holds the top one on. There are 5 or 6 screws on the bottom of the pad that need to be removed as well.

Showing the stud that the nut goes on to at bottom of picture to get the pad off. Also you can see where the screws are located at as well.

Remove these 2 bolts and 1 near the stereo to remove the Main Dash Support.

I went to remove the Main Dash Support and for got to get the Hood Release Cable freed. Remove it by sliding it off of the nipple and thru the slot.

Main Supoort out.

I left the Heater Control Assembly in when I took out the Main Dash. Here I spray some paint on the cables and where they route when I put it back to gether. This is top passenger side. I got black on top and orange for the bottom ones. This will help when putting Heater Controls back in and is probably the most difficult part.

Drivers Top.

Passenger Bottom. I can touch up with black paint after install, but it should not show anyways when done.

Orange is Drivers Bottom.
 03-20-2014, 07:54 AM
#3
Super Moderator
Staff
Thread Starter
iTrader: (1)
Join Date: Aug 2008
Location: Anderson Missouri
Posts: 11,788
Likes: 0
Received 21 Likes
on
19 Posts
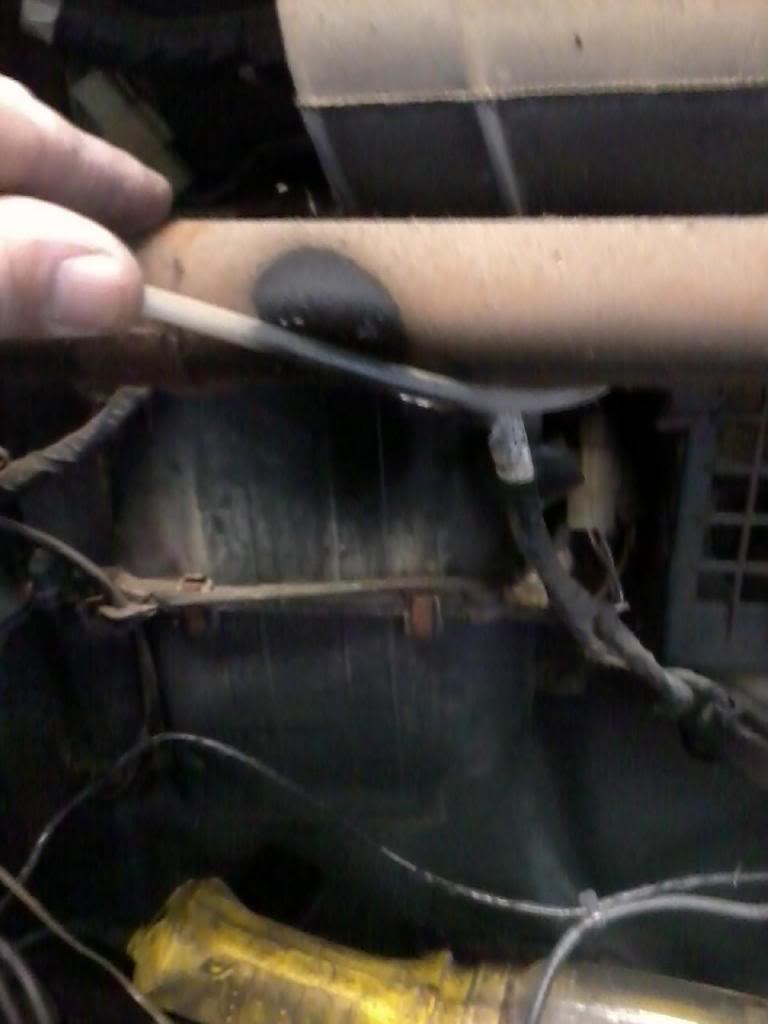
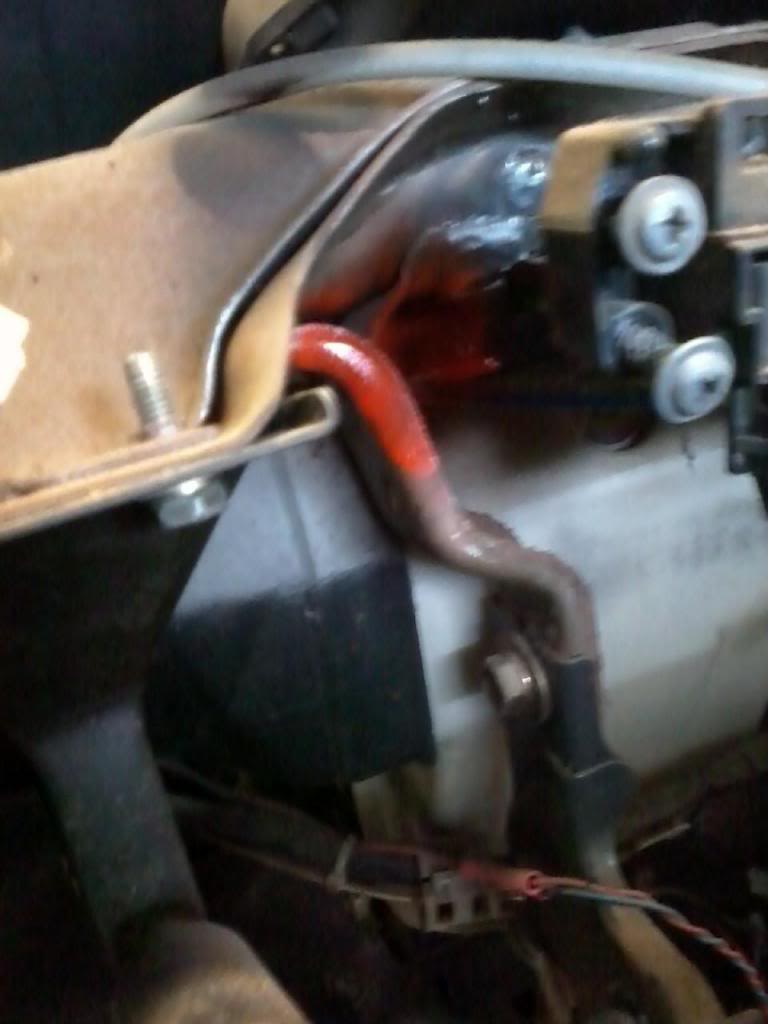
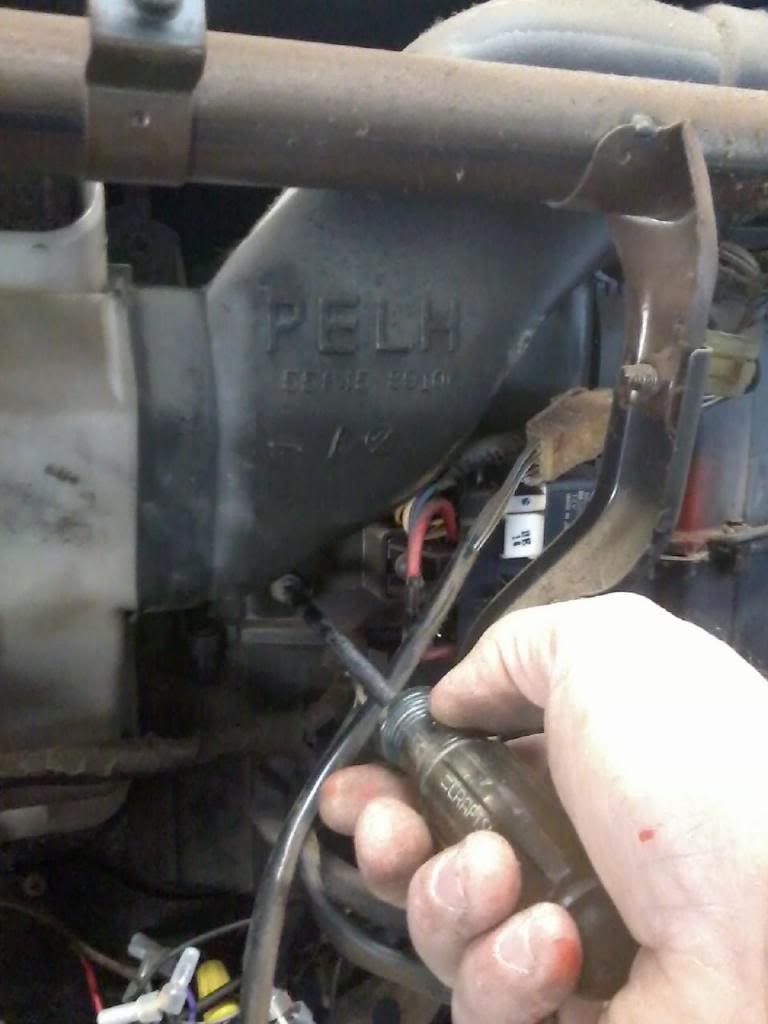
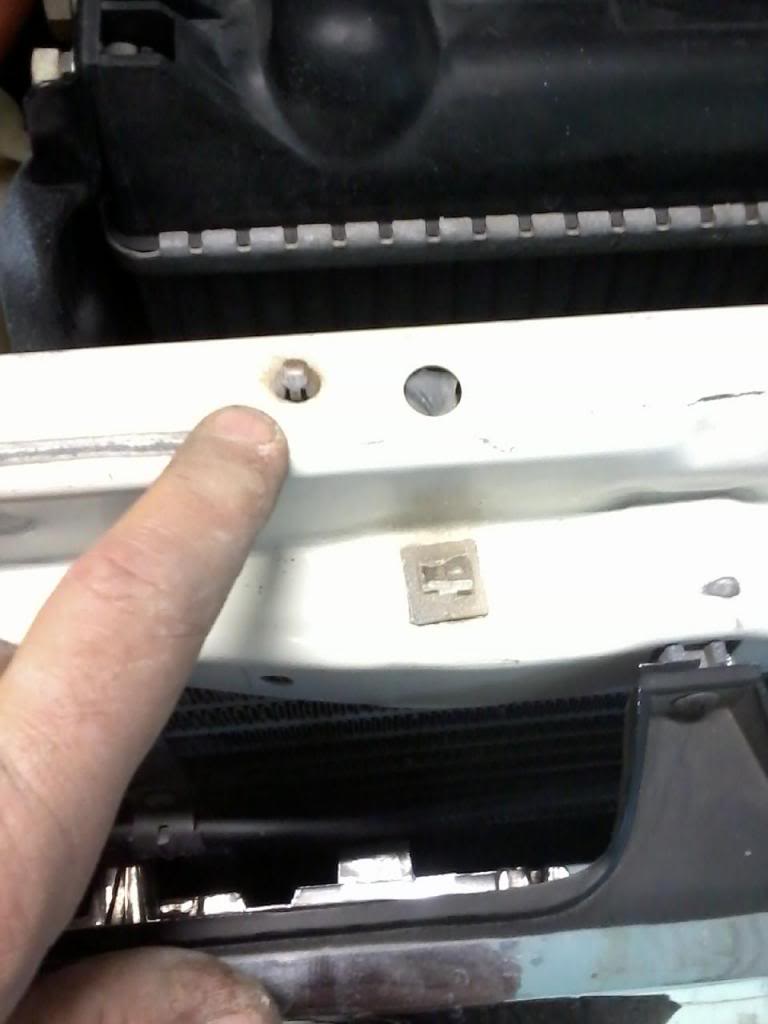
On the bottom of this cable there is a clip that holds the black cable. I shot some orange paint on it to show where it needs to sit in the clip.

Remove the Passenger Vent and you will need to work it side to side and work it up. All of these vents are dirty and you would be suprised at the mud that comes out of these.
Remove Center Vents. All vents will need removed to get the harness out.
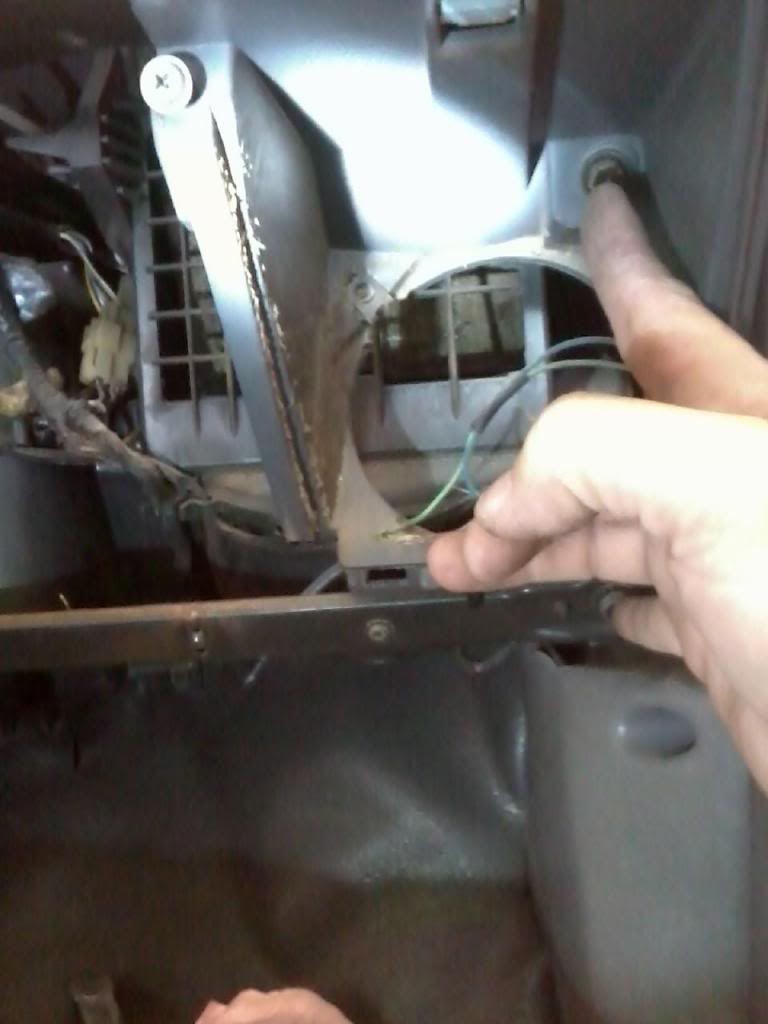
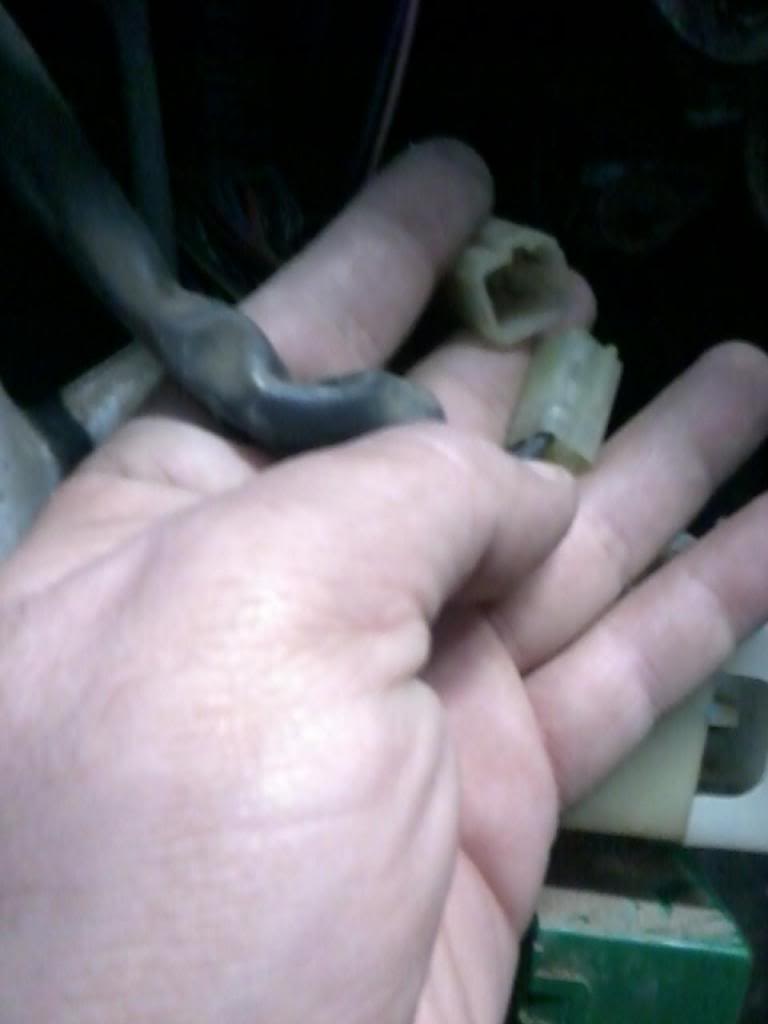
With the Center and Passenger Vents out, You can get access to the top cable on the passenger side and release the clip that is holding the cable and the end of the cable that slides over a post.
Here is the Blue Cable that is under the hood. Just pull down on the little clip that is clamping the cable and remove it from its post.
This one can be a pain in the butt to get installed correctly. It is located near your foot or the gas pedal area. I tried to mark it for easier installation.
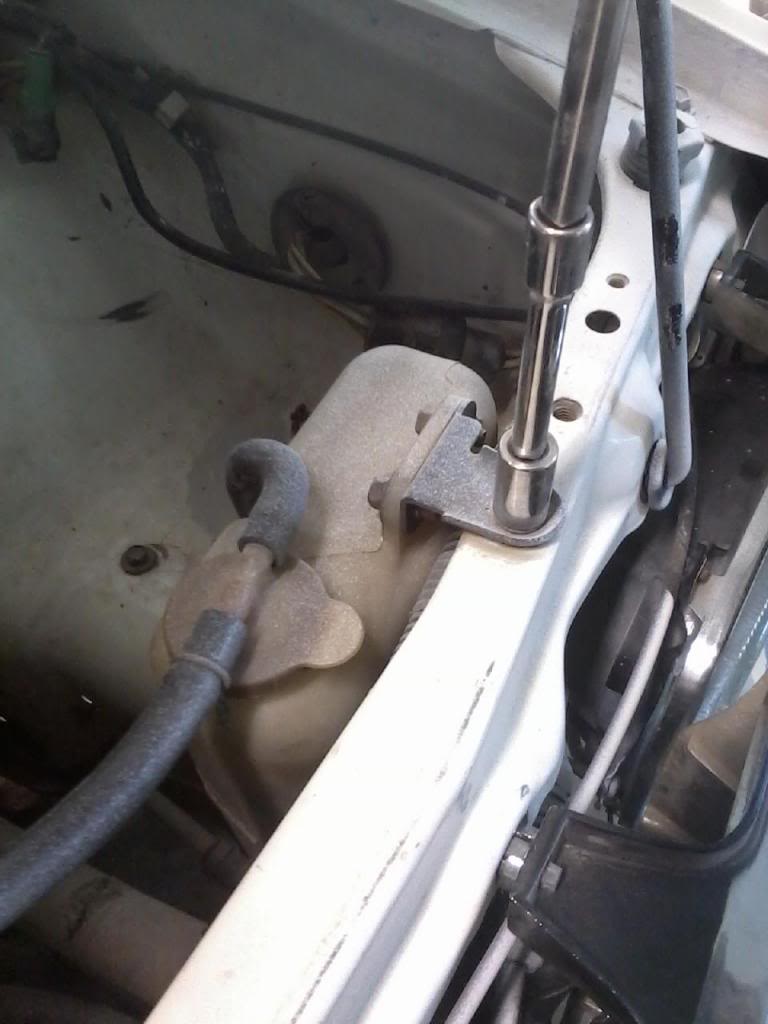
Notice that the Blue and Black cable run thru the inside of the black brackets that support the main dash frame.

The Black Cable and electrical connections run behind the bracket on the passenger side. White cable is in front.
Another view of how cables were routed when coming out.
Screw that holds vent on Passenger side that connects to the PE pipe.
Keeps it all together. Also keep putting your nuts and bolts back where they come from.

Remove the Passenger Vent and you will need to work it side to side and work it up. All of these vents are dirty and you would be suprised at the mud that comes out of these.

Remove Center Vents. All vents will need removed to get the harness out.

With the Center and Passenger Vents out, You can get access to the top cable on the passenger side and release the clip that is holding the cable and the end of the cable that slides over a post.

Here is the Blue Cable that is under the hood. Just pull down on the little clip that is clamping the cable and remove it from its post.

This one can be a pain in the butt to get installed correctly. It is located near your foot or the gas pedal area. I tried to mark it for easier installation.

Notice that the Blue and Black cable run thru the inside of the black brackets that support the main dash frame.

The Black Cable and electrical connections run behind the bracket on the passenger side. White cable is in front.

Another view of how cables were routed when coming out.

Screw that holds vent on Passenger side that connects to the PE pipe.

Keeps it all together. Also keep putting your nuts and bolts back where they come from.

Last edited by Terrys87; 03-20-2014 at 08:18 AM.
03-20-2014, 07:55 AM
#4
Super Moderator
Staff
Thread Starter
iTrader: (1)
Join Date: Aug 2008
Location: Anderson Missouri
Posts: 11,788
Likes: 0
Received 21 Likes
on
19 Posts
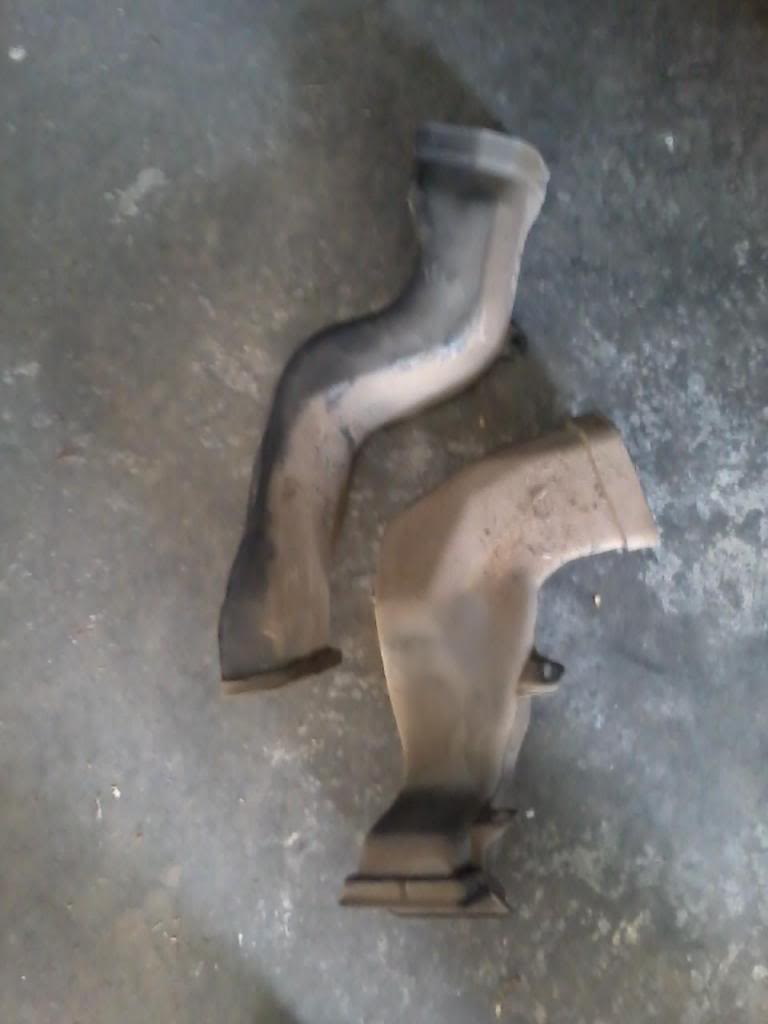
This vent pipe is the one that would be by your right knee if you were sitting in the driver seat.
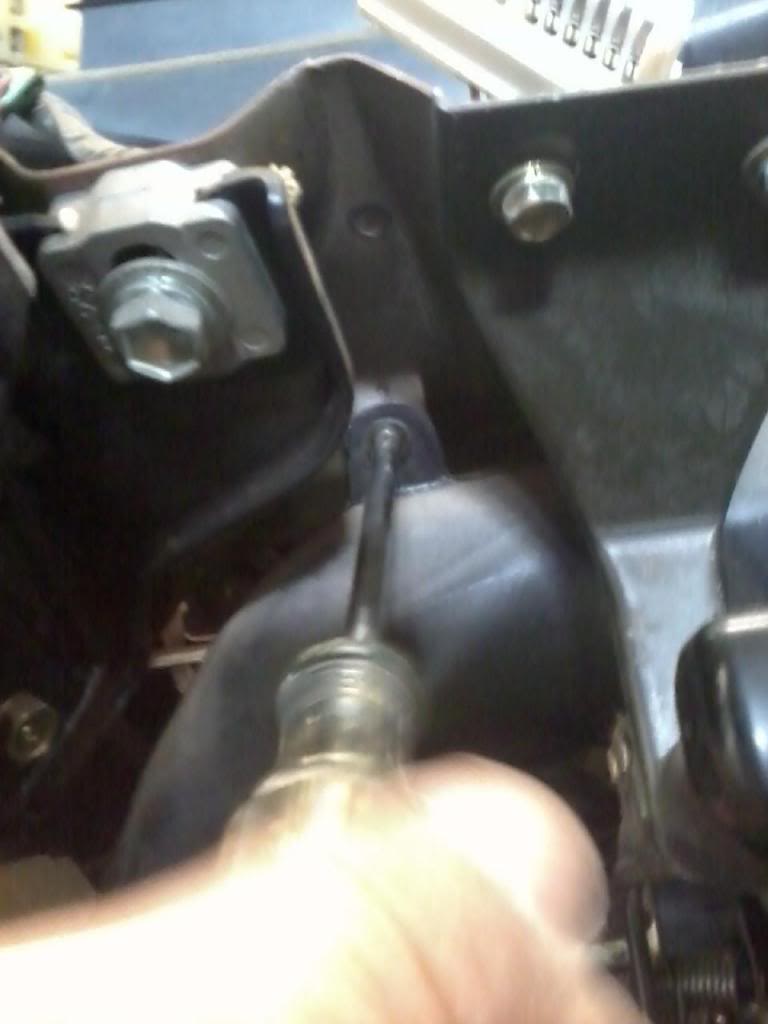
These 2 screws are the far left side on the drivers side. It takes a little manuvering to get it out but not bad at all.
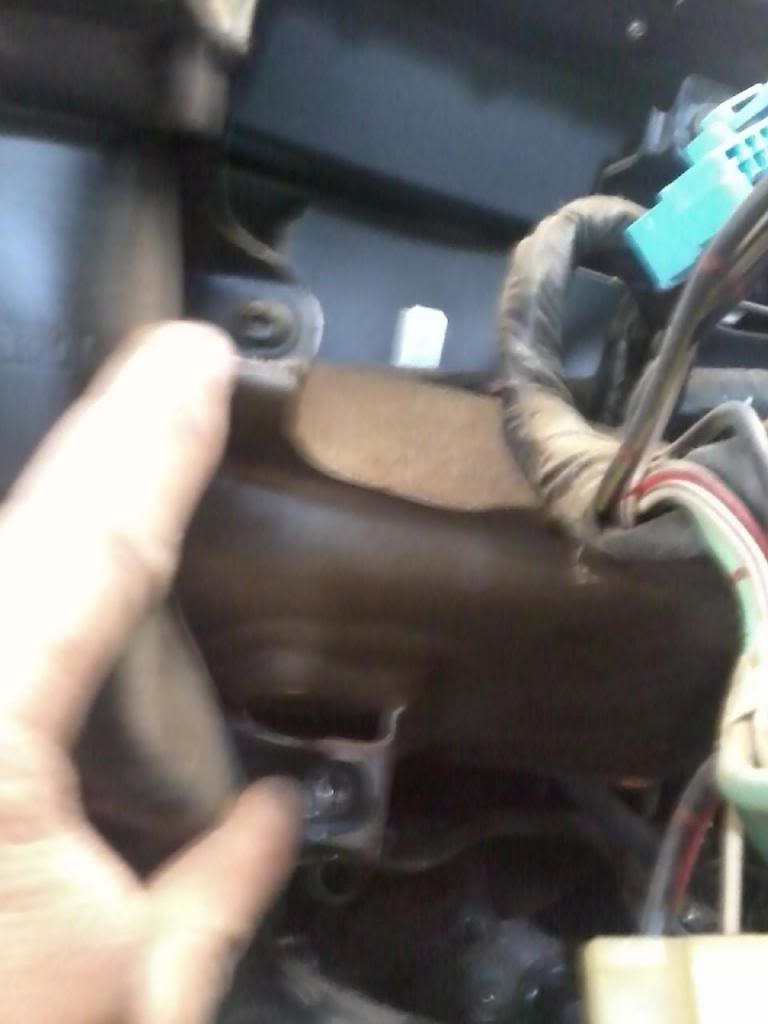
Two of the vent pipes out. This can be typical of the dust that gets trapped behind the dash.
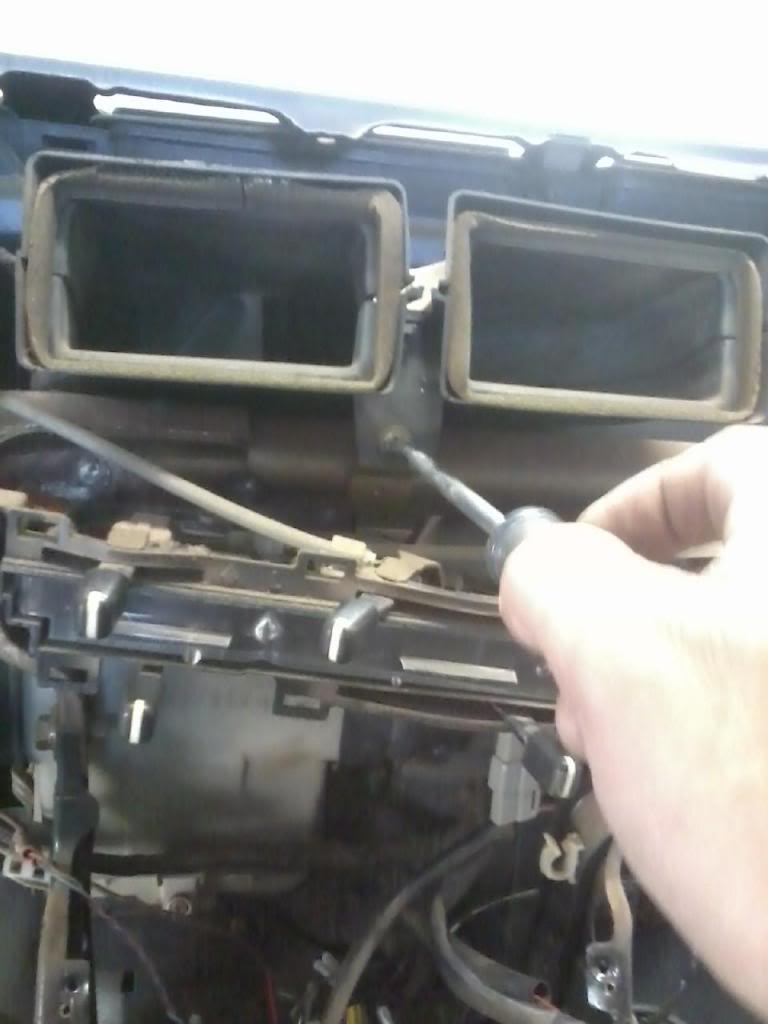
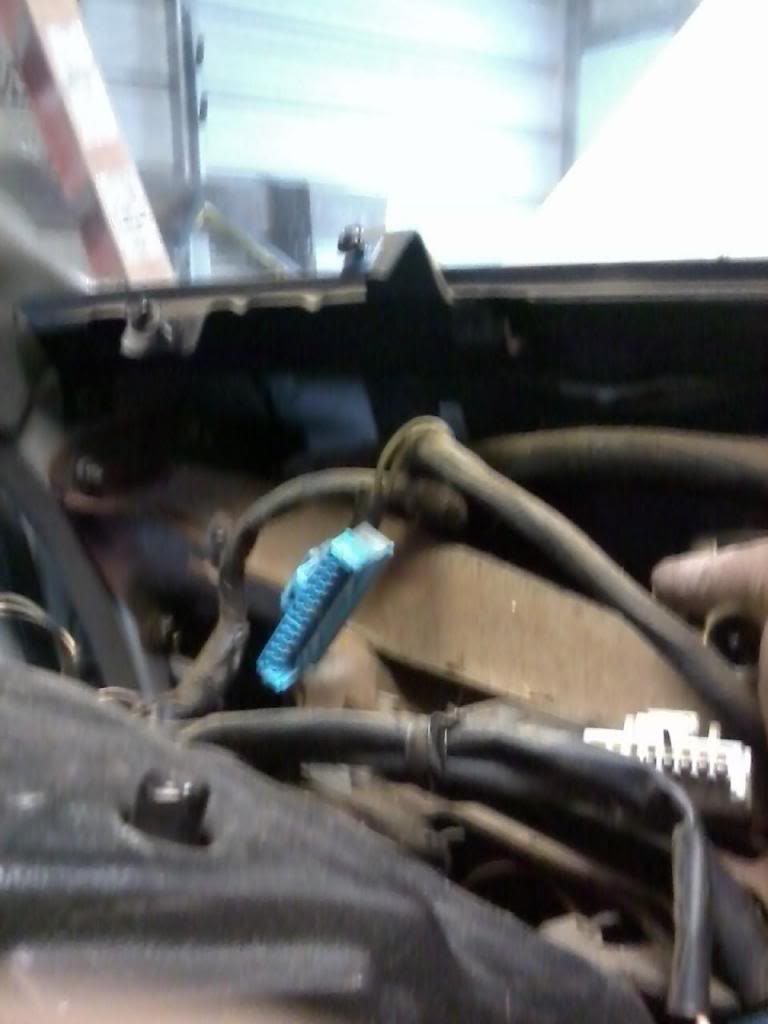
This is the big defrost vent that can be a pain to get out. You have a big screw on the bottom and 3 screws that hold it on top. When removing it, slide it to the left to clear the white vent in front of it, but watch the lever that operates the white vent assembly.
Getting the white clips out of the firewall is difficult. Usually they want to break. I just cut the tape and then I will use zip ties to install the new one. The white clips like to break is why I just cut the tape.
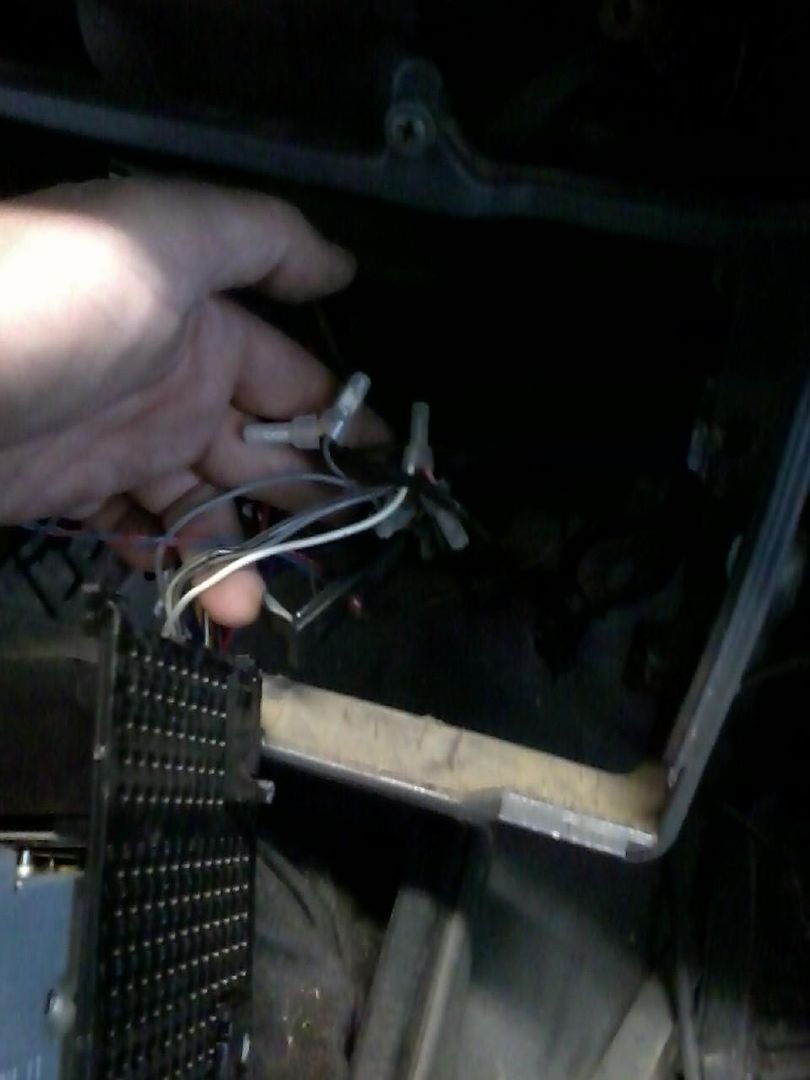
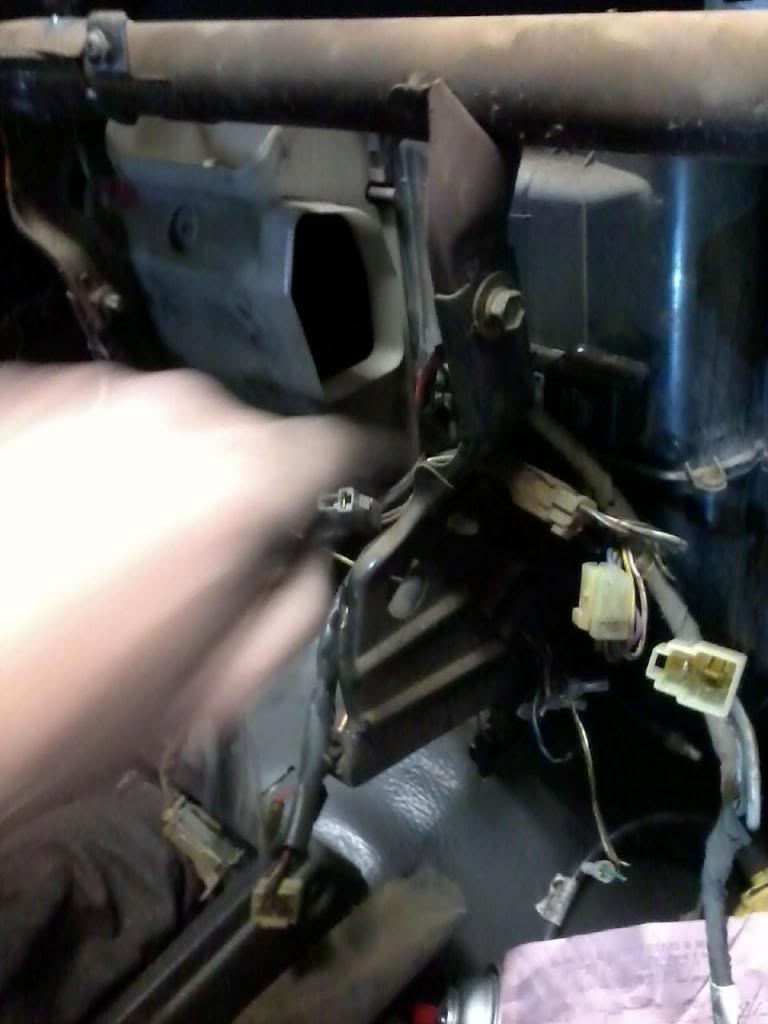
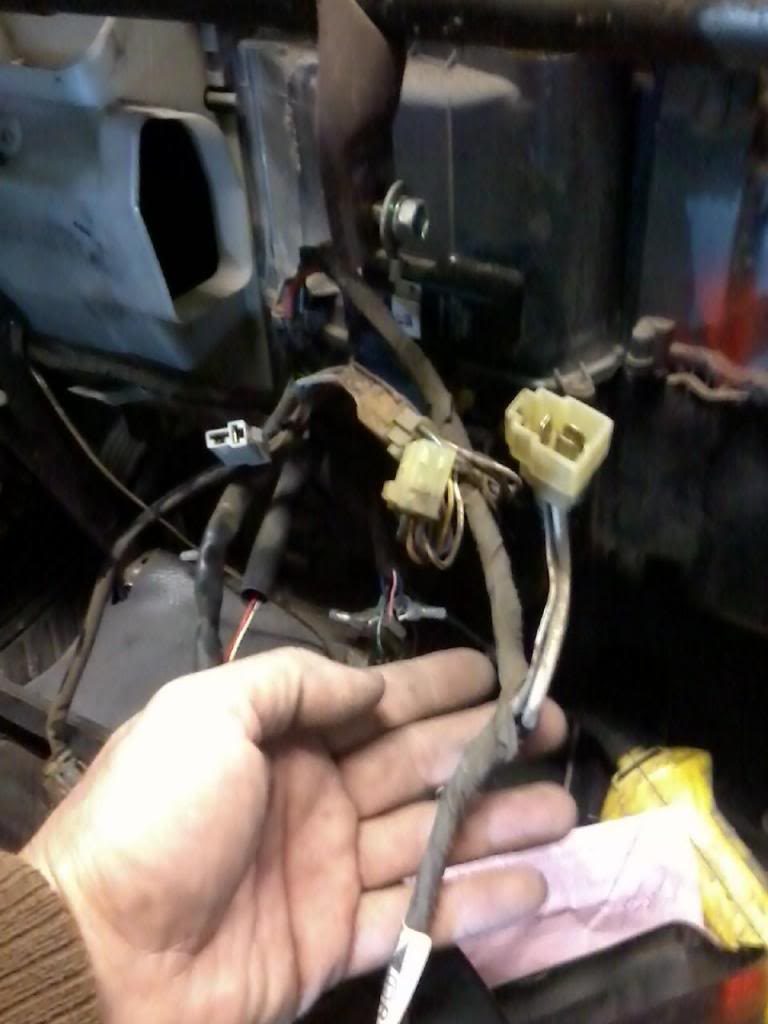
Finish disconnecting any electric plugs that may have been missed. May not show in the picture, but more poor wiring was spliced in.
You will need to remove these 4 bolts/nuts to get the harness to clear the fire wall and the cross bar. Still need to disconnect the harness from the front of the truck.

These 2 screws are the far left side on the drivers side. It takes a little manuvering to get it out but not bad at all.

Two of the vent pipes out. This can be typical of the dust that gets trapped behind the dash.

This is the big defrost vent that can be a pain to get out. You have a big screw on the bottom and 3 screws that hold it on top. When removing it, slide it to the left to clear the white vent in front of it, but watch the lever that operates the white vent assembly.

Getting the white clips out of the firewall is difficult. Usually they want to break. I just cut the tape and then I will use zip ties to install the new one. The white clips like to break is why I just cut the tape.

Finish disconnecting any electric plugs that may have been missed. May not show in the picture, but more poor wiring was spliced in.

You will need to remove these 4 bolts/nuts to get the harness to clear the fire wall and the cross bar. Still need to disconnect the harness from the front of the truck.
 03-20-2014, 07:55 AM
#5
Super Moderator
Staff
Thread Starter
iTrader: (1)
Join Date: Aug 2008
Location: Anderson Missouri
Posts: 11,788
Likes: 0
Received 21 Likes
on
19 Posts
Here I am removing the fuse box under the hood. A friend of mine swapped one from 22re to 22r. When done the heater blower would not work. We eventually found that the boxes are wired different. It may look tempting to not swap the fuse boxes but it is not hard.
Remove these 2 plugs from the Fusebox. Just press tabs.
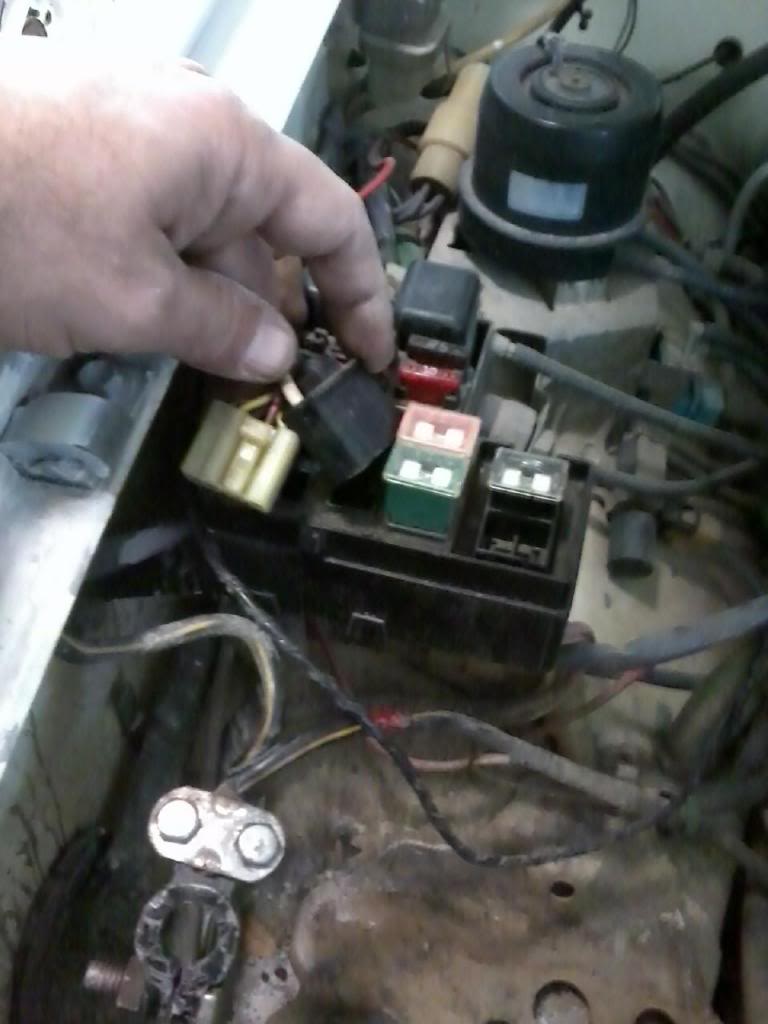
There is a little plastic clip that holds the 2 cables on back of the fusebox. Just unbolt three bolts that hold the box for access.
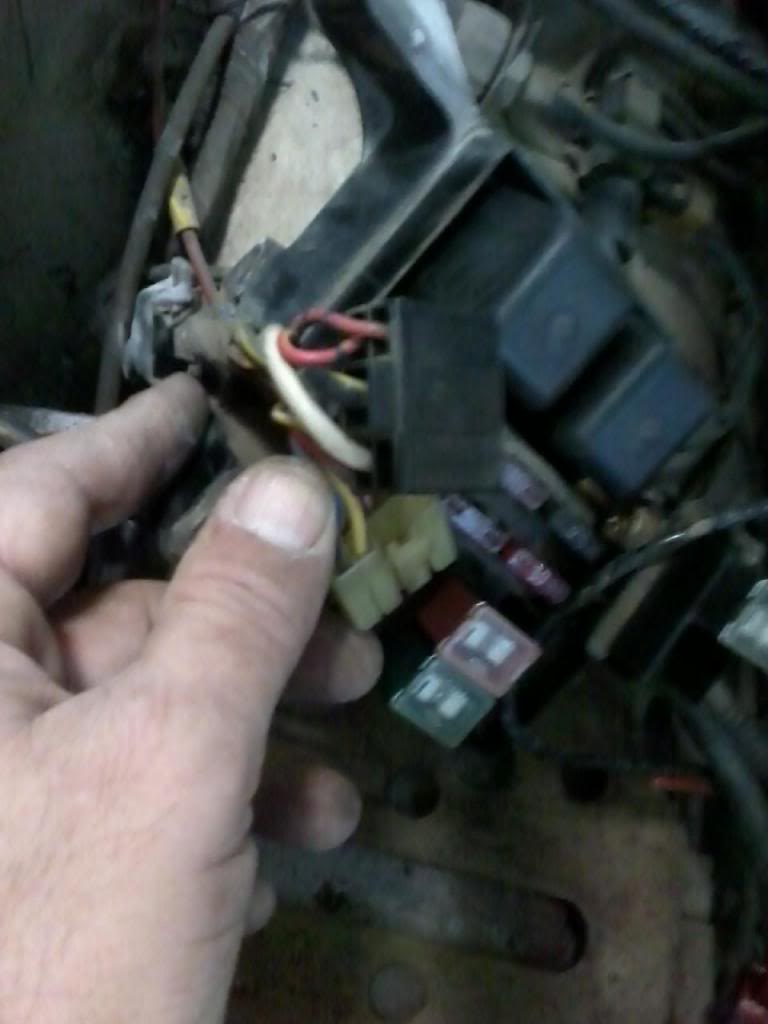
I removed the Postive terminal so as not to have to remove cable from Starter. It should be ok, if there is a problem I will mention when I go to install it. This is a California Emissions truck. It has alot more vacuum lines attached. If doing a 22r, a Webber is so much cleaner looking. I will post the differences between a Webber and a California truck. I dont have a picture to show what a Federal Emission truck looks like.

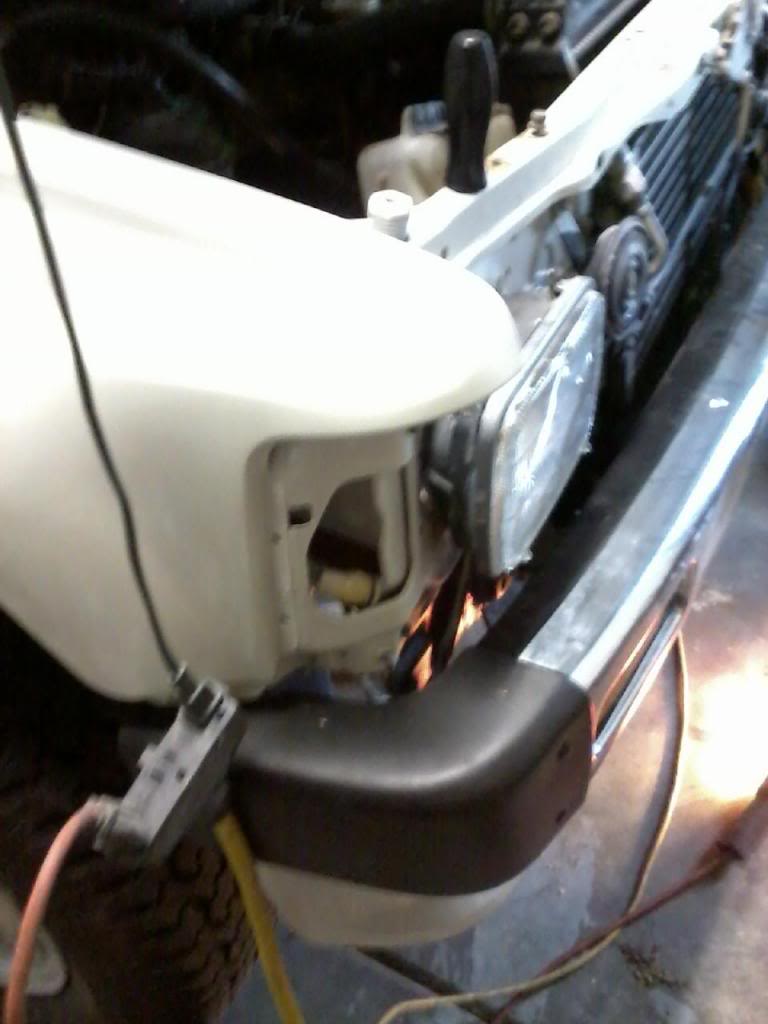
With fuse box unbolted, disconnect passenger side headlight, unbolt the windshield washer bottle. There is a squeeze tab behind the headlights that hold the harness in. I can usually squeeze with my fingers to get them to release.
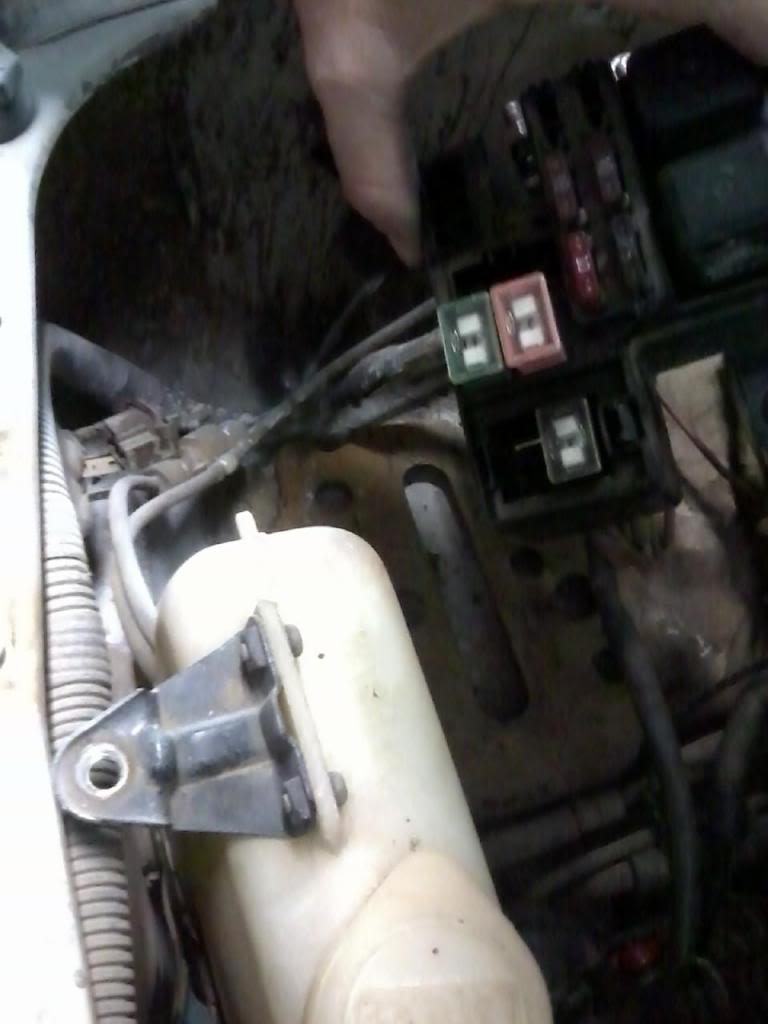
Here is the squeeze tabs. I think there are 5 total. This truck has an aftermarket radiator. A factory radiator is a tighter fit and you may need to loosen the radiator to get the cable out.
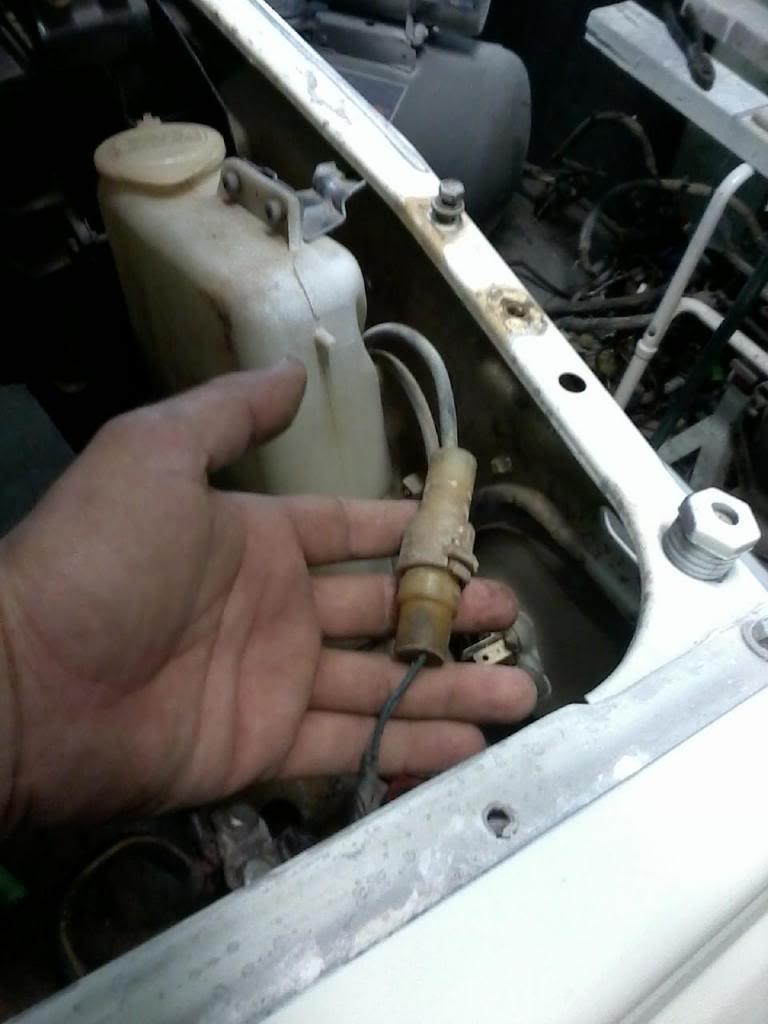
Remove the Overflow Bottle as harness runs behind it. Disconnect the black plugs.
One of the black plugs I was mentioning.
You can open this box and it is just a factory connection that is connected by a nut and bolt. I just follow it all the way to the alternator and remove the entire assembly as one piece. The bblack ground wire that goes to the alternator is damaged so I just took the whole assembly as one piece.

Here is the Fuse Box Harness. Not hard to remove. May not show, but I did mark this as a 86 22r part.
Remove these 2 plugs from the Fusebox. Just press tabs.

There is a little plastic clip that holds the 2 cables on back of the fusebox. Just unbolt three bolts that hold the box for access.

I removed the Postive terminal so as not to have to remove cable from Starter. It should be ok, if there is a problem I will mention when I go to install it. This is a California Emissions truck. It has alot more vacuum lines attached. If doing a 22r, a Webber is so much cleaner looking. I will post the differences between a Webber and a California truck. I dont have a picture to show what a Federal Emission truck looks like.

With fuse box unbolted, disconnect passenger side headlight, unbolt the windshield washer bottle. There is a squeeze tab behind the headlights that hold the harness in. I can usually squeeze with my fingers to get them to release.

Here is the squeeze tabs. I think there are 5 total. This truck has an aftermarket radiator. A factory radiator is a tighter fit and you may need to loosen the radiator to get the cable out.

Remove the Overflow Bottle as harness runs behind it. Disconnect the black plugs.

One of the black plugs I was mentioning.

You can open this box and it is just a factory connection that is connected by a nut and bolt. I just follow it all the way to the alternator and remove the entire assembly as one piece. The bblack ground wire that goes to the alternator is damaged so I just took the whole assembly as one piece.

Here is the Fuse Box Harness. Not hard to remove. May not show, but I did mark this as a 86 22r part.
 03-20-2014, 07:56 AM
#6
Super Moderator
Staff
Thread Starter
iTrader: (1)
Join Date: Aug 2008
Location: Anderson Missouri
Posts: 11,788
Likes: 0
Received 21 Likes
on
19 Posts
There several different ways to do this but I am trying to keep it easy to do. I am starting on the drivers side and will work my over to the passenger side.
Remove Marker Light, Inner Fender and Mudflap. Disconnect the bumper blinker plug. You can leave the blinker in.
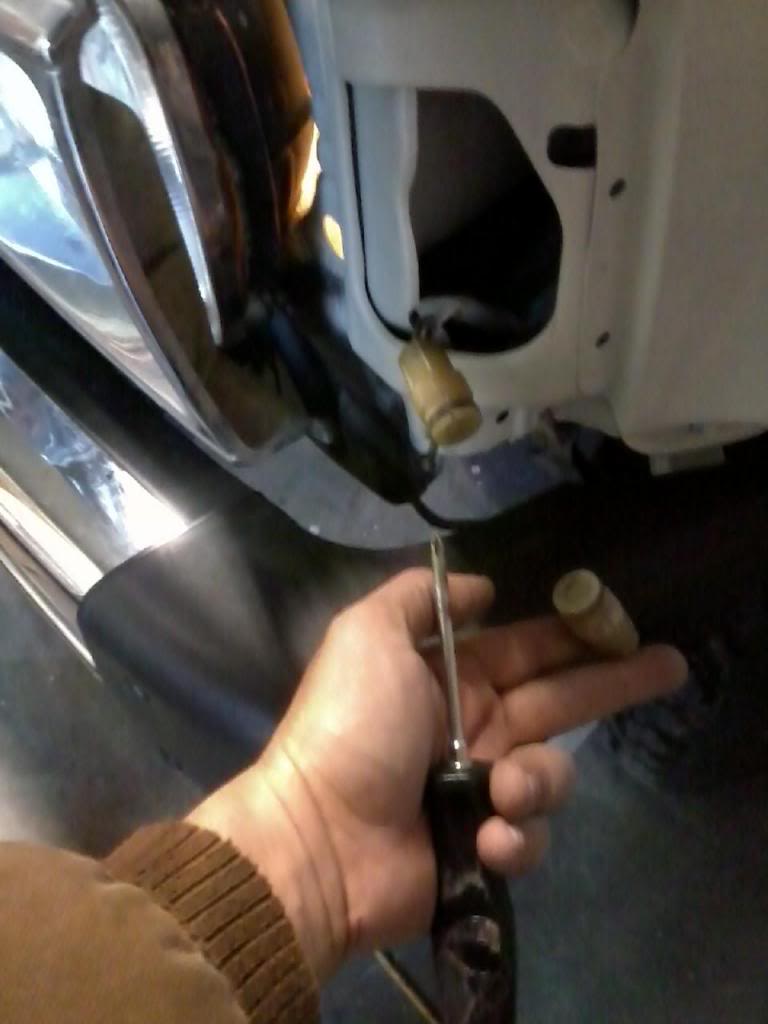
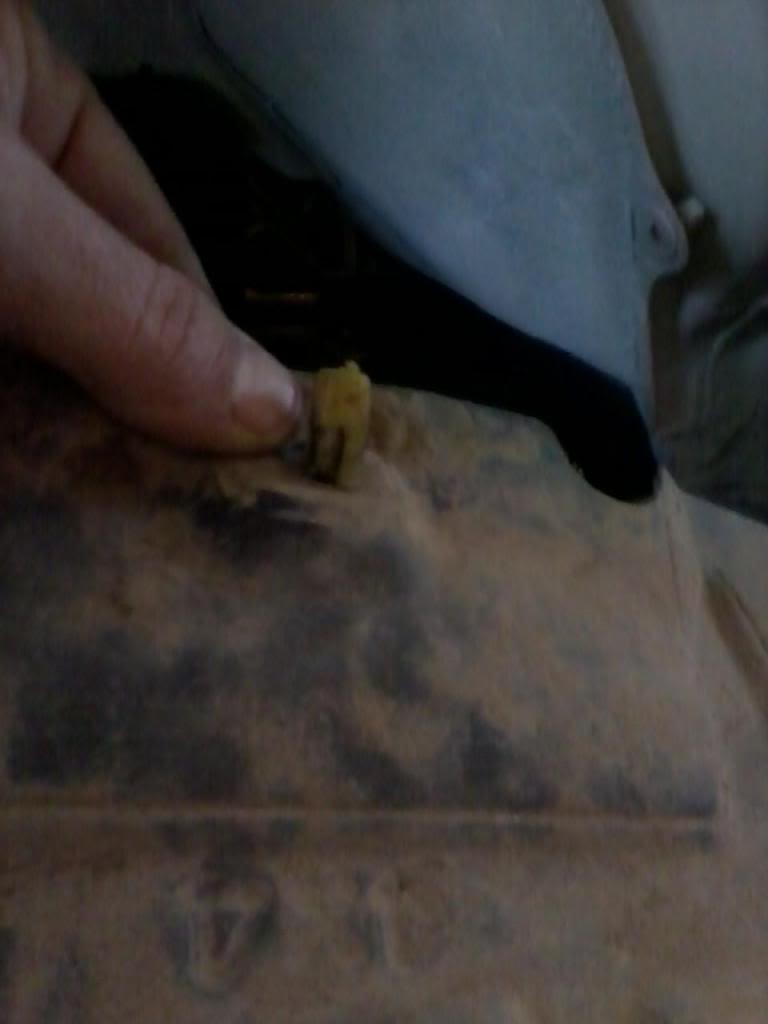
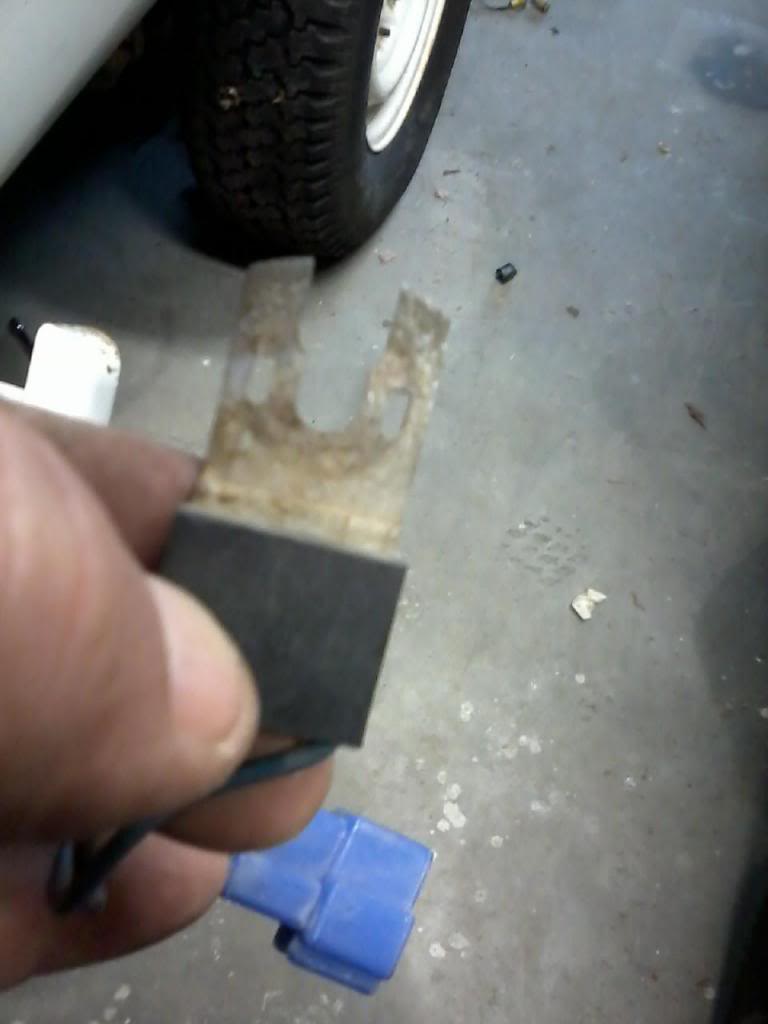
This white tab behind the coil is a pain to get out. It just has two squeeze tabs and it pops thru the inner fender. It holds the inner fender plastic piece in.
Picture of it out and what it looks like on plastic inner fender.
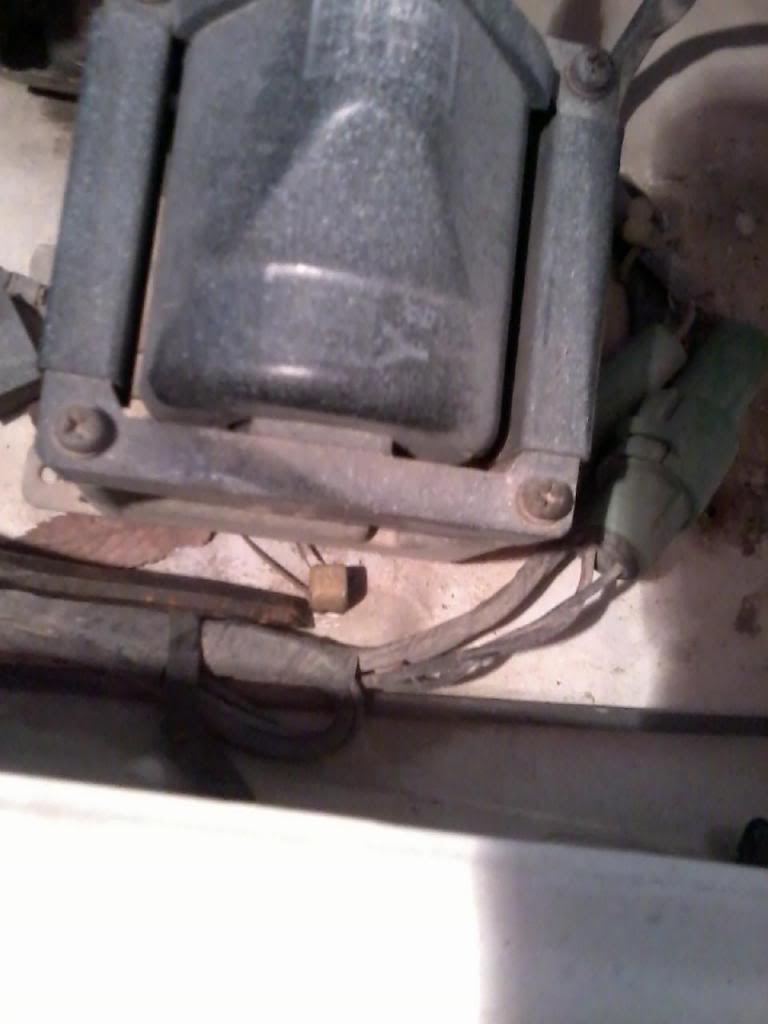
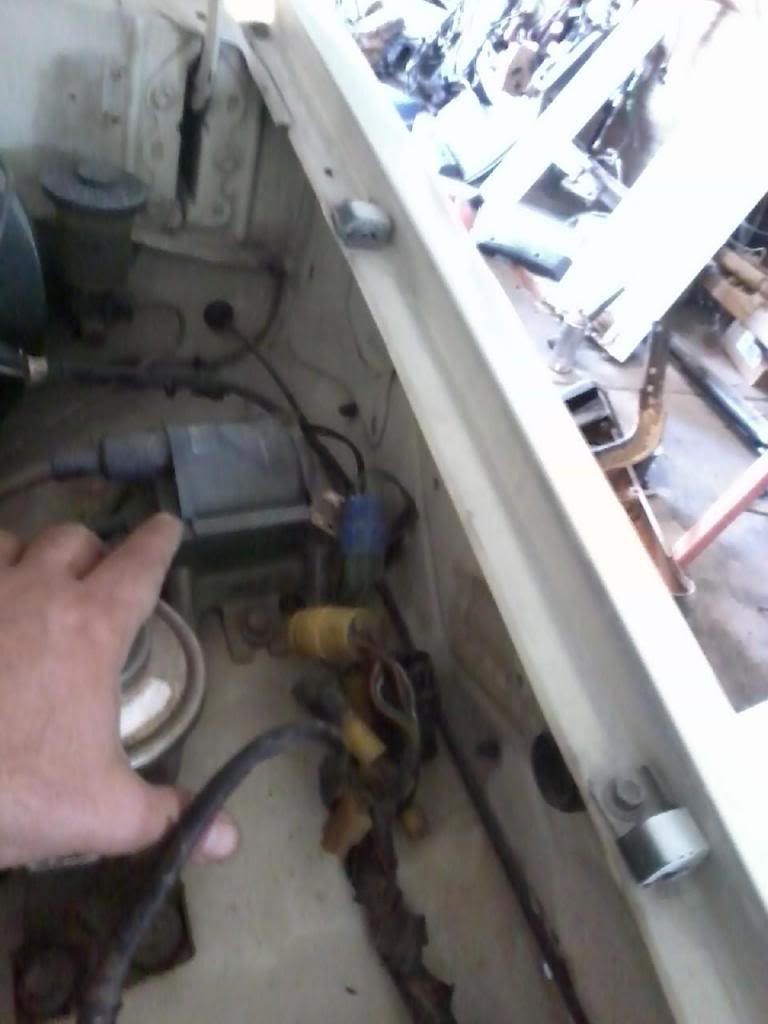
Disconnect remaing plugs from Coil, Brake Fluid Container, and any other I may have missed mentioning. I will remove the Coil at a later time. I gets replaced with a different Coil/Igniter later on. I am doing just disassembly at this time. Trying to make it easy.

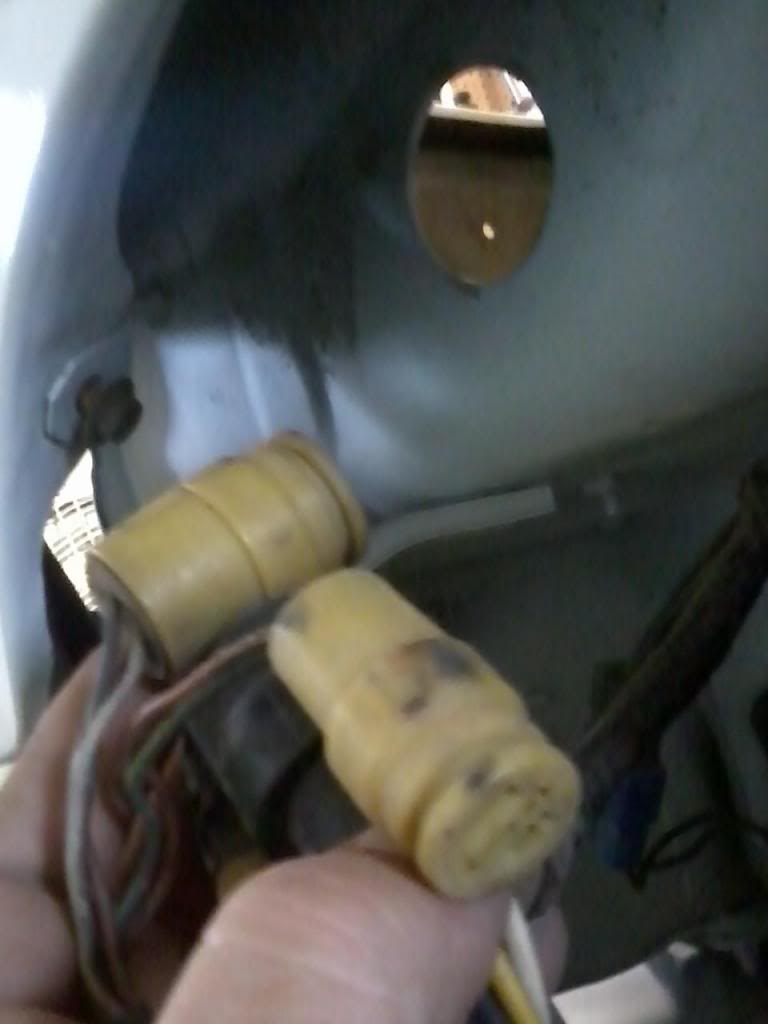
The hole in the inner fender, behind the headlight, is where all of this harness goes thru. There is a brown plastic piece that needs removed that isnt showing.
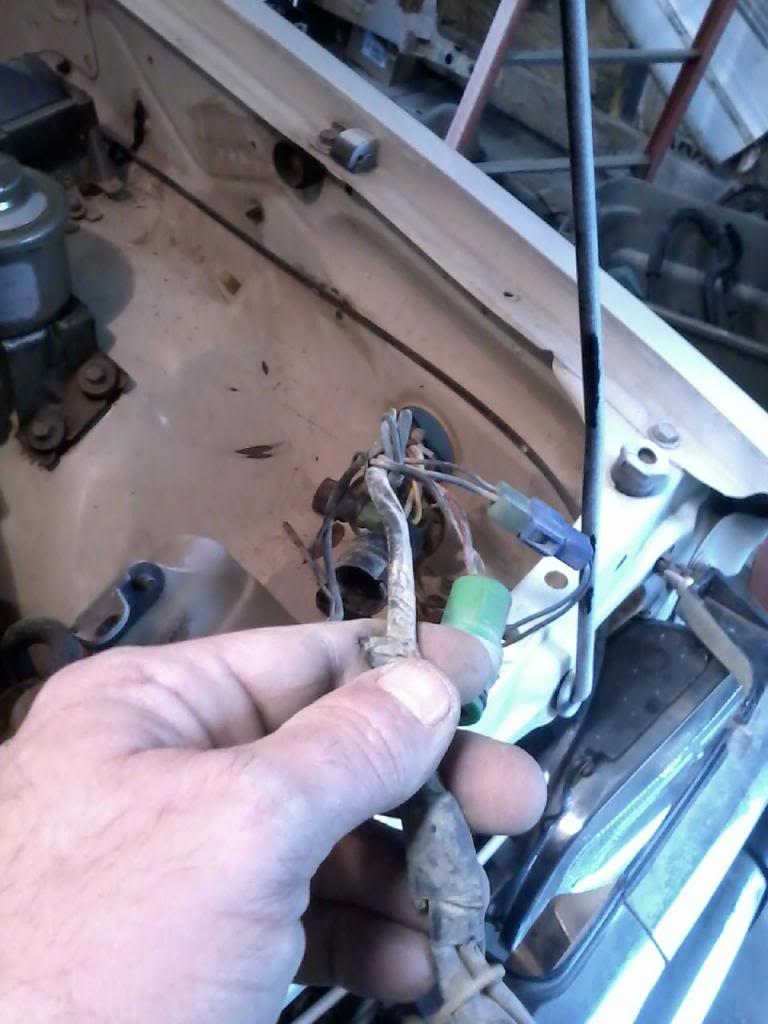
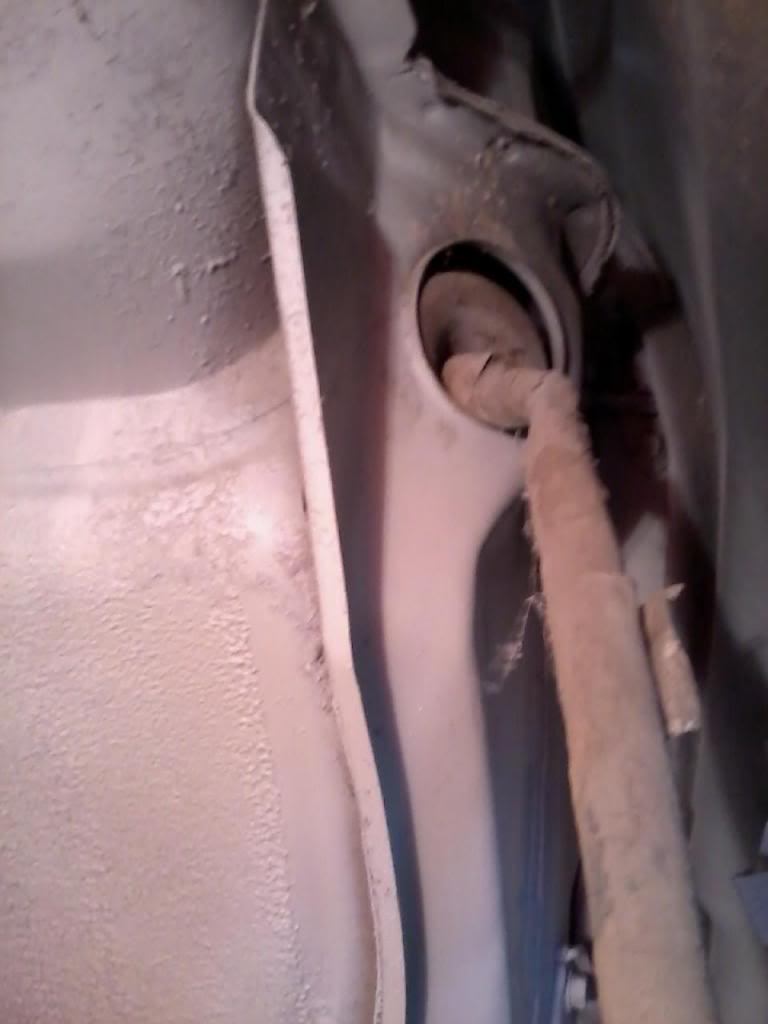
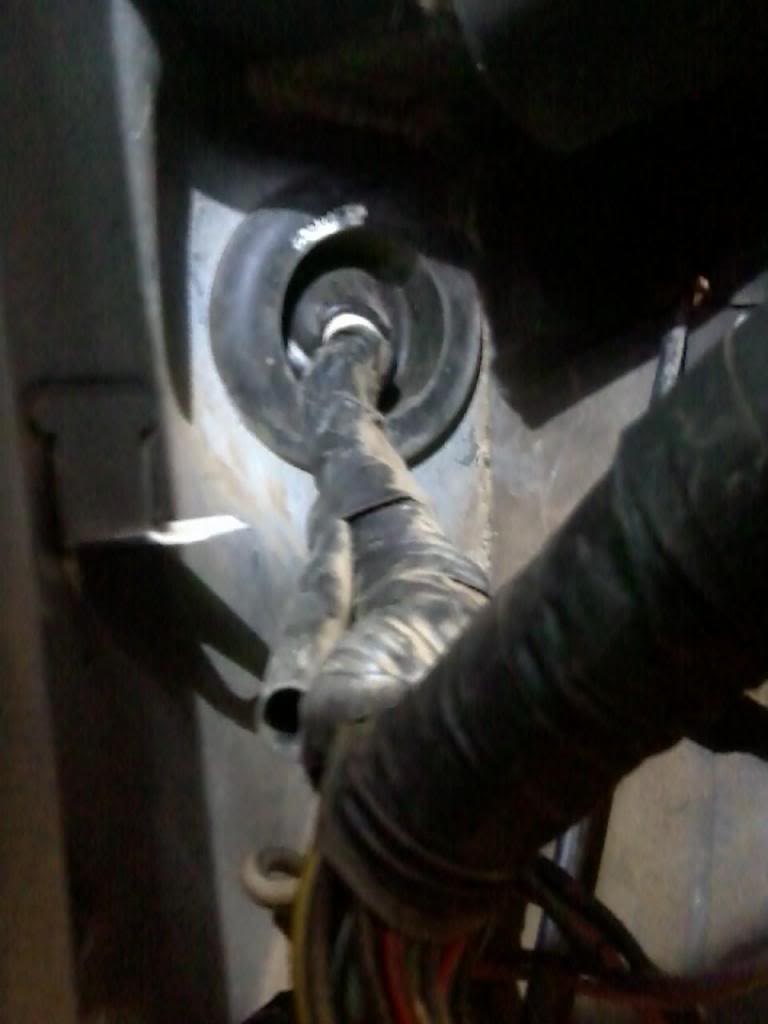
I now have the harness thru the inner fender. With the plastic inner fender out, this is where the harness goes thru to inside the cab thru the firewall. I pushed the rubber boot inside the cab to helps show direction and how it needs to be done.
Remove Marker Light, Inner Fender and Mudflap. Disconnect the bumper blinker plug. You can leave the blinker in.

This white tab behind the coil is a pain to get out. It just has two squeeze tabs and it pops thru the inner fender. It holds the inner fender plastic piece in.

Picture of it out and what it looks like on plastic inner fender.

Disconnect remaing plugs from Coil, Brake Fluid Container, and any other I may have missed mentioning. I will remove the Coil at a later time. I gets replaced with a different Coil/Igniter later on. I am doing just disassembly at this time. Trying to make it easy.

The hole in the inner fender, behind the headlight, is where all of this harness goes thru. There is a brown plastic piece that needs removed that isnt showing.

I now have the harness thru the inner fender. With the plastic inner fender out, this is where the harness goes thru to inside the cab thru the firewall. I pushed the rubber boot inside the cab to helps show direction and how it needs to be done.
 03-20-2014, 07:57 AM
#7
Super Moderator
Staff
Thread Starter
iTrader: (1)
Join Date: Aug 2008
Location: Anderson Missouri
Posts: 11,788
Likes: 0
Received 21 Likes
on
19 Posts
I had to remove the grill as the horn was repaired and I as unable to unplug it with the grill in. Also you need to remove MudFlap, Marker Light, and Plastic Inner Fender on Passenger side as well.
Grill, Marker, Mudflap and Inner Fender removed on passenger side
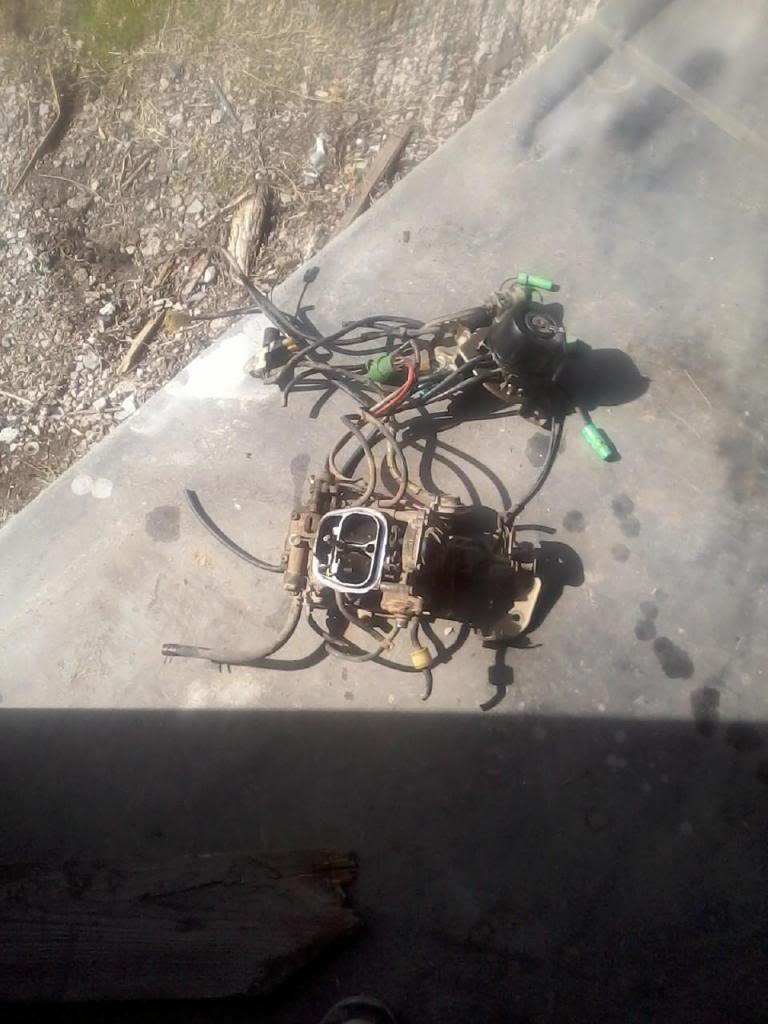
Start from the Wiper Motor and work all the way back to the Windshield Fluid Bottle. This is a California Emissions truck. If you want to stay with a carburator, go with a Webber. So much easier to work on in a 22r.
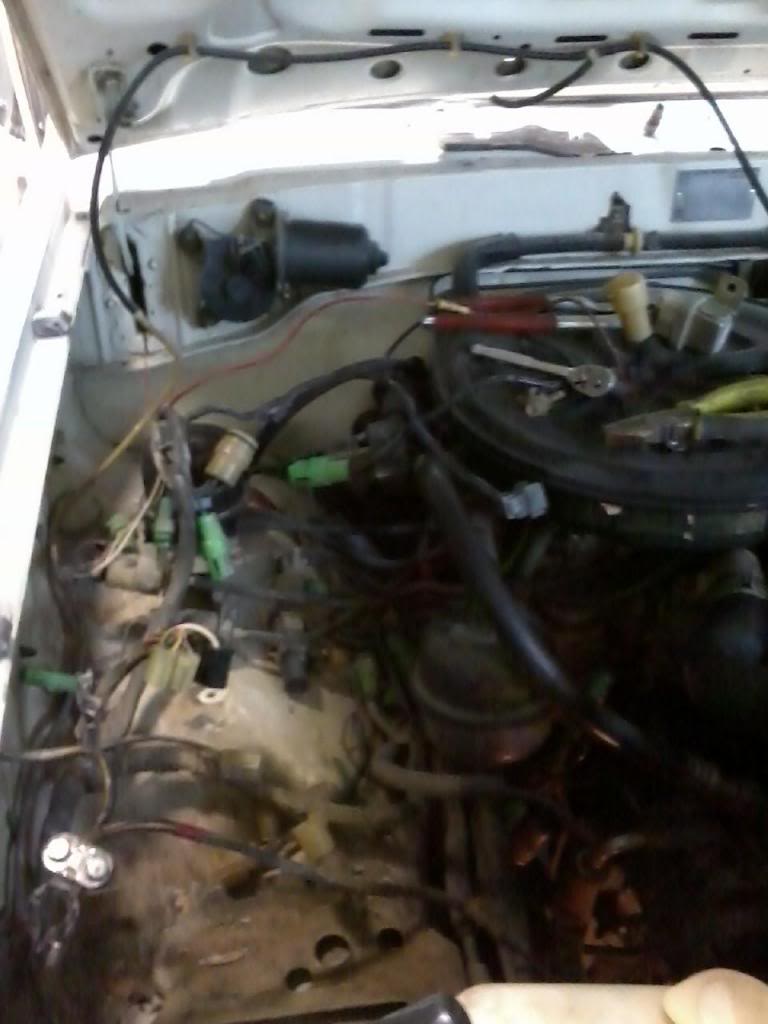
Passenger harness ready to go thru the fire wall. I still have some work to do on the inside to get the harness thru. Will post that next.
Drivers side ready.
Grill, Marker, Mudflap and Inner Fender removed on passenger side

Start from the Wiper Motor and work all the way back to the Windshield Fluid Bottle. This is a California Emissions truck. If you want to stay with a carburator, go with a Webber. So much easier to work on in a 22r.

Passenger harness ready to go thru the fire wall. I still have some work to do on the inside to get the harness thru. Will post that next.

Drivers side ready.

Trending Topics
03-20-2014, 07:58 AM
#8
Super Moderator
Staff
Thread Starter
iTrader: (1)
Join Date: Aug 2008
Location: Anderson Missouri
Posts: 11,788
Likes: 0
Received 21 Likes
on
19 Posts
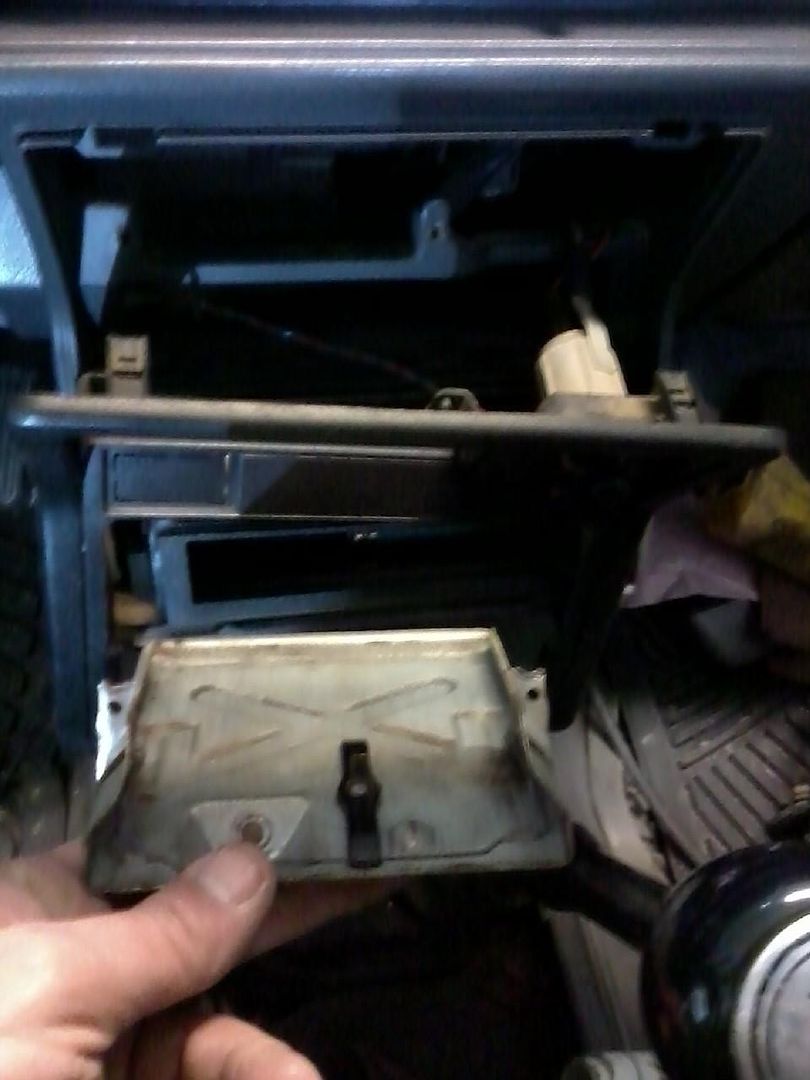
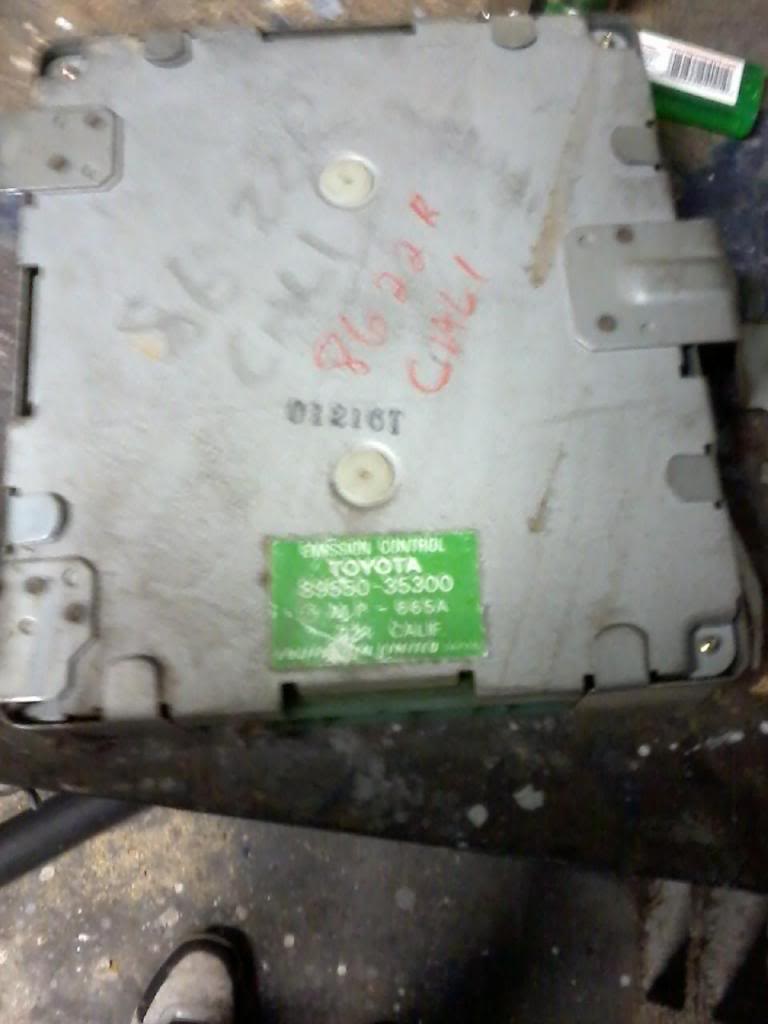
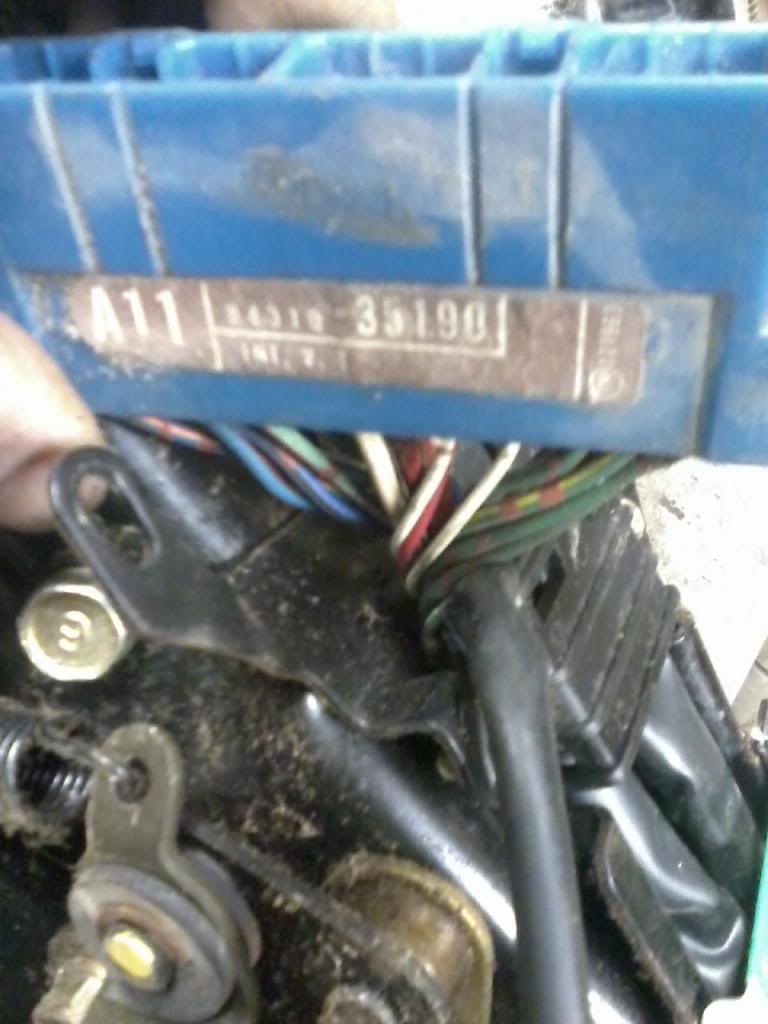
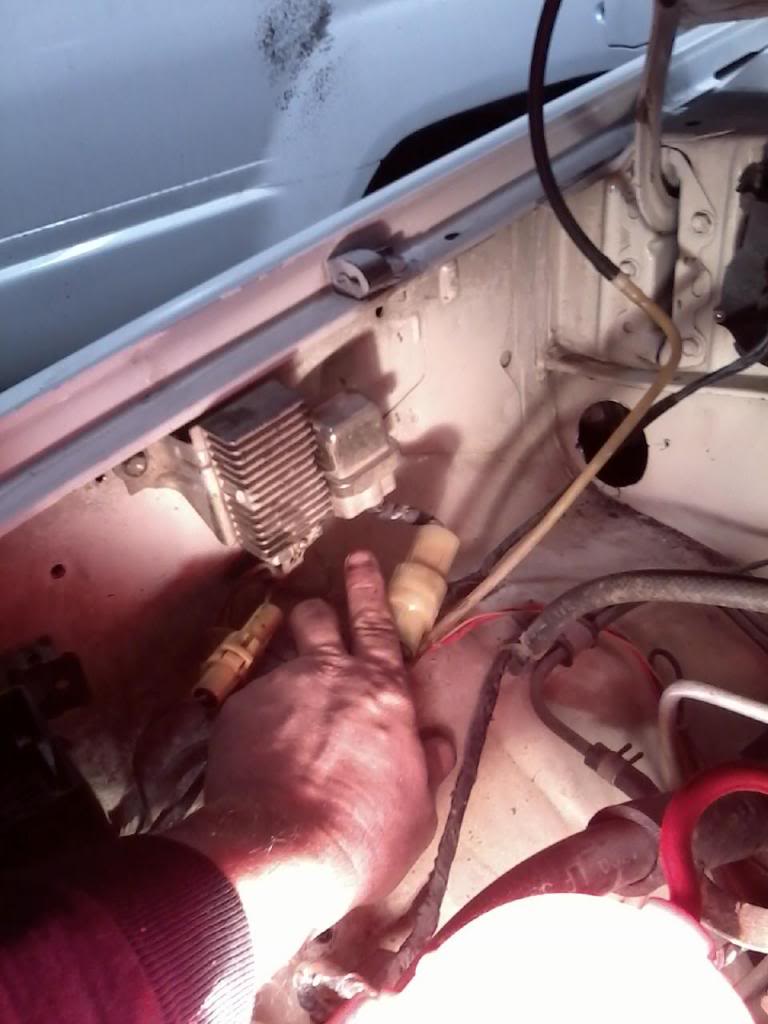
This being a California Emissions truck, I was suprised to see this size of control box. Remove passenger kick panel and control box.
86 22r California Control box. This truck even has the O2 sensor in it.
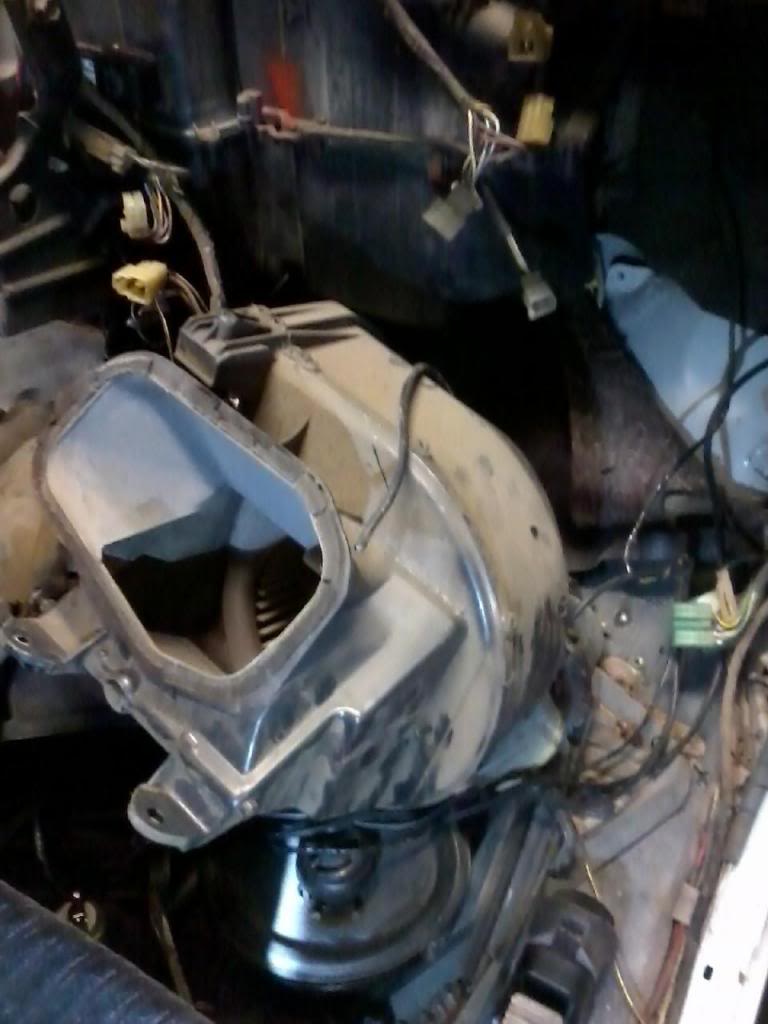
Remove Blower Motor Assembly. You will need to loosen the AC component next to the blower assembly. It takes a little manuvering to get it out and around the AC assembly.
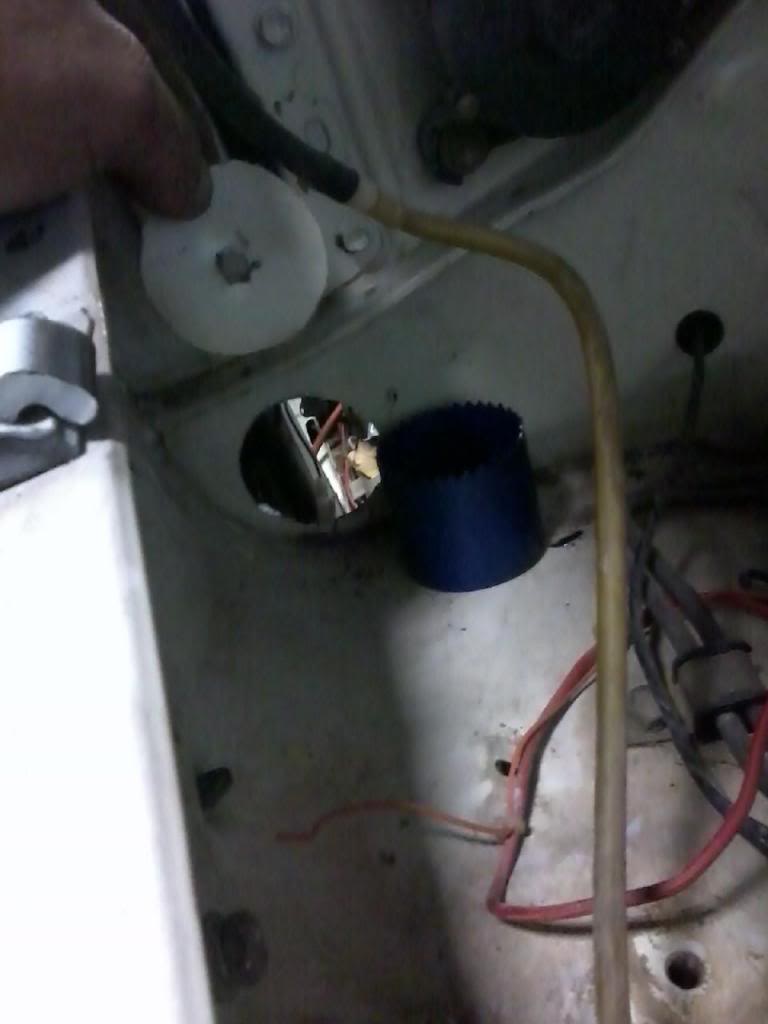
Here is where the factory has the cutout for the Injector Harness on the firewall. You will need a hole saw to cut out the access. I will get to it later.
 03-20-2014, 07:59 AM
#9
Super Moderator
Staff
Thread Starter
iTrader: (1)
Join Date: Aug 2008
Location: Anderson Missouri
Posts: 11,788
Likes: 0
Received 21 Likes
on
19 Posts
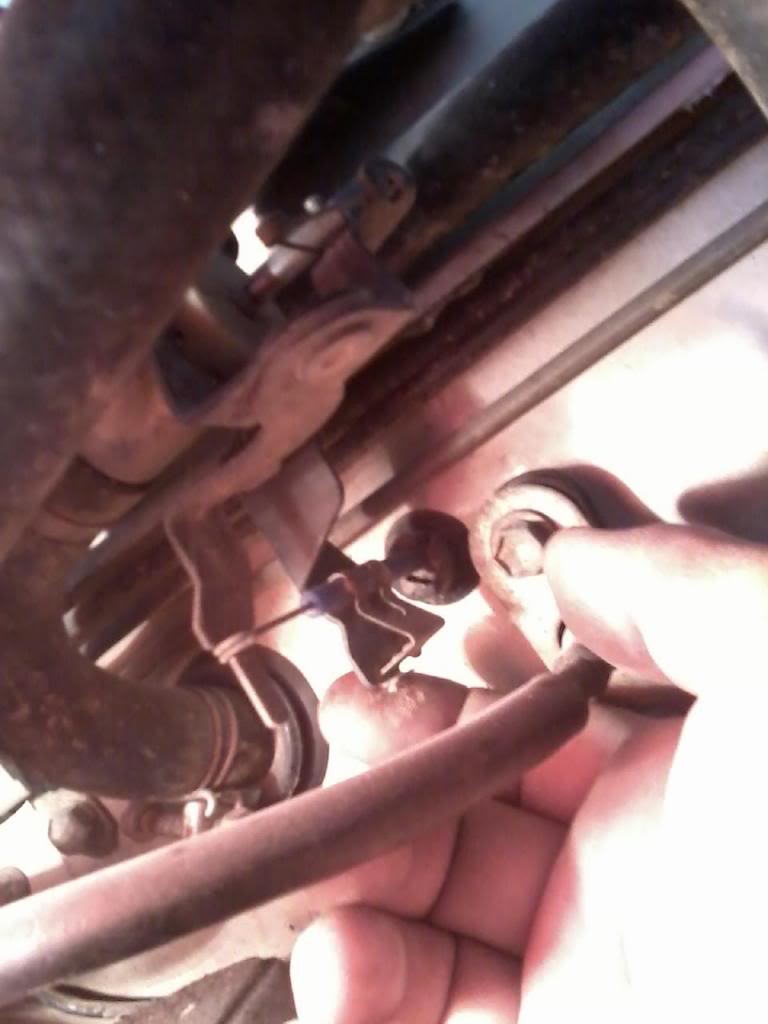
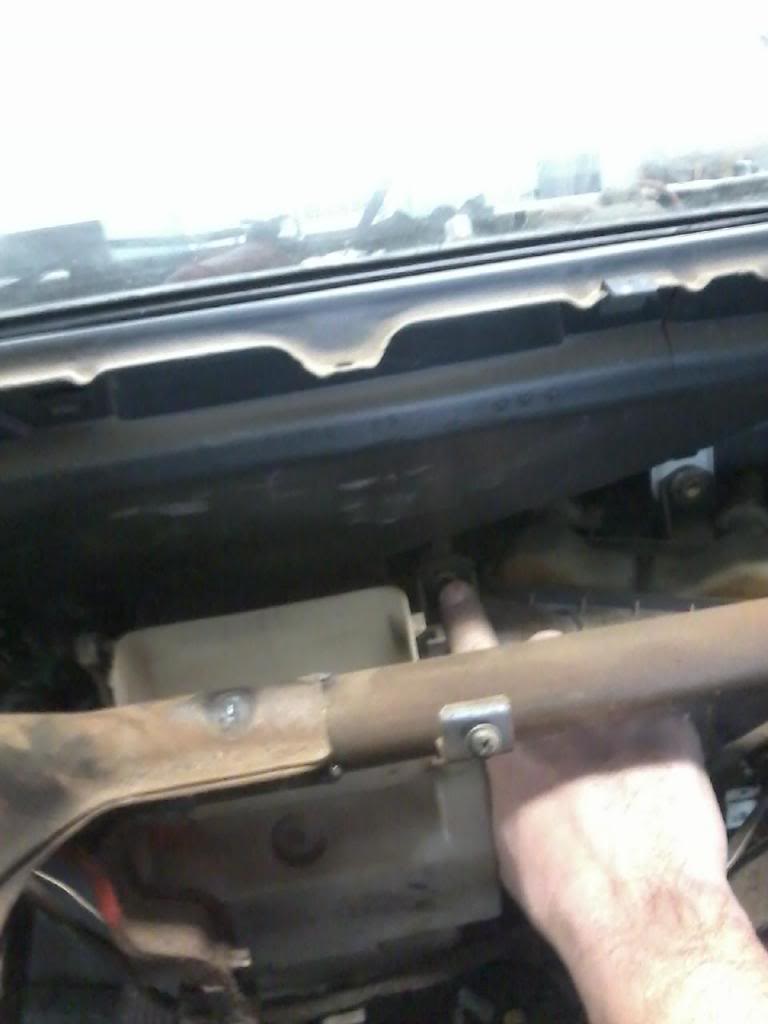
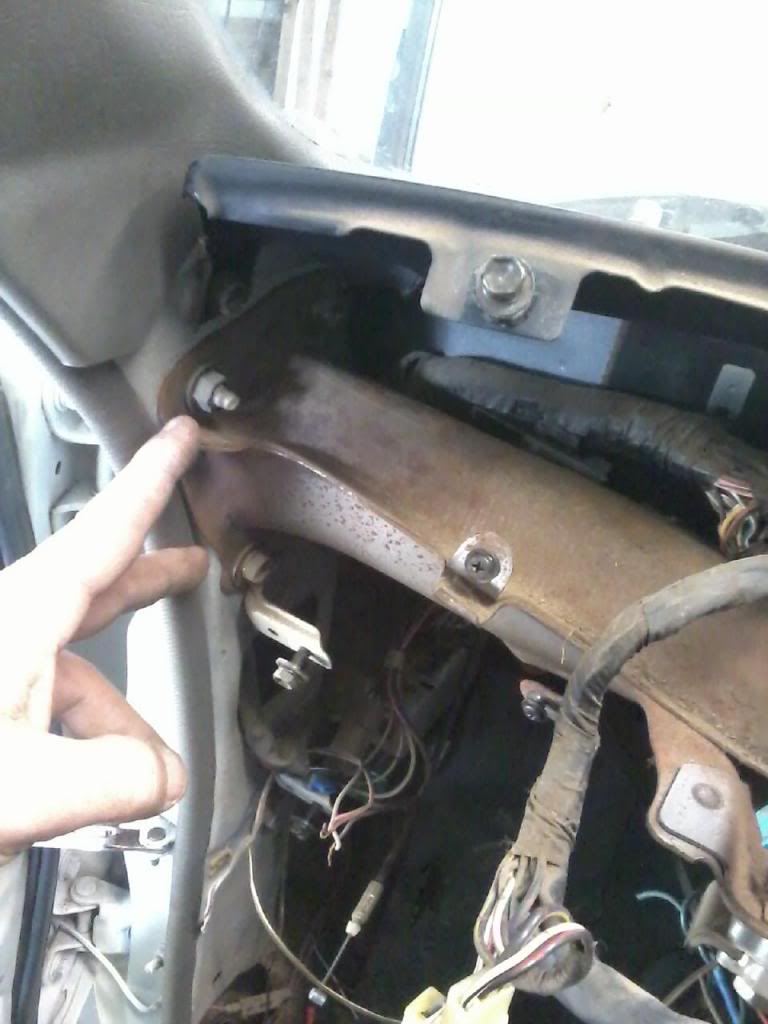
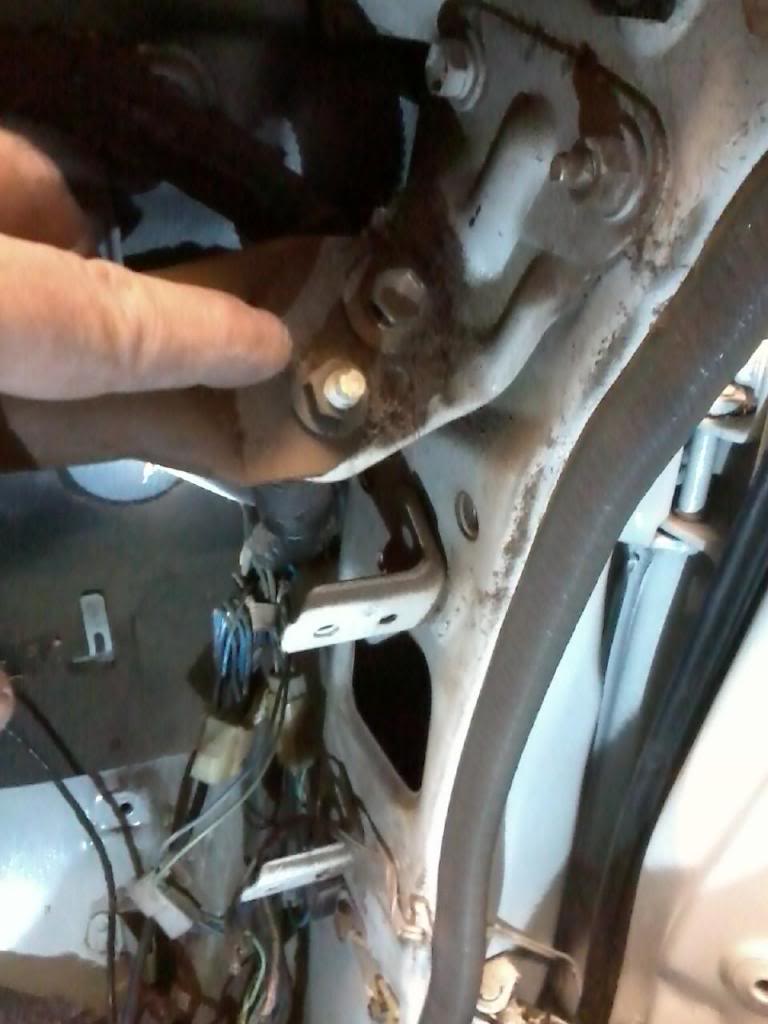
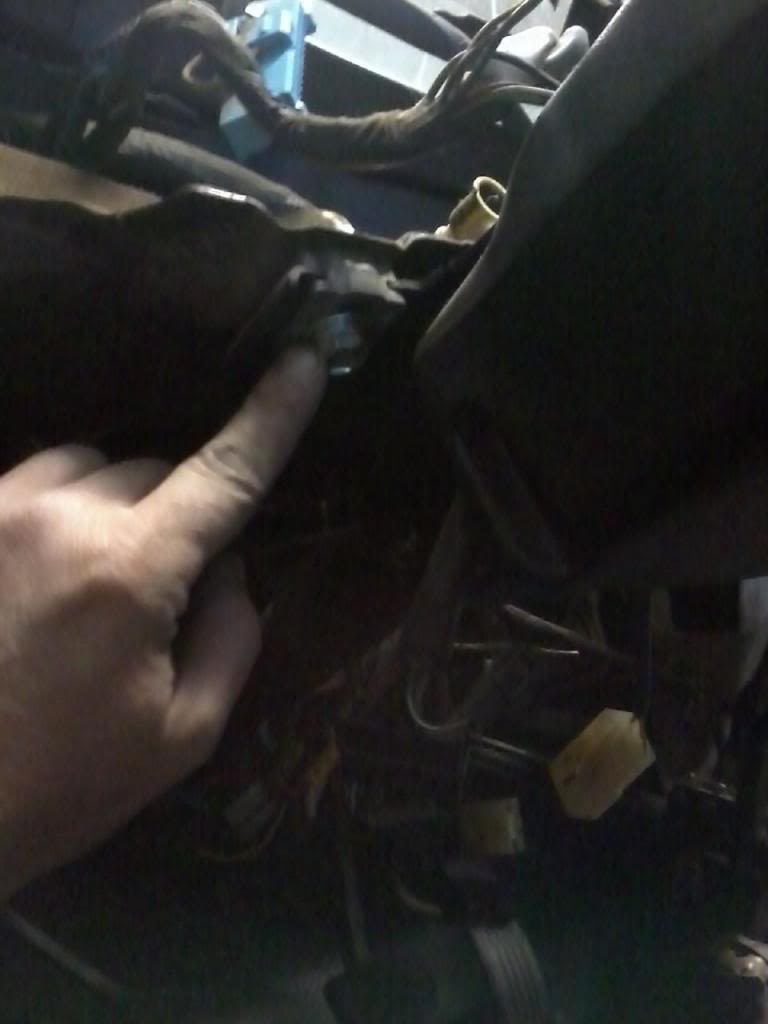
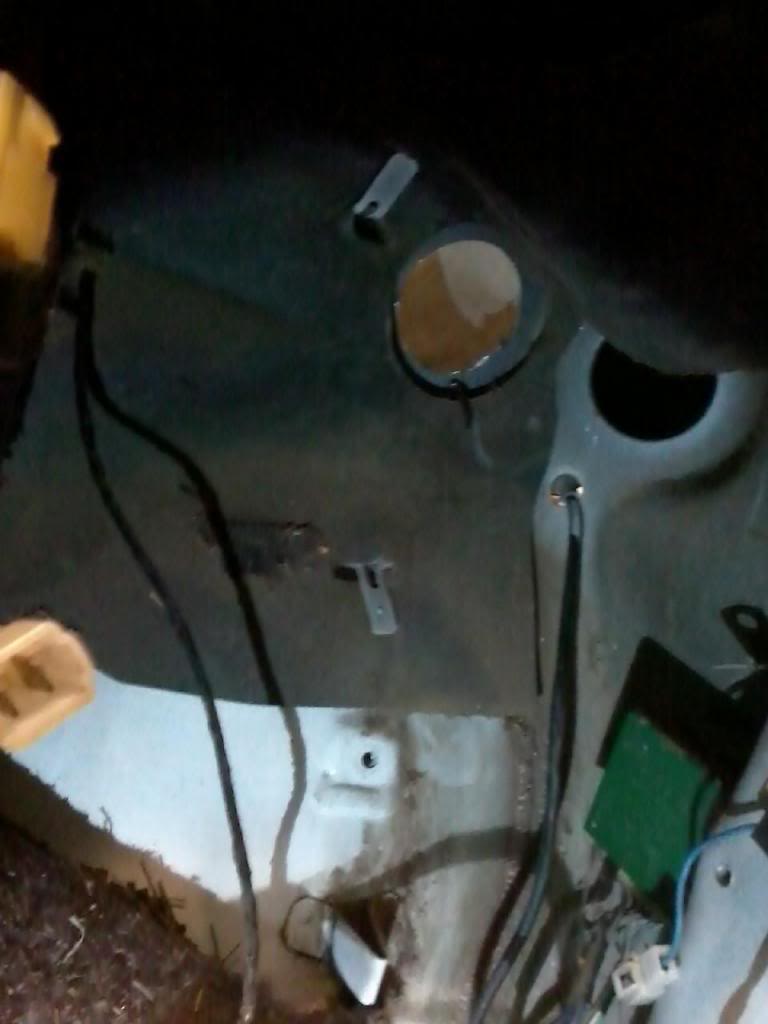
You need to remove 2 bolts that hold the Parking Brake. The cross bar that runs the width of the cab has to be removed to get harness out. It wont fit between the cross bar and firewall.
2 bolts to Parking Brake inside of cab.
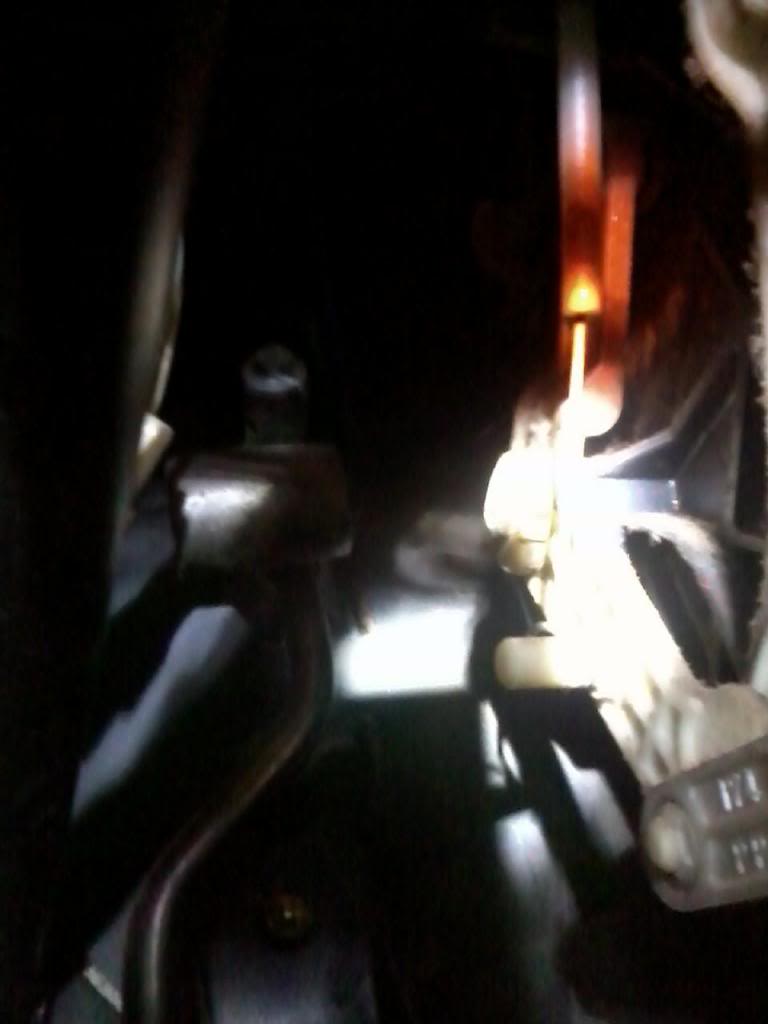
Parking brake under hood on firewall. The 2 nuts on the socket.
I remove the nut and bolt on the passenger side. You can do the 4 bolts that attach to the pillar.
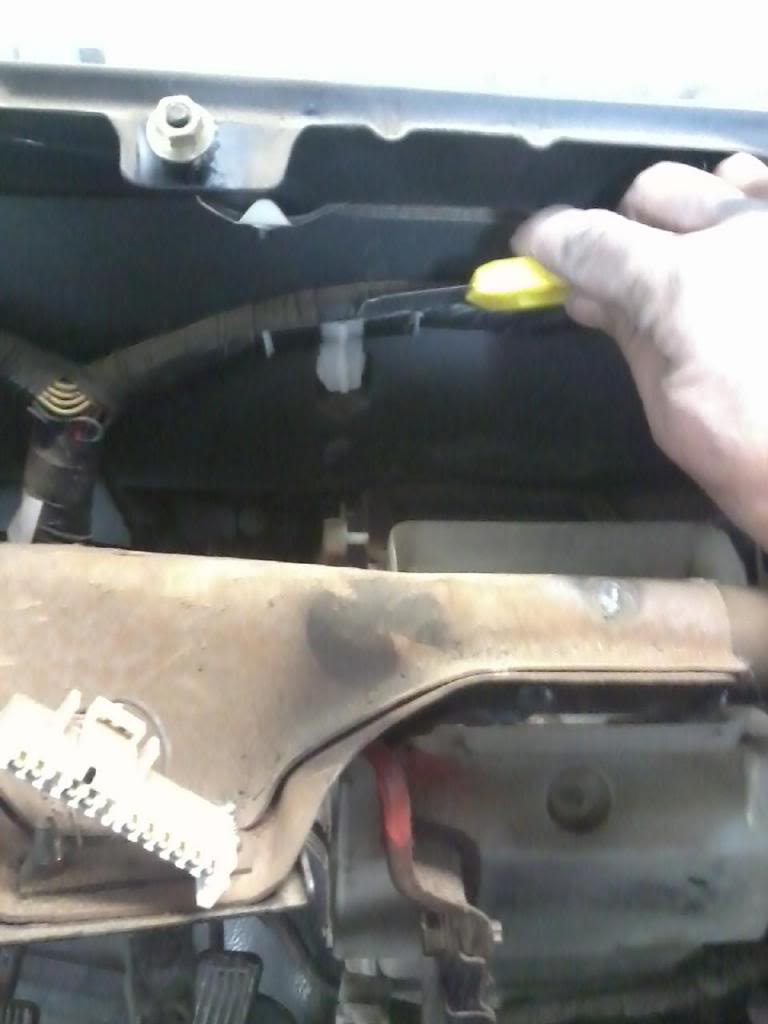
Remove 2 bolts on each of the black brakets.
I keep all of the wiring to the heater and ac components attached to themselves. I may need to switch these out later but will mention it then. Most are interchangeable.
2 bolts on the far left of the picture where my finger is. One bolt is easily missed behind the one I am pointing to. You will need to remove the 3 bolts and 1 nut on the far left of picture that attaches the bar to the pillar.
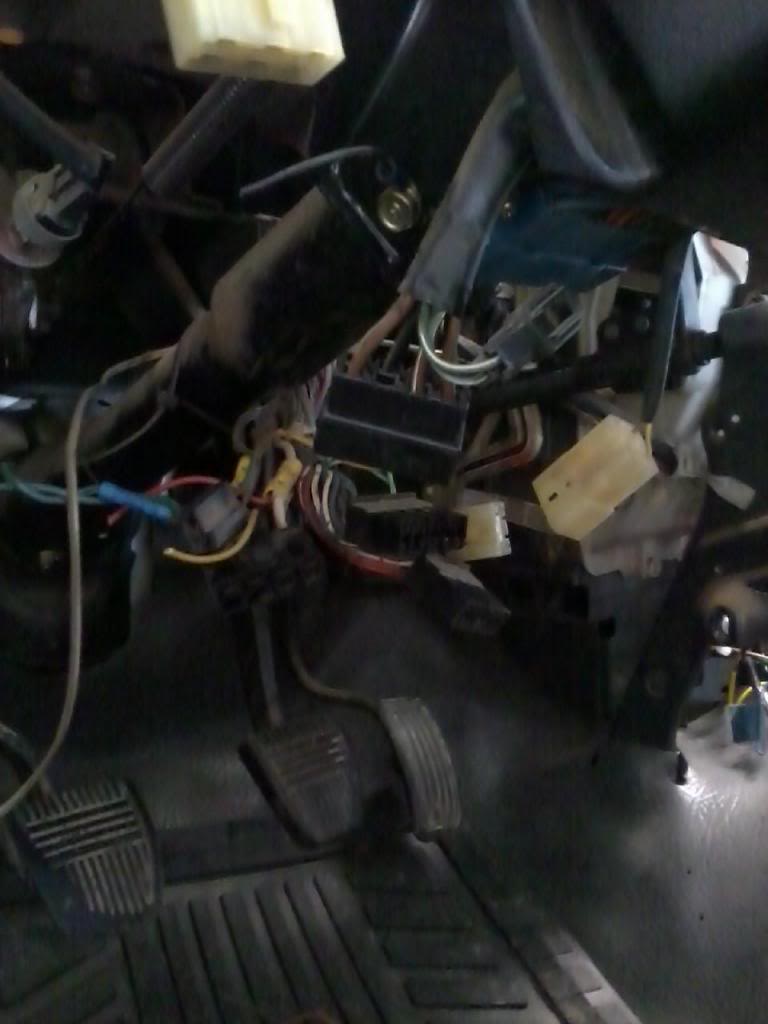
Remove the 2 silver bolts that attach the Steering Column. You could remove Steering Column at this time. I am focusing on wiring at this time.
There are 2 springs. One ot the Clutch Pedal and one to the Brake Pedal. I disconnect them at the cross bar and leave them attached to the pedals.
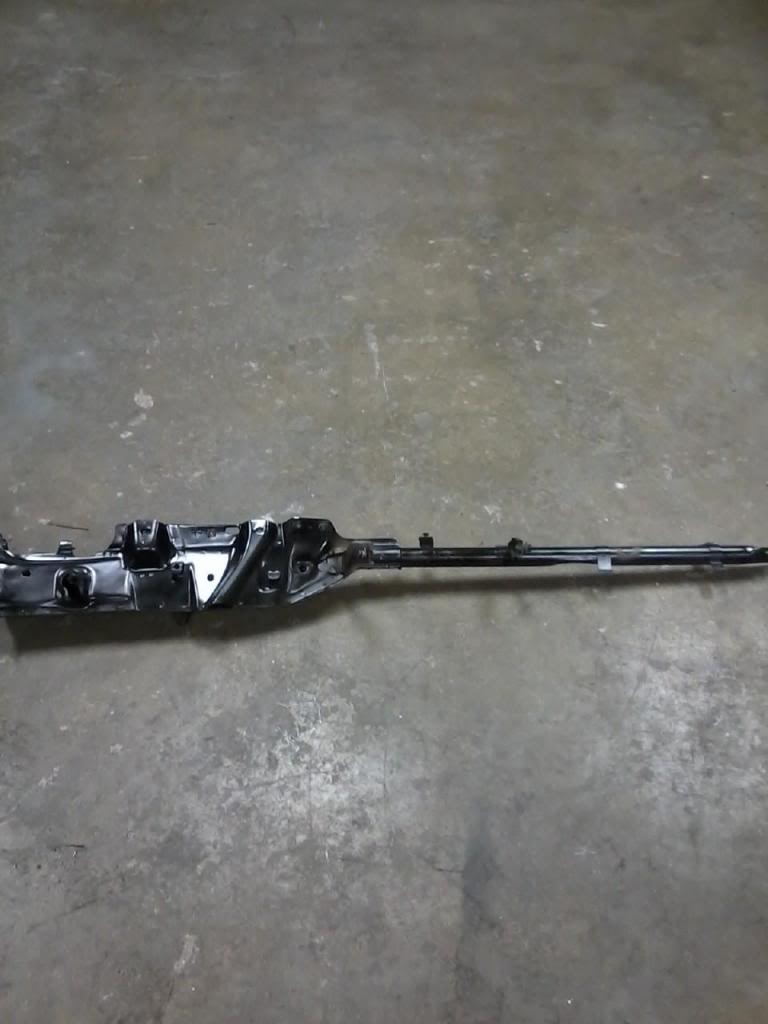
Remove Crossbar.
Remove 1 bolt at the bottom of the Fusebox. Then with your middle finger under the tab, lift up on tab and slide fusebox to passenger side.
2 bolts to Parking Brake inside of cab.

Parking brake under hood on firewall. The 2 nuts on the socket.

I remove the nut and bolt on the passenger side. You can do the 4 bolts that attach to the pillar.

Remove 2 bolts on each of the black brakets.

I keep all of the wiring to the heater and ac components attached to themselves. I may need to switch these out later but will mention it then. Most are interchangeable.

2 bolts on the far left of the picture where my finger is. One bolt is easily missed behind the one I am pointing to. You will need to remove the 3 bolts and 1 nut on the far left of picture that attaches the bar to the pillar.

Remove the 2 silver bolts that attach the Steering Column. You could remove Steering Column at this time. I am focusing on wiring at this time.

There are 2 springs. One ot the Clutch Pedal and one to the Brake Pedal. I disconnect them at the cross bar and leave them attached to the pedals.

Remove Crossbar.

Remove 1 bolt at the bottom of the Fusebox. Then with your middle finger under the tab, lift up on tab and slide fusebox to passenger side.
 03-20-2014, 08:00 AM
#10
Super Moderator
Staff
Thread Starter
iTrader: (1)
Join Date: Aug 2008
Location: Anderson Missouri
Posts: 11,788
Likes: 0
Received 21 Likes
on
19 Posts
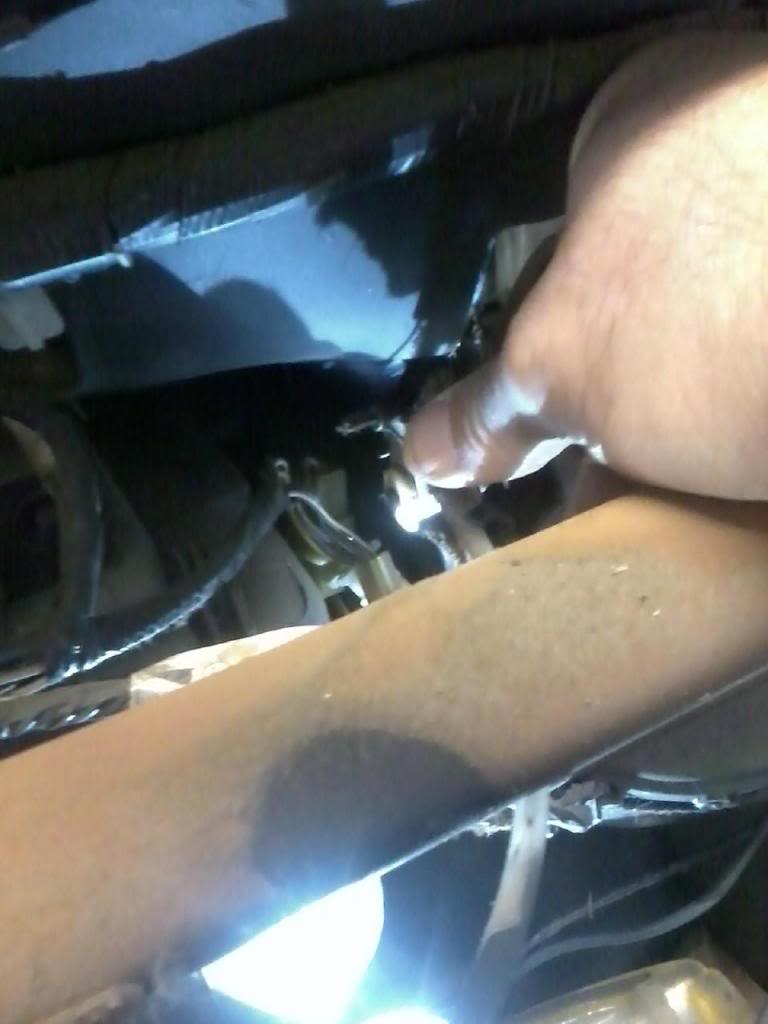
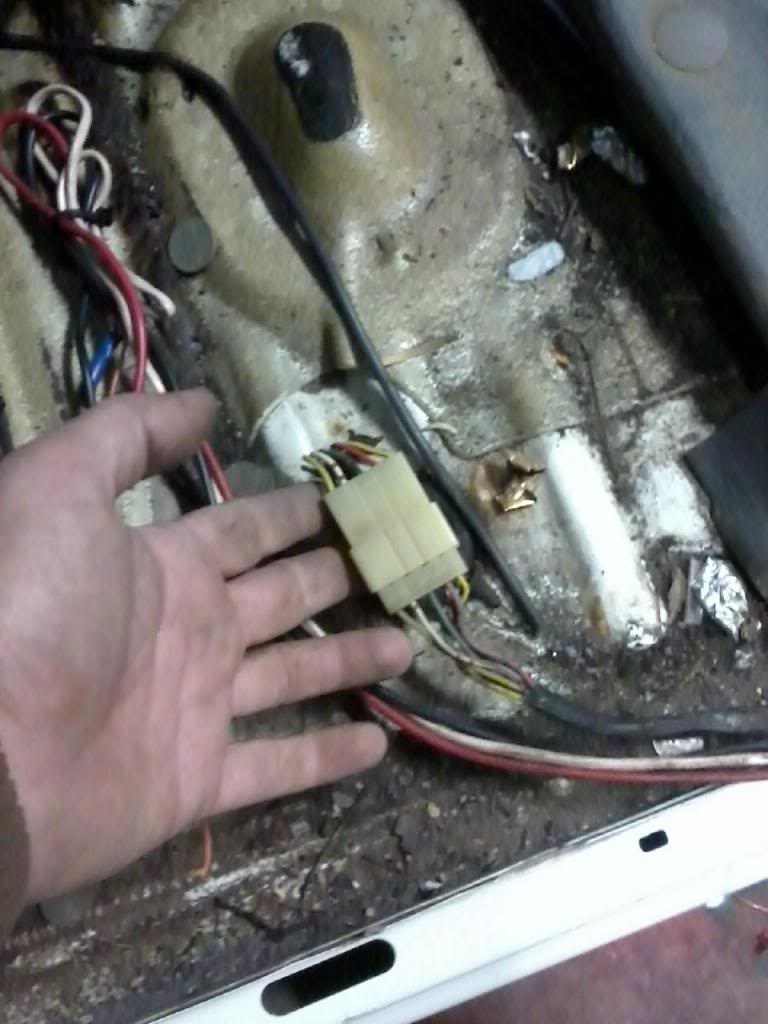
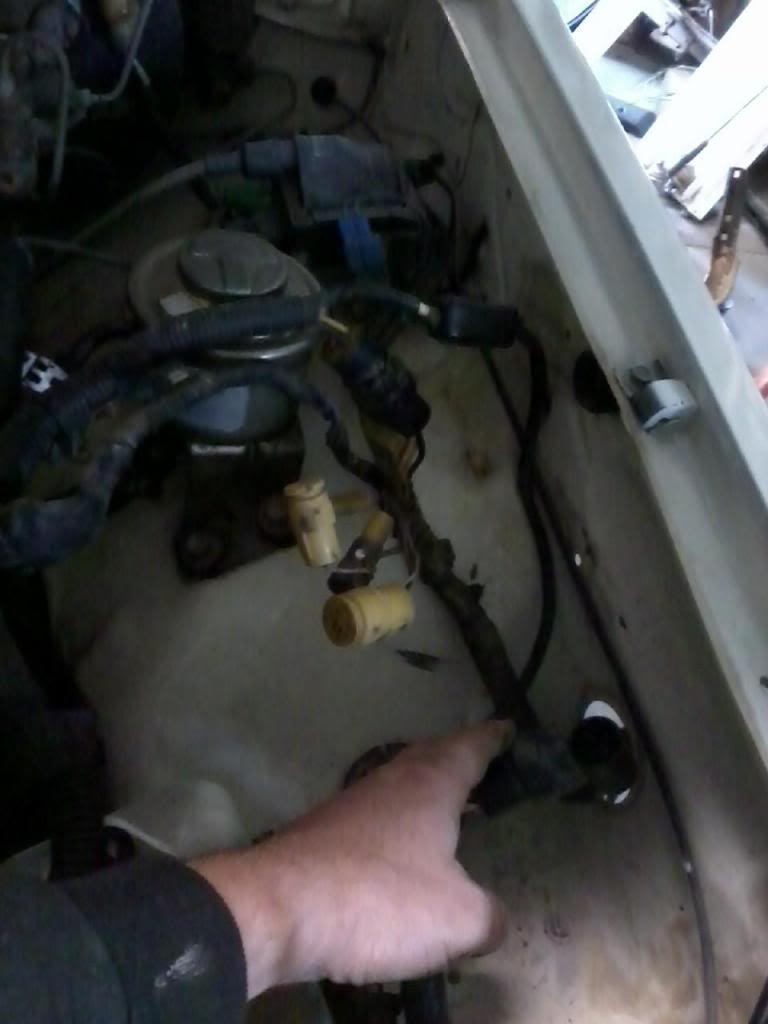
Remove seats. You will need to do this to get access to the plug under the passenger seat. It connect under seat to provide power to the lights and fuel guage. One fuel injected truck, it is power to the fuel pump.
Tail lights, Fuel Guage, and Fuel Pump connector sticking thru bottom of floor. Teh front part of the harness goes with the Main Harness.
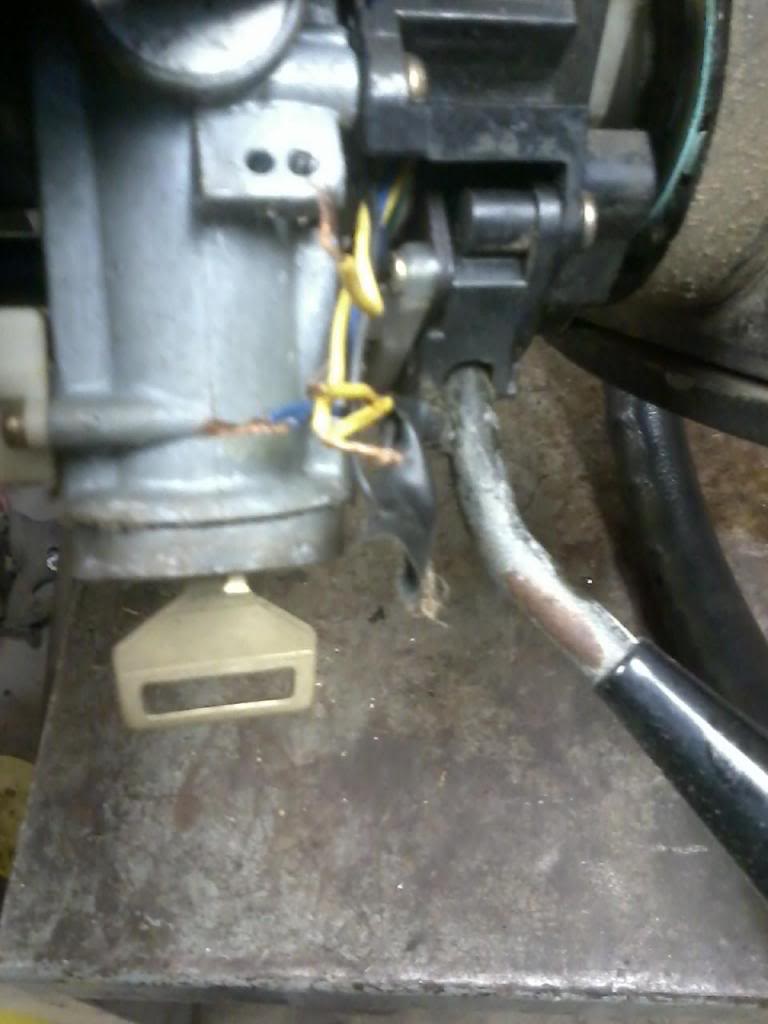
Reason for removing drivers seat is you need access to the seat belt connector. On a truck 88 or newer, it is how you get access to the O2 Sensor. 87 and older the O2 Sensor is in the exhaust manifold.
 03-20-2014, 08:00 AM
#11
Super Moderator
Staff
Thread Starter
iTrader: (1)
Join Date: Aug 2008
Location: Anderson Missouri
Posts: 11,788
Likes: 0
Received 21 Likes
on
19 Posts
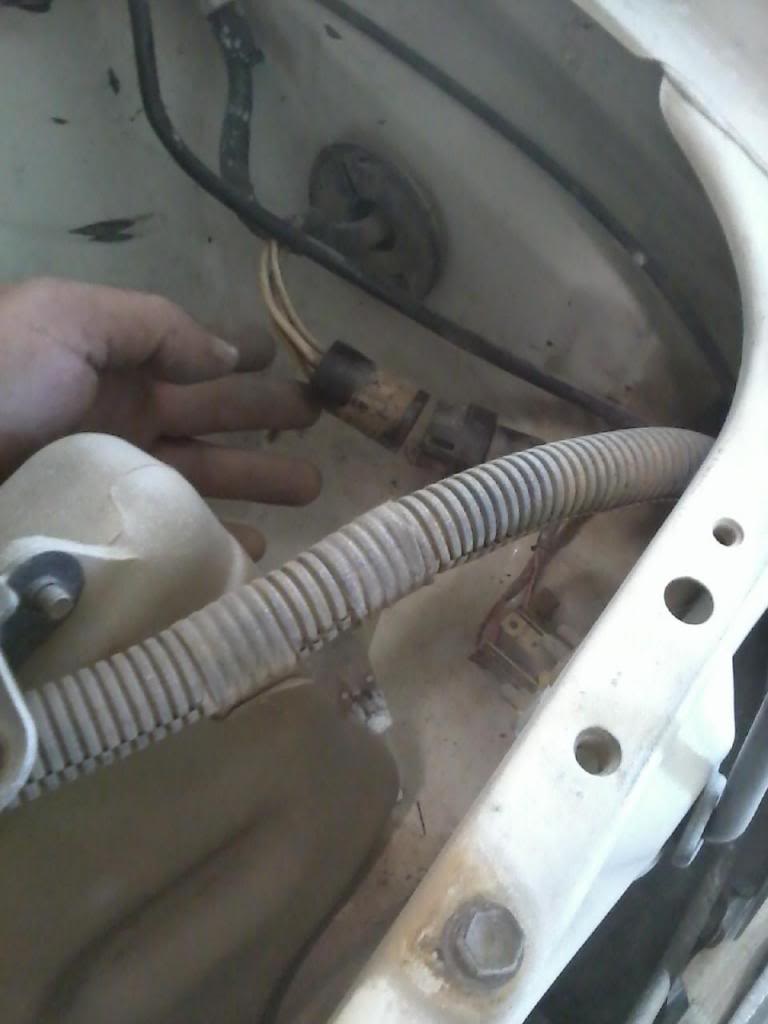
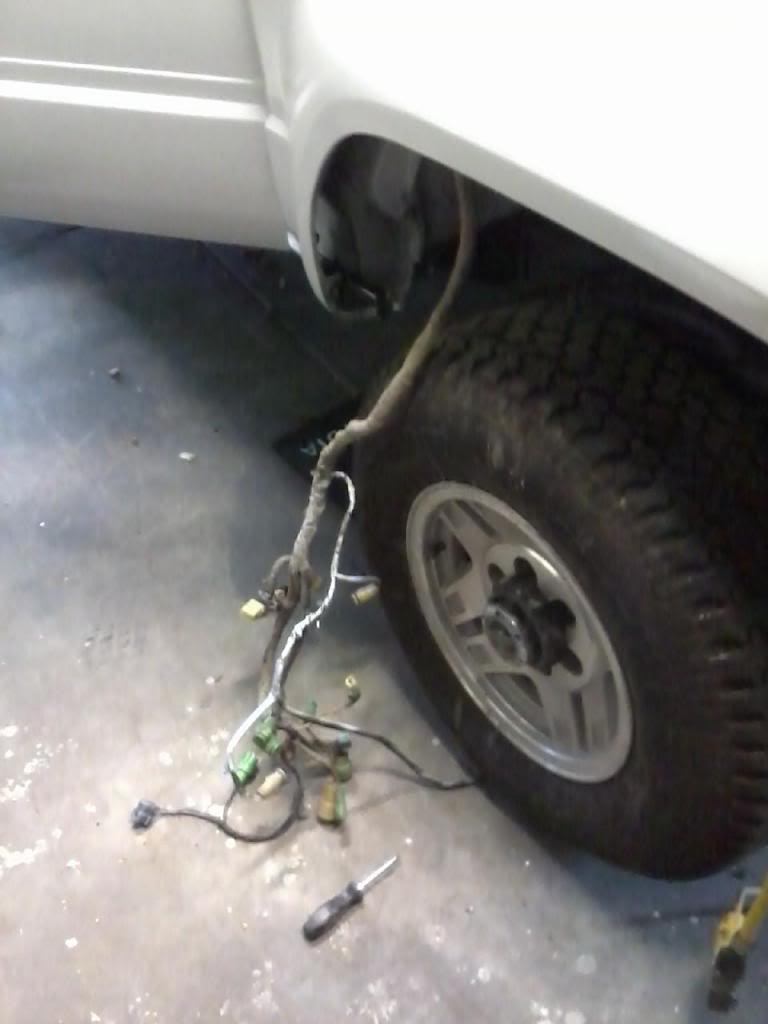
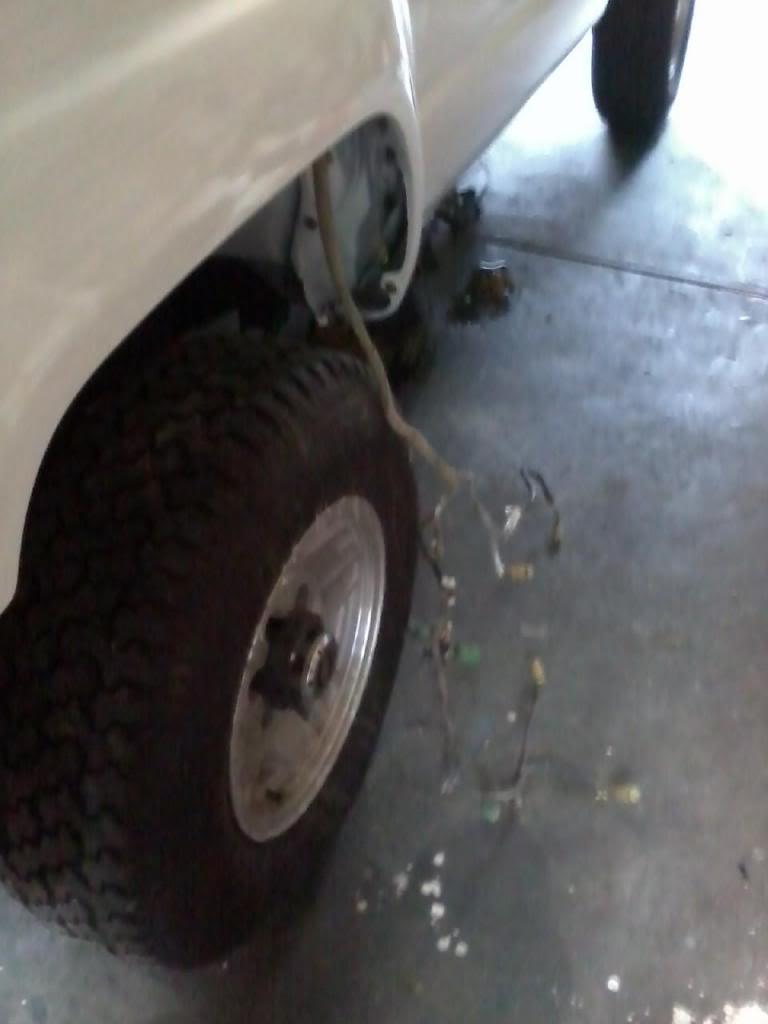
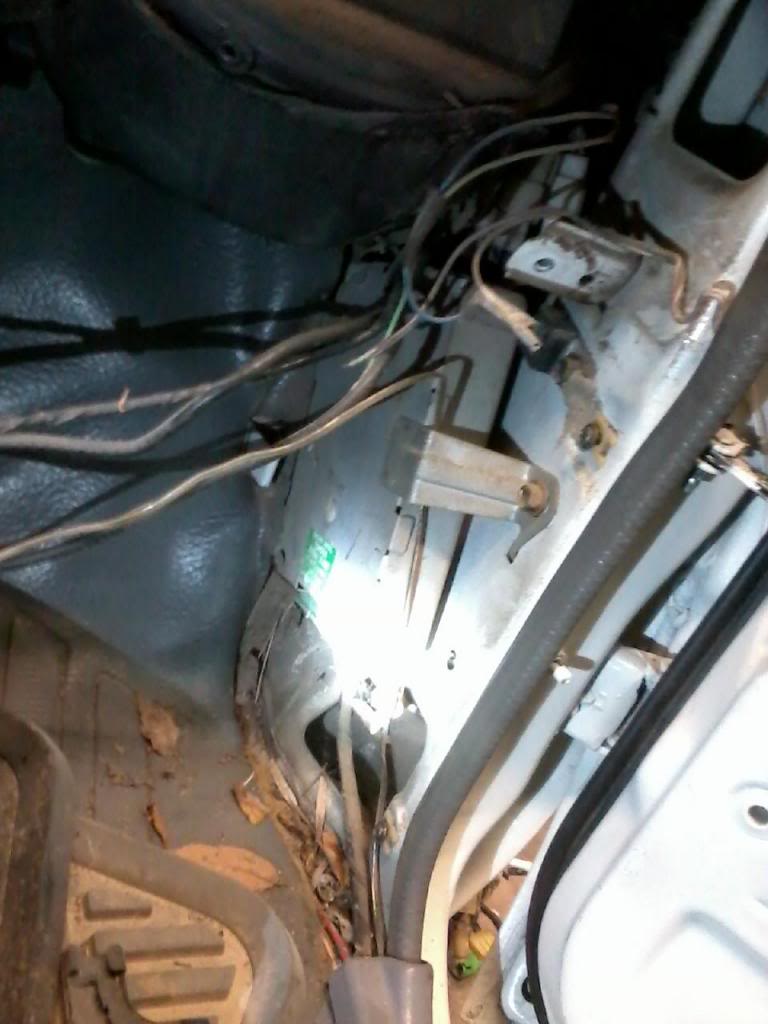
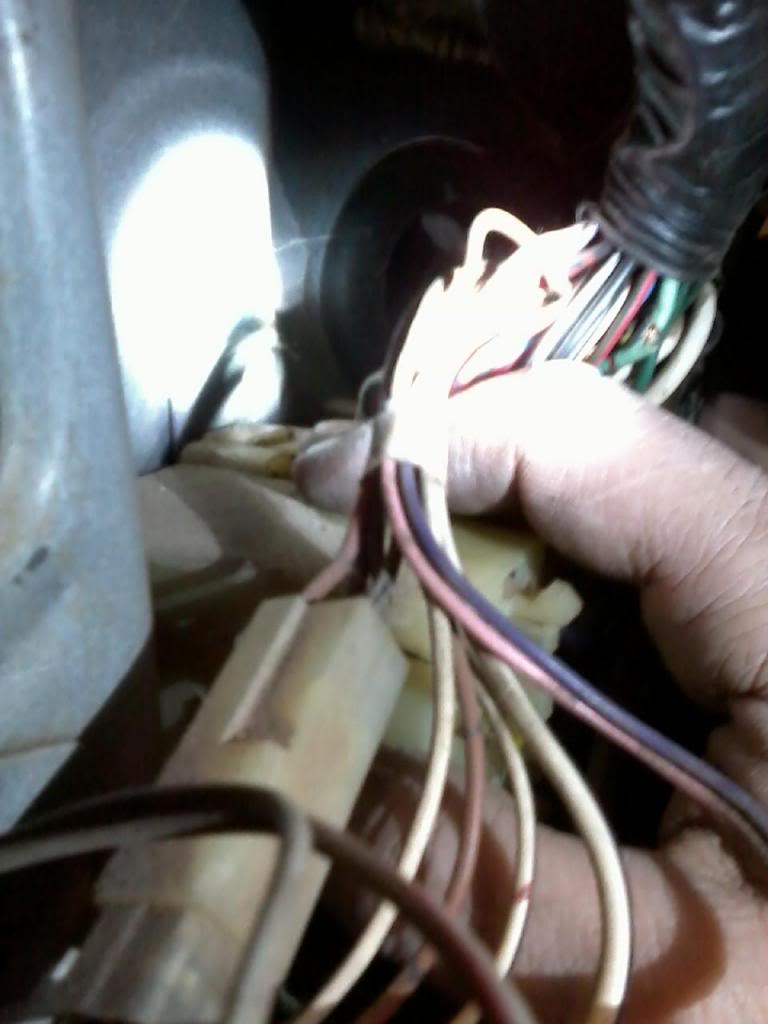
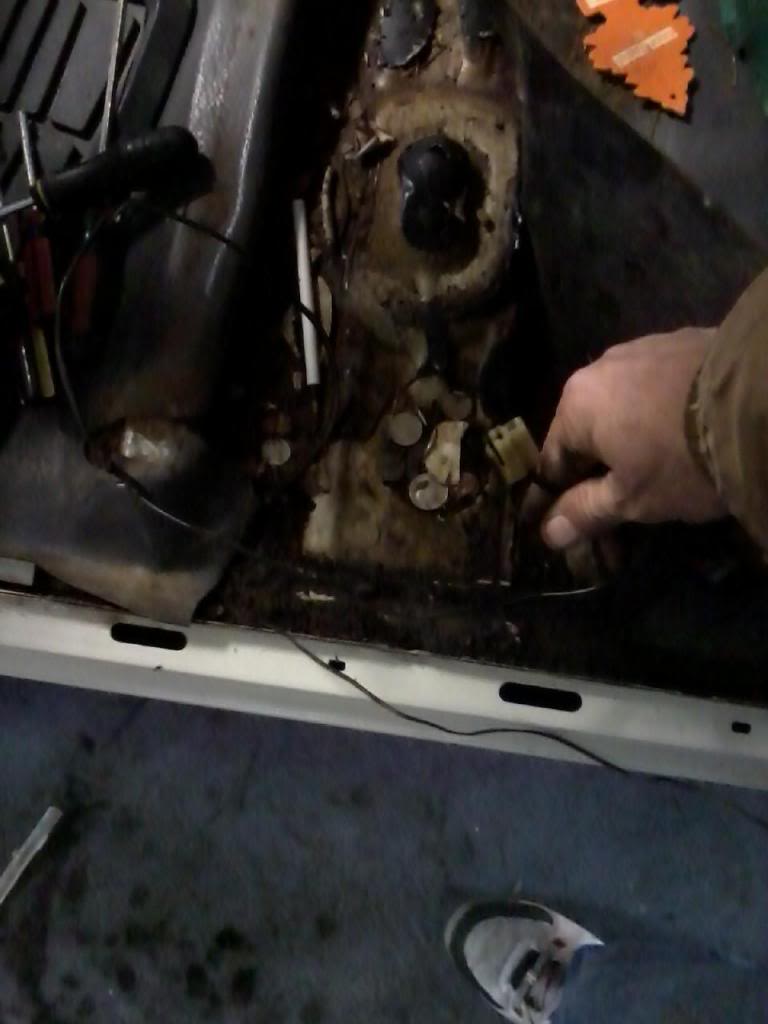
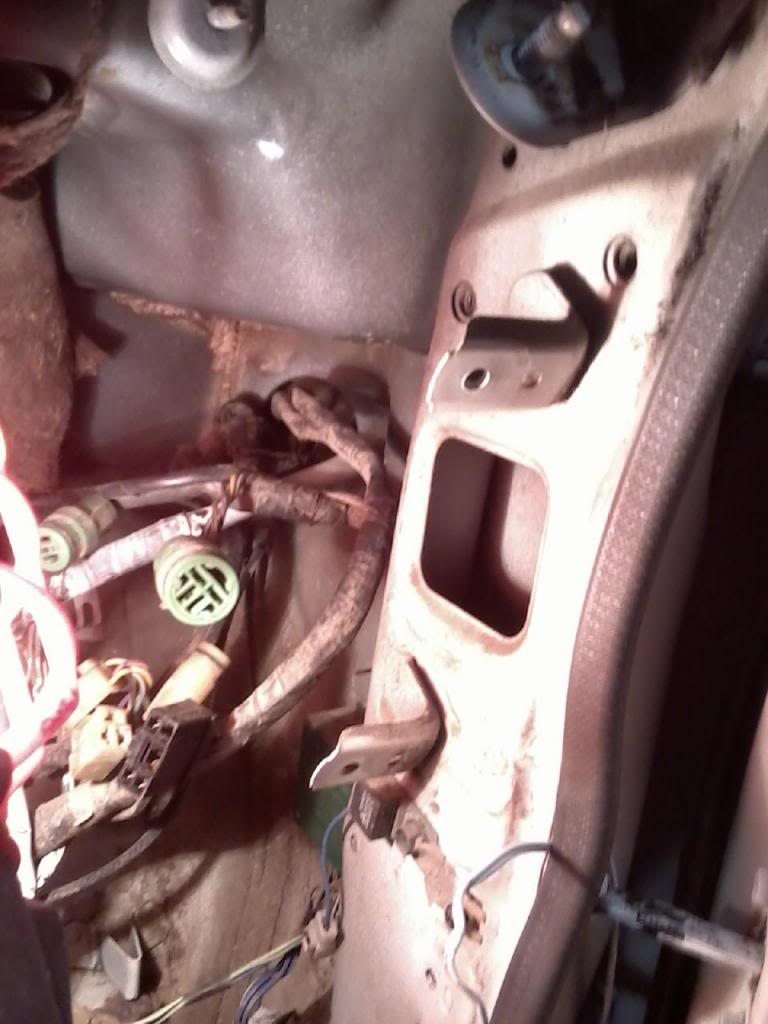
All of these plugs have to go from over the tire, thru the firewall.
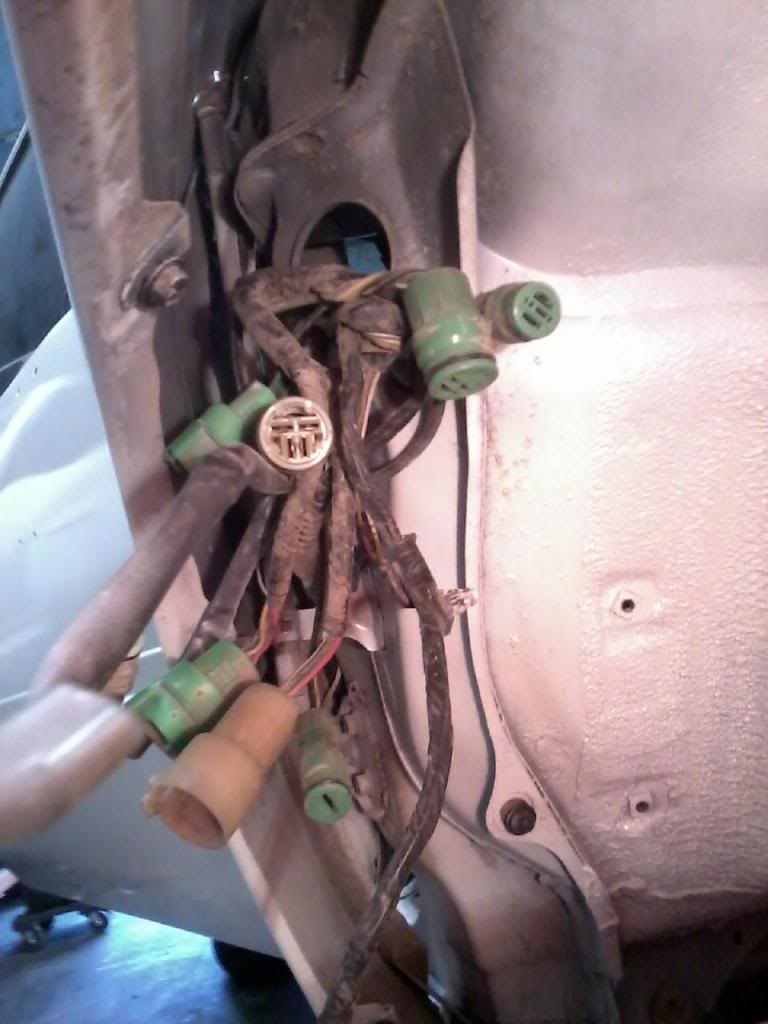
Here I am pulling them from inside of the cab thru the same hole, just a different view.
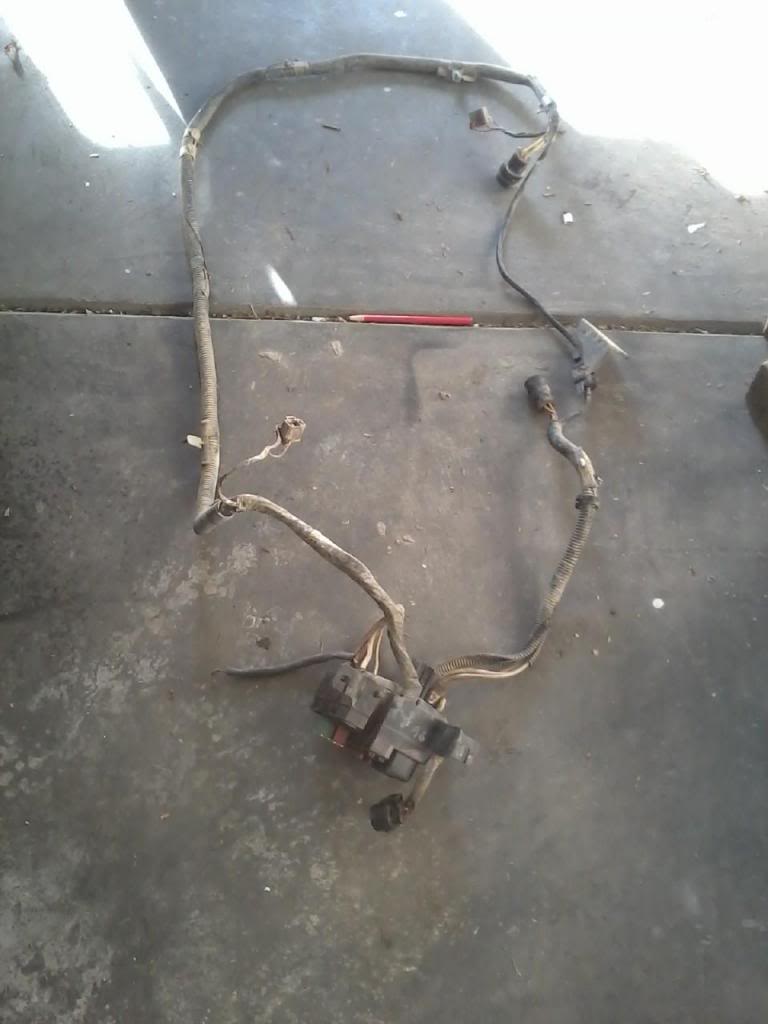
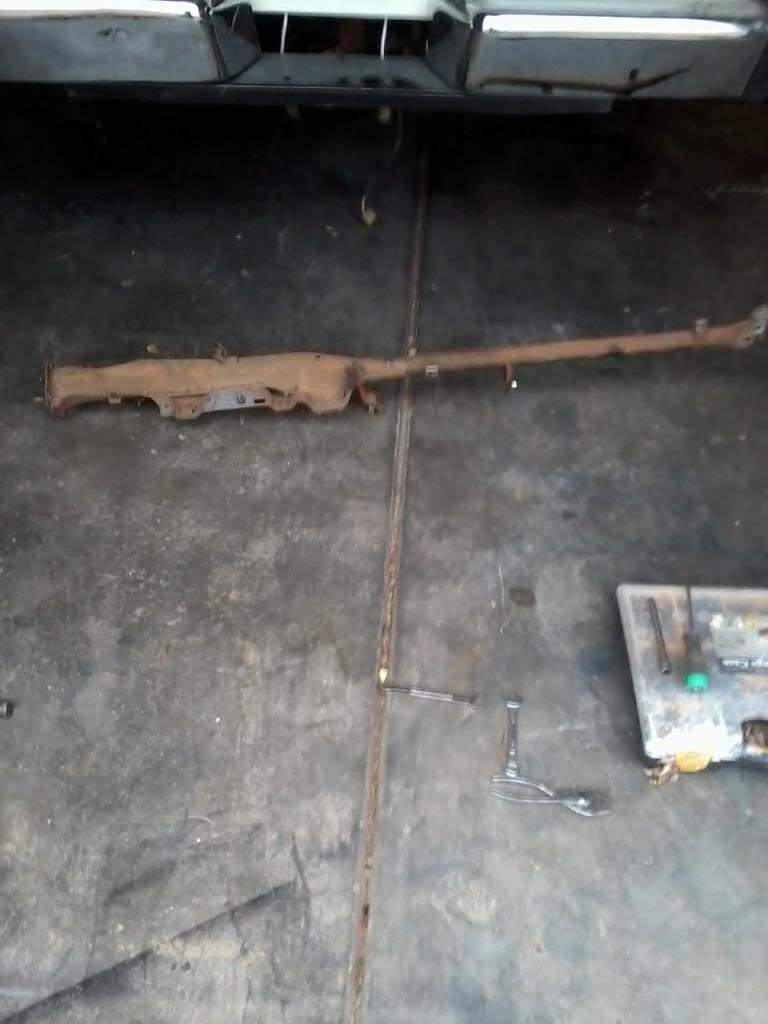
Harness is out.
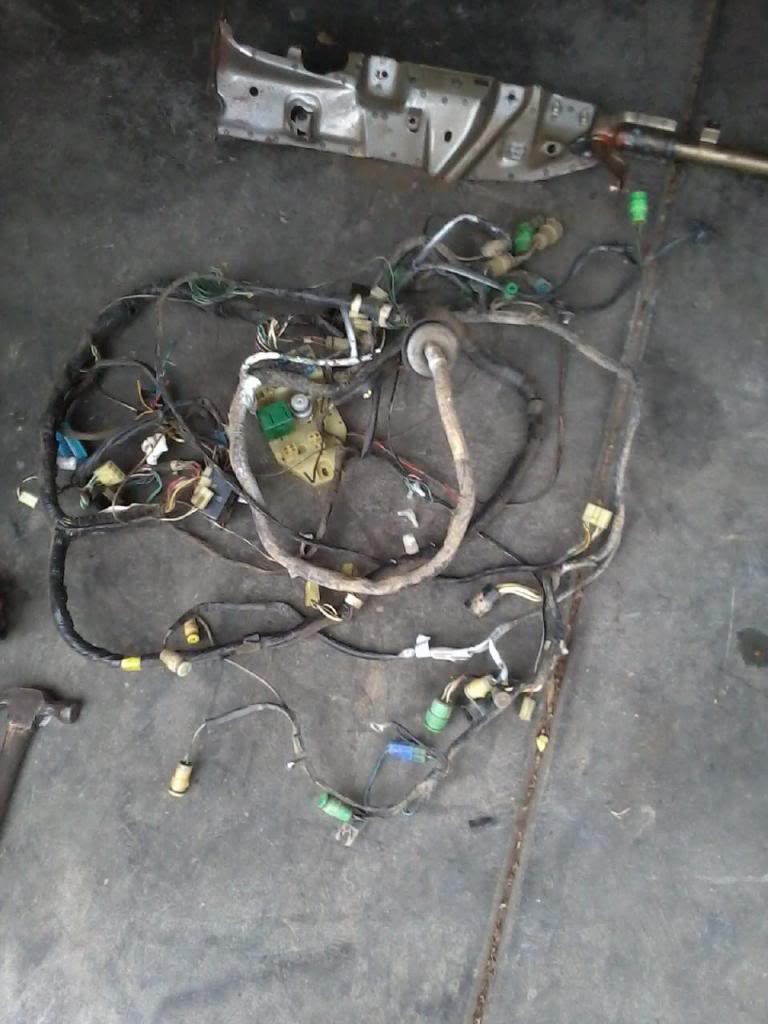
View of Main Harness out. The Fusebox harness is out as well. Still need to remove bed and pull the Taillight,Fuel Guage harness assembly out.

Here I am pulling them from inside of the cab thru the same hole, just a different view.

Harness is out.

View of Main Harness out. The Fusebox harness is out as well. Still need to remove bed and pull the Taillight,Fuel Guage harness assembly out.
 03-20-2014, 08:01 AM
#12
Super Moderator
Staff
Thread Starter
iTrader: (1)
Join Date: Aug 2008
Location: Anderson Missouri
Posts: 11,788
Likes: 0
Received 21 Likes
on
19 Posts
Half of dirt I pulled out of Condenser.
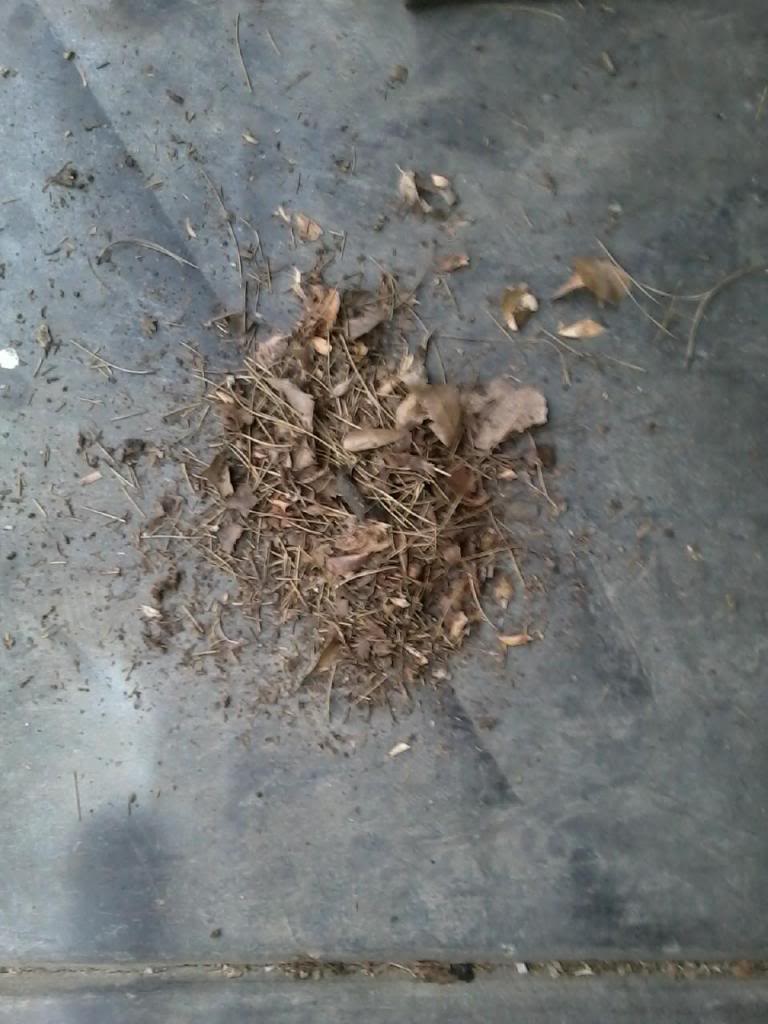
This AC system is charged, so I will just get a vacuum cleaner in there to get the other half out. This is from not having screens in the windshield cowl. Just posting to show what could be some your problem with your AC.

This AC system is charged, so I will just get a vacuum cleaner in there to get the other half out. This is from not having screens in the windshield cowl. Just posting to show what could be some your problem with your AC.
 03-20-2014, 08:01 AM
#13
Super Moderator
Staff
Thread Starter
iTrader: (1)
Join Date: Aug 2008
Location: Anderson Missouri
Posts: 11,788
Likes: 0
Received 21 Likes
on
19 Posts
I measured the Injector Harness hole in my 85. I have several Hole Saws and it was 57mm. I have one but I used my 54mm Hole Saw. I can always go back and remove but you cant add to it as easily. The plugs will go thru as it is anyways. The harness has a rubber boot to seal out the air and to protect the wires.
Hole cut. Wanted to get it cut before putting in the harness. I have heard of people cutting whole harnesses getting it out of order.
Engine Bay side.
It may look like I cut the hole way small, but this is to allow for the seal to sit inside the firewall insulation. Really no good way of explaning the measurements. I used my 85 for all references. If you are going to try something like this, have a truck to refer to nearby.
View from inside of cab.
Hole cut. Wanted to get it cut before putting in the harness. I have heard of people cutting whole harnesses getting it out of order.
Engine Bay side.

It may look like I cut the hole way small, but this is to allow for the seal to sit inside the firewall insulation. Really no good way of explaning the measurements. I used my 85 for all references. If you are going to try something like this, have a truck to refer to nearby.
View from inside of cab.
 03-20-2014, 08:03 AM
#14
Super Moderator
Staff
Thread Starter
iTrader: (1)
Join Date: Aug 2008
Location: Anderson Missouri
Posts: 11,788
Likes: 0
Received 21 Likes
on
19 Posts
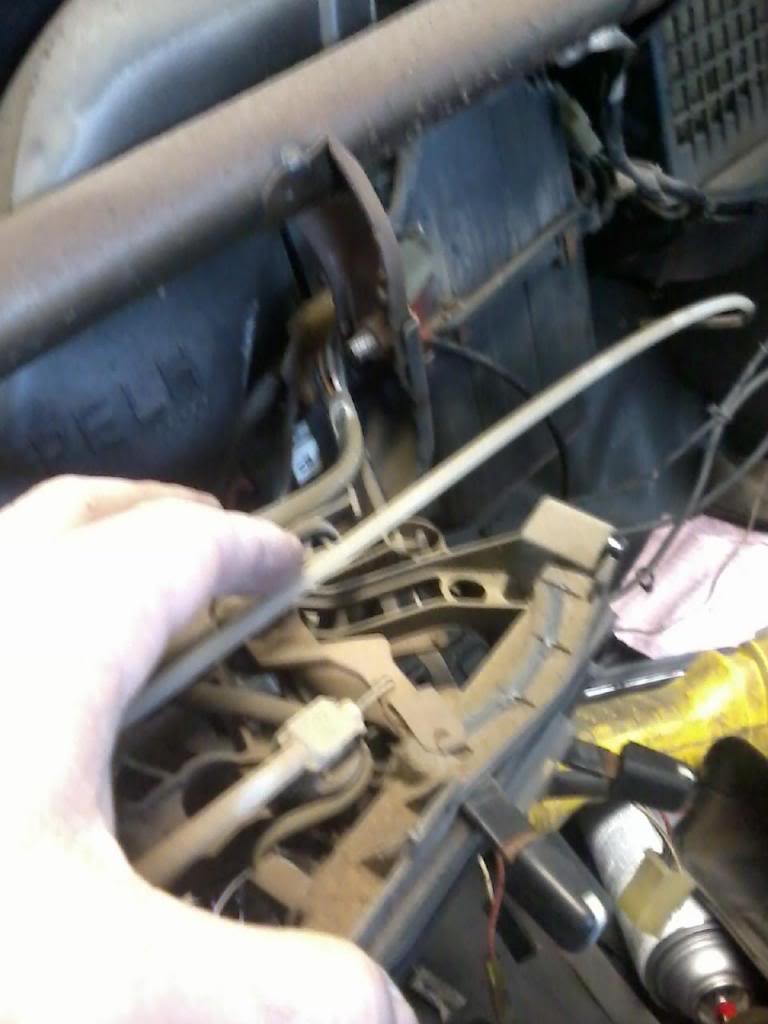
While having the dash out, I am taking care of a few issues. I cleaned an painted the crossbar. I made sure not to cover over my paint marks for the heater cables. That makes a good reference for the cables and makes it alot easier to remember. Some of this is on my threads already, but always new members not knowing of the things below.
Found 2 problems with the Steering Column that I will be putting in. The horn contact is damaged fairly bad. I got a spare colmn that should have the part to fix it. I need to rent a steering wheel puller. I will do that on Monday and pull the wheel. Not showing in the picture to well, but it is far from making contact.

Someone has messed up the wire to the Wiper Control Arm. I will splice and solder back together and see if there are any other problems.
If I have to replace the Combo Switch, here is the part number. Toyota has several different part numbers for these for the different options from what I can tell. They all look the same and will work, just not all options will operate. Been down that road before.
You have to remove these 2 screws and flip it over to get the correct part number.
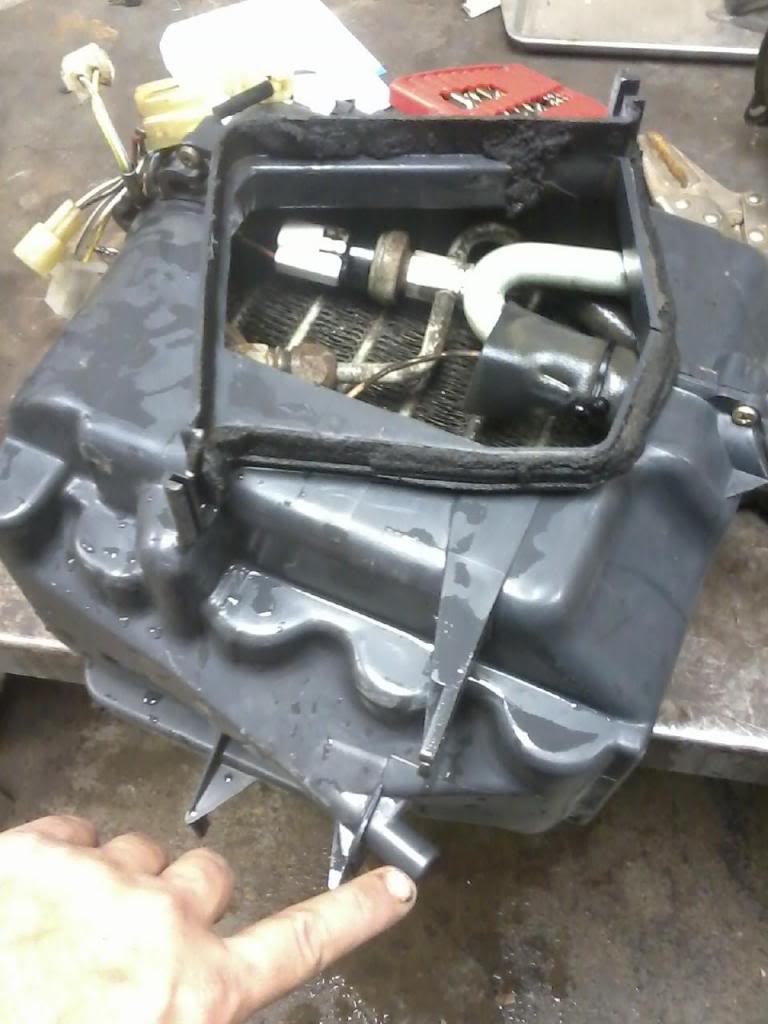
Condenser was dirty. This truck has been well taken care of. It might look like some of the junk trucks I have worked on in the past, but this is common on nice daily drivers as well. It is from not having Vent Screens on the windshield cowl.
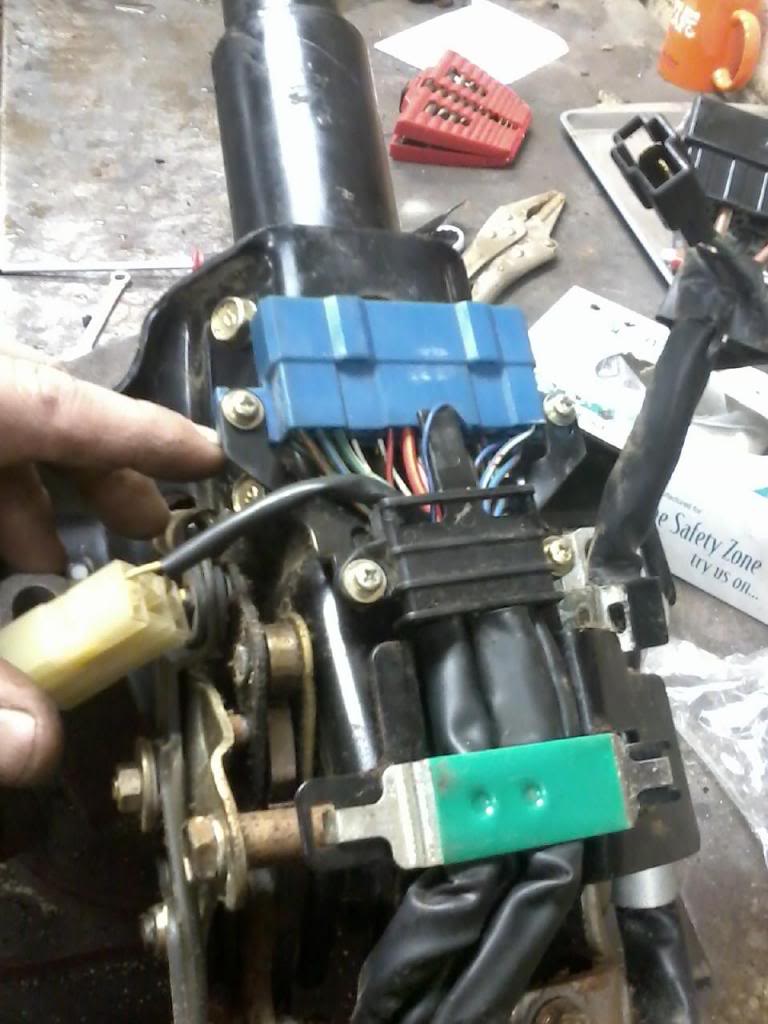
Here is the resistor that controls some speeds for the blower. I havent seen one like this as it is not typical. I wonder if it was someones cheap fix. Mark says he has found replacements on Rockauto for $8. I will be checking that site later today for one.
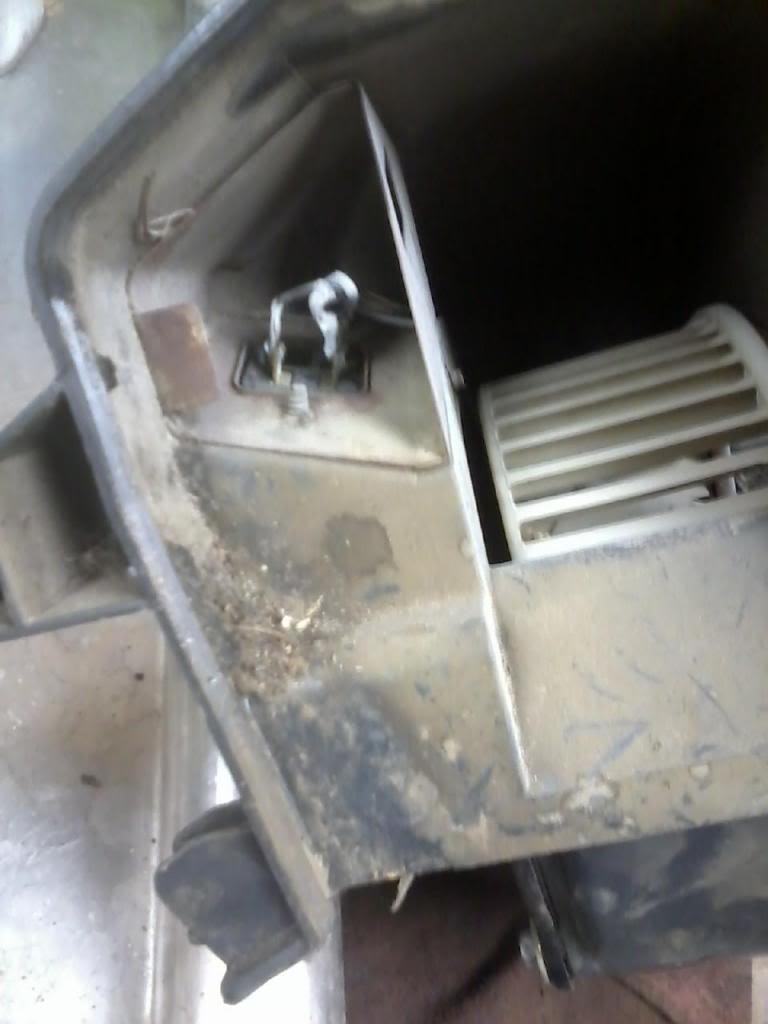
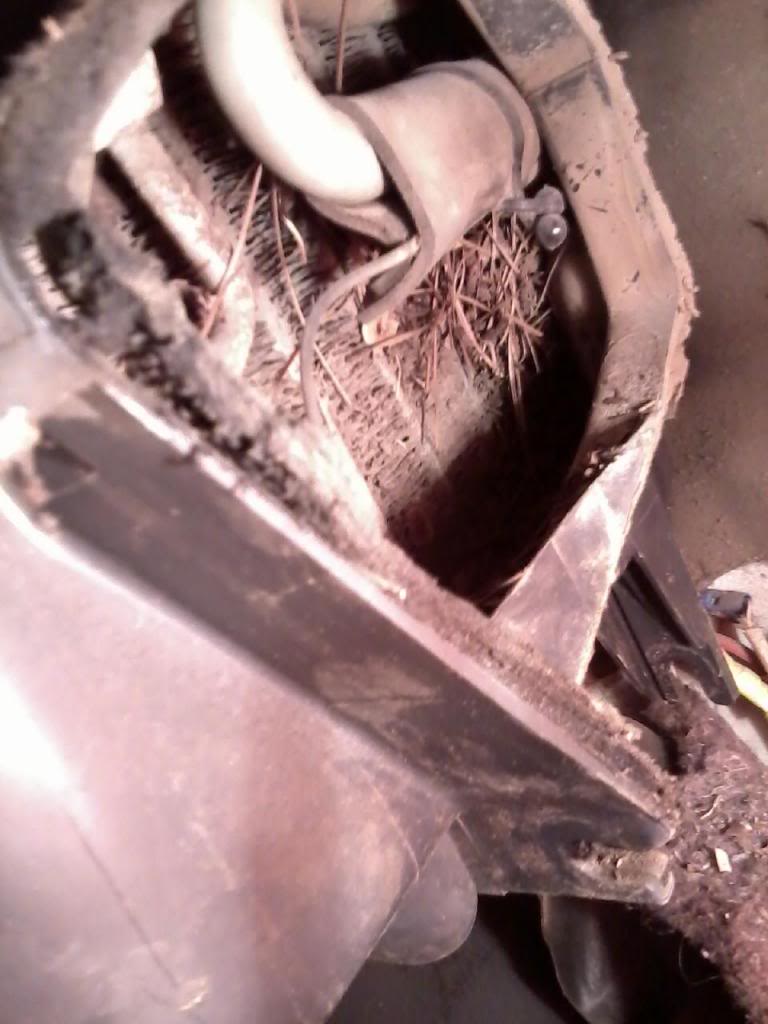
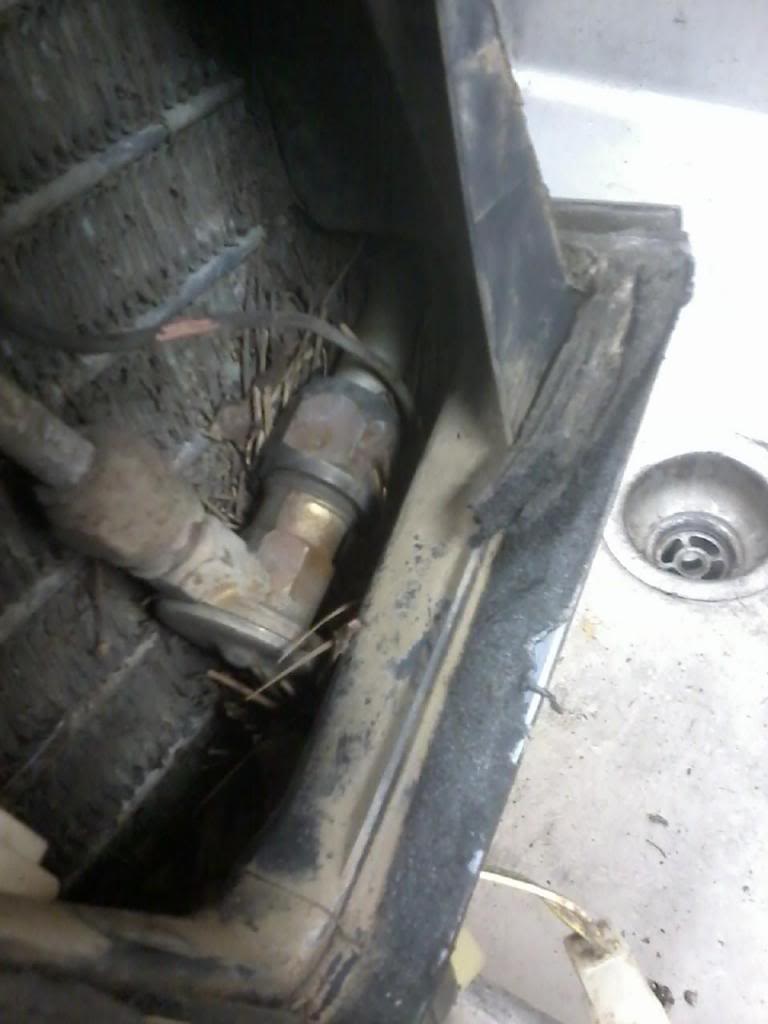
Another common problem of debri getting into the windshield cowl. You can hear the debri alot of times in the blower.
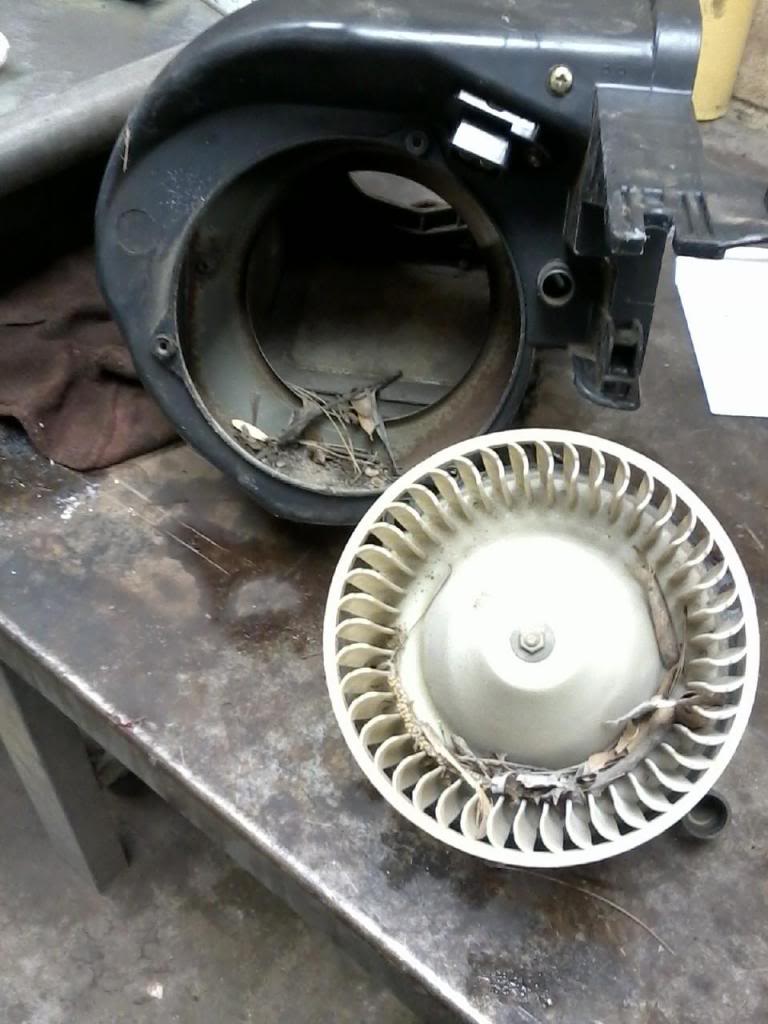
There is alot of dust from the brushes inside the motor. I take an air hose and clean it out. Also cleaned the fan blade assembly.
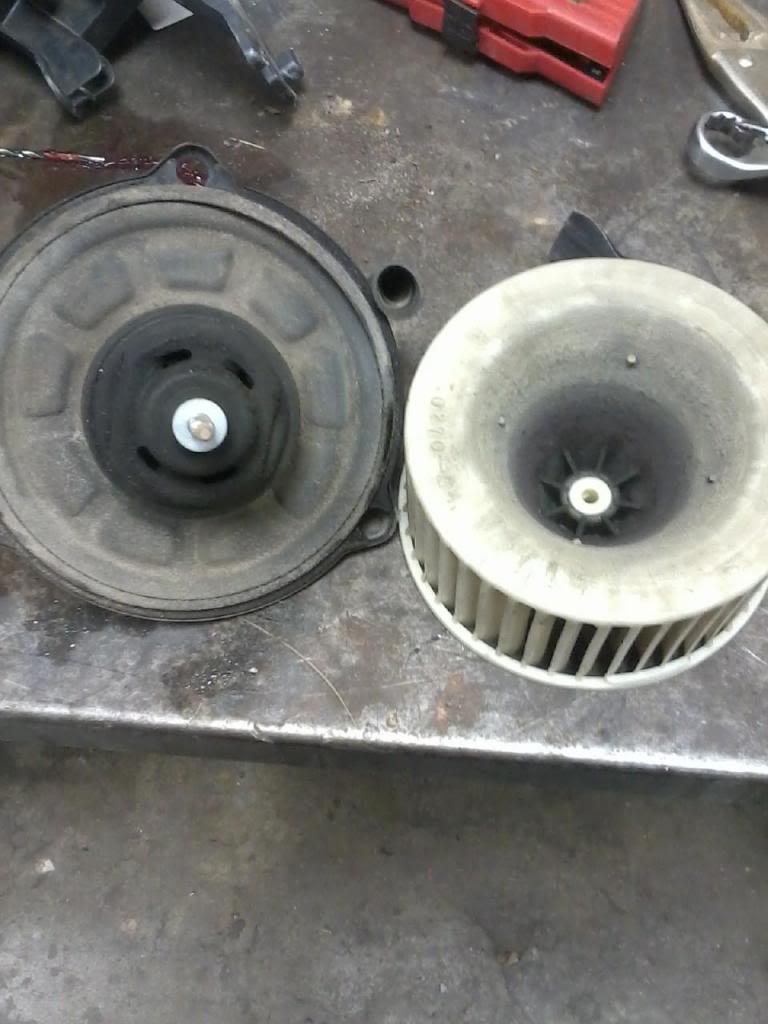
You cant see in the picture, but you can actually see brass windings in there. It was dusty. Nice and clean now.
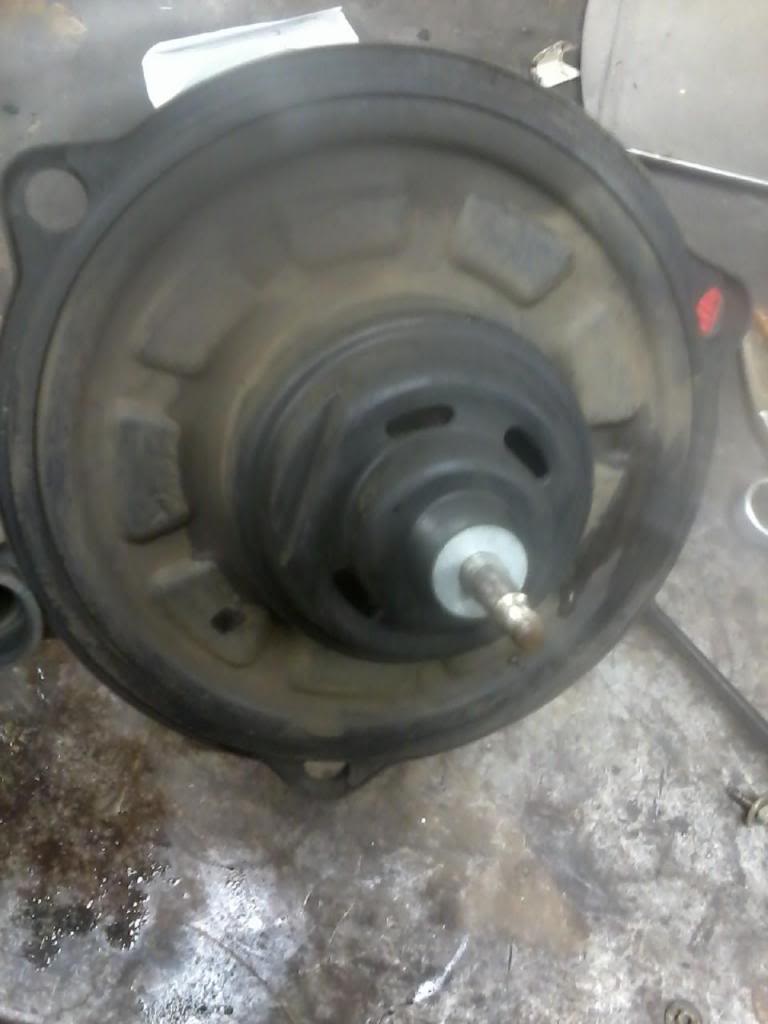
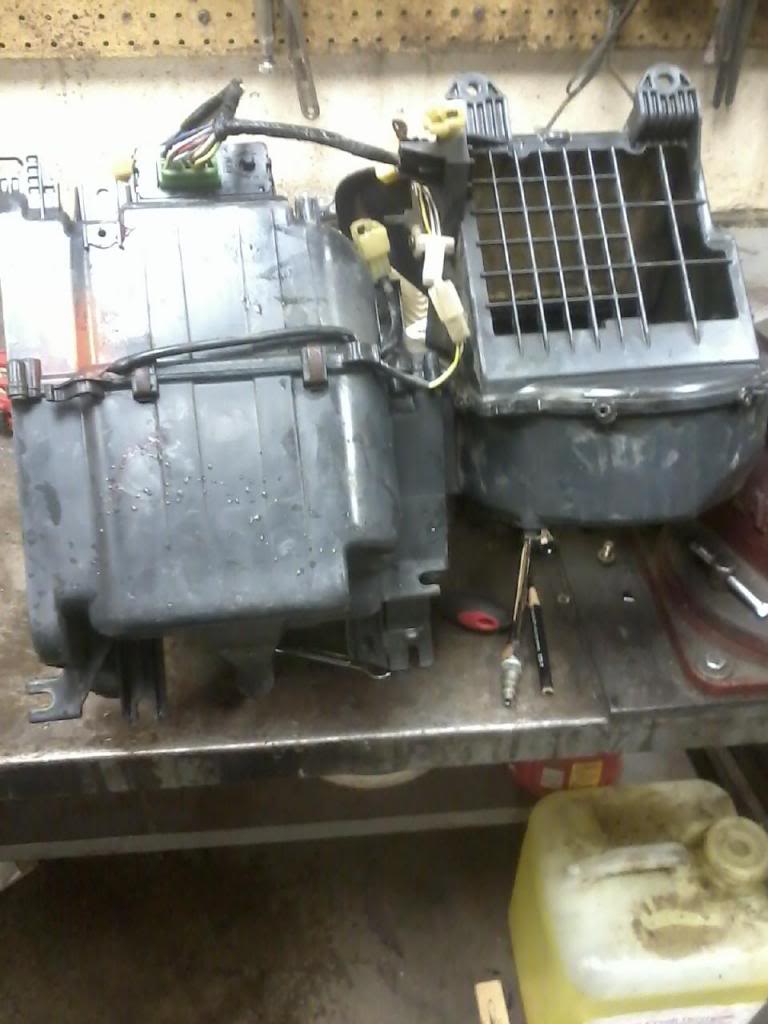
Cleaned the Condenser, make sure drain is clear as well. Washing the condenser wasnt a problem as it is always wet. I soaked the coils in Simple Green and then rinsed with water and an air hose. You can see thru it now.
Here is how it sits in the truck. You can take just the Blower Assembly out by its self, but is difficult. If you pull the AC Condenser out, the Blower comes out so much easier. You will need to recharge the system. I dont know if this truck has been converted from R12 to 134. Will need to look and see about that later. Put Blower in first THEN Condenser.

Found 2 problems with the Steering Column that I will be putting in. The horn contact is damaged fairly bad. I got a spare colmn that should have the part to fix it. I need to rent a steering wheel puller. I will do that on Monday and pull the wheel. Not showing in the picture to well, but it is far from making contact.

Someone has messed up the wire to the Wiper Control Arm. I will splice and solder back together and see if there are any other problems.

If I have to replace the Combo Switch, here is the part number. Toyota has several different part numbers for these for the different options from what I can tell. They all look the same and will work, just not all options will operate. Been down that road before.

You have to remove these 2 screws and flip it over to get the correct part number.

Condenser was dirty. This truck has been well taken care of. It might look like some of the junk trucks I have worked on in the past, but this is common on nice daily drivers as well. It is from not having Vent Screens on the windshield cowl.

Here is the resistor that controls some speeds for the blower. I havent seen one like this as it is not typical. I wonder if it was someones cheap fix. Mark says he has found replacements on Rockauto for $8. I will be checking that site later today for one.

Another common problem of debri getting into the windshield cowl. You can hear the debri alot of times in the blower.

There is alot of dust from the brushes inside the motor. I take an air hose and clean it out. Also cleaned the fan blade assembly.

You cant see in the picture, but you can actually see brass windings in there. It was dusty. Nice and clean now.

Cleaned the Condenser, make sure drain is clear as well. Washing the condenser wasnt a problem as it is always wet. I soaked the coils in Simple Green and then rinsed with water and an air hose. You can see thru it now.

Here is how it sits in the truck. You can take just the Blower Assembly out by its self, but is difficult. If you pull the AC Condenser out, the Blower comes out so much easier. You will need to recharge the system. I dont know if this truck has been converted from R12 to 134. Will need to look and see about that later. Put Blower in first THEN Condenser.
 03-20-2014, 08:05 AM
#15
Super Moderator
Staff
Thread Starter
iTrader: (1)
Join Date: Aug 2008
Location: Anderson Missouri
Posts: 11,788
Likes: 0
Received 21 Likes
on
19 Posts
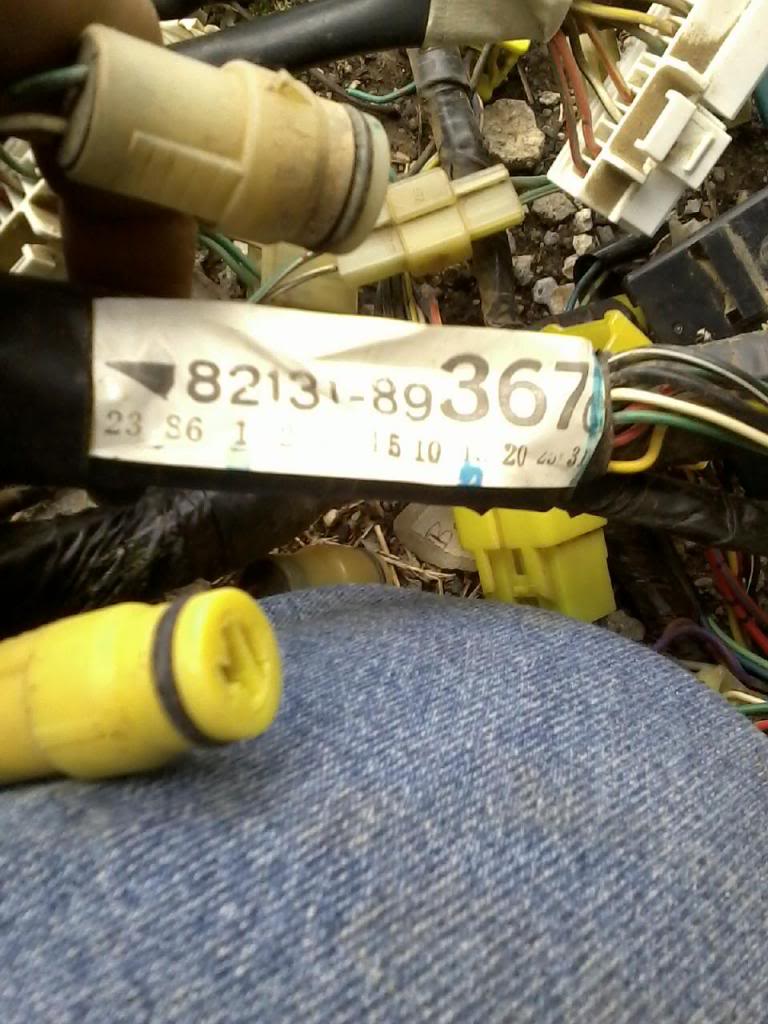
There are 15 different ways to go about and do a conversion. I decided to start installing the main harness. The harness part number is just above the steering column. From what I have seen is each option determines the part number and I have yet to see any two harnesses with the same part number. Here is where I mention about round plugs and flat plugs. 85 and 86 use alot more round plugs.
I started on the drivers side and with the boot I ran the whole harness under the drivers fender up until the boot was reseated to the firewall. Getting all of the plugs thru the hole is a bit of a chore.
Once you get the boot in, I set the fuse box on it mounting tabs and here you can reuse the dome light plug that Toyota has kept the same thru the years. I didnt have to switch that out.
All of the plugs I mentioned earlier have to go thru this hole on the front of the inner fender. All except the blinker connections.
Next I ran the harness along the fender. 86 has the O2 sensor and brake fluid sensor in the same area. This is how to know you have ran it far enough. What I am pointing at is the coil for a 22r. I will swap that out later.
On passenger side, everything forward of the boot goes thru the hole on the right side. That is the one Toyota put in all trucks. The hole on the left is what I made for the injector harness. I cut the hole earlier to prevent me from possibly cutting the harness when installing the harness.
Here is the connection to the tail lights and fuel pump. It will connect but the 22r harness does not have the fuel pump wiring in it so I will have to swap out the tail light and fuel pump harness later on when I get to the fuel system. You have to change from one end of the truck to the next when doing a conversion.

I started on the drivers side and with the boot I ran the whole harness under the drivers fender up until the boot was reseated to the firewall. Getting all of the plugs thru the hole is a bit of a chore.

Once you get the boot in, I set the fuse box on it mounting tabs and here you can reuse the dome light plug that Toyota has kept the same thru the years. I didnt have to switch that out.

All of the plugs I mentioned earlier have to go thru this hole on the front of the inner fender. All except the blinker connections.

Next I ran the harness along the fender. 86 has the O2 sensor and brake fluid sensor in the same area. This is how to know you have ran it far enough. What I am pointing at is the coil for a 22r. I will swap that out later.

On passenger side, everything forward of the boot goes thru the hole on the right side. That is the one Toyota put in all trucks. The hole on the left is what I made for the injector harness. I cut the hole earlier to prevent me from possibly cutting the harness when installing the harness.

Here is the connection to the tail lights and fuel pump. It will connect but the 22r harness does not have the fuel pump wiring in it so I will have to swap out the tail light and fuel pump harness later on when I get to the fuel system. You have to change from one end of the truck to the next when doing a conversion.
 03-20-2014, 08:05 AM
#16
Super Moderator
Staff
Thread Starter
iTrader: (1)
Join Date: Aug 2008
Location: Anderson Missouri
Posts: 11,788
Likes: 0
Received 21 Likes
on
19 Posts
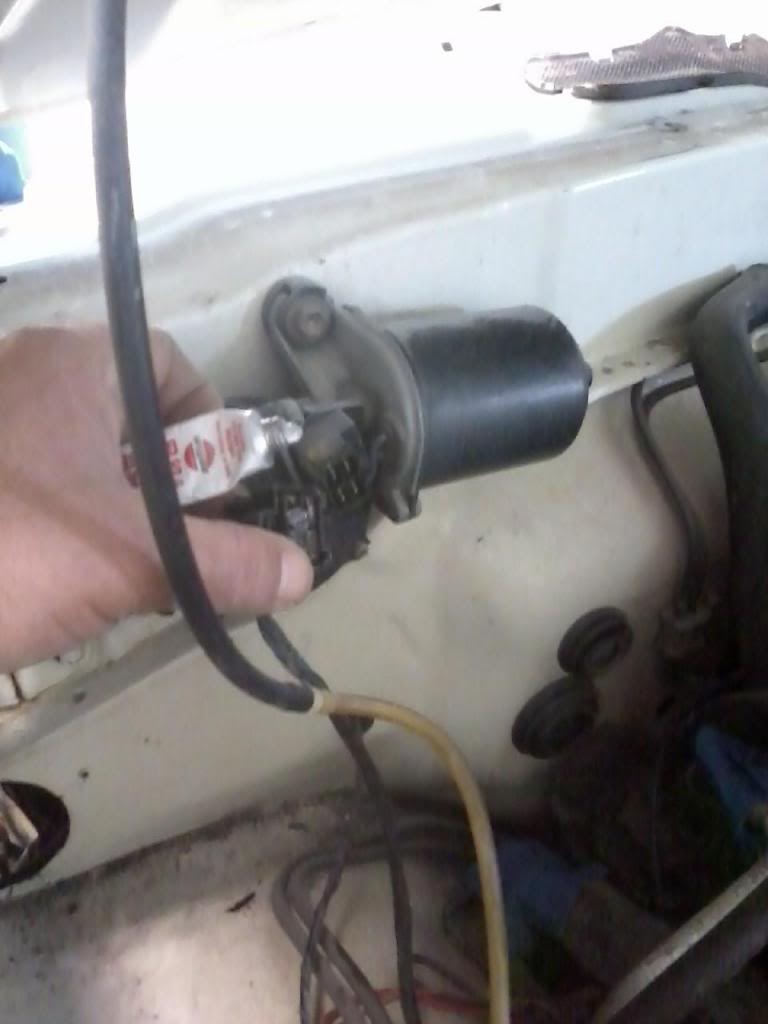
Here I ran the wiring up to the windshield wiper motor. I know the wires are mostly blue and here is a difference between 85 and 86 and newer. The wiper connector is round and the exact same plug as the Starter Relay on an 85. This will get all of the other connections in a place to where they need to be.

I have done alot of this earlier but putting up more just as a reminder that helps these old trucks. Put some dielectric grease on all of your connections when making them.
Here I am connecting the washer fluid bottle and plugs are in close proximity to where the need to be. 86 has a round plug for washer bottle, 87 and newer has a flat plug but same wiring color.

I have done alot of this earlier but putting up more just as a reminder that helps these old trucks. Put some dielectric grease on all of your connections when making them.

Here I am connecting the washer fluid bottle and plugs are in close proximity to where the need to be. 86 has a round plug for washer bottle, 87 and newer has a flat plug but same wiring color.
 03-20-2014, 08:06 AM
#17
Super Moderator
Staff
Thread Starter
iTrader: (1)
Join Date: Aug 2008
Location: Anderson Missouri
Posts: 11,788
Likes: 0
Received 21 Likes
on
19 Posts
I got the head light harness installed. The brown tab goes in the center. You hav to swap the headlight harness as one problem I have seen helping someone else is the way the white wire that goes from the alternator to the fuse box and contiunes on to the heater blower connects in a different area.

Just showing some more connections. They are fool proof.
Toyota loves their grounds. I take a wire brush and get all of the corrosion off of the terminals and where they get grounded to. This one is mounted to the inner fender.
Installed Coil and Igniter.
This surprised me. Usually Toyota has all of the screw holes punched out. I will need to drill the holes out for the air box. I also do a test fitting before installing it. I learned something today that not all holes are pre punched. Will clean box up and drill holes later. You cant really see it in picture but the hole for the mounting tabs are there.
I also installed the Starter Relay and the Injector Resistor. Install the Starter Relay first as the Injector Resistor over laps the Relays tab.

Just showing some more connections. They are fool proof.

Toyota loves their grounds. I take a wire brush and get all of the corrosion off of the terminals and where they get grounded to. This one is mounted to the inner fender.

Installed Coil and Igniter.

This surprised me. Usually Toyota has all of the screw holes punched out. I will need to drill the holes out for the air box. I also do a test fitting before installing it. I learned something today that not all holes are pre punched. Will clean box up and drill holes later. You cant really see it in picture but the hole for the mounting tabs are there.

I also installed the Starter Relay and the Injector Resistor. Install the Starter Relay first as the Injector Resistor over laps the Relays tab.
 03-20-2014, 08:09 AM
#18
Super Moderator
Staff
Thread Starter
iTrader: (1)
Join Date: Aug 2008
Location: Anderson Missouri
Posts: 11,788
Likes: 0
Received 21 Likes
on
19 Posts
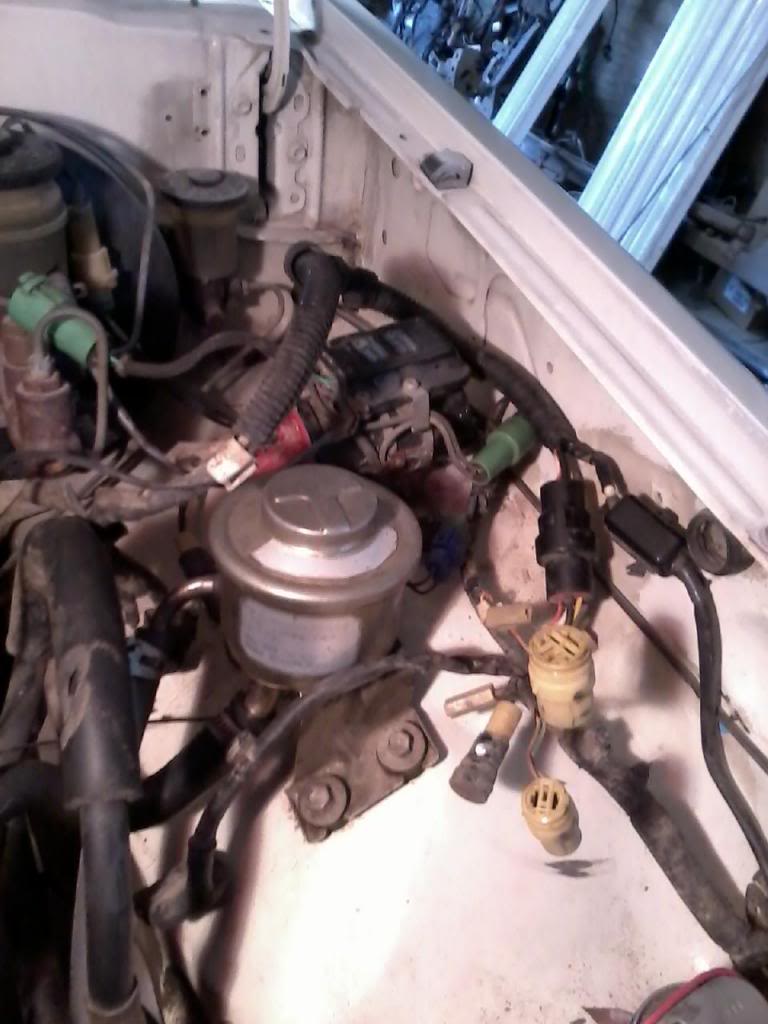
Remove 2 bolts holding on Fuel Pump.
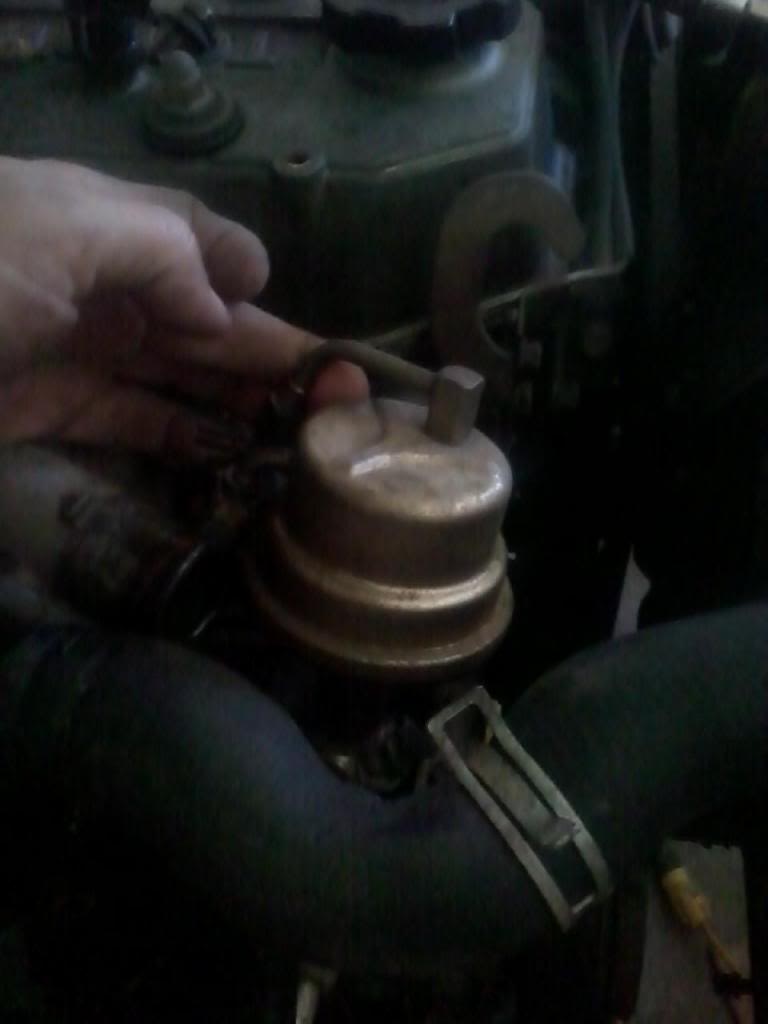
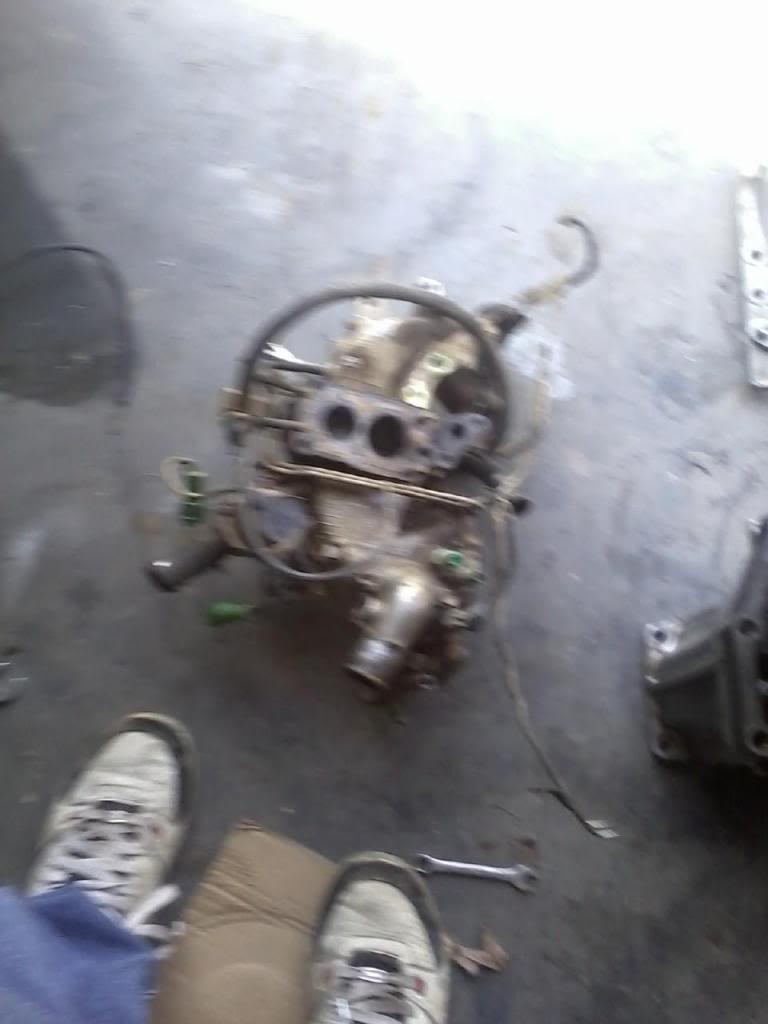
Here is the Carburator off. I tried to leave as many hoses hooked up so the next guy wont have to figure out what will need to be hooked up. A Webber is just a better carburator all the way around on a 22r truck. Dear Toyota.. Could you possibly added any more lines and made this carburator and intake any more complicated? It isnt quite that bad but it is a slow process to remove. I tried to remove the carburator still mounted on the intake and was unable to get to all of the intake bolts.

Here is the Carburator off. I tried to leave as many hoses hooked up so the next guy wont have to figure out what will need to be hooked up. A Webber is just a better carburator all the way around on a 22r truck. Dear Toyota.. Could you possibly added any more lines and made this carburator and intake any more complicated? It isnt quite that bad but it is a slow process to remove. I tried to remove the carburator still mounted on the intake and was unable to get to all of the intake bolts.
 03-20-2014, 08:09 AM
#19
Super Moderator
Staff
Thread Starter
iTrader: (1)
Join Date: Aug 2008
Location: Anderson Missouri
Posts: 11,788
Likes: 0
Received 21 Likes
on
19 Posts
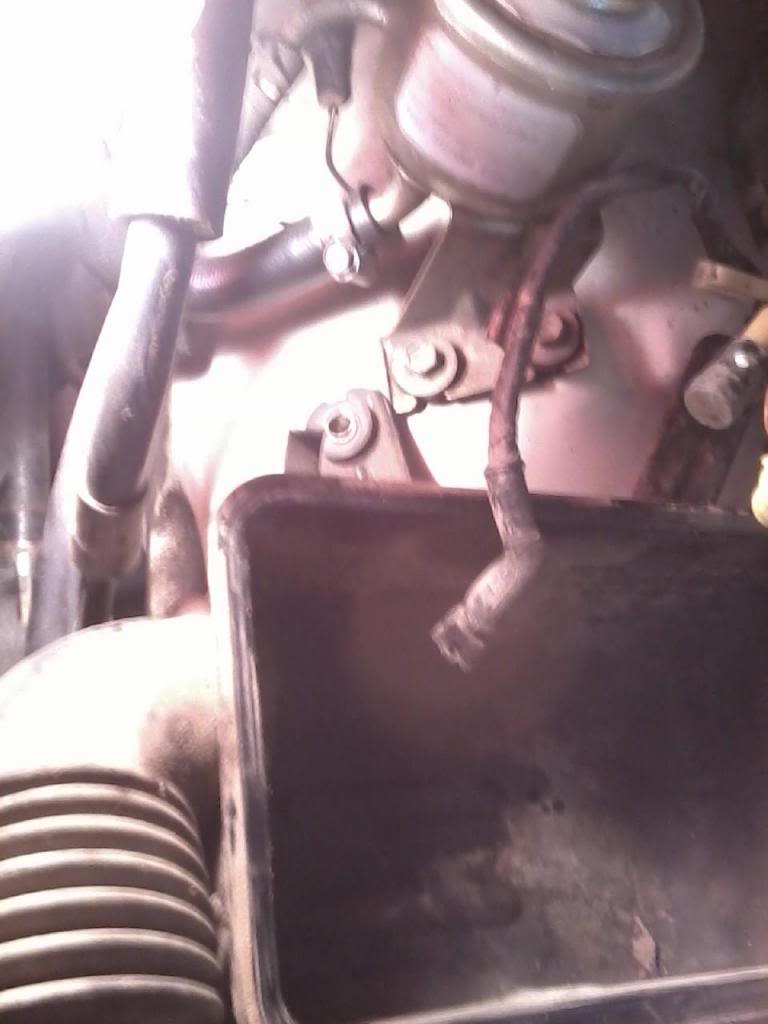
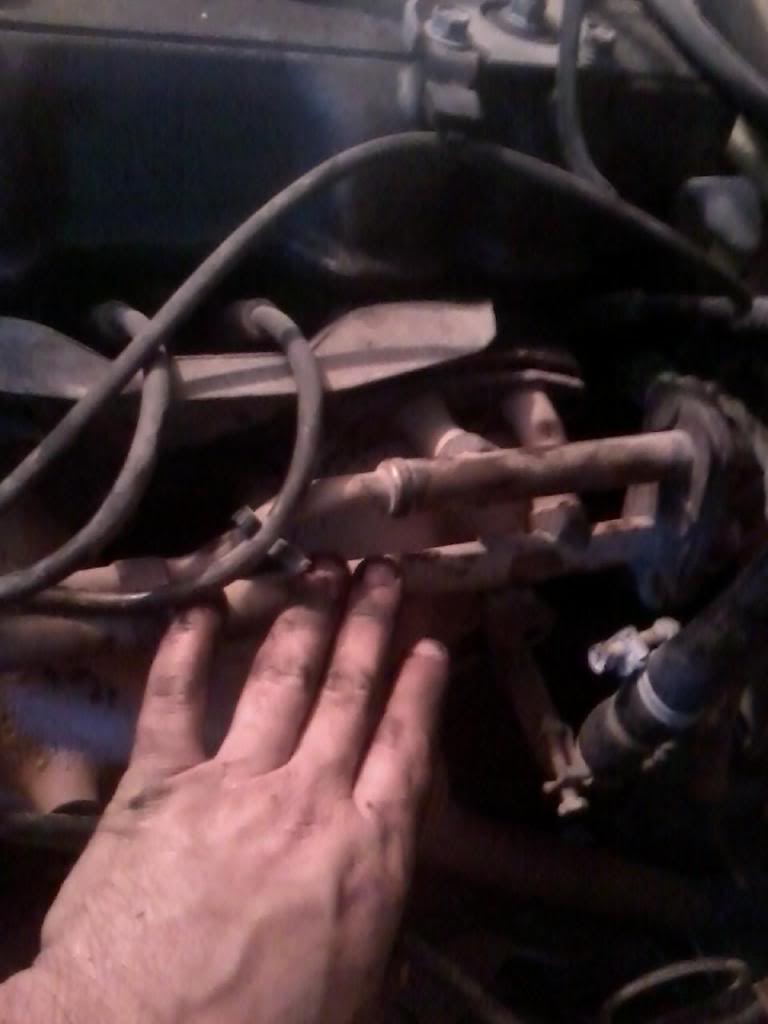
Remove the EGR, 2 bolts and 1 nut. The EGRs are different between a 22r and a 22re.
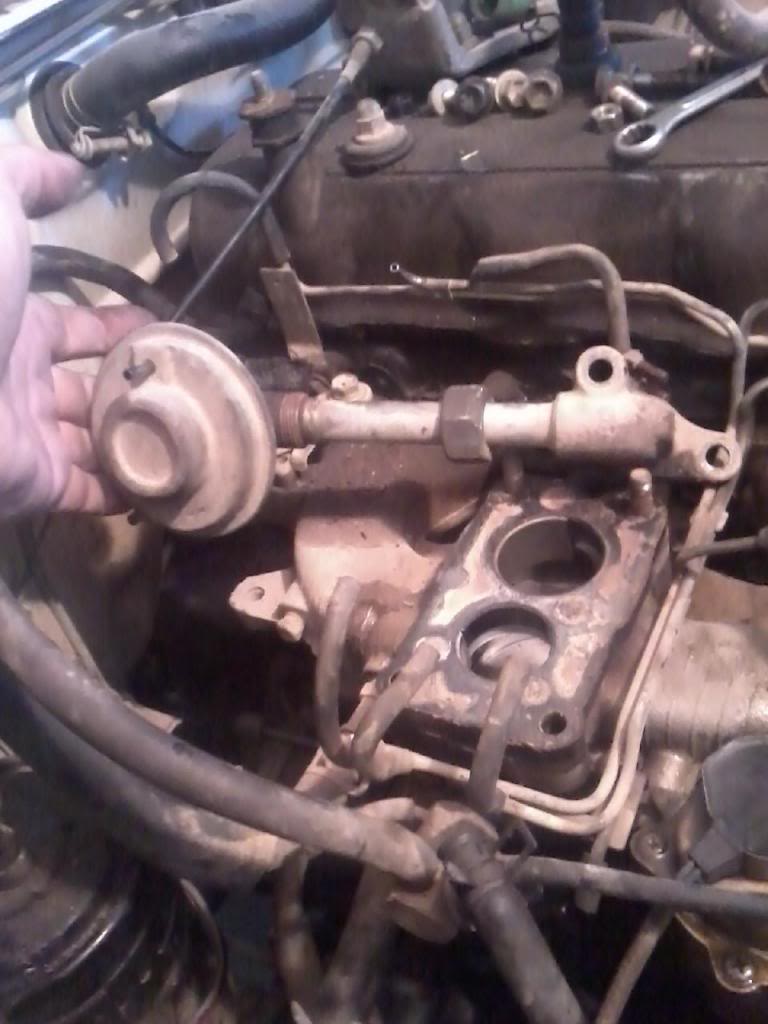
I remove the vacuum lines to the metal pipes. Remove the 10mm bolt. This helps keep the Modulator on the Distributor clean. The Modulator can fail and you just as well to replace the whole Distributor as just the Modulator. (Not Cheap)

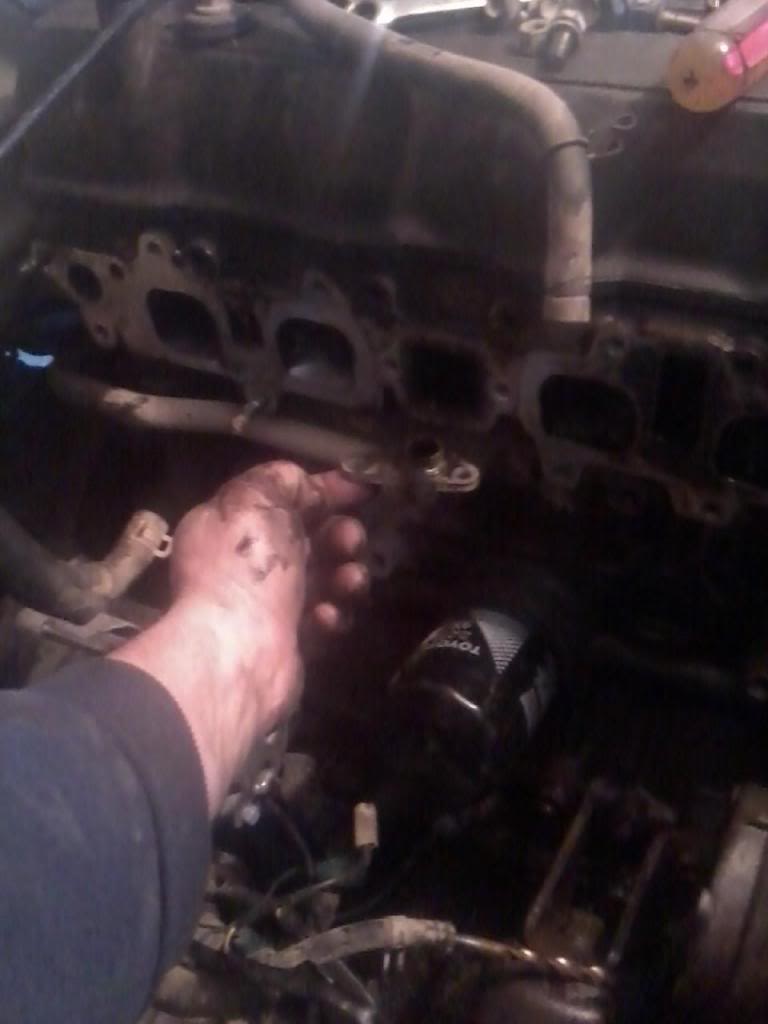
Remove Intake Manifold. This can be troublesome with the vacuum lines attached to it.

I remove the vacuum lines to the metal pipes. Remove the 10mm bolt. This helps keep the Modulator on the Distributor clean. The Modulator can fail and you just as well to replace the whole Distributor as just the Modulator. (Not Cheap)

Remove Intake Manifold. This can be troublesome with the vacuum lines attached to it.
 03-20-2014, 08:10 AM
#20
Super Moderator
Staff
Thread Starter
iTrader: (1)
Join Date: Aug 2008
Location: Anderson Missouri
Posts: 11,788
Likes: 0
Received 21 Likes
on
19 Posts
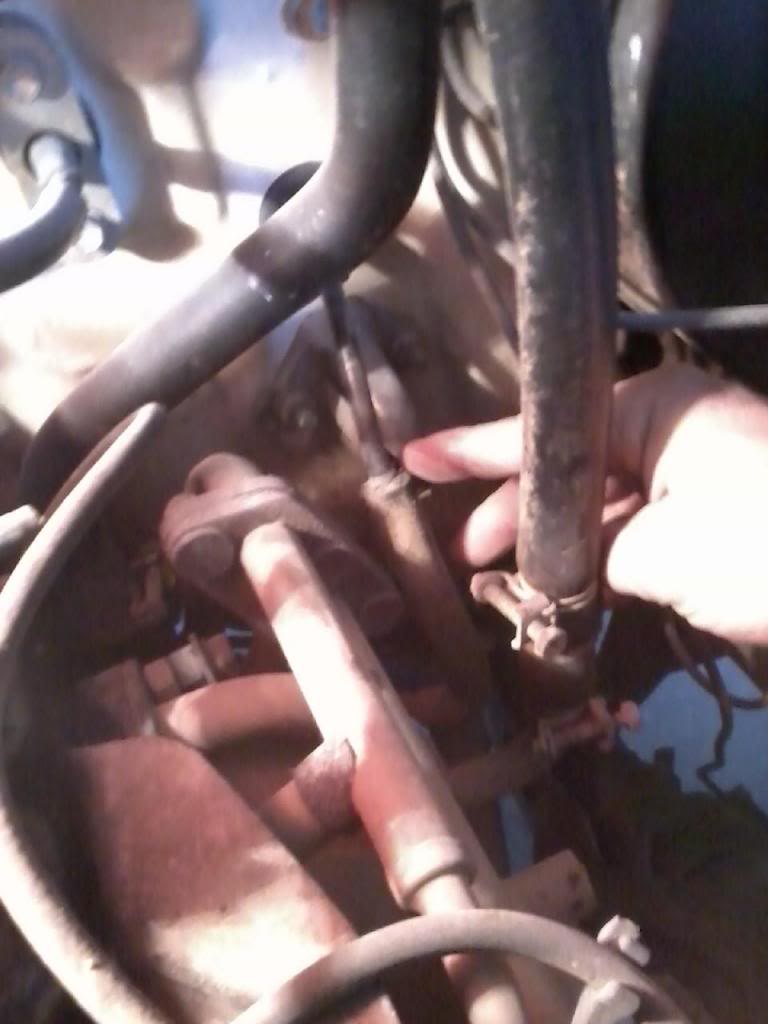
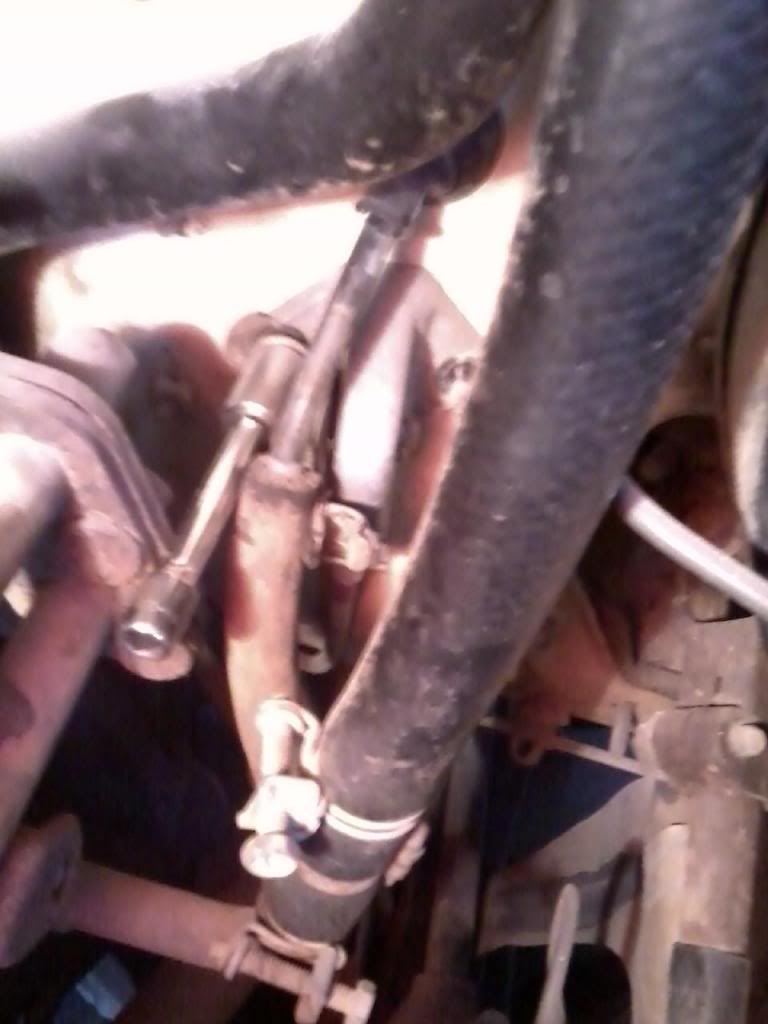
This metal pipe is different from a 22re. It has to be removed as well.
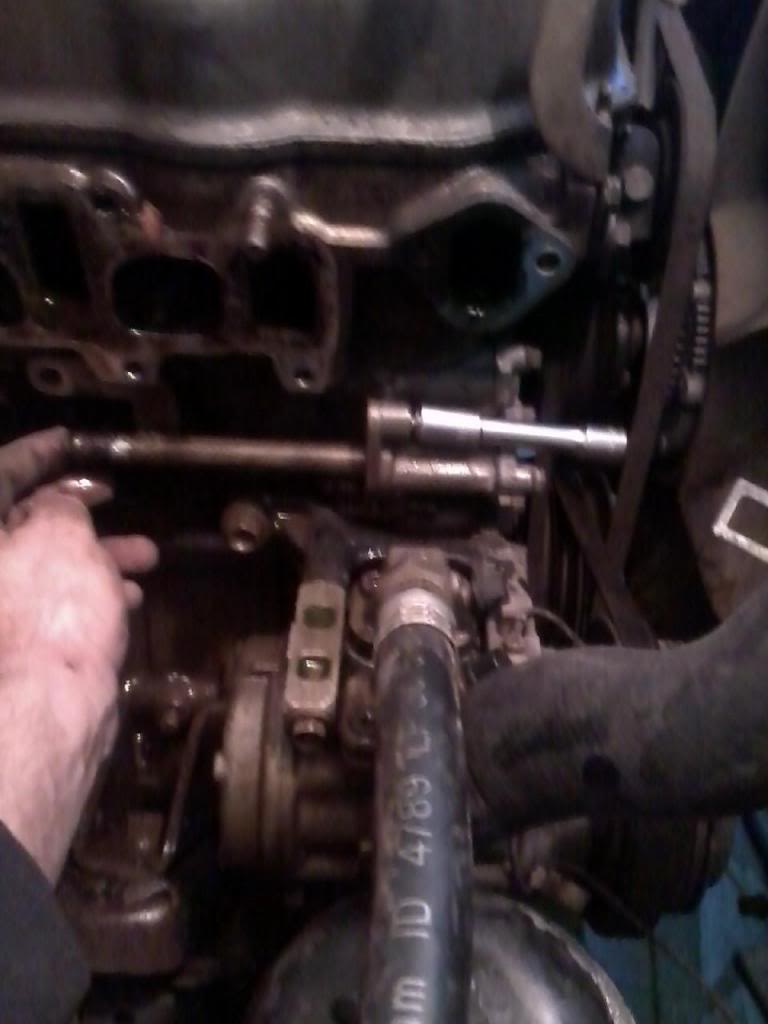
You can use this pipe, but remove the 2 bolts holding the vacuum ports assembly. This is a 22r only part. The lower water pipe can be used for the conversion. (The vacuum port is in the next picture below that has been removed.)
2 bolts hold this to the block and remove the 2 nuts attached to the pipe to make removing this assembly a whole lot easier. Remove the bolt on the top of the exhaust manifold only to get the pipes out.
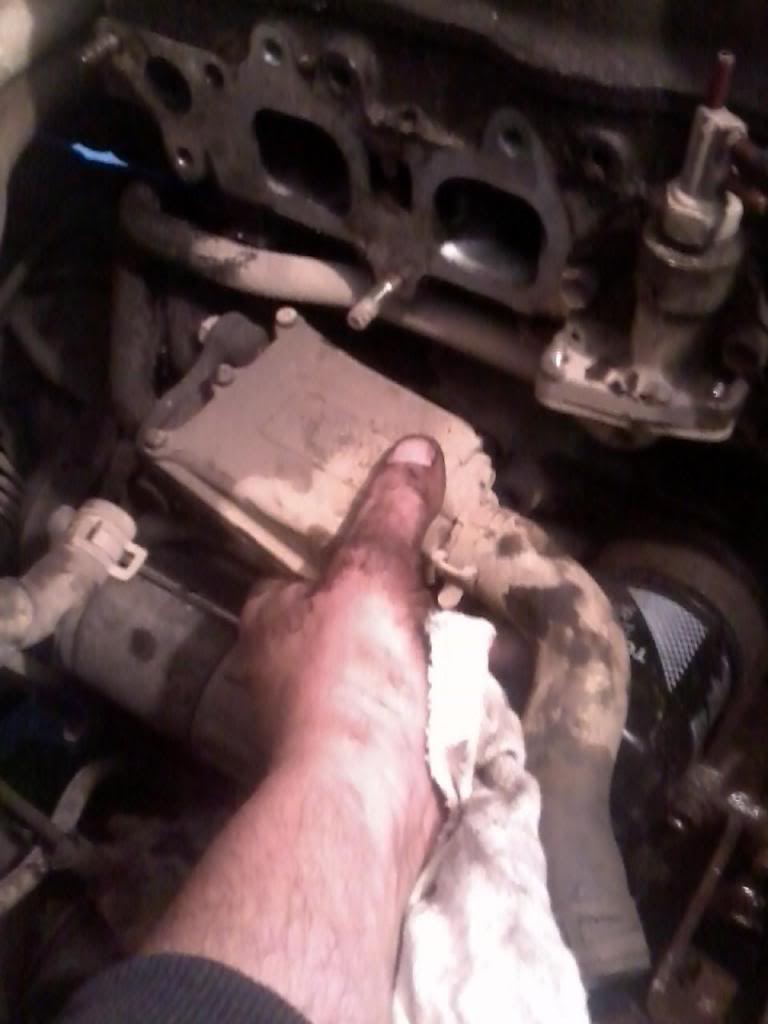
Remove 3 nuts that is connected to the exhaust gas/ egr set up to get the pipes out.

You can use this pipe, but remove the 2 bolts holding the vacuum ports assembly. This is a 22r only part. The lower water pipe can be used for the conversion. (The vacuum port is in the next picture below that has been removed.)

2 bolts hold this to the block and remove the 2 nuts attached to the pipe to make removing this assembly a whole lot easier. Remove the bolt on the top of the exhaust manifold only to get the pipes out.

Remove 3 nuts that is connected to the exhaust gas/ egr set up to get the pipes out.


