1st gen rear cargo panel questions
 11-26-2009, 02:59 PM
#1
Registered User
Thread Starter
Join Date: Oct 2009
Posts: 85
Likes: 0
Received 0 Likes
on
0 Posts
1st gen rear cargo panel questions
Hey party people,
I recently purchased a 1987 4runner, and the rear panels and cargo area are pretty hammered.
I have searched around on the site and wanted to see what you guys thought of these 3 options.
1. Making new rear panels out of wood, with new pockets.
- whats the advantages dis advantages?
2. Making them out of metal.
3. Replacing with factory panels. However, have not had much luck finding a clean set with both cargo doors.
Just looking for input to see who has done what and what has lasted and worked best.
THANKS!
 11-26-2009, 03:06 PM
#3
YotaTech Milestone-Two Millionth Post
post up some pics.......my son's were pretty bad too...got "new" doors from ebay and cleaned up the panels and "new" doors and painted them up.......look cherry now.
pics coming......I never pass up an opportunity to show off our hard work...LOL!
pics coming......I never pass up an opportunity to show off our hard work...LOL!


 11-26-2009, 03:24 PM
#5
Contributing Member
iTrader: (3)
You can ebay them and clean them up with some paint made for plastic or go with a custom set up. I have a couple sheets of aluminum in my shed that I plan on using to replace mine eventually. Even have some aluminum hinge stock for doors.
11-26-2009, 03:56 PM
#6
Registered User
Join Date: Nov 2009
Location: Northeast PA
Posts: 51
Likes: 0
Received 0 Likes
on
0 Posts
If you have a gray interior like mine, you can clean it, spray clear plastic primer, and use gray paint. If you're interior isn't gray, you can use the plastic primer and paint.
11-26-2009, 09:31 PM
#7
Registered User
Join Date: Mar 2008
Location: Temecula Valley, CA
Posts: 12,723
Likes: 0
Received 4 Likes
on
4 Posts
Do you have all the panels and access doors? ... or are you missing parts?
If you have everything, then just sand and paint, maybe even fiberglass if it's really foobar'd (or just use the resin) and texture and paint.
If you have everything, then just sand and paint, maybe even fiberglass if it's really foobar'd (or just use the resin) and texture and paint.
Trending Topics
11-27-2009, 10:38 AM
#8
Registered User
Thread Starter
Join Date: Oct 2009
Posts: 85
Likes: 0
Received 0 Likes
on
0 Posts
Thanks for all the replies,
The two big panels are there, however one door is totally smashed and the other is MIA.
I have been searching ebay and have not found any.
Luckly I have the gray interior, so I think I am going to try and get some decent condition parts then sand, prime, and paint.
I like the OE look.
If anyone has a left top trim section (the part that goes over the shell bolts) and two cargo doors shoot me a PM.
Still would like to see some photos of some custom setups though... Bueller..Bueller..
11-27-2009, 08:52 PM
#9
Registered User
Join Date: Dec 2008
Location: City of Angels
Posts: 103
Likes: 0
Received 0 Likes
on
0 Posts
I have some gray panels too. When I first got my truck the panels were in very bad condition. One panel even had a few cracks. So I scuffed up the inside part (the part you don't see when installed) and put a thin layer of fiberglass on them, and it reinforced them very strongly. I even made some fiberglass enclosures for some 6x9s that fit in the spot between the roll bars. Then I washed them off very good and scrubbed them with a red scotch pad. Wiped them down with lacquer thinner, allowed to dry and sprayed them with some plastic coat paint. The panels now look awesome.
11-27-2009, 09:17 PM
#10
Registered User
Join Date: Nov 2009
Location: Central Sierra Nevadas (Oakhurst)
Posts: 504
Likes: 0
Received 2 Likes
on
2 Posts
I replaced my back panels on my first runner (an 87 that I had several years ago) with OSB. I loved it. It was easy to work with, and durable. Keep in mind that I used the back as more of a pickup and less of a "nice carpety area." If I were to do it again (and I hope to,) I'd pull the plastic panels off and replace them with a large metal panel, then bedliner the ENTIRE interior (except the dash and seats). Just my taste, I guess. Good luck with it!
MC
MC
11-30-2009, 05:57 PM
#11
Registered User
Join Date: Dec 2008
Location: City of Angels
Posts: 103
Likes: 0
Received 0 Likes
on
0 Posts
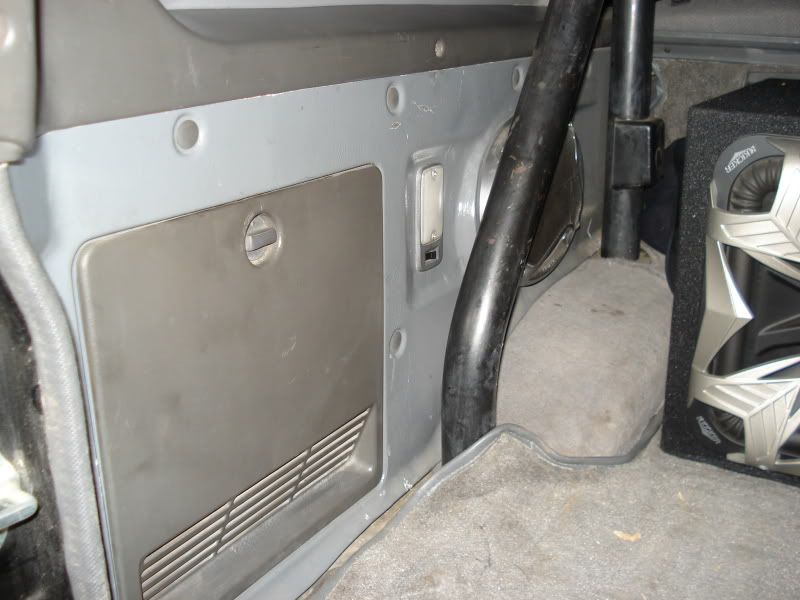
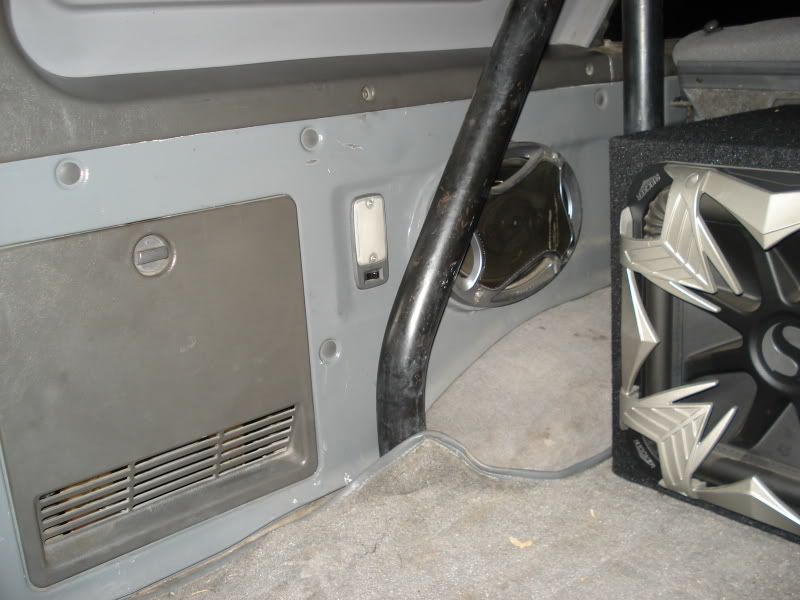
Okay I was finally able to get some pictures. However I took them at night so the color looks a little different than in the day time. The color is two toned with the grays. That is actually how all of my interior is.
Take a look at the 6x9 position. I build the enclosure so that the speakers aim slightly forward and up towards the passengers. From the inside of the panel, the 6x9 enclosure is sealed, so it sounds great.
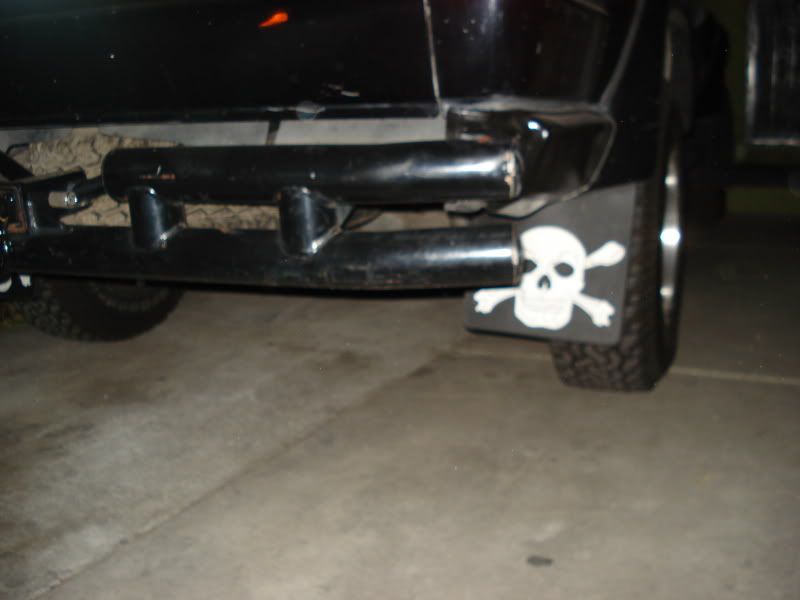
And just for kicks, check out my new mudflaps:
Take a look at the 6x9 position. I build the enclosure so that the speakers aim slightly forward and up towards the passengers. From the inside of the panel, the 6x9 enclosure is sealed, so it sounds great.
And just for kicks, check out my new mudflaps:
12-01-2009, 09:29 AM
#12
Registered User
Thread Starter
Join Date: Oct 2009
Posts: 85
Likes: 0
Received 0 Likes
on
0 Posts
Love the mud flaps! LOL
So I have decided to make my own after spending a day at the shop. I am going to use aluminum, and build two locking cargo doors. I will also be making spots for speakers and keeping the stock deck light.
Should get going on them next week so I will post some pics as I progress..
So I have decided to make my own after spending a day at the shop. I am going to use aluminum, and build two locking cargo doors. I will also be making spots for speakers and keeping the stock deck light.
Should get going on them next week so I will post some pics as I progress..
12-01-2009, 10:19 AM
#14
Registered User
Join Date: Dec 2008
Location: DFW, Texas!
Posts: 1,015
Likes: 0
Received 0 Likes
on
0 Posts
You can recondition the coloring, DeathCougar wrote a very nice article on it:
https://www.yotatech.com/forums/f116...on-how-167686/
https://www.yotatech.com/forums/f116...on-how-167686/
12-01-2009, 10:24 AM
#15
Registered User
Join Date: Dec 2008
Location: San Diego
Posts: 1,145
Likes: 0
Received 0 Likes
on
0 Posts
Here is what I did. I had planned to use some insulation too so it wouldn't be so cold sleeping in there in the winter months in the desert. I should use some carpet padding and carpet the bottom of the bed to insulate and add comfort too.
I got the carpet from Lowes or Home Depot. I never finished the door though. I have a locking latch for it too.
I got the carpet from Lowes or Home Depot. I never finished the door though. I have a locking latch for it too.
12-05-2009, 07:43 AM
#16
Registered User
Join Date: Nov 2009
Location: Northeast PA
Posts: 51
Likes: 0
Received 0 Likes
on
0 Posts

 01-17-2010, 08:30 PM
#17
Registered User
Join Date: Nov 2009
Location: Central Sierra Nevadas (Oakhurst)
Posts: 504
Likes: 0
Received 2 Likes
on
2 Posts
I know it is expensive for the nice chrome stuff, but just 1/8" steel diamondplate "in the white" might not be. What OrRunner did is exactly what my plan is, except I plan to rhino line the panels. I would love to see some pics of the front portions of the panels as well as the small pieces near the tailgate if you have them.
03-13-2010, 11:45 PM
#18
Registered User
Join Date: Mar 2009
Location: Port Arthur, Tx
Posts: 80
Likes: 0
Received 0 Likes
on
0 Posts
Check this place out. I just placed an order and I'm going to do mine with 4 lockable storage compartments, two 10" speaker cutouts, two 6 1/2" speaker cutouts, and I'm going to make some "B" pillar trim, and door panels. I've got to get the garage cleaned out first but hope to get started next month.
http://www.onlinemetalstore.com/item...=185&size_no=1
http://www.onlinemetalstore.com/item...=185&size_no=1
03-14-2010, 11:19 AM
#19
Registered User
Join Date: Nov 2009
Location: Central Sierra Nevadas (Oakhurst)
Posts: 504
Likes: 0
Received 2 Likes
on
2 Posts
Dude you are reading my mind. Those are exactly the places I am looking at doing. Since you appear to be getting to it sooner than I am, could I bother you for a good pic writeup and measurements? It would sure save me some trouble down the road.
Last time I build new panels, I attached them by sending a bolt in from the existing attachment holes on the body toward the inside of the bed, holding them in place with a thin nut, then locking the panel in with butterfly nuts. I didn't think to make storage in them then, and I doubt that I will use butterfly nuts this time. I'll be interested in seeing how you go about it.
Keep us posted-
MC


