
1986 4runner tranmission solenoid replacement writeup
 04-04-2010, 05:13 PM
#1
Registered User
Thread Starter

Join Date: Mar 2007
Posts: 28
Likes: 0
Received 0 Likes
on
0 Posts
1986 4runner tranmission solenoid replacement writeup
So if you had a problem like mine, and your automatic transmission wasn't shifting correctly, it could likely be the shift solenoids in the valve body. I'm going to assume at this point you've narrowed it down to this option, which is fairly easy with OD. This being the first serious work I've done on my 4runner, there could be so mistakes, so let me know what you think. The FSM is fairly helpful. I used the 1987 edition for my 86. Also, I’m back at school writing this, and I don’t have my FSM here with the torque values for the filter, holder, pan, and drain bolt. If someone could look those up I would really appreciate it, I can’t find the 86 FSM online, only the 87, and I want to be sure I have the right ones.
What you’ll need
• Ratchet set
• Torque Wrench
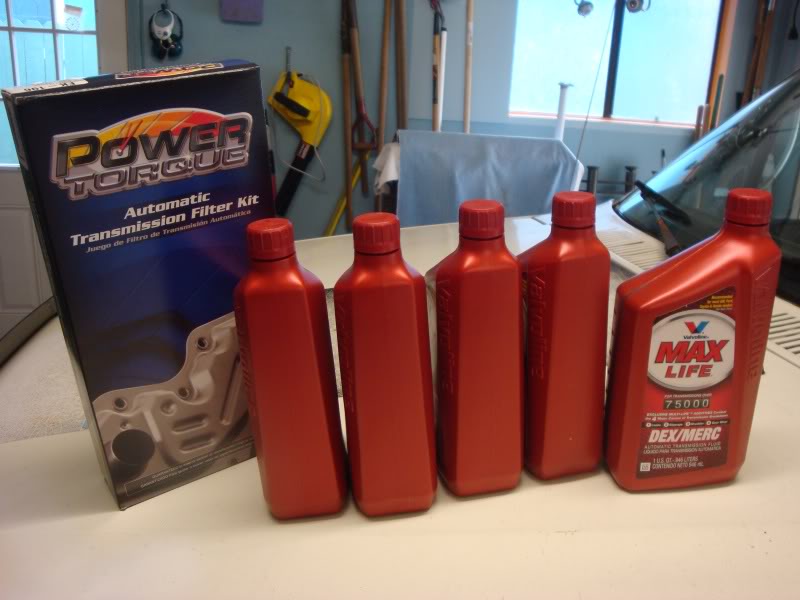
• 5-6 qts Dexron II ATF
• Bucket for draining fluid
• New Solenoids (I bought mine here: http://www.bulkpart.com/Merchant2/me...roduct_Count=0) They shipped in under a week to Sacramento, and their customer service emailed me back within several hours when I had a question). Also, although it is not necessary to replace all three, this combo pack makes them cheap, and you might as well replace all three while you’re at it.
• New filter (not necessary, but I replaced mine and it came with a new gasket for both the filter holder and the valve body pan, which proved to be useful)
• Plastic putty knife
• Solvent (acetone works fine)
• Abrasive pad (I used a small green scouring pad, but I’m sure fine steel wool would work as well)
• Paper towels
• Toyota service manual
• Optional
o Permatex “The Right Stuff” or similar FIPG. If you don’t purchase a gasket for the valve body, then you will need to use FIPG to replace Toyota’s original gasket
Note: much of the directions and advice for this were taken from a similar procedure from this site: http://home.centurytel.net/stevenjac...sh/tranny.html
I’m not sure if he’s a user on here, but his write-up had more pictures than mine and was helpful. He was only flushing his transmission, not replacing anything, and his 4runner was much newer than mine, but it still worked as a basis for my work.
Approx Costs: keep in mind the new filter isn't necessary, but i decided to replace it
New Solenoids: ~$200 with shipping to Sacramento
New Filter: $45
Transmission Fluid: 43 (i don't remember exactly, but i believe the 5 quarts were this much)
So all in all, it cost about 300 bucks to replace all of this, so you'll probably be saving yourself hundreds over having a mechanic doing it
1. The fluid and filter I used to replace mine
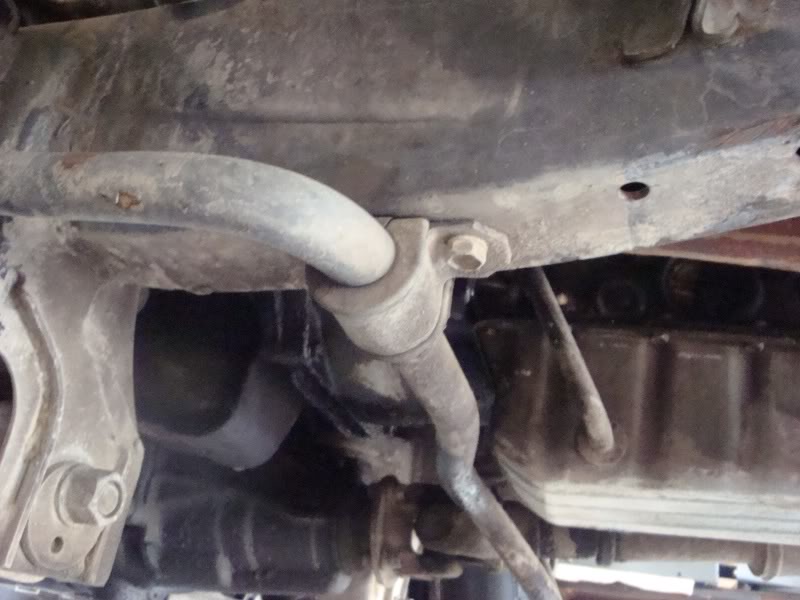
2. Unbolt the sway bar brackets on either side and just let the bar hang down on its own. This isn’t entirely necessary, as you can still get to the valve body without doing this, but it will make it easier later.
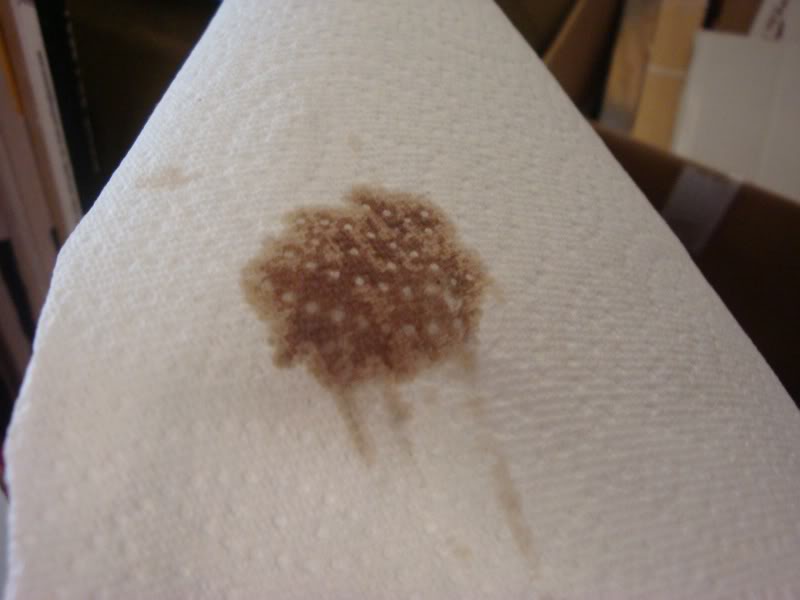
3. Check your transmission fluid. A brownish color is fine, if it smells burnt then you could be in trouble
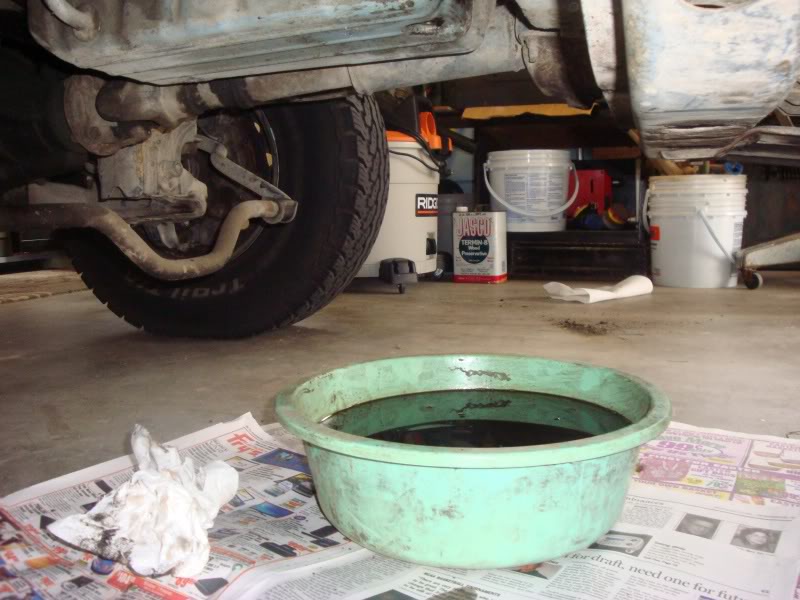
4. Place a bucket underneath the drain bolt, and unbolt it. Yes, it appears I’ve had a very slow leak for a while
5. Clean off the outside of the pan and the surrounding areas around the pan. It doesn’t need to be spotless, but it helps prevent anything from getting into the valve body after you take the pan off
6. Unbolt the pan. It will still be held on by the gasket, which is a little tricky to break. Toyota has a SST that they use to remove it, but obviously most people will not have this tool. Here’s where you can just use whatever is most convenient for you or you have lying around. I held a rectangular razor blade lengthwise with a pair of pliers (making a sort of mini axe, if you’re confused on this setup) and tapped the back of it with a hammer lightly. I would start at one of the back corners, as it is easiest to begin at a corner and this will allow the drain bolt end to sag and drain more oil as you go. Some may not be comfortable doing this, as you may make very shallow scratches on the pan or valve body, but going very slowly, I think you can do this and be alright
7. Detach the dipstick tube. You’ll probably find it easier to remove the dipstick prior to this as well. This is a little tricky, and I found it to be a 2 man job. One person should grab hold of the pan, while another grabs the tube right below the joint. Both should pull downwards, and by twisting the pan back and forth, even though it is only a small distance, the tube will eventually separate.
8. Remove the pan carefully, as there will still be fluid inside, and you don’t want to make more of a mess than you need to.
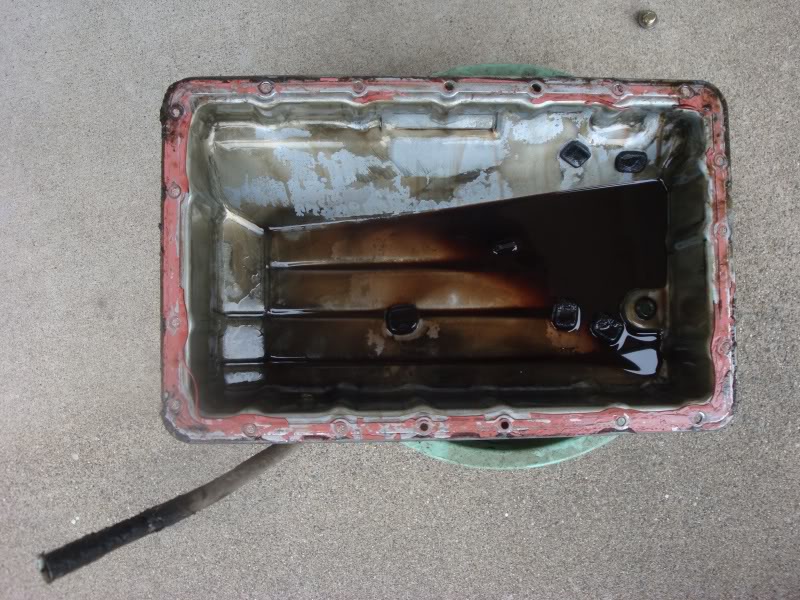
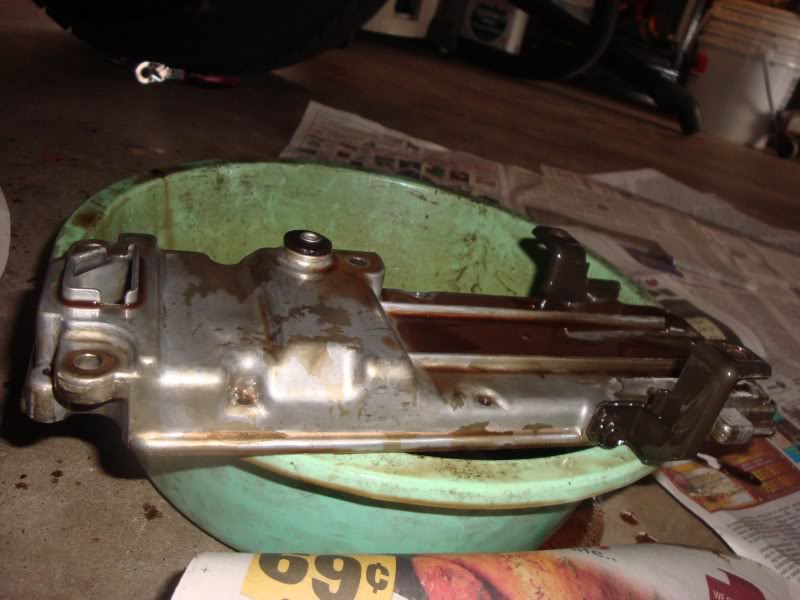
9. Here’s the pan, with the magnets inside. I believe these magnets catch the metal slivers from your transmission as it nears the end of its life.
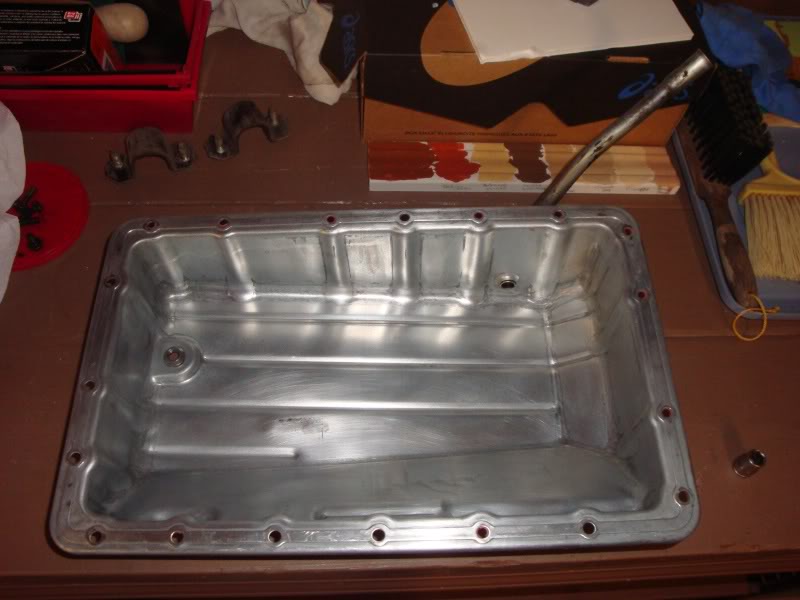
10. Clean out the pan. I poured out the fluid, wiped out the remaining with paper towels, removed the gasket, and then wiped down the whole thing with acetone. To get the gasket off, I use a two part process. First use a plastic putty knife to scrape the gasket off (the corner works well), then use a scouring pad to remove the leftovers. Don’t forget to put the magnets back in afterwards!
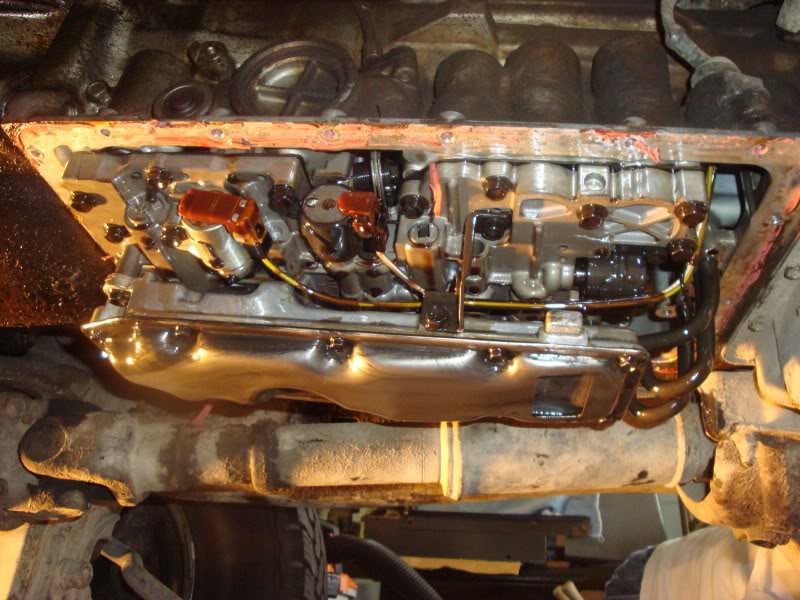
11. You’ll also need to clean off the flanges on the valve body. I used the same process as with the pan. You’ll have to be more cautious here though, since you do not want to get a flake of the old gasket on the bottom of the valve body and have it loose in there. I’m not sure how bad this would actually be, but I can’t imagine it would be good. Unclean and clean
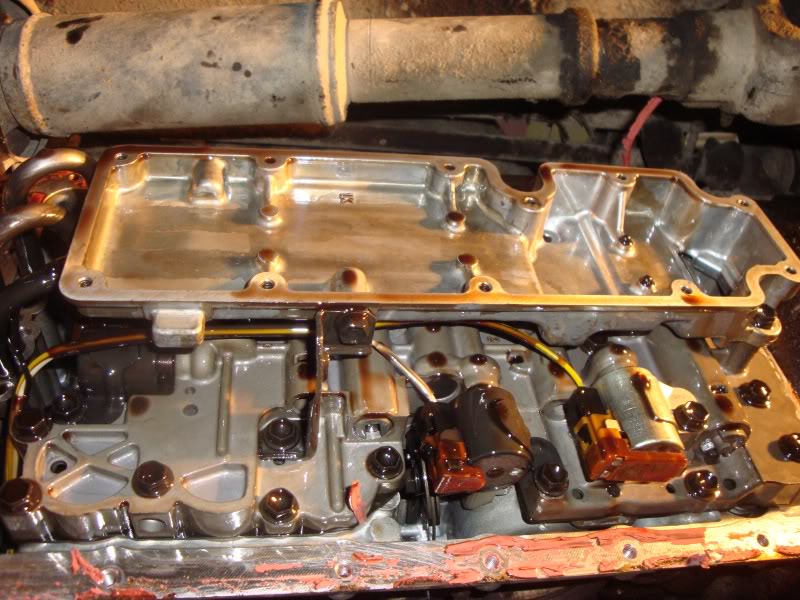
12. Remove the filter, and be ready for more fluid to surprise you as take out the bolts. It spills out from over the edges as you go. My original gasket was pretty brittle, so if you’re not replacing it, be careful as you remove the filter from the holder
13. Remove the filter holder as well. I believe on newer models you can remove the entire assembly with the filter, but with mine, one of the bolts was inaccessible with the filter still attached. IMPORTANT: there is a small black plastic washer on TOP of the filter holder. It falls off very easily, so I would remove this right after you take the filter holder off the valve body.
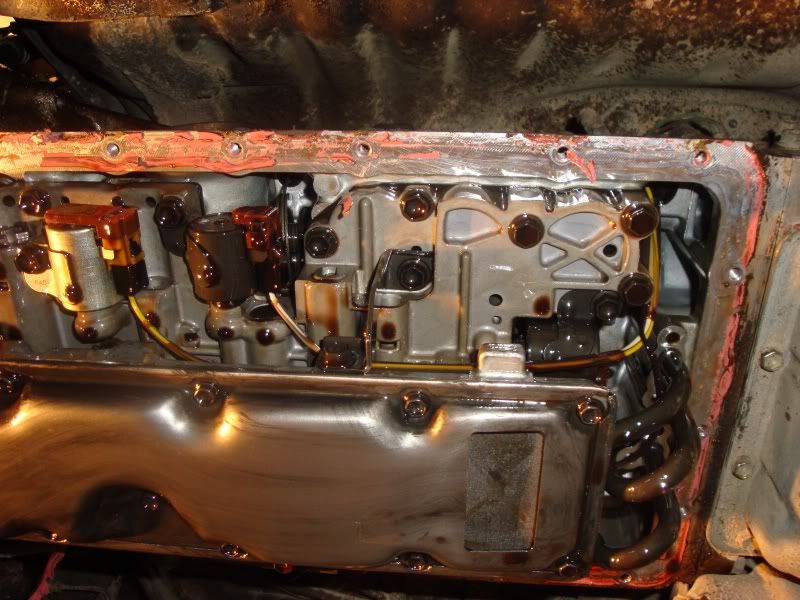
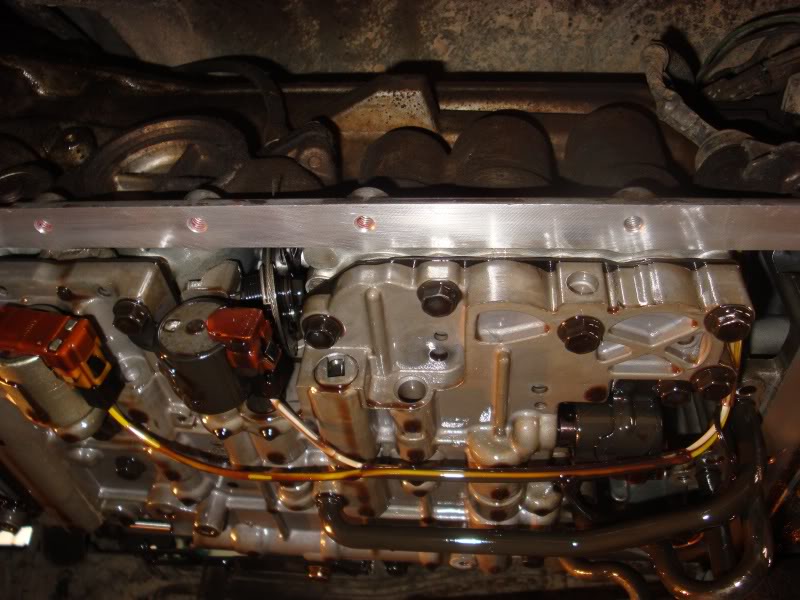
14. Here’s what the lower valve body looks like everything removed. Note the solenoid locations.
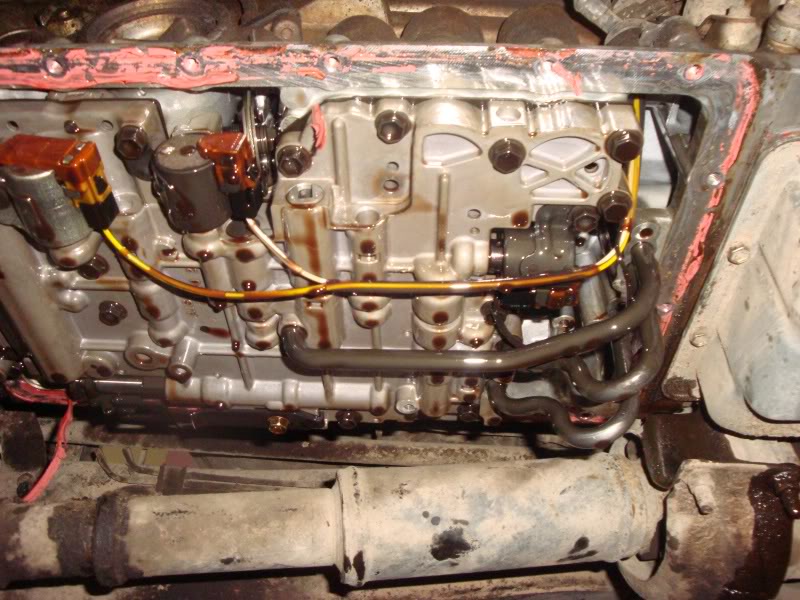
15. Removing the solenoids is fairly easily. From left to right, the solenoids are lock up, 2, and 1. I would remove each and replace it individually. Each solenoid is connected with a single bolt as you can see, and with a wire clip. It is most likely safer to take the wire clip off first, and then remove the bolt, but it is easier to get at the wire clip once removed, so do what you like. After you remove the bolt the solenoid is still held in place by a rubber gasket on its tip. Simply wiggle and twist the solenoid as you pull it out, and it will come out without too much trouble.
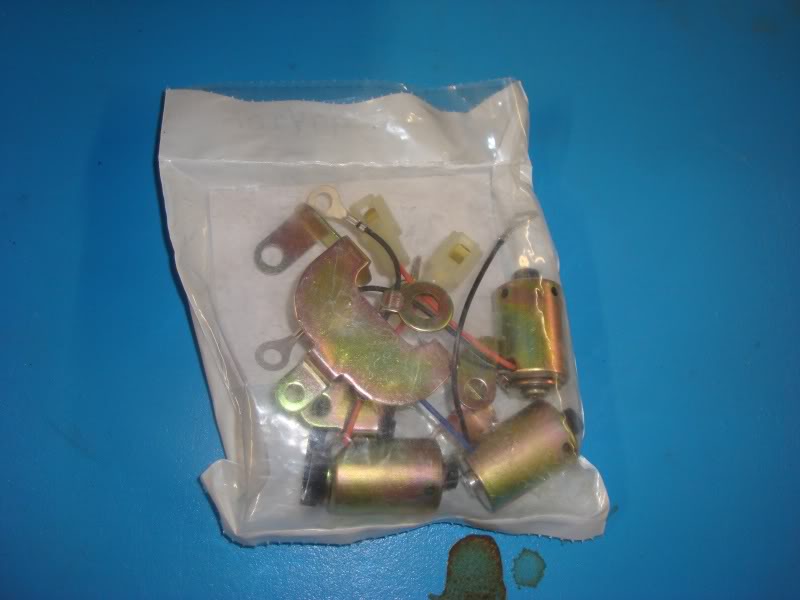
16. Here are the new solenoids I received from bulkparts
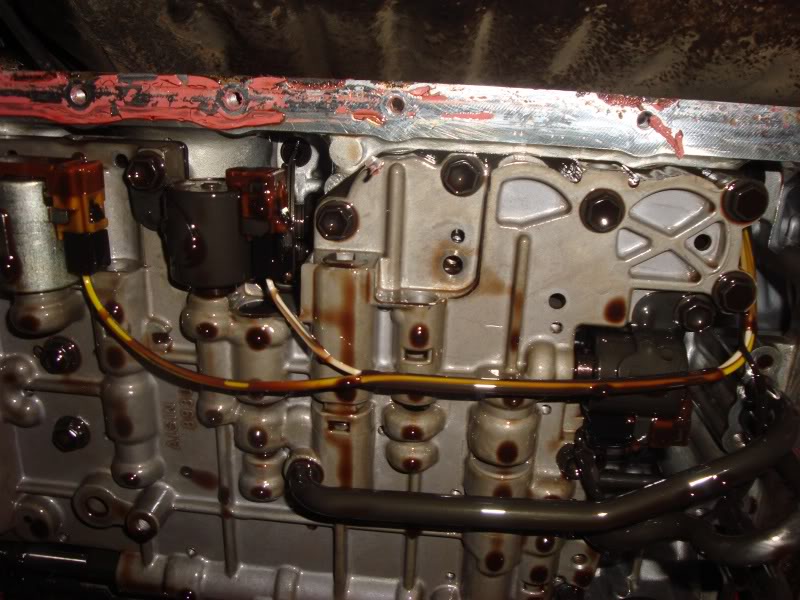
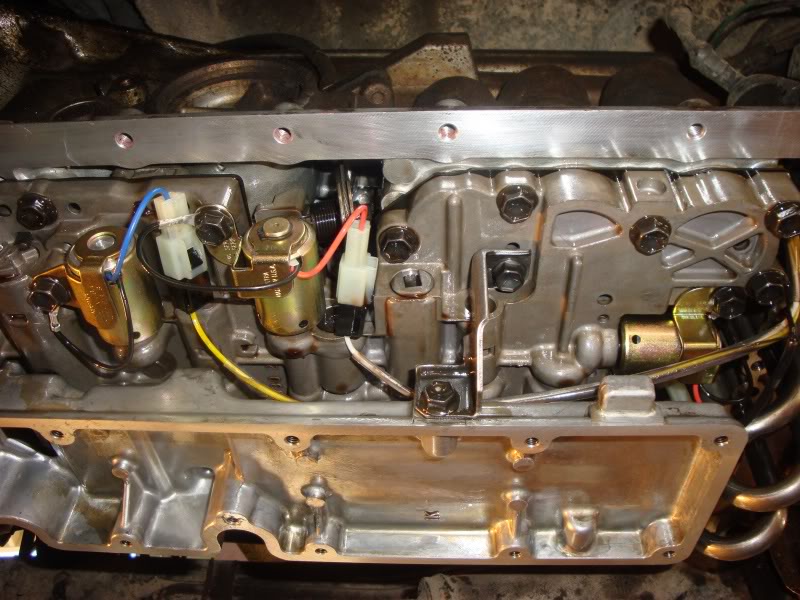
17. Put the new solenoids in. This is basically the last step in reverse. The wire clips on the replacement solenoids are slightly different, though. The clip is not on the solenoid itself, and so a ground wire was also added. Simply clip in the new harness, and put the ground wire on the solenoid bolt, as shown in the picture below.
18. I’d recommend cleaning the screws off. The ones inside the valve body probably don’t need it, but I think it was helpful for the ones holding the pan on. Simply dipping them in soapy water, scrubbing the threads with a wire brush to remove most of the old gasket, and rinsing them off with some acetone is probably fine.
19. Bolt the filter holder back on. (7ft-lbs, 84in-lbs) IMPORTANT: make sure you have the washer still on top. I bolted the holder and filter back on before I looked at my desk and saw that washer staring at me.
20. Bolt your new filter and gasket on. 61in-lbs
21. If you have a new gasket, skip to the next step. If not, refer to the link at the beginning of my write-up for directions on how to use permatex to reseal the pan
22. Important to note: there was no torque pattern given in my service manual, or at least not in the section I was in. Since the pan was identical to the one on the 2002 runner in Steven Jackie’s (or possible Steve n’ Jackie?) runner in the link above, I used the bolt pattern given in this one. It is helpful to write the pattern on a blank sheet of paper, and tape it to the underbelly of your car so you don’t have to refer back to the manual for each bolt. 65in-lbs
23. Put the cleaned pan back on the car, and put all the bolts on finger tight before you torque them on. Note that you have to line up the dipstick tube properly before you can put the pan on. Here’s where I have to admit I did not use a torque wrench. I went to my neighbor, who was a mechanic for years and had experience with Toyotas to borrow one. He said he didn’t have one small enough for the torque values given in the FSM, and that he believed it was fine to simply go by feel. For experienced users, this may probably be fine. I forgot where I heard this, but someone recommended snugging the bolts up to the car, and then rotating about a quarter turn past this. In my case, this squeezed the new gasket out slightly beyond normal, so I believe the compression was ok. That being said, I got a little over eager with the last bolt, and snapped the head right off. After much swearing, I had to re-lower the entire pan, squeeze a little bit of silicon sealant into the area where the broken bolt was, and re-torque all the screws. It would’ve been better to drill the broken bolt out and replace it, but I didn’t. So all of you with 24 year old runners like mine, remember those screws are just as old.
24. Replace the drain bolt. 15ft-lbs
25. Replace the sway bar brackets
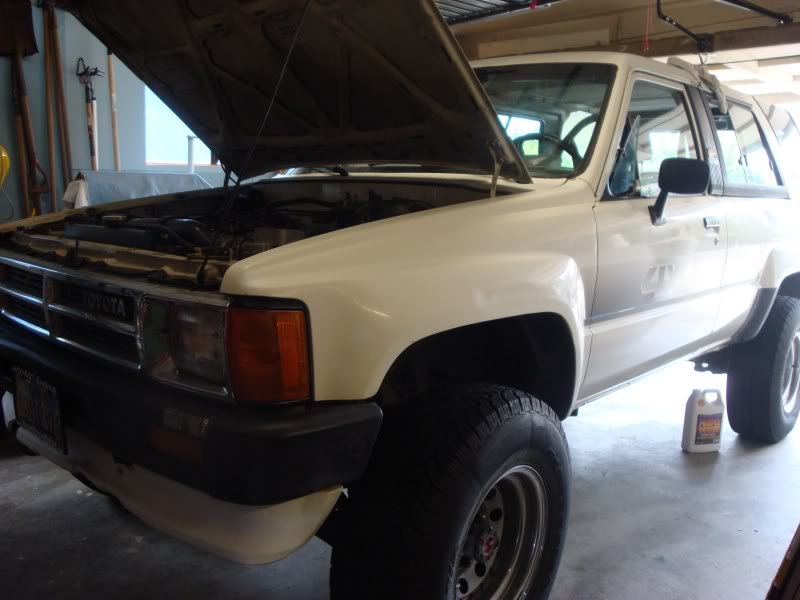
26. Stand back and admire your work and 4runner, reminding yourself that the occasional pain of dealing with a 25 year old car is totally worth owning one.
27. I had to let the sealant dry overnight to be safe.
28. Replace the ATF with your fresh fluid. Although the FSM listed the capacity of the pan at 4.8 quarts, I seemed to have lost more than that. Maybe removing the filter and holder also drains more. Either way, I put all 5 quarts in and it was still a hair underneath the level for “Hot” on my dipstick after I drove it around for a while.
The result: success! Rather than having to manually shift from 2 to D like I did when it did not shift properly into second gear, my 4runner works great now! Also, for some reason, my car accelerates smooth and faster throughout each gear. I used to have very slow acceleration in 2nd gear when I had to manually put it in 2, but now it works much better.
What you’ll need
• Ratchet set
• Torque Wrench
• 5-6 qts Dexron II ATF
• Bucket for draining fluid
• New Solenoids (I bought mine here: http://www.bulkpart.com/Merchant2/me...roduct_Count=0) They shipped in under a week to Sacramento, and their customer service emailed me back within several hours when I had a question). Also, although it is not necessary to replace all three, this combo pack makes them cheap, and you might as well replace all three while you’re at it.
• New filter (not necessary, but I replaced mine and it came with a new gasket for both the filter holder and the valve body pan, which proved to be useful)
• Plastic putty knife
• Solvent (acetone works fine)
• Abrasive pad (I used a small green scouring pad, but I’m sure fine steel wool would work as well)
• Paper towels
• Toyota service manual
• Optional
o Permatex “The Right Stuff” or similar FIPG. If you don’t purchase a gasket for the valve body, then you will need to use FIPG to replace Toyota’s original gasket
Note: much of the directions and advice for this were taken from a similar procedure from this site: http://home.centurytel.net/stevenjac...sh/tranny.html
I’m not sure if he’s a user on here, but his write-up had more pictures than mine and was helpful. He was only flushing his transmission, not replacing anything, and his 4runner was much newer than mine, but it still worked as a basis for my work.
Approx Costs: keep in mind the new filter isn't necessary, but i decided to replace it
New Solenoids: ~$200 with shipping to Sacramento
New Filter: $45
Transmission Fluid: 43 (i don't remember exactly, but i believe the 5 quarts were this much)
So all in all, it cost about 300 bucks to replace all of this, so you'll probably be saving yourself hundreds over having a mechanic doing it
1. The fluid and filter I used to replace mine
2. Unbolt the sway bar brackets on either side and just let the bar hang down on its own. This isn’t entirely necessary, as you can still get to the valve body without doing this, but it will make it easier later.
3. Check your transmission fluid. A brownish color is fine, if it smells burnt then you could be in trouble
4. Place a bucket underneath the drain bolt, and unbolt it. Yes, it appears I’ve had a very slow leak for a while
5. Clean off the outside of the pan and the surrounding areas around the pan. It doesn’t need to be spotless, but it helps prevent anything from getting into the valve body after you take the pan off
6. Unbolt the pan. It will still be held on by the gasket, which is a little tricky to break. Toyota has a SST that they use to remove it, but obviously most people will not have this tool. Here’s where you can just use whatever is most convenient for you or you have lying around. I held a rectangular razor blade lengthwise with a pair of pliers (making a sort of mini axe, if you’re confused on this setup) and tapped the back of it with a hammer lightly. I would start at one of the back corners, as it is easiest to begin at a corner and this will allow the drain bolt end to sag and drain more oil as you go. Some may not be comfortable doing this, as you may make very shallow scratches on the pan or valve body, but going very slowly, I think you can do this and be alright
7. Detach the dipstick tube. You’ll probably find it easier to remove the dipstick prior to this as well. This is a little tricky, and I found it to be a 2 man job. One person should grab hold of the pan, while another grabs the tube right below the joint. Both should pull downwards, and by twisting the pan back and forth, even though it is only a small distance, the tube will eventually separate.
8. Remove the pan carefully, as there will still be fluid inside, and you don’t want to make more of a mess than you need to.
9. Here’s the pan, with the magnets inside. I believe these magnets catch the metal slivers from your transmission as it nears the end of its life.
10. Clean out the pan. I poured out the fluid, wiped out the remaining with paper towels, removed the gasket, and then wiped down the whole thing with acetone. To get the gasket off, I use a two part process. First use a plastic putty knife to scrape the gasket off (the corner works well), then use a scouring pad to remove the leftovers. Don’t forget to put the magnets back in afterwards!
11. You’ll also need to clean off the flanges on the valve body. I used the same process as with the pan. You’ll have to be more cautious here though, since you do not want to get a flake of the old gasket on the bottom of the valve body and have it loose in there. I’m not sure how bad this would actually be, but I can’t imagine it would be good. Unclean and clean
12. Remove the filter, and be ready for more fluid to surprise you as take out the bolts. It spills out from over the edges as you go. My original gasket was pretty brittle, so if you’re not replacing it, be careful as you remove the filter from the holder
13. Remove the filter holder as well. I believe on newer models you can remove the entire assembly with the filter, but with mine, one of the bolts was inaccessible with the filter still attached. IMPORTANT: there is a small black plastic washer on TOP of the filter holder. It falls off very easily, so I would remove this right after you take the filter holder off the valve body.
14. Here’s what the lower valve body looks like everything removed. Note the solenoid locations.
15. Removing the solenoids is fairly easily. From left to right, the solenoids are lock up, 2, and 1. I would remove each and replace it individually. Each solenoid is connected with a single bolt as you can see, and with a wire clip. It is most likely safer to take the wire clip off first, and then remove the bolt, but it is easier to get at the wire clip once removed, so do what you like. After you remove the bolt the solenoid is still held in place by a rubber gasket on its tip. Simply wiggle and twist the solenoid as you pull it out, and it will come out without too much trouble.
16. Here are the new solenoids I received from bulkparts
17. Put the new solenoids in. This is basically the last step in reverse. The wire clips on the replacement solenoids are slightly different, though. The clip is not on the solenoid itself, and so a ground wire was also added. Simply clip in the new harness, and put the ground wire on the solenoid bolt, as shown in the picture below.
18. I’d recommend cleaning the screws off. The ones inside the valve body probably don’t need it, but I think it was helpful for the ones holding the pan on. Simply dipping them in soapy water, scrubbing the threads with a wire brush to remove most of the old gasket, and rinsing them off with some acetone is probably fine.
19. Bolt the filter holder back on. (7ft-lbs, 84in-lbs) IMPORTANT: make sure you have the washer still on top. I bolted the holder and filter back on before I looked at my desk and saw that washer staring at me.
20. Bolt your new filter and gasket on. 61in-lbs
21. If you have a new gasket, skip to the next step. If not, refer to the link at the beginning of my write-up for directions on how to use permatex to reseal the pan
22. Important to note: there was no torque pattern given in my service manual, or at least not in the section I was in. Since the pan was identical to the one on the 2002 runner in Steven Jackie’s (or possible Steve n’ Jackie?) runner in the link above, I used the bolt pattern given in this one. It is helpful to write the pattern on a blank sheet of paper, and tape it to the underbelly of your car so you don’t have to refer back to the manual for each bolt. 65in-lbs
23. Put the cleaned pan back on the car, and put all the bolts on finger tight before you torque them on. Note that you have to line up the dipstick tube properly before you can put the pan on. Here’s where I have to admit I did not use a torque wrench. I went to my neighbor, who was a mechanic for years and had experience with Toyotas to borrow one. He said he didn’t have one small enough for the torque values given in the FSM, and that he believed it was fine to simply go by feel. For experienced users, this may probably be fine. I forgot where I heard this, but someone recommended snugging the bolts up to the car, and then rotating about a quarter turn past this. In my case, this squeezed the new gasket out slightly beyond normal, so I believe the compression was ok. That being said, I got a little over eager with the last bolt, and snapped the head right off. After much swearing, I had to re-lower the entire pan, squeeze a little bit of silicon sealant into the area where the broken bolt was, and re-torque all the screws. It would’ve been better to drill the broken bolt out and replace it, but I didn’t. So all of you with 24 year old runners like mine, remember those screws are just as old.
24. Replace the drain bolt. 15ft-lbs
25. Replace the sway bar brackets
26. Stand back and admire your work and 4runner, reminding yourself that the occasional pain of dealing with a 25 year old car is totally worth owning one.
27. I had to let the sealant dry overnight to be safe.
28. Replace the ATF with your fresh fluid. Although the FSM listed the capacity of the pan at 4.8 quarts, I seemed to have lost more than that. Maybe removing the filter and holder also drains more. Either way, I put all 5 quarts in and it was still a hair underneath the level for “Hot” on my dipstick after I drove it around for a while.
The result: success! Rather than having to manually shift from 2 to D like I did when it did not shift properly into second gear, my 4runner works great now! Also, for some reason, my car accelerates smooth and faster throughout each gear. I used to have very slow acceleration in 2nd gear when I had to manually put it in 2, but now it works much better.
Last edited by rooney; 04-17-2010 at 08:08 PM. Reason: updated costs and torques
 04-04-2010, 06:32 PM
#3
Registered User
Great write-up!
I have been wondering when my solenoids will start causing problems in my '89.
You should submit this in the tech write-up section, this is a great reference for anyone doing this repair.
I will look up the torque specs for you after my three year old goes to sleep.
I have been wondering when my solenoids will start causing problems in my '89.
You should submit this in the tech write-up section, this is a great reference for anyone doing this repair.
I will look up the torque specs for you after my three year old goes to sleep.
04-04-2010, 06:57 PM
#6
Registered User
Some Torque Specs for your write-up, I found these in the AT section of my 1988 FSM:
Oil Pan: 65 in-lbs
Drain plug: 15 ft-lbs
Oil strainer case: 7 ft-lbs (84 in-lbs)
Oil strainer: 61 in-lbs
I could not find anything for the solenoid bolts.
Thanks for the write-up.
Mike
Oil Pan: 65 in-lbs
Drain plug: 15 ft-lbs
Oil strainer case: 7 ft-lbs (84 in-lbs)
Oil strainer: 61 in-lbs
I could not find anything for the solenoid bolts.
Thanks for the write-up.
Mike
Trending Topics
11-13-2011, 01:28 PM
#9

I have a 1997 4runner with transmission trouble, the transmission cooler blew mixing the train oil with the anti freeze. I took it to Pepboys for a transmission flush where they denied it, so I kept the car running for 3months until it gave me the "check engine" symbol with the code of: P0770. I also noticed, my battery died. After flushing the transmission myself, all the trouble pointed to the shifted solenoid, open/short circuit condition. I have in mind to order the solenoid kit, and at this point due to driving the car with the bad oil I want to know is it worth it. In the beginning I smelt burning oil, and now after flushing it, I don't smell it anymore. The car runs but after a while I have to shut it down and restart it. Please give your best advice.
12-07-2011, 03:26 PM
#10
Registered User

Join Date: Dec 2011
Posts: 1
Likes: 0
Received 0 Likes
on
0 Posts
Awesome! It worked perfectly.
Thanks for the write-up and detail. I bought an 86' 4runner with 270k miles for $700 because the owner thought the transmission was going out. New solinoids were the answer, runs like a top. THANKS!
04-28-2013, 12:08 PM
#11
Registered User

Great reference!
Trying to breath life back into my 1990 pickup 3.0. I was very scared about my transmission going. After figuring out how to read the transmission codes and reading your posts, I no longer fear. Thanks a bunch!
07-17-2013, 04:31 PM
#12
Registered User

Join Date: Jul 2013
Posts: 1
Likes: 0
Received 0 Likes
on
0 Posts
I need help. I'm at high altitude - does air pressure keep the solenoid stuck in place? I located the lockup solenoid and removed the bolt but can't get the solenoid out. I suspect perhaps it's being held by a retaining clip, but I sure don't see one. When you say remove the wire clip I assume you're talking about the electrical connection. Is there a trick to getting the solenoid out - does it need to be jiggled? Any suggestions?
Thanks!
Thanks!
Last edited by gnolly; 07-17-2013 at 09:39 PM.
 03-19-2014, 08:11 PM
#14
Registered User
Join Date: Mar 2014
Location: South Cali.
Posts: 130
Likes: 0
Received 0 Likes
on
0 Posts
Just got this 4runner last saturday. Its not wanting to change gears like yours. I just order everything needed too get this going. Lets see where it goes from there. Thanks for the write up 
03-27-2014, 06:20 PM
#15
Registered User
Join Date: Mar 2014
Location: South Cali.
Posts: 130
Likes: 0
Received 0 Likes
on
0 Posts
Update, all my stuff came in. This saturday everything gonna go down. My solenoids from your link in the post. Came in a bag just like your too  i'm gonna drop those in plus, change out the diff. OilS
  got me sum amsoils gear oil plus their tranny oil. I'll update how things go for me.
i'm gonna drop those in plus, change out the diff. OilS got me sum amsoils gear oil plus their tranny oil. I'll update how things go for me.
03-28-2014, 04:45 PM
#16
Registered User

Join Date: Mar 2013
Location: Leesport, PA
Posts: 139
Likes: 0
Received 0 Likes
on
0 Posts
Update, all my stuff came in. This saturday everything gonna go down. My solenoids from your link in the post. Came in a bag just like your too i'm gonna drop those in plus, change out the diff. OilS got me sum amsoils gear oil plus their tranny oil. I'll update how things go for me.
i'm gonna drop those in plus, change out the diff. OilS got me sum amsoils gear oil plus their tranny oil. I'll update how things go for me.
03-28-2014, 05:34 PM
#17
Registered User
Join Date: Mar 2014
Location: South Cali.
Posts: 130
Likes: 0
Received 0 Likes
on
0 Posts
Well with mines, it won't shift into second when i start off in "D" i gotta drive it from "L" to "2" den "D". I reallie can't take it up too high rpm's cause it won't shift. So i change gears around 3800, any higher i gotta let off gas for it too change gear. So i changed tranny oil once already too see if it was the oil. Turns out nope it still acting up. So thanks too the write on this  gonna try this before i use even more money
  and thats where i'm at right now on mines. Also just found out that what i thought too be a turbo manifold crack is starting too look like a turbo exhaste side is cracked. Please just let it be the turbo
gonna try this before i use even more money and thats where i'm at right now on mines. Also just found out that what i thought too be a turbo manifold crack is starting too look like a turbo exhaste side is cracked. Please just let it be the turbo
03-28-2014, 07:18 PM
#18
Registered User
Join Date: Mar 2014
Location: South Cali.
Posts: 130
Likes: 0
Received 0 Likes
on
0 Posts
 well i was gonna do it saturday morning but, instead i'm gonna get going now on it. Well after my brother gets his out of the area first. I'll be posting how things go afterwords. Gonna be ah long night guys
03-29-2014, 12:35 PM
well i was gonna do it saturday morning but, instead i'm gonna get going now on it. Well after my brother gets his out of the area first. I'll be posting how things go afterwords. Gonna be ah long night guys
03-29-2014, 12:35 PM
#19
Registered User
Join Date: Mar 2014
Location: South Cali.
Posts: 130
Likes: 0
Received 0 Likes
on
0 Posts
Ok here we go. So i installed everything made sure the ground and clips where in place then put on pan and all the good stuff. Put in oil. Started the truck up and now it won't go into gear? Its in park but wen changed into gear "d" "2" "l" it won't go. Just rolls back or stays still? What did i do or didn't do? Can sum one help? plus. For right now i'm testing it with out much oil in the pan. It that good or bad. Just hate pouring out again and again...should i fill it up full and try that....update i put the old ones back in and the tranny still those not want too go in gear for me (still with no oil in pan) ??
plus. For right now i'm testing it with out much oil in the pan. It that good or bad. Just hate pouring out again and again...should i fill it up full and try that....update i put the old ones back in and the tranny still those not want too go in gear for me (still with no oil in pan) ??
Last edited by Munkymag; 03-29-2014 at 05:17 PM.
09-12-2014, 10:02 AM
#20
Registered User

Join Date: Sep 2014
Posts: 1
Likes: 0
Received 0 Likes
on
0 Posts
Awesome writeup!
Friend I can't thank you enough for posting this! I recently swapped out the solenoids on my second gen and your writeup was helpful and informative! The only thing I would add (and this may just be me), would be a recommendation of lots of gloves! I personally like to keep everything very clean as I am a clean freak....although my wife would beg to differ.... Oh yeah and safety goggles....although I did not use them hahah. I paid with a nice dollop of used atf in the eye...
Thanks again!
Munkymag
I am not sure if to late to help you but I would suggest that you NOT run a vehicle without tranny fluid...just my personal opinion.
Thanks again!
Munkymag
I am not sure if to late to help you but I would suggest that you NOT run a vehicle without tranny fluid...just my personal opinion.
Last edited by happy4x; 09-12-2014 at 10:13 AM.

Thread
Thread Starter
Forum
Replies
Last Post
voiddweller
86-95 Trucks & 4Runners (Build-Up Section)
19
05-02-2016 09:10 PM
bigblue82
General Electrical & Lighting Related Topics
10
07-06-2015 08:27 AM
94 Newbie
95.5-2004 Tacomas & 96-2002 4Runners
2
07-06-2015 04:23 AM


