
1.25" Coil spacers install - 95 4Runner
 11-20-2008, 06:37 AM
#1
Registered User
Thread Starter

Join Date: Oct 2008
Posts: 27
Likes: 0
Received 0 Likes
on
0 Posts
So 3.5 hours in my garage yesterday with only a 'low profile', 14" lift floor jack, and hand tools and I ended up having to put everything back together stock  Ok, I'm not an mechanical idiot but I am new to this
truck. I got the spacers from DayStar and the instructions are on the site here: http://www.daystarweb.com/attachment.../kt/p10499.pdf
Well, it didn't take long to realize the those instructions are simple wrong and don't even have pictures from a 2nd Gen.
Anyways, I jacked the diff with my puny jack until I could get jackstands high under my hitch, took off the wheels, let the jack down all the way. The springs were still absolutely loaded in this senario. I mean, I could not even spin them. Not sure what is actually holding up the rear end now but I could see that soft brake line almost fully extending already.
I had no idea at the time how much longer the stock springs were so off to the local hardware store with a loan-a-tool program for a claw spring compressor. I figured I'd just load the spring, clamp it and jack it up. No way...in end I had to flatten three coils almostly com,pletely. Well, I finally got one coil (passenger side) out with much difficulty but it was quickly apparent that with the 1.25" spacer, there was no way the spring was going back in.
Who as done this? What do I need to do to get more droop in the rear end? I'm thinking of loosening the hard line mounting bolts, disco the sway bar (I could break a nut loose last night)...what else?
Thanks,
Ryan
Ok, I'm not an mechanical idiot but I am new to thistruck. I got the spacers from DayStar and the instructions are on the site here: http://www.daystarweb.com/attachment.../kt/p10499.pdf
Well, it didn't take long to realize the those instructions are simple wrong and don't even have pictures from a 2nd Gen.
Anyways, I jacked the diff with my puny jack until I could get jackstands high under my hitch, took off the wheels, let the jack down all the way. The springs were still absolutely loaded in this senario. I mean, I could not even spin them. Not sure what is actually holding up the rear end now but I could see that soft brake line almost fully extending already.
I had no idea at the time how much longer the stock springs were so off to the local hardware store with a loan-a-tool program for a claw spring compressor. I figured I'd just load the spring, clamp it and jack it up. No way...in end I had to flatten three coils almostly com,pletely. Well, I finally got one coil (passenger side) out with much difficulty but it was quickly apparent that with the 1.25" spacer, there was no way the spring was going back in.
Who as done this? What do I need to do to get more droop in the rear end? I'm thinking of loosening the hard line mounting bolts, disco the sway bar (I could break a nut loose last night)...what else?
Thanks,
Ryan
 11-20-2008, 07:43 AM
#2
Registered User
Join Date: Apr 2008
Location: CenCal
Posts: 536
Likes: 0
Received 0 Likes
on
0 Posts
Man, I was in the EXACT SAME POSITION with my '90. Same spacers, same problem. I ended up muscling them around with a very large pry bar (the 4 foot kind). Much knuckle blood was spilled on those installs. In hindsight, dropping the brake line and sway would have been smarter. Take your time and do it the right way. May be a long and drawn out process, but it's worth it. My truck doesn't look like a wounded duck anymore.
PS- Plan on adjust your rear brake proportioning valve accordingly. Do NOT overlook this.
Qdude
PS- Plan on adjust your rear brake proportioning valve accordingly. Do NOT overlook this.
Qdude
11-20-2008, 08:18 AM
#4
Registered User
Join Date: Jul 2008
Location: Grew up in S.C.V, So Cal.....now in Hampstead, NC
Posts: 4,592
Likes: 0
Received 0 Likes
on
0 Posts
I just did this a few months back with 1.5" SDORI coil spacers. I did a mini write up here. Here is a link to my thread,with pics. Taking your time, 2-2 1/2 hours tops wrench time. 1 thing that makes the job a breeze are coil spring collapsers.https://www.yotatech.com/forums/f116...pacers-152258/. Scroll down to post 25, and thats where my install pics start. Hope this helps.....
Last edited by a4runnerfreak; 11-20-2008 at 08:30 AM.
11-20-2008, 09:10 AM
#5
Registered User
Thread Starter
Join Date: Oct 2008
Posts: 27
Likes: 0
Received 0 Likes
on
0 Posts
Found your write up here:
https://www.yotatech.com/forums/f116...pacers-152258/
Very good thanks for that.
However, you never mentioned the brake line? Was it an issue for you?
Your pics are from the driver's side, I tried the passenger yesterday and there is alot more stuff in the way with the pandhard mount etc. I had a bitch of a time even getting the spring out after flattening 3 coils. Was the other side as easy?
Thanks,
Ryan
11-20-2008, 09:21 AM
#6
Registered User
Join Date: Jul 2008
Location: Grew up in S.C.V, So Cal.....now in Hampstead, NC
Posts: 4,592
Likes: 0
Received 0 Likes
on
0 Posts
The driver's side is easier. It was the pass. side that took the longest cuz of the panhard bar. But it is do-able. I didn't have any issues with the brakelines, just was careful around them, and all I did for the LVSP, was remove the 2 bolts that held it to the axle, then lowered the axle. When I jacked the truck up, I unbolted the shocks and swaybar first, then lowered the axle. Made it much easier. So did the 2x4 to help keep push down the axle. Even with the coil spring collapsers, I still had to wrestle (gently) to put the coils back in w/ the spacers.
Just take your time, and don't get frustrated. You'll get it
Just take your time, and don't get frustrated. You'll get it
11-20-2008, 09:24 AM
#7
Registered User
Join Date: Jan 2007
Location: Chico Republic, NOR*CAL
Posts: 1,987
Likes: 0
Received 0 Likes
on
0 Posts
when i put in my lift coils i was having a lot of trouble so i ended up unhooking the pan hard bar, swaybar, shocks for sure, and one upper link. it was easy this way to get the extra length in there this way.
Trending Topics
11-22-2008, 03:30 PM
#9
Registered User
Thread Starter
Join Date: Oct 2008
Posts: 27
Likes: 0
Received 0 Likes
on
0 Posts
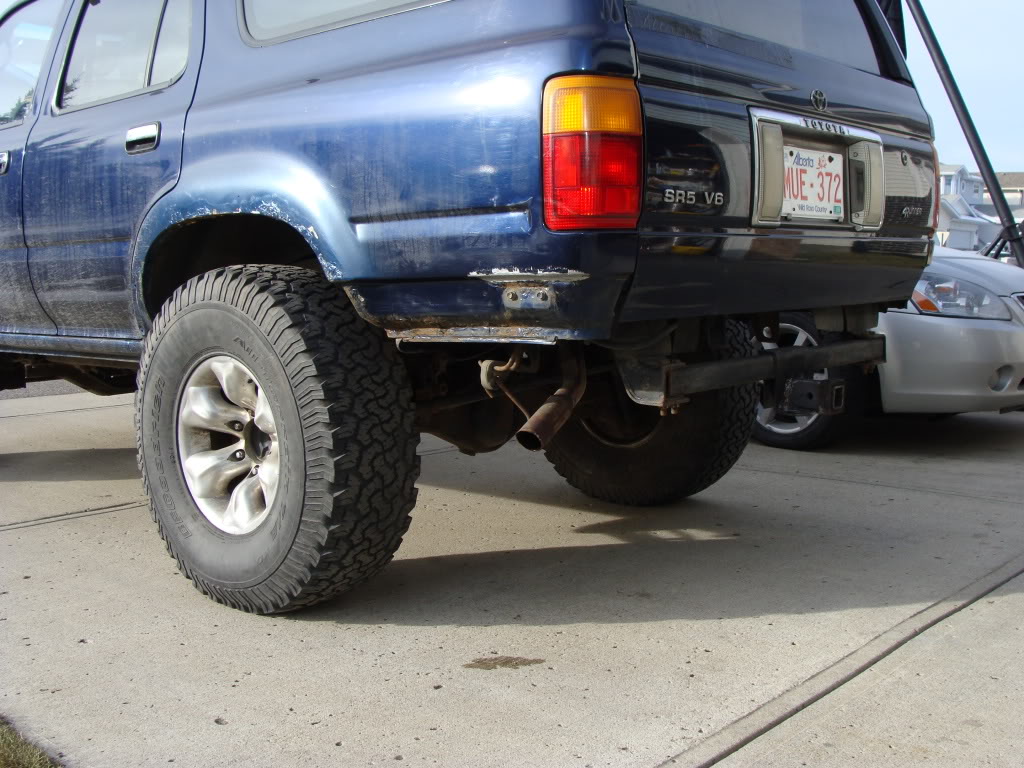
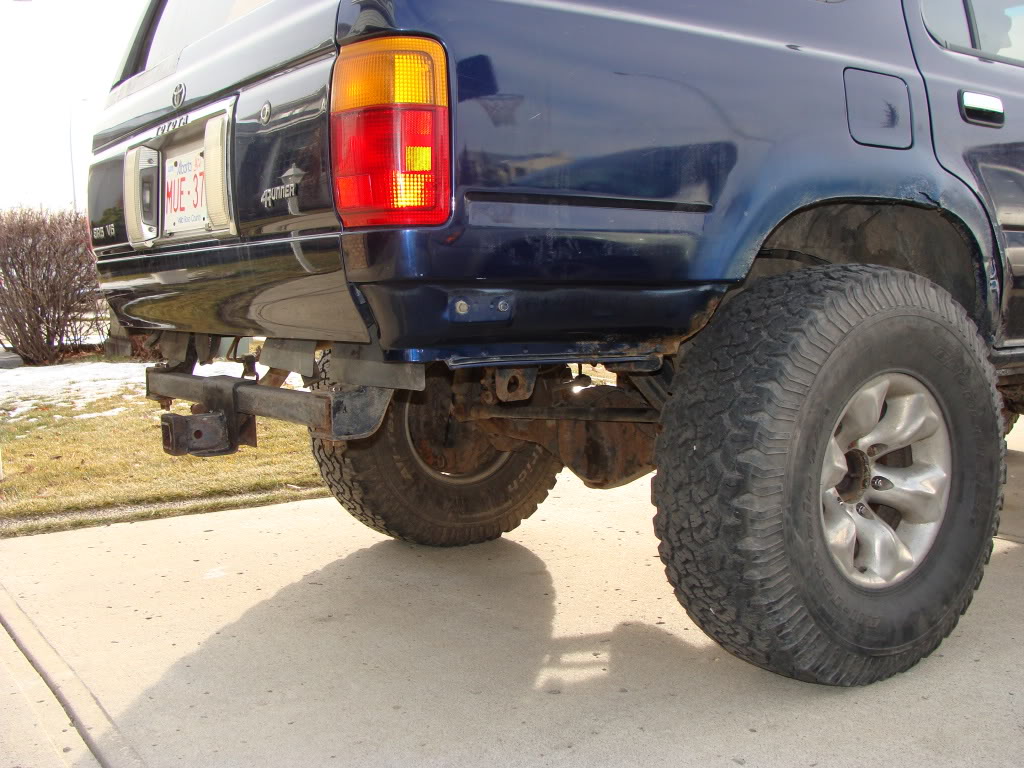
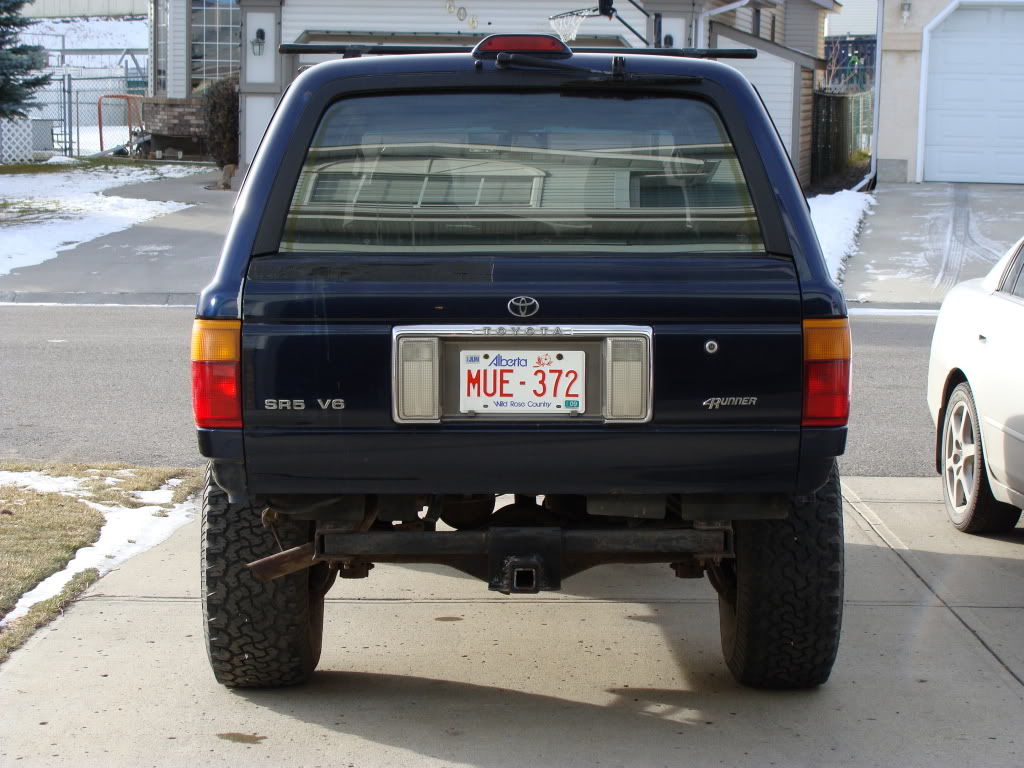
Ok, second time around only took 2.5 hours and got it done. Unhooker the brake hardlines on the axle to allow more droopp and help from a 210lbs friend on a 6' pry bar did the trick.

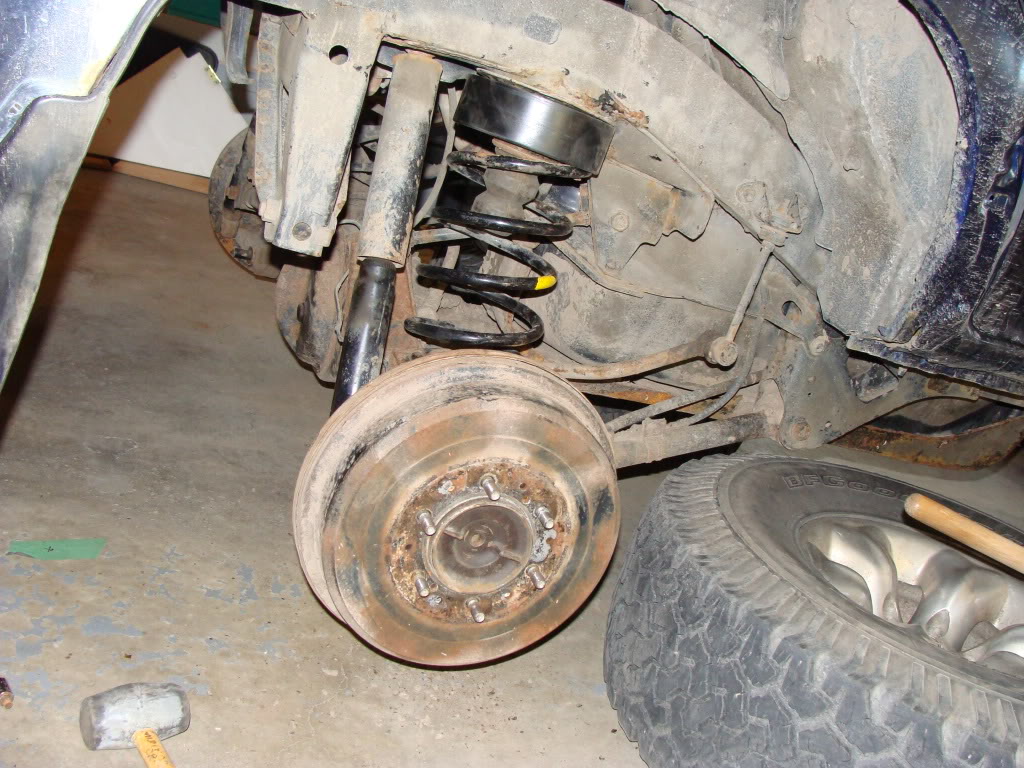
While I was at it, I removed the rear bumper completely in preperation for a custom job I am building. Well, turns out the mudflap was holding the quarter panel together Rust everywhere, 8" hole under the bumper.
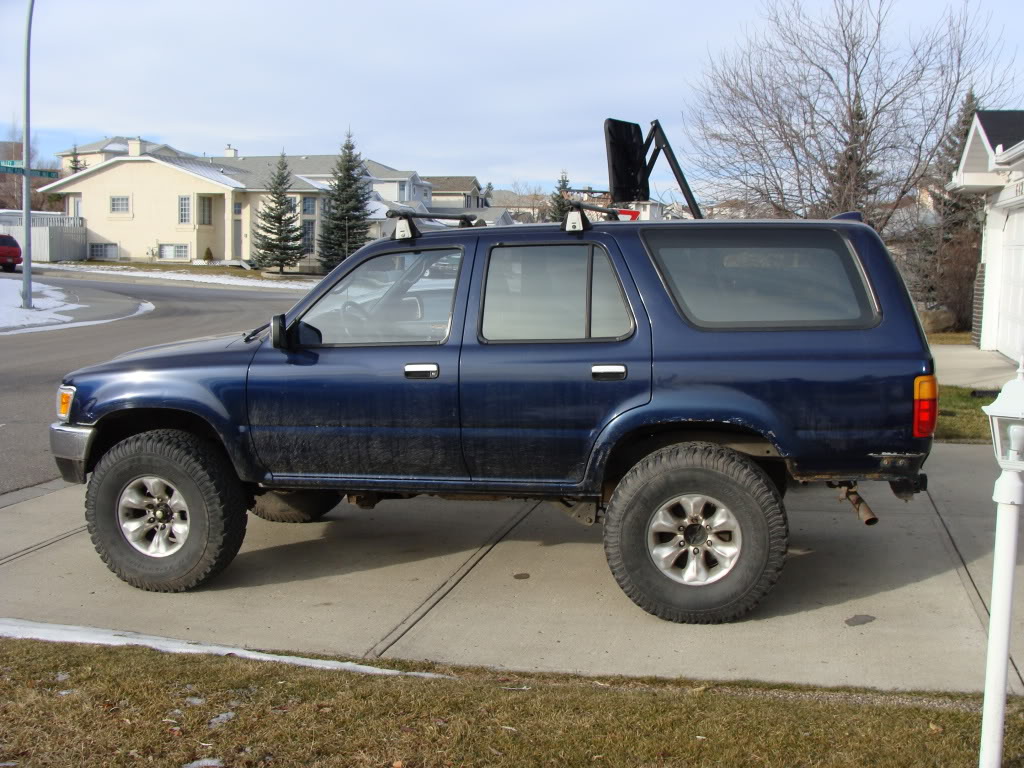
Before 1.25" DayStar spacer:

After spacer:
While I was at it, I removed the rear bumper completely in preperation for a custom job I am building. Well, turns out the mudflap was holding the quarter panel together
Rust everywhere, 8" hole under the bumper.Before 1.25" DayStar spacer:
After spacer:


Thread
Thread Starter
Forum
Replies
Last Post
Vargntucson
95.5-2004 Tacomas & 96-2002 4Runners
0
07-04-2015 12:15 PM


