SR-5 fender edge trim (need to remove)
 11-20-2014, 12:15 PM
#1
Registered User
Thread Starter
Join Date: Mar 2009
Location: Central Va
Posts: 78
Likes: 0
Received 0 Likes
on
0 Posts
1984 SR-5 Bed welding repair rust patch
Any advice on how to remove the SR-5 fender edge trim. I'd prefer to do it gently and reuse it.
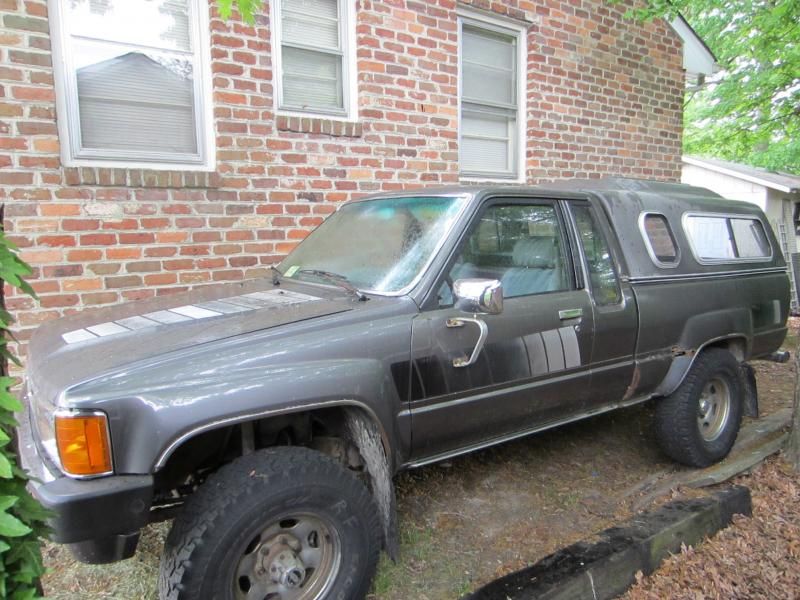
Here is a pic of Anema's truck (same year / color and fender trim as mine). 1985 FSM has windshield trim / rocker trim but no fender trim.

Here is a pic of Anema's truck (same year / color and fender trim as mine). 1985 FSM has windshield trim / rocker trim but no fender trim.
Last edited by Whitfield; 12-17-2014 at 03:45 PM. Reason: title was missleading as this has morphd into bed repair
 11-20-2014, 05:35 PM
#3
Registered User
My fenders were just like yours. You don't want to fight with rusty screws in that delicate rusty area. Spray some Liquid Wrench or Kroil on the bolts or screws an hour before you remove the screws or bolts. I think mine were 10mm bolts. You are going to find a bit more rust under the trim.
11-21-2014, 08:33 AM
#4
Registered User
Thread Starter
Join Date: Mar 2009
Location: Central Va
Posts: 78
Likes: 0
Received 0 Likes
on
0 Posts
Drivers rear fender trim (front side)
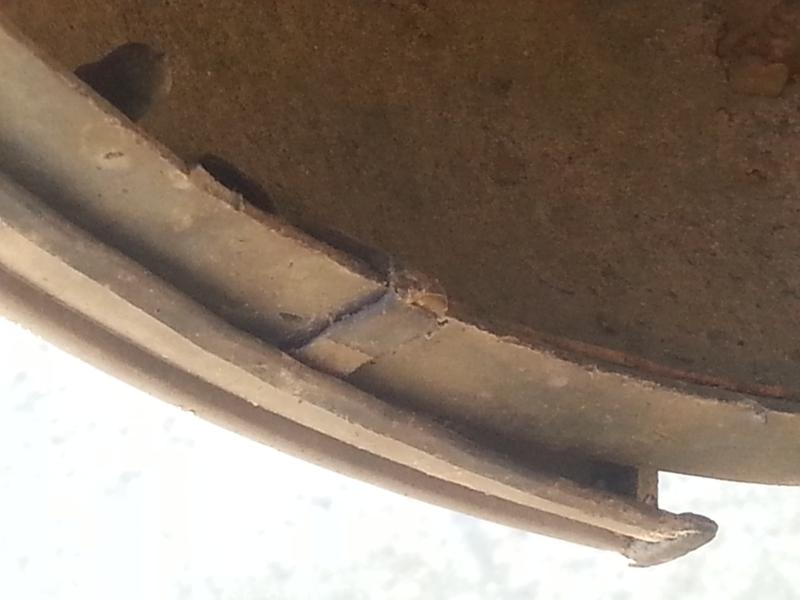
Drivers rear fender trim (top middle)
Drivers rear fender trim (back side ~ toward bumper)
Ive found clips and nylon studs but so far no screws or bolts. Unfortunately no time to dive into the project today ~ working on bed rust repair.
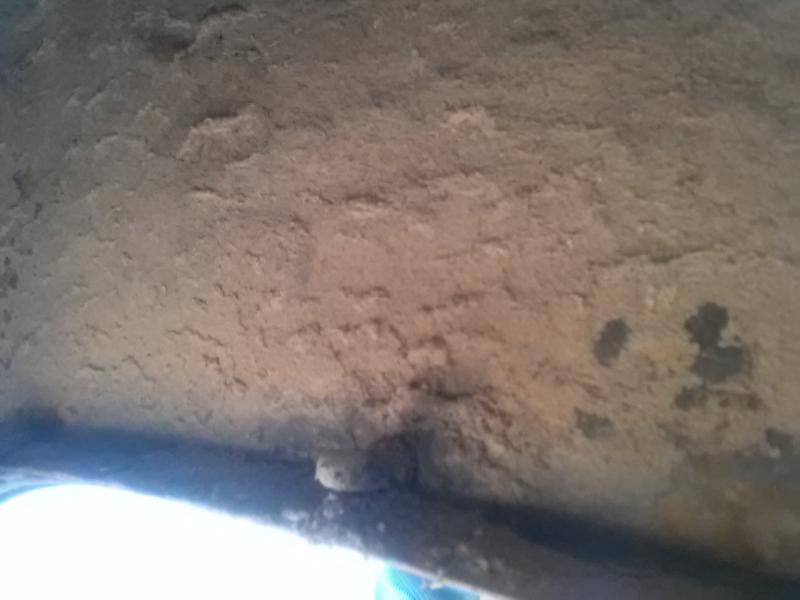
AND ~ The cancer patient

Drivers rear fender trim (top middle)

Drivers rear fender trim (back side ~ toward bumper)

Ive found clips and nylon studs but so far no screws or bolts. Unfortunately no time to dive into the project today ~ working on bed rust repair.
AND ~ The cancer patient

Last edited by Whitfield; 11-21-2014 at 12:09 PM.


Trending Topics
11-21-2014, 02:49 PM
#8
Registered User
iTrader: (1)

Join Date: Feb 2009
Location: Medford, Oregon
Posts: 255
Likes: 0
Received 0 Likes
on
0 Posts
I take it those doors where in bad shape? looks like you could have just took them off and put them on your truck. Its crazy how rusty these trucks get in the east. Nearly every truck in the valley I live in is rust free, unless it came from some other place.
11-21-2014, 04:44 PM
#9
Registered User
Thread Starter
Join Date: Mar 2009
Location: Central Va
Posts: 78
Likes: 0
Received 0 Likes
on
0 Posts
My cab and doors are clean (hood is ugly) ~ I'm using them as patches for my bed. I don't need anywhere near this much metal ~ but figured i'd get as much as I can. Having Toyota metal with the factory body lines already stamped in it put me 3 steps ahead.
I also chopped up the front fender flared section to use as a base to form my rear flare patches. Each 86 door had enough damage to keep it from selling. Thanks for the heads up on the handles and vent glass. If i go back I'll snag them.
I also chopped up the front fender flared section to use as a base to form my rear flare patches. Each 86 door had enough damage to keep it from selling. Thanks for the heads up on the handles and vent glass. If i go back I'll snag them.
Last edited by Whitfield; 11-21-2014 at 04:47 PM.
12-15-2014, 02:54 PM
#10
Registered User
Thread Starter
Join Date: Mar 2009
Location: Central Va
Posts: 78
Likes: 0
Received 0 Likes
on
0 Posts
Fender trim was held in with plastic push pin type clips and 4 bent metal tabs. The push pin clips are individual items that snap into the fender molding. not too bad to remove ~ the SR-5 plastic stone guard was a bear 1-screw. 1-trim pin, and (3) tiny phillips head screws holding 3 other plastic square retainers. The miniature phillips screw heads were packed with 30+ yrs of road grim and undercoat.
Rust in front of gas filler is surrounding a turd of bondo a little bigger than a golf ball.
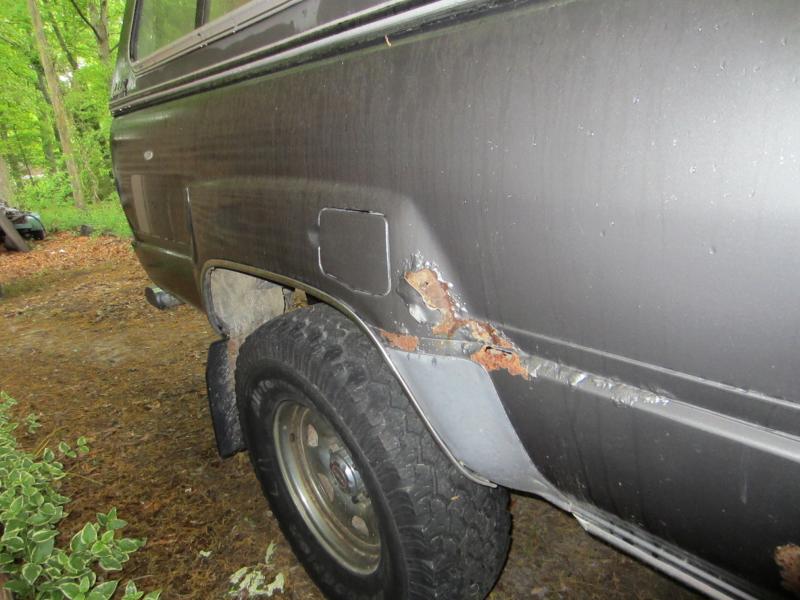
Rust in front of gas filler is surrounding a turd of bondo a little bigger than a golf ball.

Last edited by Whitfield; 12-17-2014 at 08:27 PM.
12-15-2014, 04:12 PM
#11
Registered User
Thread Starter
Join Date: Mar 2009
Location: Central Va
Posts: 78
Likes: 0
Received 0 Likes
on
0 Posts
Working on making the 1986 drivers front fender that I cut up into a passenger rear fender patch panel.
The length is a little short. It does not go further forward because flipped around to this side this is the back end of the front fender, where the door would be when it was on the drivers side. This is why I also cut out the door skins to use, as I will need additional pieces.
The front fender is a poor fit over all as the flare is not shaped the same. The only true advantage is that I can get the Toyota bodyline complex shape from the bed seam into the flare. The rest of the patch panel will have to be reworked slightly to fit correctly.
Now for the big question
Weld or 3m Panel bond
.
Last edited by Whitfield; 12-15-2014 at 04:18 PM.
12-16-2014, 04:20 PM
#12
Registered User
My fender trim is completely different from yours so it explains the difference in hardware. Mine (1st gen 4Runner) is L shaped stainless steel with no black plastic on it.
Panel bond all day long. It's what most modern body shops use for non structural repairs. If you weld in the middle of a the bed you will be fighting rust around the seam. Eastwood sells a panel bond that is intended as a refill for their "no weld panel repair kit." It differs from 3M in that the tube will fit in a regular $4 caulk gun. It's $19.49 a tube. 3M requires a special gun that is expensive for something you hope to never need again. If you decide to get it nose around on the web for a free shipping code. It looks like you'll need several tubes:
http://www.eastwood.com/no-weld-pane...&parent_id=501
I live in Richmond. Where did you find an old Toyota in a junkyard? I look at Circle/Chesterfield's inventory all the time and they never seem to show up.
12-16-2014, 06:54 PM
#13
Registered User
Thread Starter
Join Date: Mar 2009
Location: Central Va
Posts: 78
Likes: 0
Received 0 Likes
on
0 Posts
The sheet metal came from the new circle @ south side speedway (Used to be Woodfin Jeep / Honda salvage) ~ It was a 1986 single cab with frame rust and dents on every panel + it had been in the yard 2-months. Ft.Lee has a 87 Yota now, cam in early Nov. and I have yet to make the 2 mile trip to check it out. I'm down in Colonial Heights by South Park but work in Richmond @ Chippenham / I-95.
Don't take off her mask if you don't want to see her face... (Bed liner removed)

The bed floor repair will be a multistage process.
Am considering reworking the driver side bed side seam with the door skins + Panel bond and loosing the factory rust prone joint.
I may need to weld in the driver side bed floor outer edge supports at the fender / they are gone. Also considering removing the entire panel behind drivers wheel well. With so much rust in the panel and underlying support / patching it is not practical.
Checking Panel bond use recommendations they still recommend spot welding in certain high stress areas. I have a 3M gun i can borrow / return but I have yet to try it.
Last edited by Whitfield; 12-16-2014 at 07:20 PM.
12-17-2014, 12:58 PM
#14
Registered User
Thread Starter
Join Date: Mar 2009
Location: Central Va
Posts: 78
Likes: 0
Received 0 Likes
on
0 Posts
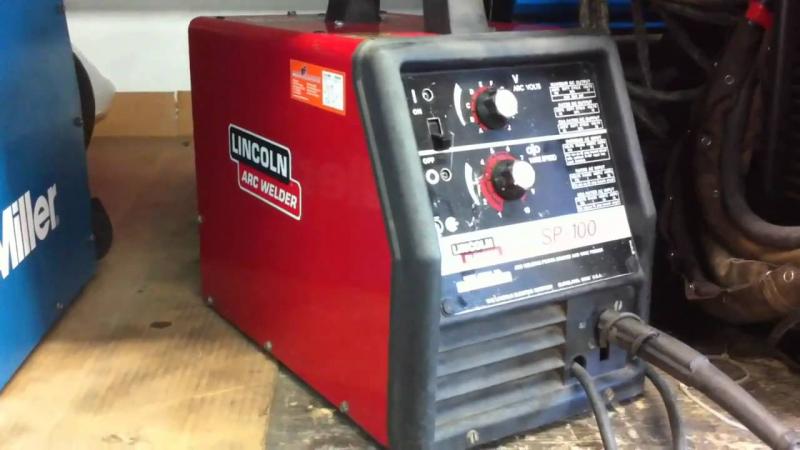
Welder = Lincoln SP100 Perfect little 110v sheet metal machine running .024 / 6mm wire with gas shield
Take your time fitting / shaping / bending the patch to meet your work. Minutes working here perfecting your fit will save hours later. Work around the patch in slowly one spot weld at a time. Try to get the corners / sides first as the patch may move / shift and not fit if you begin on one side and then work your way around. Work it smart using a tool to hold / push / pull the patch to keep it even with the surrounding metal. Don't be afraid to break out the hammer. The more even it lays in now / the less work you will have later. Try to keep work opposing locations to avoid heat build up in one area. I kept my bare hand on the patch so that was a good way to regulate heat.
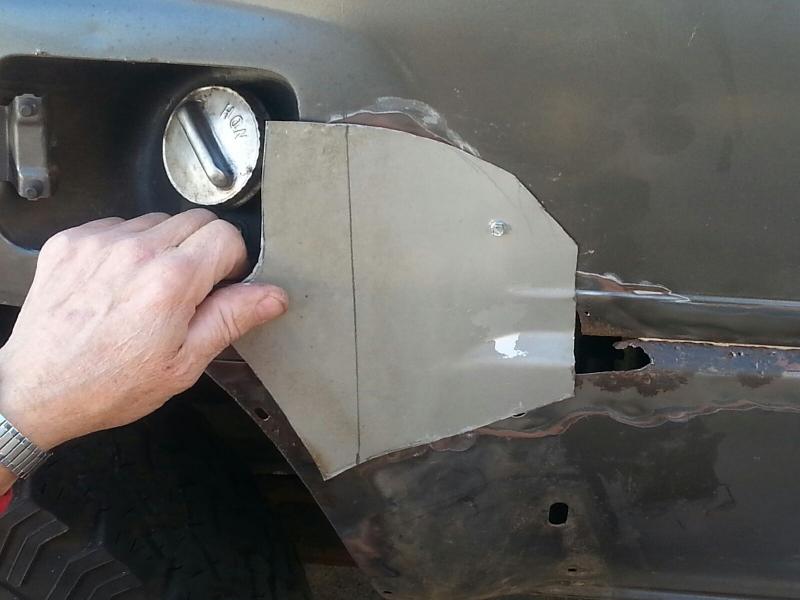
First patch ~ rust cut out / panel sized to fit.
I cut out the rust with a Dremmel Tool. I cut out the patch with HVAC sheet metal shears. Shaped by hand / hammer / foot / shoe and what ever else seemed to do the trick. The front fender flare transition is more abrupt so this one needed to relax a little ~ For others who are considering this / the front fender it is not a perfect match but it is close.
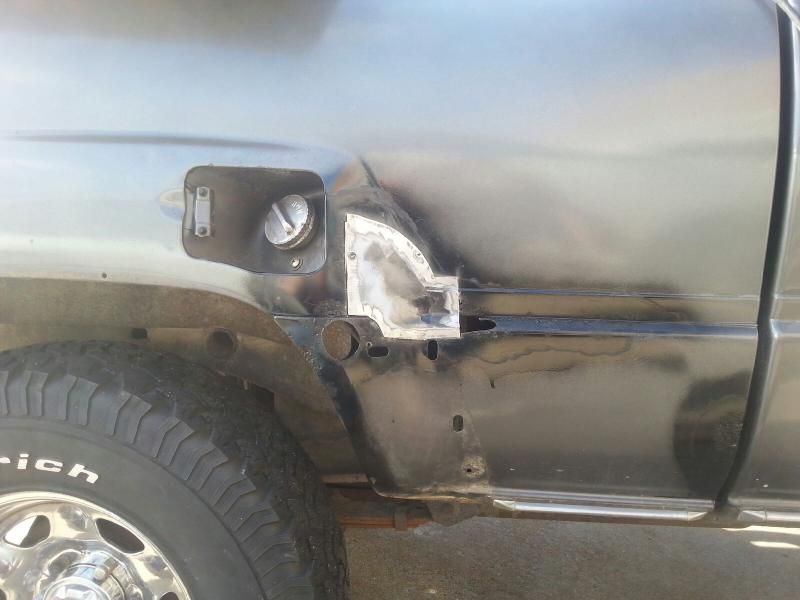
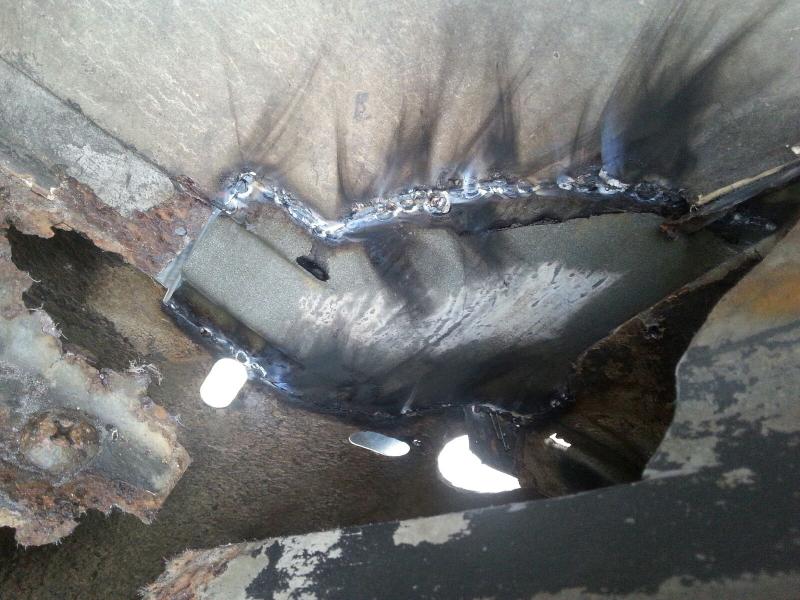
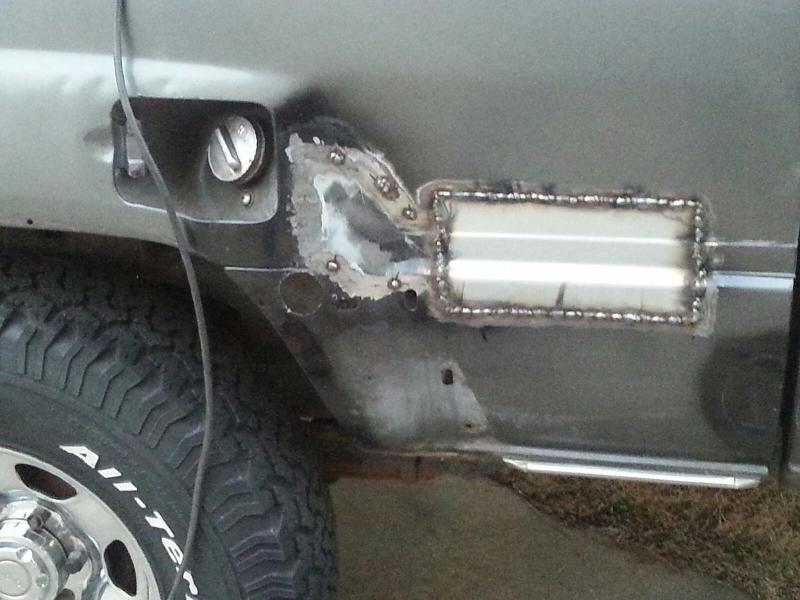
Spot welded in place / 200+ individual spot welds ~ then I ran out of time and had to go to work... Will grind smooth / back light / check for holes tomorrow.
Hope to continue replacing the seam / working towards the cab with another patch tomorrow. This will require me removing the bed floor in front of the wheel well. Replacing the bed side seam with no seam (door skin material) will also require me to fabricate a new flange for the bed floor to attach to.

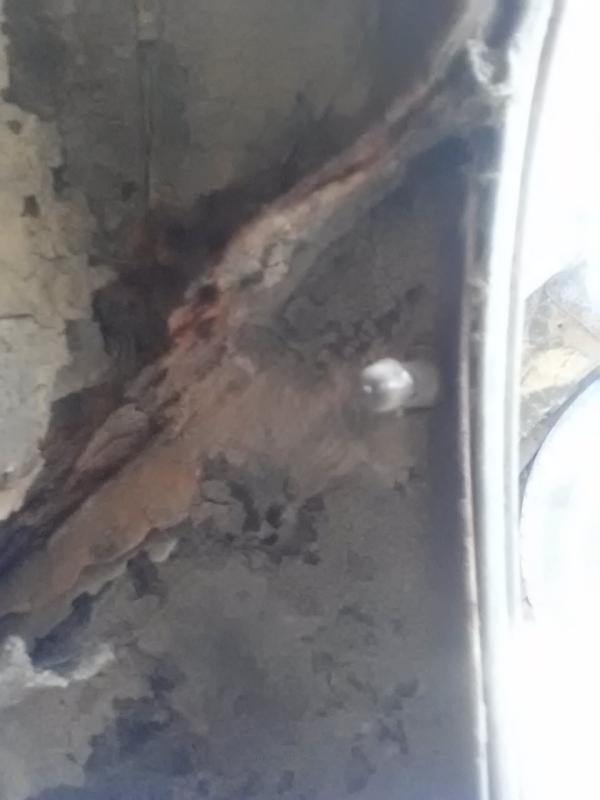
And a pic of the inside ~ I will clean it up and seal it, but much much more patch work to do... lower right is forward edge of pass rear fender well (taken from in the bed) ~ bed floor rusted out in pic ~ lower left is pass fender well to cab.

Take your time fitting / shaping / bending the patch to meet your work. Minutes working here perfecting your fit will save hours later. Work around the patch in slowly one spot weld at a time. Try to get the corners / sides first as the patch may move / shift and not fit if you begin on one side and then work your way around. Work it smart using a tool to hold / push / pull the patch to keep it even with the surrounding metal. Don't be afraid to break out the hammer. The more even it lays in now / the less work you will have later. Try to keep work opposing locations to avoid heat build up in one area. I kept my bare hand on the patch so that was a good way to regulate heat.

First patch ~ rust cut out / panel sized to fit.
I cut out the rust with a Dremmel Tool. I cut out the patch with HVAC sheet metal shears. Shaped by hand / hammer / foot / shoe and what ever else seemed to do the trick. The front fender flare transition is more abrupt so this one needed to relax a little ~ For others who are considering this / the front fender it is not a perfect match but it is close.

Spot welded in place / 200+ individual spot welds ~ then I ran out of time and had to go to work... Will grind smooth / back light / check for holes tomorrow.
Hope to continue replacing the seam / working towards the cab with another patch tomorrow. This will require me removing the bed floor in front of the wheel well. Replacing the bed side seam with no seam (door skin material) will also require me to fabricate a new flange for the bed floor to attach to.

And a pic of the inside ~ I will clean it up and seal it, but much much more patch work to do... lower right is forward edge of pass rear fender well (taken from in the bed) ~ bed floor rusted out in pic ~ lower left is pass fender well to cab.

Last edited by Whitfield; 12-17-2014 at 08:21 PM.
12-17-2014, 01:41 PM
#15
Registered User
My son took me to go look at a 88 Ex Cab last week. The same body style as yours. The outside looked great but the frame was toast. I put my finger in some of the holes and nothing but shards of rust came out. It's a shame. I never realized that this body style does not have a rear seat. I had a series of Nissan King cabs in the 80's that had really neat jump seats.
Body adhesive is fine but not for structural use and the bed is structural. How did you cut the panels at the yard? By hand?
Body adhesive is fine but not for structural use and the bed is structural. How did you cut the panels at the yard? By hand?
12-17-2014, 03:19 PM
#16
Registered User
Thread Starter
Join Date: Mar 2009
Location: Central Va
Posts: 78
Likes: 0
Received 0 Likes
on
0 Posts
I cut the sheet metal at the yard with Tin snips ~ I use them alot for sheet metal work but I'm still learning how to use them correctly. My father in law did 40 yrs HVAC so he is a pro with sheet metal work. Started my cuts with a hammer and a flat blade screw driver ~ it is crewd but effective. I hatchet and a hammer work very well to.
On the pre 89 frames. It is always easier to buy rust free if you can find it / afford it. But ~ Lots of guys now are just hacking the rear of a 2wd behind the cab. Grafting the good frame on to a 4-wd is not too bad. Some guys are even using taco rear frame sections on the mid 80's trucks. Otherwise $300 - $500 will cover most frame repairs from a local steel fabrication shop. Or this >>>> Bud Built Replacment Frame (Coming Soon)
Luckily my frame and cab are clean!
Last edited by Whitfield; 12-17-2014 at 08:23 PM.
12-18-2014, 05:40 PM
#17
Registered User
Thread Starter
Join Date: Mar 2009
Location: Central Va
Posts: 78
Likes: 0
Received 0 Likes
on
0 Posts
Installing a mail box or . . .

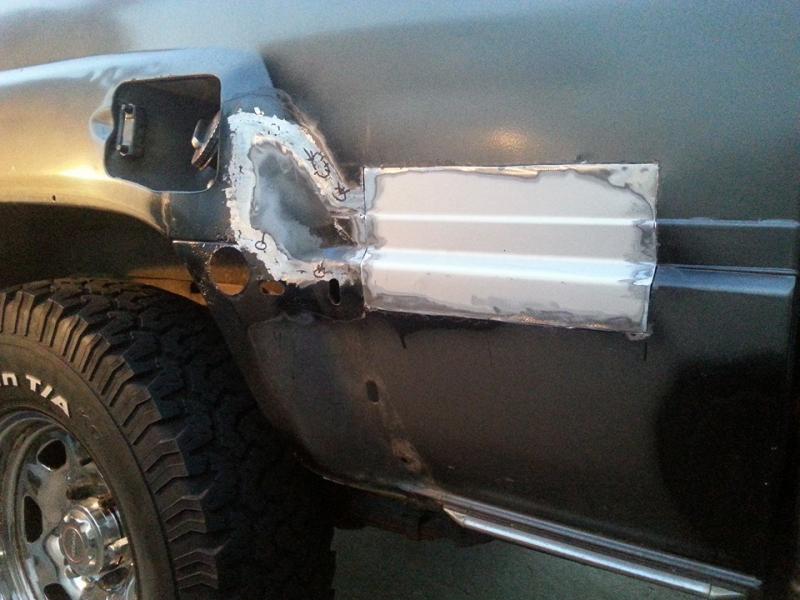
Such a large hole, but had to get away from the body lines to be able to smooth out the adjoining patch. SCARY = YES
Next day : : : : Chopping up a 1986 Yota door skin ~
New patch is dressed and fitted ~ out of time. Hope to weld tomorrow. Hopefully it welds up 1/2 as clean as it is fitted.
**** Chopping the magnets off of some old Toyota dash speakers makes for a nice fit up magnet.

Such a large hole, but had to get away from the body lines to be able to smooth out the adjoining patch. SCARY = YES
Next day : : : : Chopping up a 1986 Yota door skin ~

New patch is dressed and fitted ~ out of time. Hope to weld tomorrow. Hopefully it welds up 1/2 as clean as it is fitted.
**** Chopping the magnets off of some old Toyota dash speakers makes for a nice fit up magnet.

Last edited by Whitfield; 12-19-2014 at 07:08 PM.
12-20-2014, 05:04 PM
#18
Registered User
Thread Starter
Join Date: Mar 2009
Location: Central Va
Posts: 78
Likes: 0
Received 0 Likes
on
0 Posts
Today may be the last day I can work on the truck for (3) weeks 
Welding in long flat panels SUX.... Here is where panel bond would shine. I chose to weld because I will need to spot weld the edge for the bed floor on the back of the new panel so this will be some what structural. But as bad as this panel twisted / warped / and now have high and low spots I'm tempted to panel bond the other side.
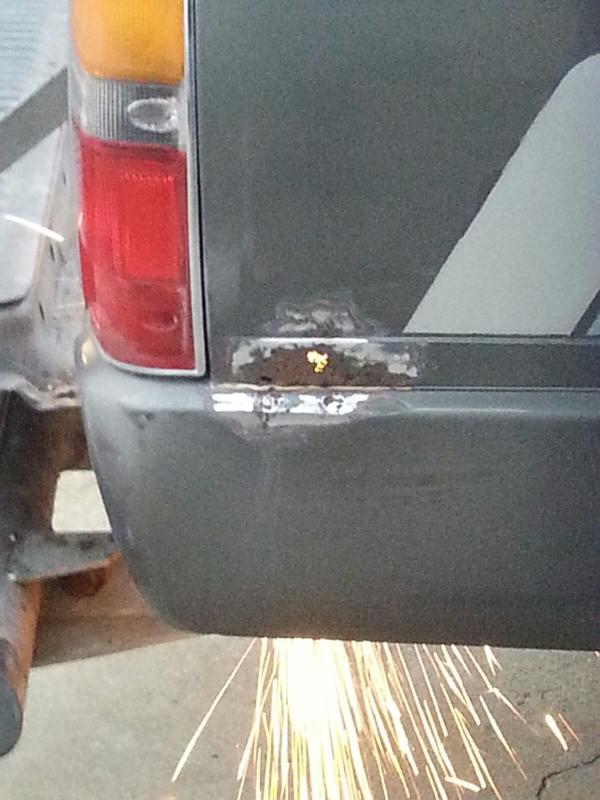
Cut out the passenger rear just in front o the tail light ~ last section on this side.
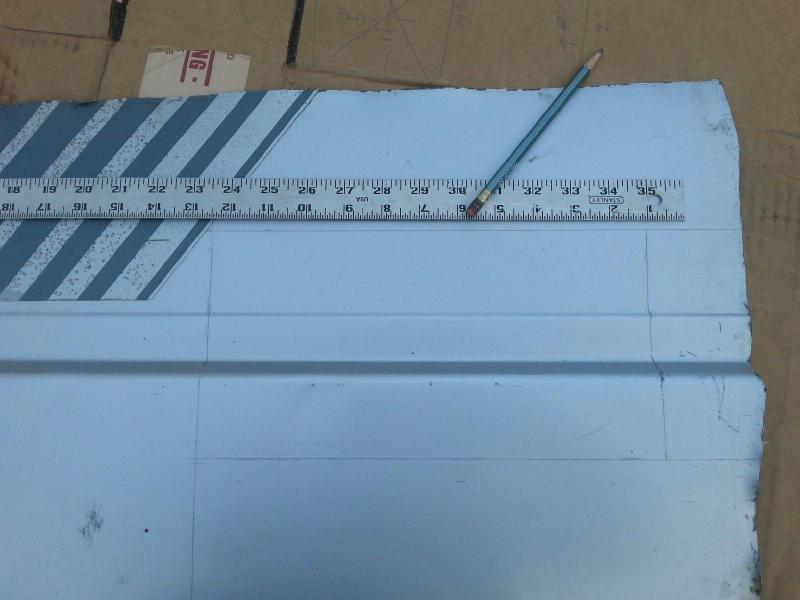
Unfortunately my 1986 door skins panels do not fit the sheet metal here. The distance from the bottom rolled line to the top rolled line is almost 1/4" taller on the stock 84 bed. I may have to make my own custom patch panel by combining (2) 86 door skin pieces. Also realized that the rolled edge in the sheet metal is different ~ the 84 has a sharp edge where the 86 is much more rounded.
Welding in long flat panels SUX.... Here is where panel bond would shine. I chose to weld because I will need to spot weld the edge for the bed floor on the back of the new panel so this will be some what structural. But as bad as this panel twisted / warped / and now have high and low spots I'm tempted to panel bond the other side.

Cut out the passenger rear just in front o the tail light ~ last section on this side.
Unfortunately my 1986 door skins panels do not fit the sheet metal here. The distance from the bottom rolled line to the top rolled line is almost 1/4" taller on the stock 84 bed. I may have to make my own custom patch panel by combining (2) 86 door skin pieces. Also realized that the rolled edge in the sheet metal is different ~ the 84 has a sharp edge where the 86 is much more rounded.
 12-21-2014, 04:53 PM
#19
Registered User
Yeah. I think panel bond would be easier on those thin quarter panels. You should get some seam sealer and get the back side of the panels you welded. Your truck is going to last a long time after all this work. I hope you come back after your three weeks away from the project. You've done a good tutorial for the many who struggle with rust.


