blower motor sounds like freight train...
 03-03-2014, 11:27 AM
#1
Registered User
Thread Starter
iTrader: (1)

Join Date: Nov 2013
Location: Virginia
Posts: 244
Likes: 0
Received 0 Likes
on
0 Posts
blower motor sounds like freight train...
Pretty sure my resistor is good although I will change it out anyway. My question is...how do I get to the blower motor? I'm sure it just needs cleaning out. I get speeds changes on every setting just not much air.
 03-03-2014, 02:39 PM
#2
Super Moderator
Staff
iTrader: (1)
Join Date: Aug 2008
Location: Anderson Missouri
Posts: 11,788
Likes: 0
Received 21 Likes
on
19 Posts
Just 3 screws that hold the blower to the housing. The one up near the firewall is the hardest to get to. I use a 1/4 in socket set. Screws go from the bottom, pointing up. Sometimes the foam around the ducting is deteriated and just needs some foam added or wrapped with something.
03-03-2014, 02:51 PM
#4
Super Moderator
Staff
iTrader: (1)
Join Date: Aug 2008
Location: Anderson Missouri
Posts: 11,788
Likes: 0
Received 21 Likes
on
19 Posts
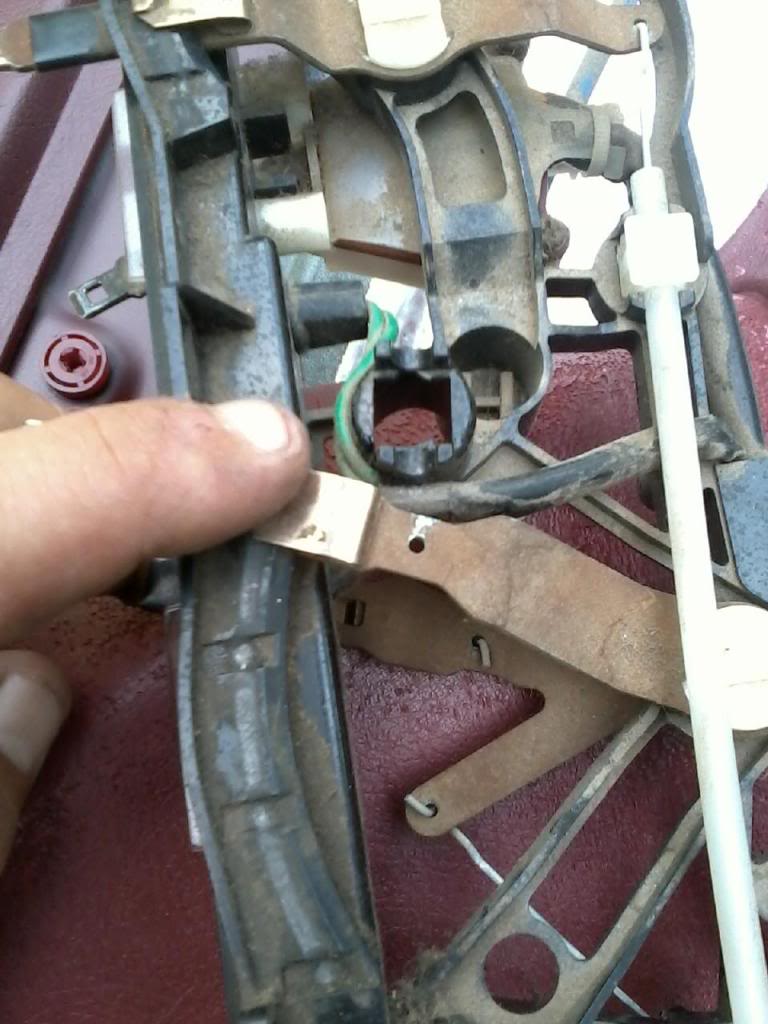
No. I have to kneel on the ground next to the passenger door. In the 8th and 9th pictrure in this link>>> https://www.yotatech.com/forums/f199...l#post52151096 you can see the three screws, (One is in between the fan blades). The very front screw can be a pain to get to but is doable. The last picture, in the far bottom right corner is where the blower will go.
Last edited by Terrys87; 03-03-2014 at 02:52 PM.
03-03-2014, 05:19 PM
#6
Registered User
Thread Starter
iTrader: (1)
Join Date: Nov 2013
Location: Virginia
Posts: 244
Likes: 0
Received 0 Likes
on
0 Posts
OK so I took the blower motor out...flew leaves in it like I figured... Still no air in the vents...what do I do? When I look up into where the motors inserts into...I can see a square peice if foamish stuff that I'm not sure if its suppoee to be there?
03-04-2014, 04:40 AM
#7
Super Moderator
Staff
iTrader: (1)
Join Date: Aug 2008
Location: Anderson Missouri
Posts: 11,788
Likes: 0
Received 21 Likes
on
19 Posts
I have seen several times where the pipe coming from the drivers vent next to the window, that goes down and under neath the steering column that connects to the heater assembly in the center of the truck to be missing. Basically what that does is just let ir blow straight to your right leg while driving.
The next possible issue and is common is where the levers that control the different functions is broken.
The next possible issue and is common is where the levers that control the different functions is broken.
Trending Topics
03-04-2014, 05:02 AM
#9
Super Moderator
Staff
iTrader: (1)
Join Date: Aug 2008
Location: Anderson Missouri
Posts: 11,788
Likes: 0
Received 21 Likes
on
19 Posts
I have also seen so much leaves and trash get in and block off the flow of air thru the consenser as well like in the 4th picture in the link above. Look in the cowl infront of your windshield and see if there is alot of debris in that area. Another sign to look for is to pull off your front mudflaps and then remove a few bolt that hold the inner fenders on and see if there is alot of debris sitting in the lower part of the fender.
What happens is the debris falls off of the edges of the cowl and some can get over the stove pipe on the passenger side of the cowl and get on down to your vent and clog the condenser.
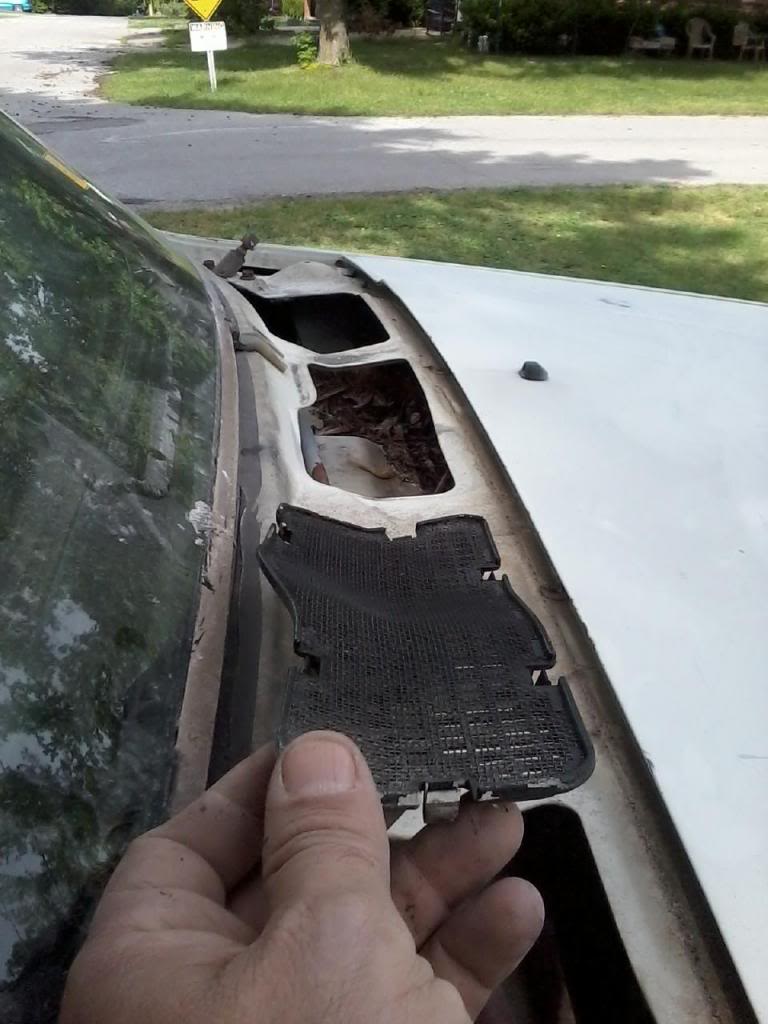
I try to mention in my threads about how dirty it gets under the cowl. This truck and other trucks I have seen dont always come with the black screen in my hand. Then on top of the black screen there is another screen that is the same you find on home windows. My 85 doesnt have these as well. Any time I am at a bone yard and can get a set of these I grab them. They help keep alot of debri from under the cowl.
If you want to scan from page 60 to about 75, on the 86 runner link below, there is things that I mention in that area that might help with some of that.
I tried to get a picture of it, but there is a stovepipe that is on the passenger side and it goes directoy to the blower motor. Sometimes debri can get over the stovepipe and gets into your ventilation system or cloggs up the AC condeser.
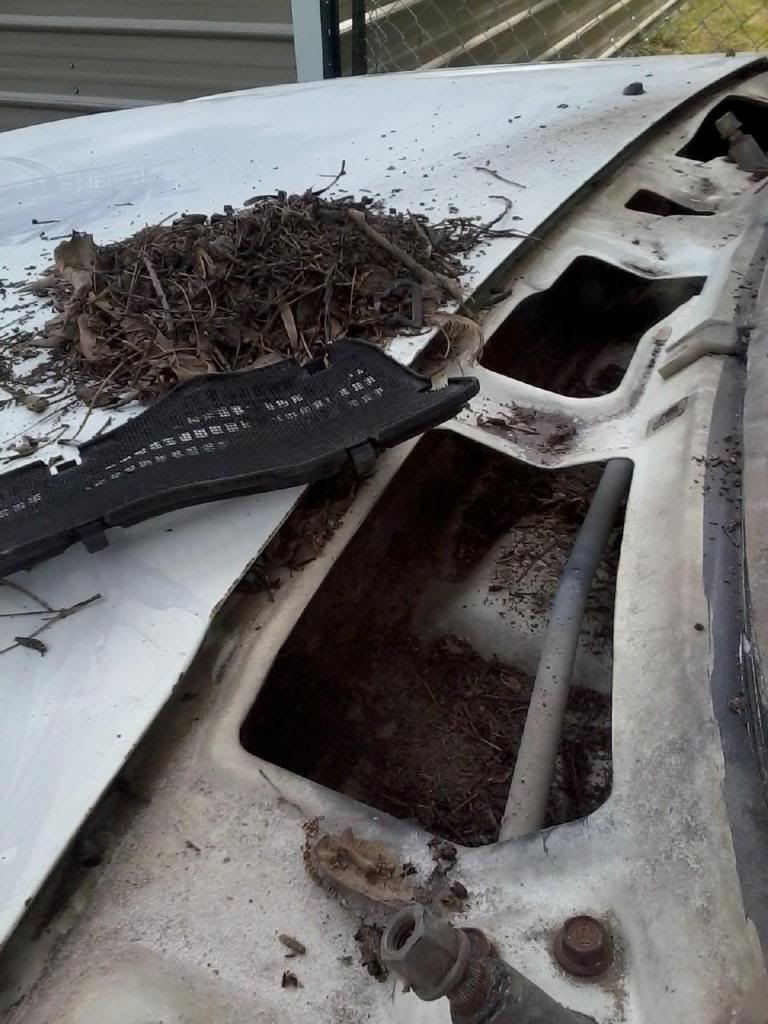
This may be half of what I got out. I used the shop vacu and then an air hose to get the rest out. There is drain holes on the far edges of the truck for water to get out, but the drains can clog. Another shot of the cowl screen I was talking about. I also took the truck to the windshield shop and had to them to remove the trim. Even after watching them, I dont think I could get it off.
If you are going to have a truck painted, removing alot of these things will give a better and cleaner paint job, as well as preventing rust.
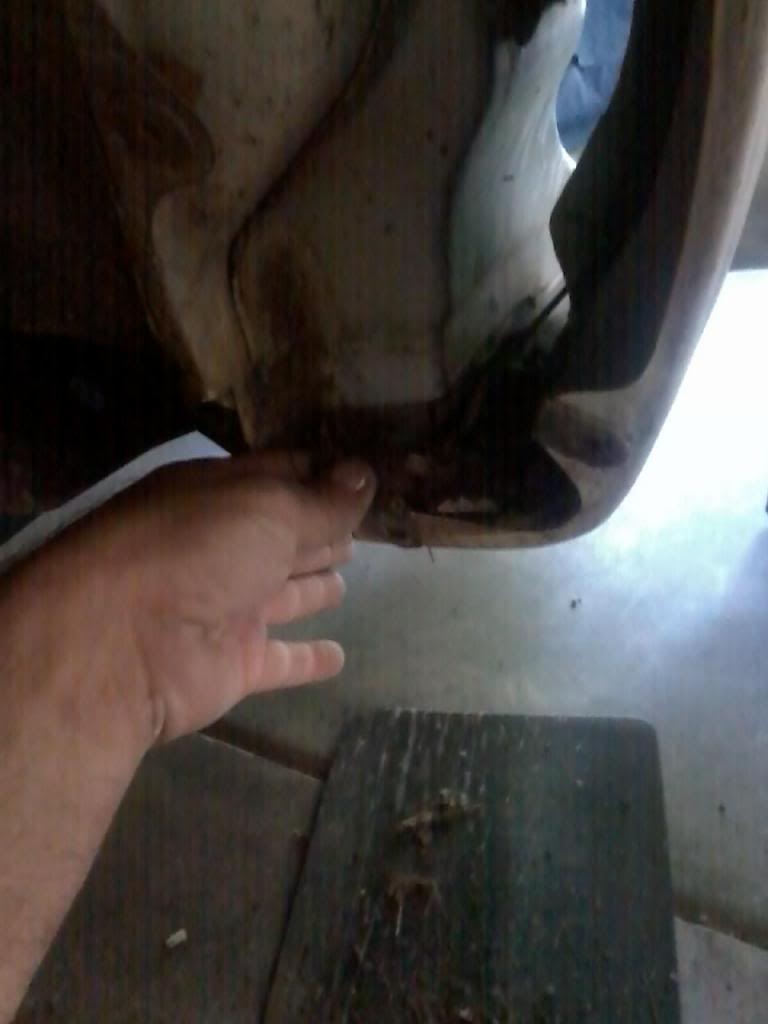
Easy to clean by removing the mudflaps and a few other screws that hold the back half of the inner fender on and blow out with air gun or remove with your fingers. You can see the day light that if I had painted with this on, when painting the jam, it would of blown dust every where.
What happens is the debris falls off of the edges of the cowl and some can get over the stove pipe on the passenger side of the cowl and get on down to your vent and clog the condenser.
I try to mention in my threads about how dirty it gets under the cowl. This truck and other trucks I have seen dont always come with the black screen in my hand. Then on top of the black screen there is another screen that is the same you find on home windows. My 85 doesnt have these as well. Any time I am at a bone yard and can get a set of these I grab them. They help keep alot of debri from under the cowl.
If you want to scan from page 60 to about 75, on the 86 runner link below, there is things that I mention in that area that might help with some of that.
I tried to get a picture of it, but there is a stovepipe that is on the passenger side and it goes directoy to the blower motor. Sometimes debri can get over the stovepipe and gets into your ventilation system or cloggs up the AC condeser.

This may be half of what I got out. I used the shop vacu and then an air hose to get the rest out. There is drain holes on the far edges of the truck for water to get out, but the drains can clog. Another shot of the cowl screen I was talking about. I also took the truck to the windshield shop and had to them to remove the trim. Even after watching them, I dont think I could get it off.
If you are going to have a truck painted, removing alot of these things will give a better and cleaner paint job, as well as preventing rust.

Easy to clean by removing the mudflaps and a few other screws that hold the back half of the inner fender on and blow out with air gun or remove with your fingers. You can see the day light that if I had painted with this on, when painting the jam, it would of blown dust every where.

Last edited by Terrys87; 03-07-2014 at 02:05 AM.
03-04-2014, 05:08 AM
#10
Super Moderator
Staff
iTrader: (1)
Join Date: Aug 2008
Location: Anderson Missouri
Posts: 11,788
Likes: 0
Received 21 Likes
on
19 Posts
I find it easier to remove the dash pad, https://www.yotatech.com/forums/f199...l#post51778558 and remove the heater bezel as a start. After that, you just have to work your way thru it. For the first time doing it like this it took me a few hours.
Here is how I would go about getting things apart and getting it corrected. I am dissassembling here and is pretty much step by step, Just reverse the procdure. I havent gotten to ressembly at this stage.
https://www.yotatech.com/forums/f199...l#post52150377 Just the things that apply to the dash. Skip the wiring things. This is a 22r to 22re conversion.
Last edited by Terrys87; 03-04-2014 at 05:12 AM.
03-04-2014, 05:35 AM
#11
Registered User
Thread Starter
iTrader: (1)
Join Date: Nov 2013
Location: Virginia
Posts: 244
Likes: 0
Received 0 Likes
on
0 Posts
Awesome info! Will be doing all of this soon. This truck was a project I started a couple of months ago. There was actually about 4 inches of leaves and dirt on the windshield and bezel. I'm sure that's gonna be a lot of the problem. Thanks a lot for all the good information!
03-04-2014, 06:54 AM
#12
Super Moderator
Staff
iTrader: (1)
Join Date: Aug 2008
Location: Anderson Missouri
Posts: 11,788
Likes: 0
Received 21 Likes
on
19 Posts
Some trucks dont have the covers in the cowls, some covers dont have a screen on them. Then some covers have screens on them. Those are the ones you want. I have seen that much junk in the cowl and no doubt that all that junk got down your stove pipe and if you have ac, it clogged your cevaporator, if you dont have ac it went straight to your heater core and clogged the air flow.
If you have ac, you can remove your glove box and loosene the evaporator, and then pull the blower assembly out. If your ac isnt charged, I would just pull the evaorator out first as it holds the blower assembly in and give the entire system a good cleaning.
It is so much easier to pull the whole dash, which really isnt as hard as you may think. Leave your heater controls attached. Spray paint how the controls lay in the dash area. You will see that in the 86 build that I mentioned earlier.
For other common problems, the 88 runner build has places where to find and fix them on the first page in the link below. Go by the post number in the top right hand of the corner. Some of the pages change as I add more info to it.
Last edited by Terrys87; 03-04-2014 at 06:56 AM.
03-05-2014, 11:43 PM
#13
Super Moderator
Staff
iTrader: (1)
Join Date: Aug 2008
Location: Anderson Missouri
Posts: 11,788
Likes: 0
Received 21 Likes
on
19 Posts
You can get a smooth cowl that stops the debris from getting in there. Here is what I plan on getting for my next project. http://www.toyotafiberglass.com/4runner_10.html

Thread
Thread Starter
Forum
Replies
Last Post
skoti89
Offroad Tech
3
07-08-2015 12:05 AM


