Alternator Upgrade!!
 07-25-2011, 05:10 AM
#1
Registered User
Thread Starter
Join Date: Feb 2011
Location: Sellersburg, IN
Posts: 58
Likes: 0
Received 0 Likes
on
0 Posts
Alternator Upgrade!!
A little background. I have a 1985 Toyota 4runner with the trusty 22re motor and as I am learning very quick, running with your headlights on, blower motor, and wipers on, almost kills my truck. Plus the amp meter just dives.
It wasn't until recently that I have started experiencing complete alternator failure. When I first start up it doesn't charge. I have to rev above 2k to get it to charge.
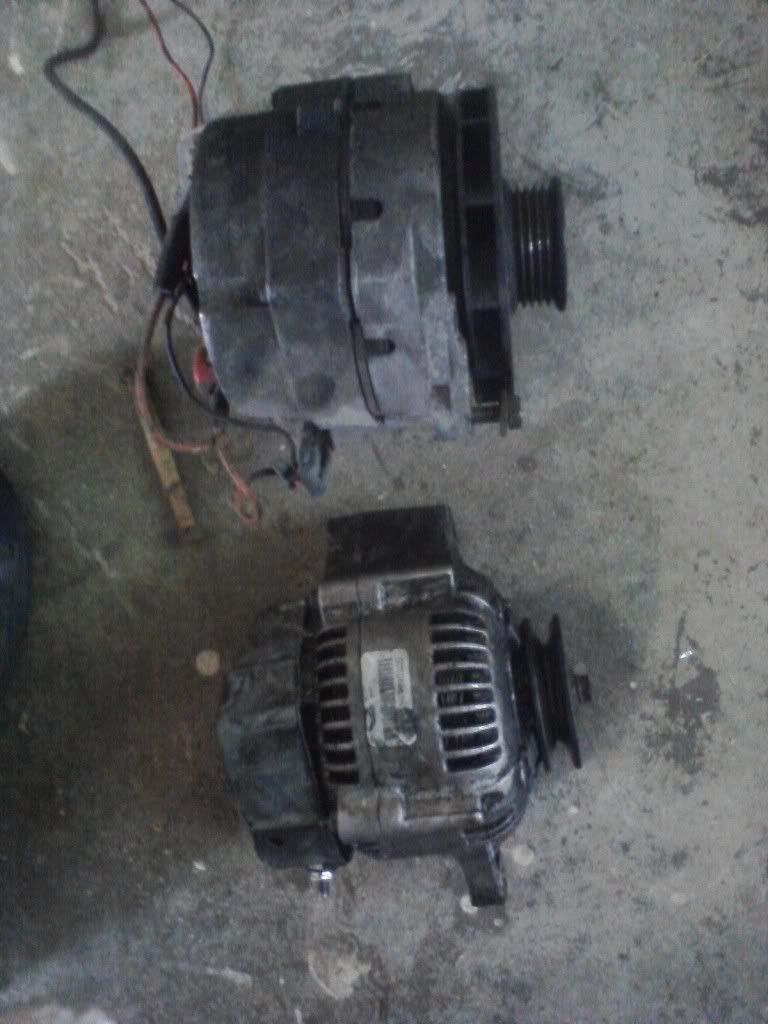
So I have been reading about upgrading the alternator and decided I would just dive in. I went to the junkyard and grabbed an alternator for 25 bucks with a warr. off of a 1987 Suburban with the 5.7litre V8.
Just tested it at autozone and the thing works great!!
Came stock with a 94 amp alternator, thought it would work so much better than my 60 something amp!
Sorry Toyota, it was the one thing you got wrong about this truck
I also grabbed the upper bracket off of a jeep wagoneer because it looked really similar to my trucks bracket. I would rather mod a spare other than my original in case I have to revert back.
Going to try and install it without getting the adapter from trail-gear. I am going to try and document everything so all the other penny pinchers out there can get some idea if the swap is possible without a welder. (since i don't have one)
Going to get started on it after I get off work today. Try to take as many pics as I can and explain this because I know everybody out there with that crappy alternator wishes they had something better. And who knows, 94 amp may not even make all that much of a difference.
Any advice would be awesome!!
It wasn't until recently that I have started experiencing complete alternator failure. When I first start up it doesn't charge. I have to rev above 2k to get it to charge.
So I have been reading about upgrading the alternator and decided I would just dive in. I went to the junkyard and grabbed an alternator for 25 bucks with a warr. off of a 1987 Suburban with the 5.7litre V8.
Just tested it at autozone and the thing works great!!
Came stock with a 94 amp alternator, thought it would work so much better than my 60 something amp!
Sorry Toyota, it was the one thing you got wrong about this truck
I also grabbed the upper bracket off of a jeep wagoneer because it looked really similar to my trucks bracket. I would rather mod a spare other than my original in case I have to revert back.
Going to try and install it without getting the adapter from trail-gear. I am going to try and document everything so all the other penny pinchers out there can get some idea if the swap is possible without a welder. (since i don't have one)
Going to get started on it after I get off work today. Try to take as many pics as I can and explain this because I know everybody out there with that crappy alternator wishes they had something better. And who knows, 94 amp may not even make all that much of a difference.
Any advice would be awesome!!
 07-25-2011, 07:16 AM
#5
Registered User
Join Date: Jul 2010
Location: vermont
Posts: 470
Likes: 0
Received 0 Likes
on
0 Posts
use an alternator from a ambulance, my dad put one in our camper that was 160 amps from an older ford ambulance and the camper was a dodge. but we welded our own bracket. some alternator shops too can upgrade and fix you stock unit.
07-25-2011, 07:26 AM
#6
i used the bracket from toolbox_guy on pirate, and one of these adapters:
round-style: http://store.alternatorparts.com/partno461804.aspx
oval-style: http://store.alternatorparts.com/partno4618061.aspx
those are for the gm 1-wire type alternators, but i'm sure you can find or make your own adapter
round-style: http://store.alternatorparts.com/partno461804.aspx
oval-style: http://store.alternatorparts.com/partno4618061.aspx
those are for the gm 1-wire type alternators, but i'm sure you can find or make your own adapter

Trending Topics
07-25-2011, 07:32 AM
#8
Registered User
Thread Starter
Join Date: Feb 2011
Location: Sellersburg, IN
Posts: 58
Likes: 0
Received 0 Likes
on
0 Posts
warpigg- I would loved to have gotten an ambulance alternator. There wasn't any in the junkyard tho.. 
Planned on writing this to help in making your own brackets and all that good stuff.
In the end, I might even end up giving up and getting a pre-fabbed bracket.
Looking forward to seeing how it turns out tho. I would love to not have to pay more than 30 bucks for a 30 amp increase!!
Planned on writing this to help in making your own brackets and all that good stuff.
In the end, I might even end up giving up and getting a pre-fabbed bracket.
Looking forward to seeing how it turns out tho. I would love to not have to pay more than 30 bucks for a 30 amp increase!!
07-25-2011, 07:37 AM
#9
the base of the gm one-wire will fit the lower stock mount. the upper mount almost fits, but you just need to extent the adjustment arm a little bit. if you have a grooved pulley, you can swap it out with your stock pulley and maintain the stock belt.
https://www.yotatech.com/forums/f116...l#post51699979

https://www.yotatech.com/forums/f116...l#post51699979
07-25-2011, 07:58 AM
#10
Registered User
Thread Starter
Join Date: Feb 2011
Location: Sellersburg, IN
Posts: 58
Likes: 0
Received 0 Likes
on
0 Posts
Wow! Thanks Irab88! I can see where the upper bracket was modded. I am going to see how this jeep bracket fits. I got it off of a 1984 Jeep Wagoneer. I thought about using another piece of metal to bolt to the alternator and then to the grooved bracket to act as the extension....
The pics were amazingly helpful!! Looks like it needs to come out towards the radiator as well...
The pics were amazingly helpful!! Looks like it needs to come out towards the radiator as well...
07-25-2011, 07:16 PM
#12
Registered User
Thread Starter
Join Date: Feb 2011
Location: Sellersburg, IN
Posts: 58
Likes: 0
Received 0 Likes
on
0 Posts
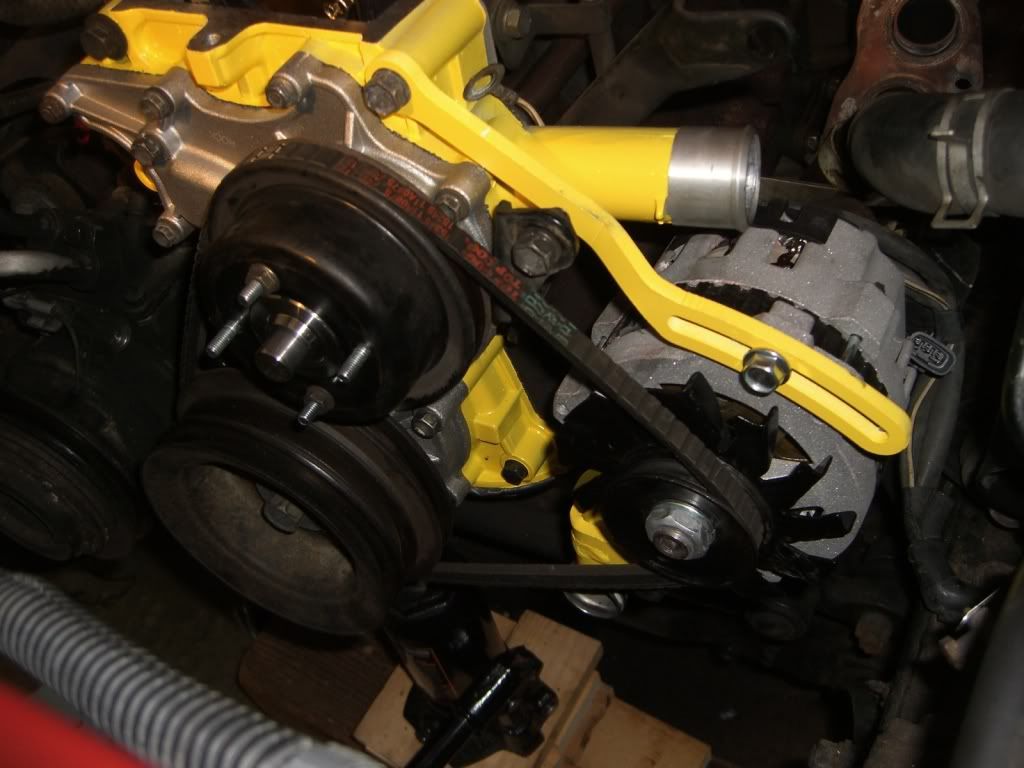
Finished the install.... Why doesn't everybody do this? INCREDIBLE!! No dimming what so ever. you can even hear it charging up to 2500rpm! This upgrade is a bare minimum for all 22re guys that have the stock 60 amp alternator. I ran 14.6vdc at idle. 14.2vdc with wipers, radio, headlights, blower motor, and left turn signal on... Started at 4:45 worked until 10:50. Took several trips to autozone to get the right belt.
Will post the details tomm.
Will post the details tomm.

 We don't like getting teased around here.
  07-26-2011, 04:36 AM
#15
Registered User
Thread Starter
Join Date: Feb 2011
Location: Sellersburg, IN
Posts: 58
Likes: 0
Received 0 Likes
on
0 Posts
Ok, supposed to be "working" right now, so this might be in a few sections.
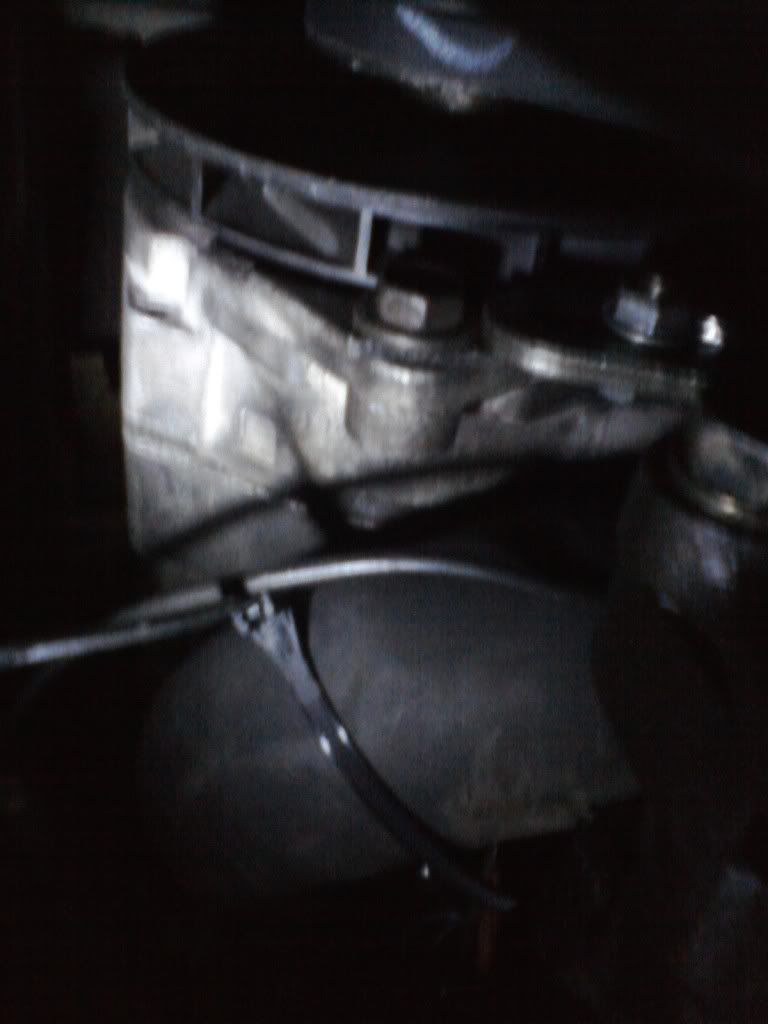
To start with I had to remove the following things to gain access to my alternator.
-Radiator fan shroud
-Removed upper radiator hose. (bent it back so it would stop leaking. Fluid from radiator just had to leak out tho, didn't have anything to plug...)
-Removed Power steering pump pulley (normal threads. not right hand or anything)
Then I unbolted the power steering pump from it's support bracket and just laid it on top of my exhaust manifold. To make added room I disconnected the vacuum lines from the intake manifold going to the steering pump.
Next I removed the power steering pump bracket. (just about every bolt around that area is 9/16)
After all that, remove your belts. AC/Alternator/and power steering. All pretty straight forward. Nothing special at all was needed here.

NOTE: Be smarter than me and loosen the power steering pump pulley before you take the belt off..
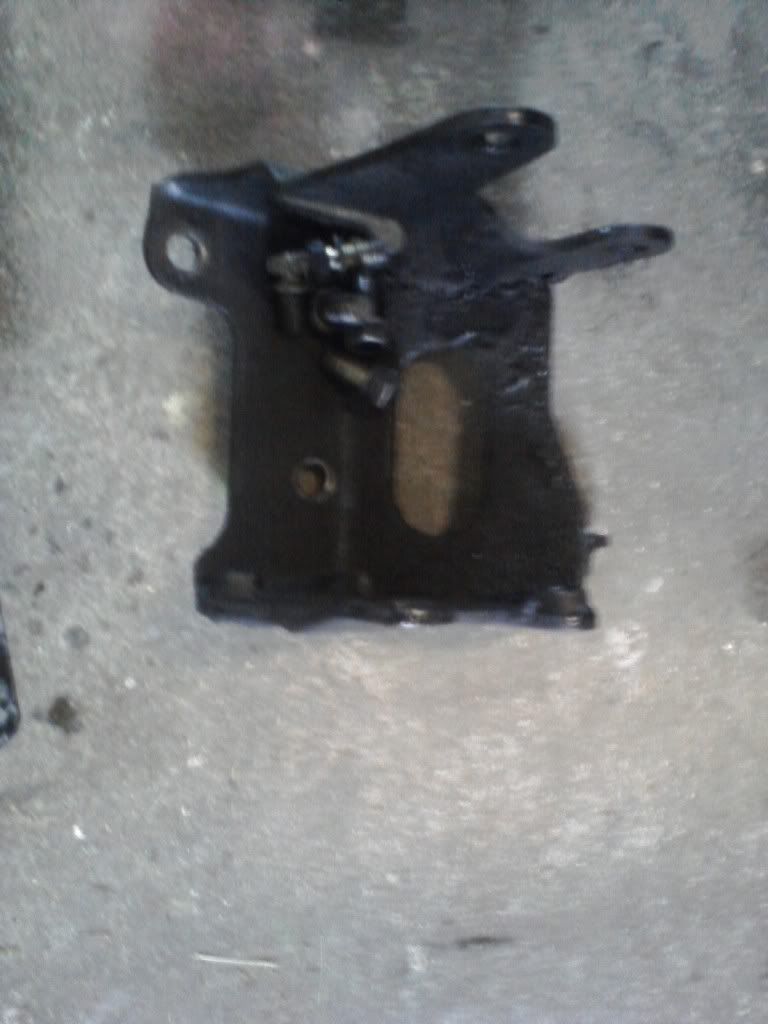
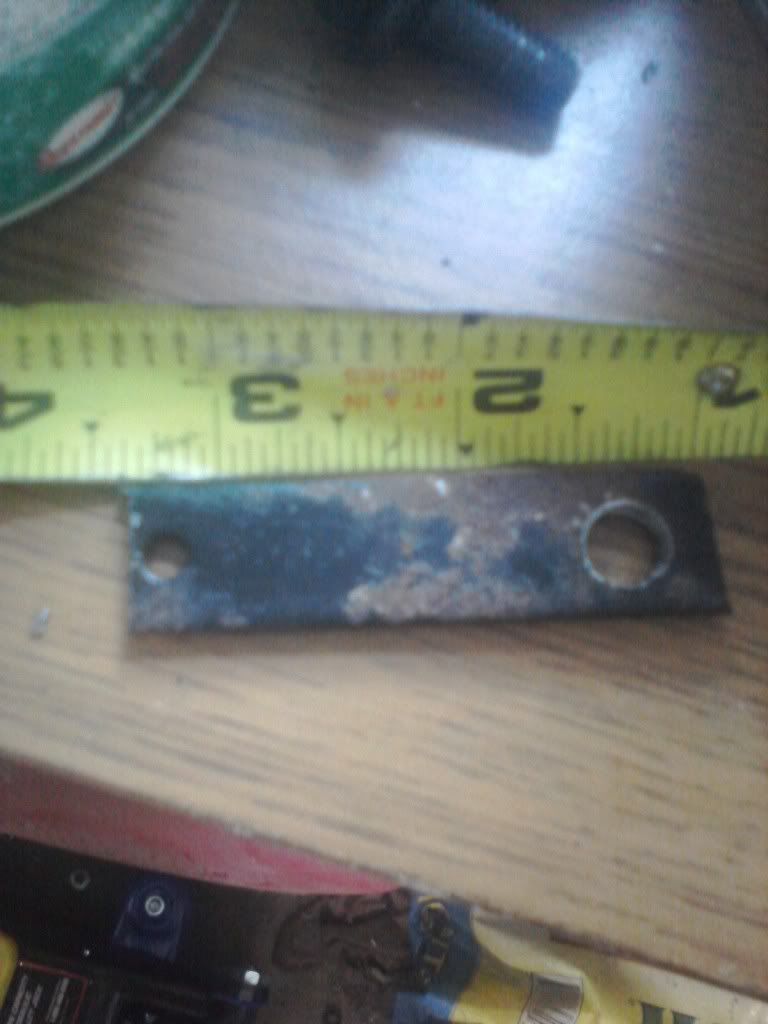
Here the two are side by side
Notice, they arn't really all that different. Bolt hole to bolt hole centers on both are 6.5 inches.

The difference is that the chevy is not a 12 and 6 oclock mounting arrangement. It is maybe a 12 and 5:30 arrangement.... Making the yota bracket just a little too short on the top.
The bottom bracket is wider for the yota, meaning you have to shim the bottom.

as you can tell, it isn't much. Only about 1/4 inch. so....
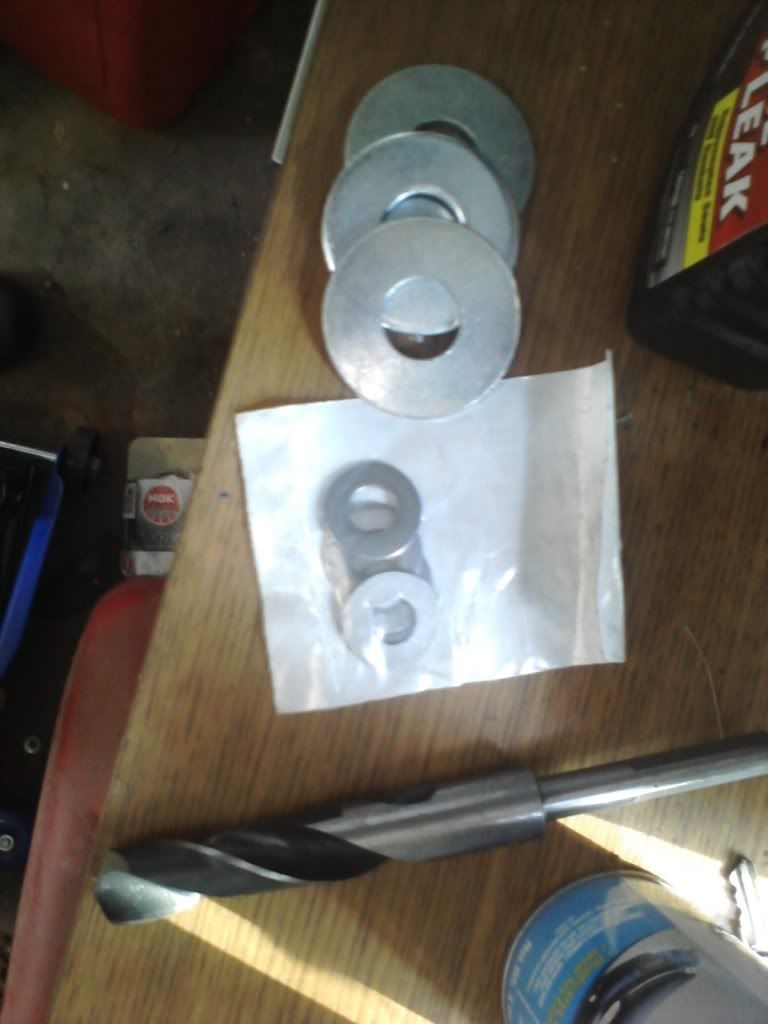
a 99 cent pack of 5 washers did the trick. I have read that this is "Mickey Mousing" my install. But, They didn't have any spacers at Tractor Supply to do the job.
Ignore the larger washers, they didn't do anything for me. wasted 22 cents.
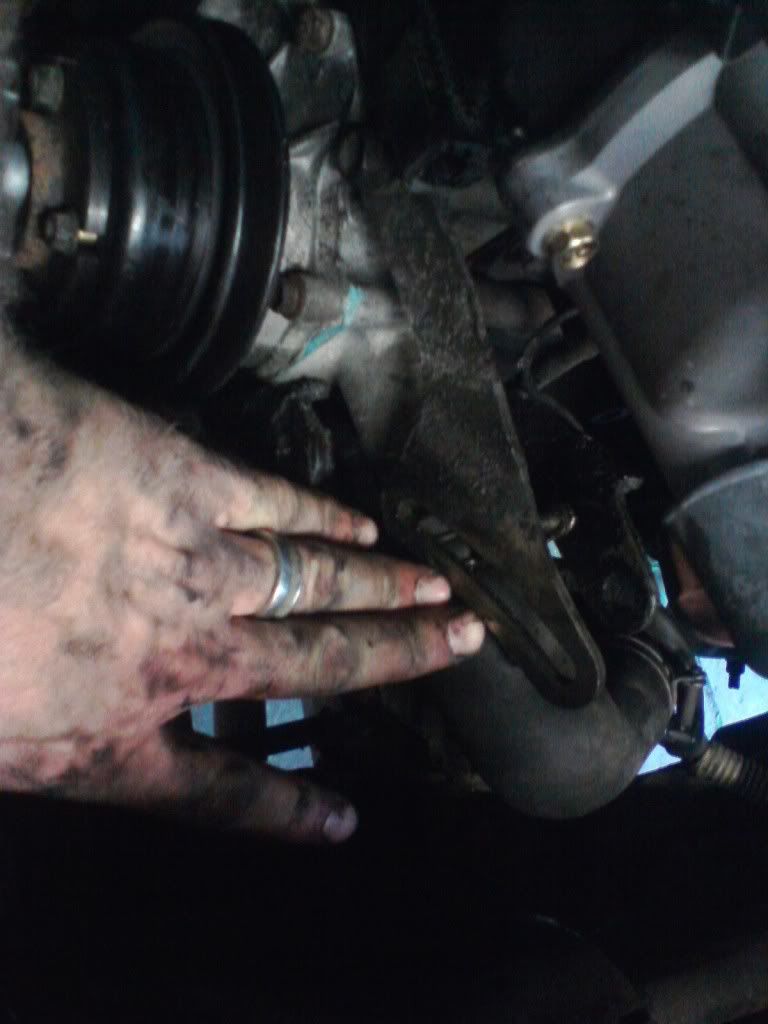
So here the upper bracket is just too short....
What I did was loosen the bolt mounting it to the motor and allow for some movement. Then I found an old wrench in my tool box that I have had in there since 7th grade when I worked on my bike...
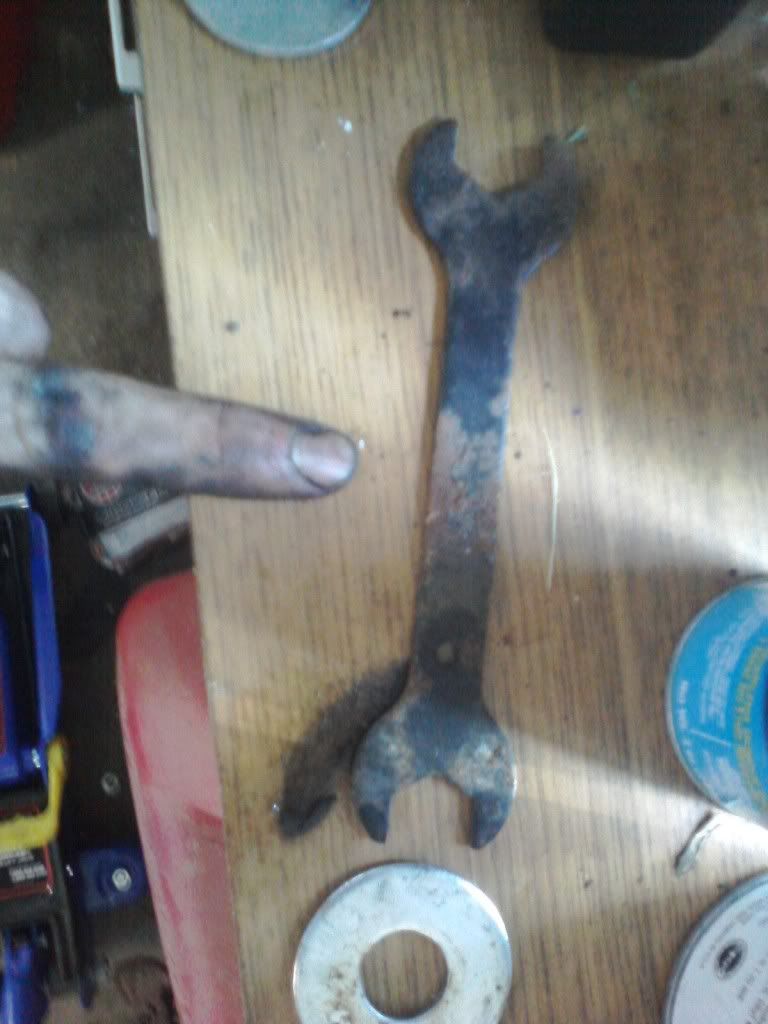
After cutting off the wrench part of the..... wrench. I Drilled 3 holes in it.
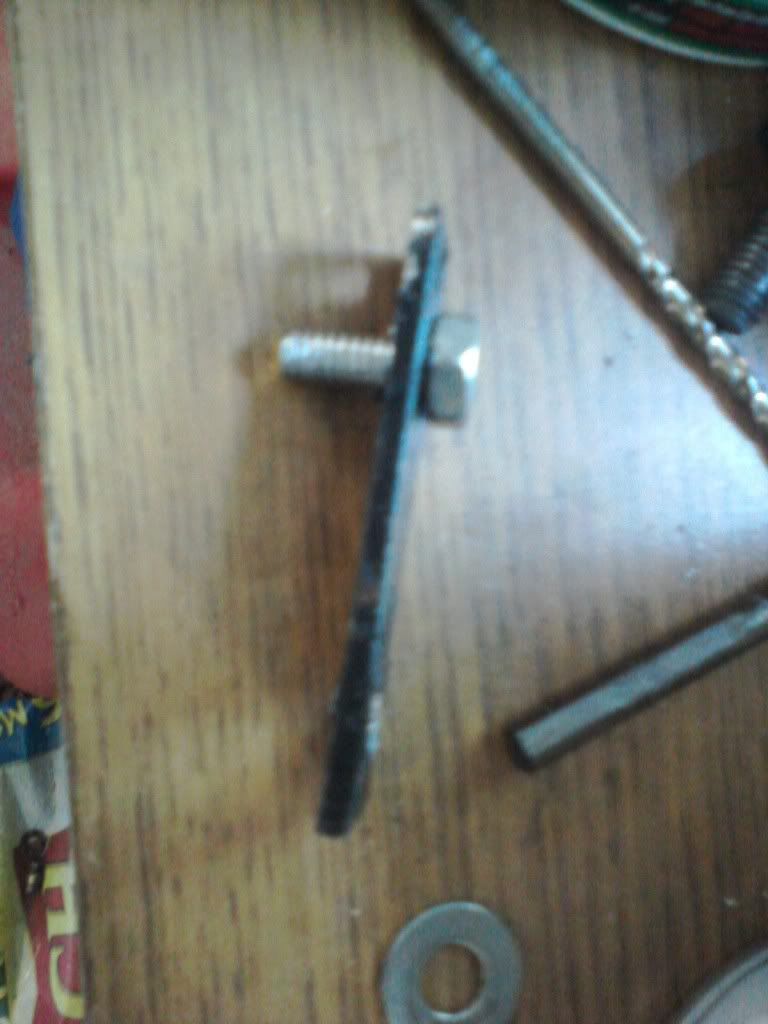
The side with the two bolts you see are mounted to the bracket. The reason you put two bolts in is to keep the bracket from rotating around like the hand of a clock when mounted to the yota bracket. So what you end up with is an almost telescoping effect to the original toy bracket.
The other hole drilled was to match the upper bolt on the alternator.
Very ridged set up.
Also, put the bracket on the rear of the toyota bracket. The toyota bracket is a little too far out from where this 12si upper bolt hole is located. I didn't measure so this isn't exact, but I would say 1/8 inch..
Continue in a few. Any questions I can try to answer?
To start with I had to remove the following things to gain access to my alternator.
-Radiator fan shroud
-Removed upper radiator hose. (bent it back so it would stop leaking. Fluid from radiator just had to leak out tho, didn't have anything to plug...)
-Removed Power steering pump pulley (normal threads. not right hand or anything)
Then I unbolted the power steering pump from it's support bracket and just laid it on top of my exhaust manifold. To make added room I disconnected the vacuum lines from the intake manifold going to the steering pump.
Next I removed the power steering pump bracket. (just about every bolt around that area is 9/16)
After all that, remove your belts. AC/Alternator/and power steering. All pretty straight forward. Nothing special at all was needed here.
NOTE: Be smarter than me and loosen the power steering pump pulley before you take the belt off..
Here the two are side by side
Notice, they arn't really all that different. Bolt hole to bolt hole centers on both are 6.5 inches.
The difference is that the chevy is not a 12 and 6 oclock mounting arrangement. It is maybe a 12 and 5:30 arrangement.... Making the yota bracket just a little too short on the top.
The bottom bracket is wider for the yota, meaning you have to shim the bottom.
as you can tell, it isn't much. Only about 1/4 inch. so....
a 99 cent pack of 5 washers did the trick. I have read that this is "Mickey Mousing" my install. But, They didn't have any spacers at Tractor Supply to do the job.
Ignore the larger washers, they didn't do anything for me. wasted 22 cents.
So here the upper bracket is just too short....
What I did was loosen the bolt mounting it to the motor and allow for some movement. Then I found an old wrench in my tool box that I have had in there since 7th grade when I worked on my bike...
After cutting off the wrench part of the..... wrench. I Drilled 3 holes in it.
The side with the two bolts you see are mounted to the bracket. The reason you put two bolts in is to keep the bracket from rotating around like the hand of a clock when mounted to the yota bracket. So what you end up with is an almost telescoping effect to the original toy bracket.
The other hole drilled was to match the upper bolt on the alternator.
Very ridged set up.
Also, put the bracket on the rear of the toyota bracket. The toyota bracket is a little too far out from where this 12si upper bolt hole is located. I didn't measure so this isn't exact, but I would say 1/8 inch..
Continue in a few. Any questions I can try to answer?
Last edited by uijongbu87; 07-26-2011 at 04:37 AM.
07-26-2011, 05:34 AM
#17
Registered User
Thread Starter
Join Date: Feb 2011
Location: Sellersburg, IN
Posts: 58
Likes: 0
Received 0 Likes
on
0 Posts
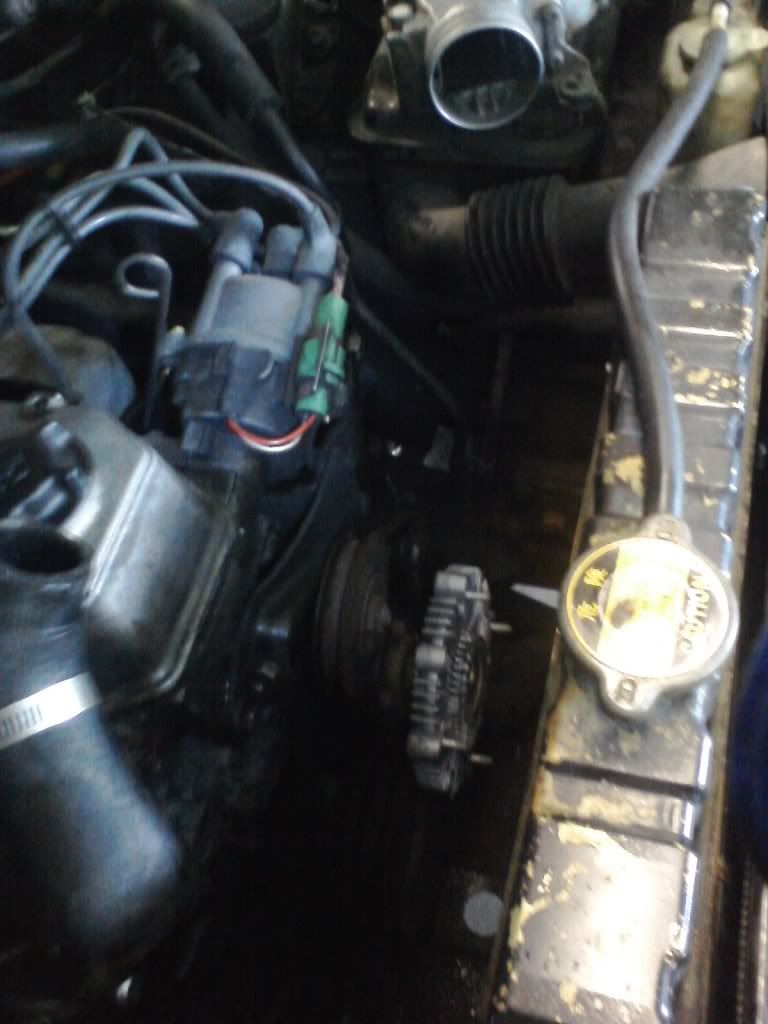
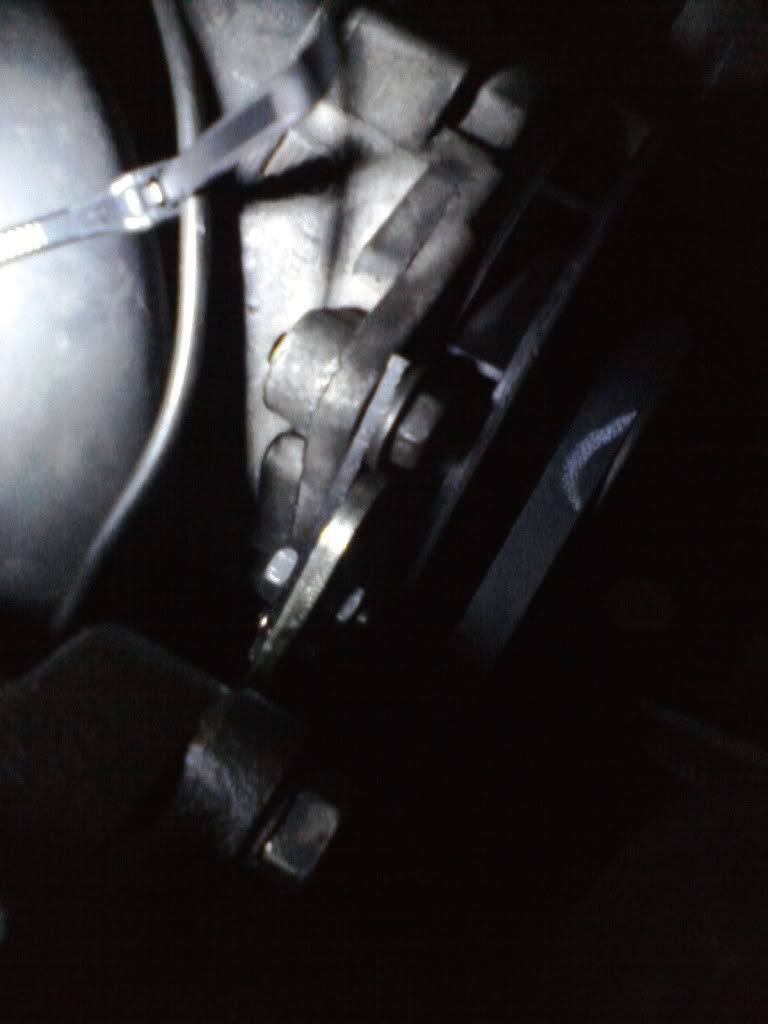
It is really really close. Going to have to do some driving around to find out how hot the thing gets. I would say that it is 1/4 inch to 1/2 inch away. Drove it for a few minutes last night under heavy load and it wasn't hotter than I could touch.... The manifold was tho Reach with care
Reach with care
07-26-2011, 11:10 AM
#18
Registered User
Thread Starter
Join Date: Feb 2011
Location: Sellersburg, IN
Posts: 58
Likes: 0
Received 0 Likes
on
0 Posts
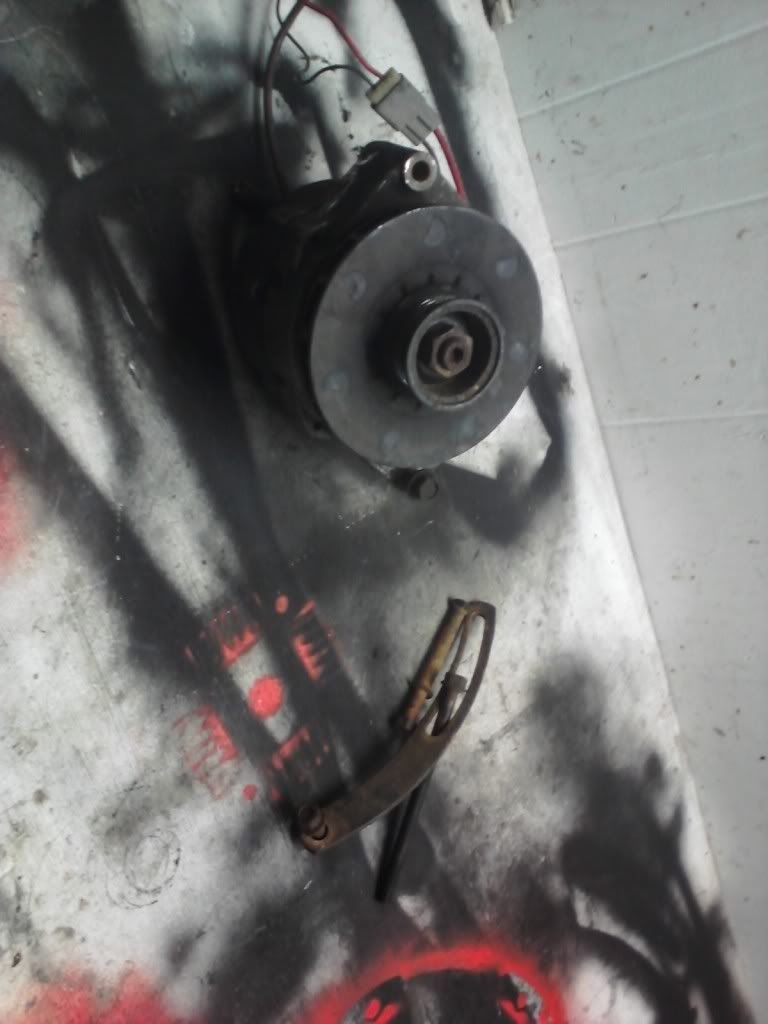
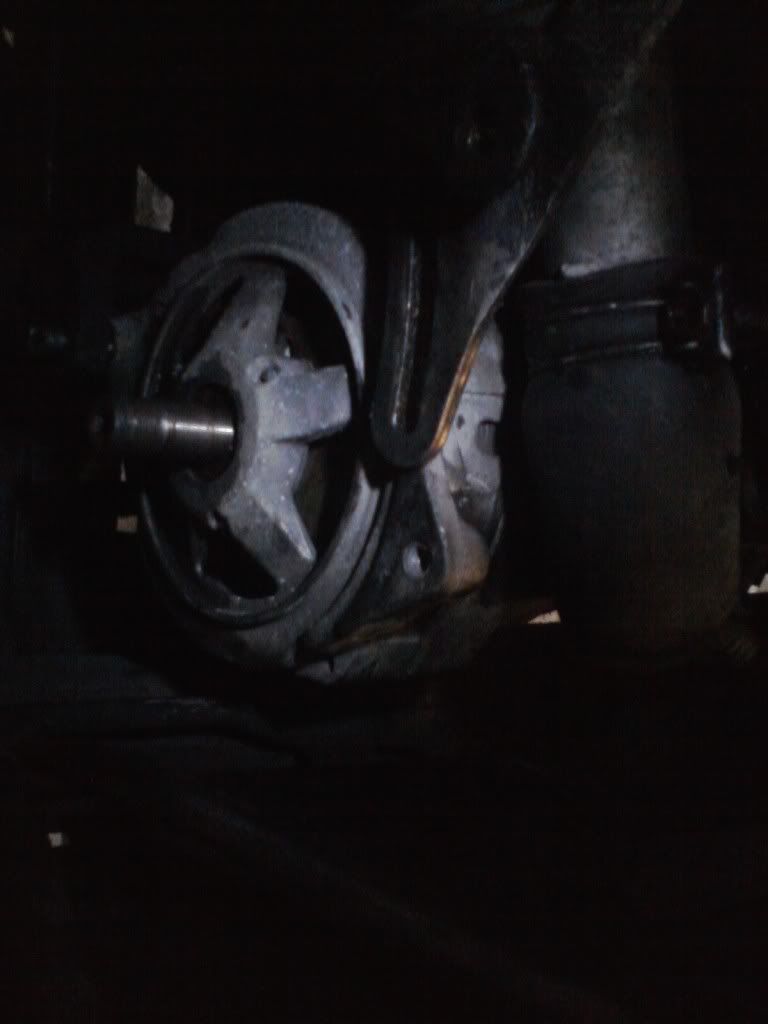
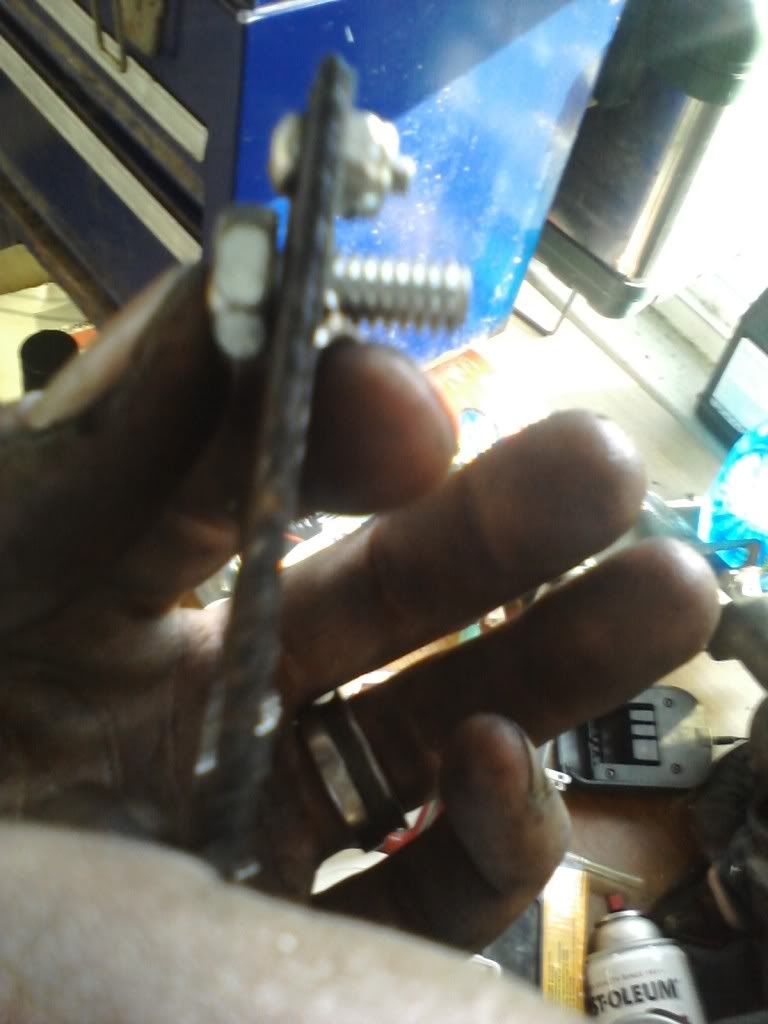
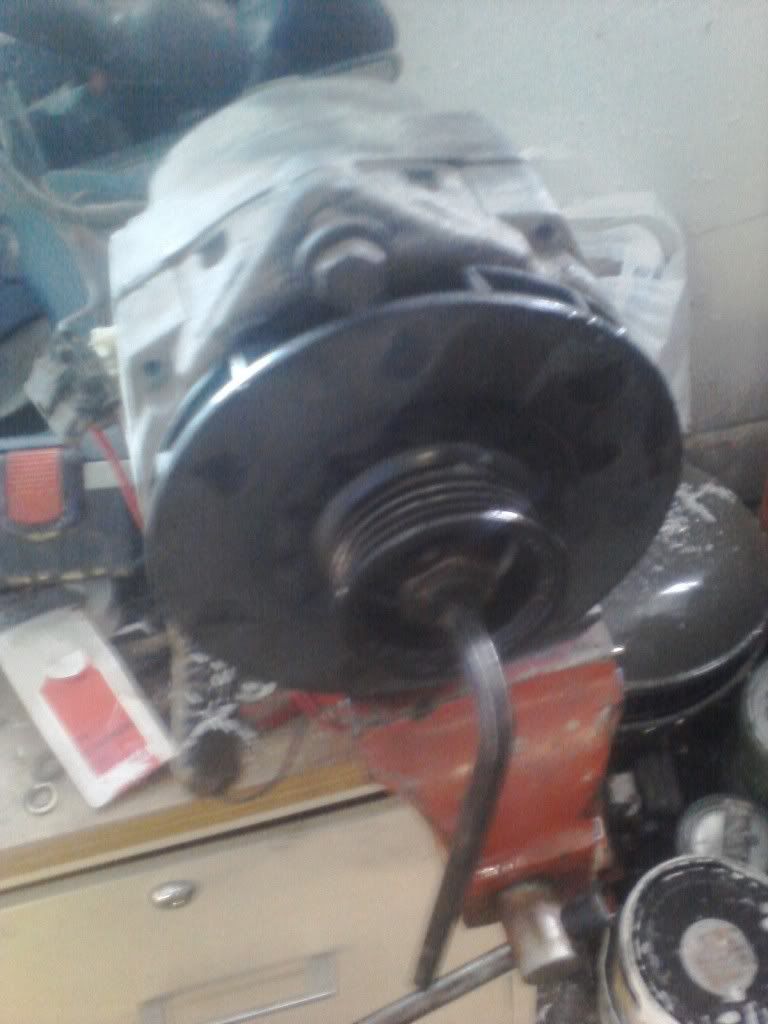
This is what the bracket ended up looking like installed on the alternator.
I can understand wanting to get the bracket for the swap, but the 12si fit so well, I wouldn't see the need to get one.
The next thing that you have to think about is the pulley alignment. The hardest thing about that was getting the pulleys off each alternator!
Years of rust....
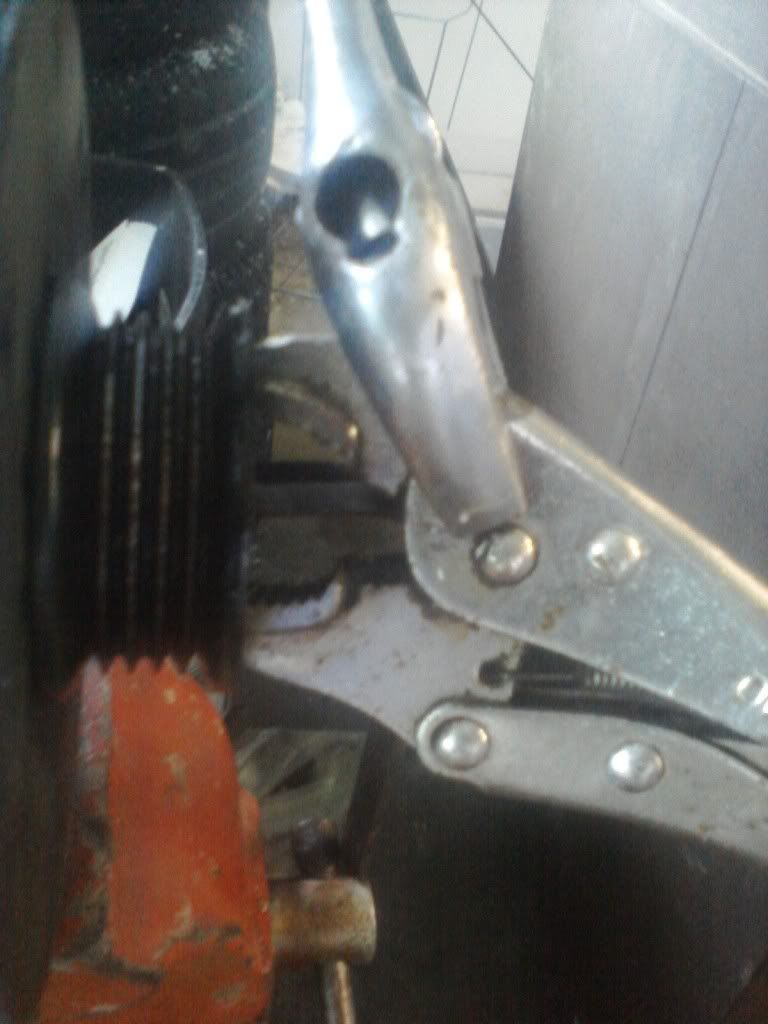
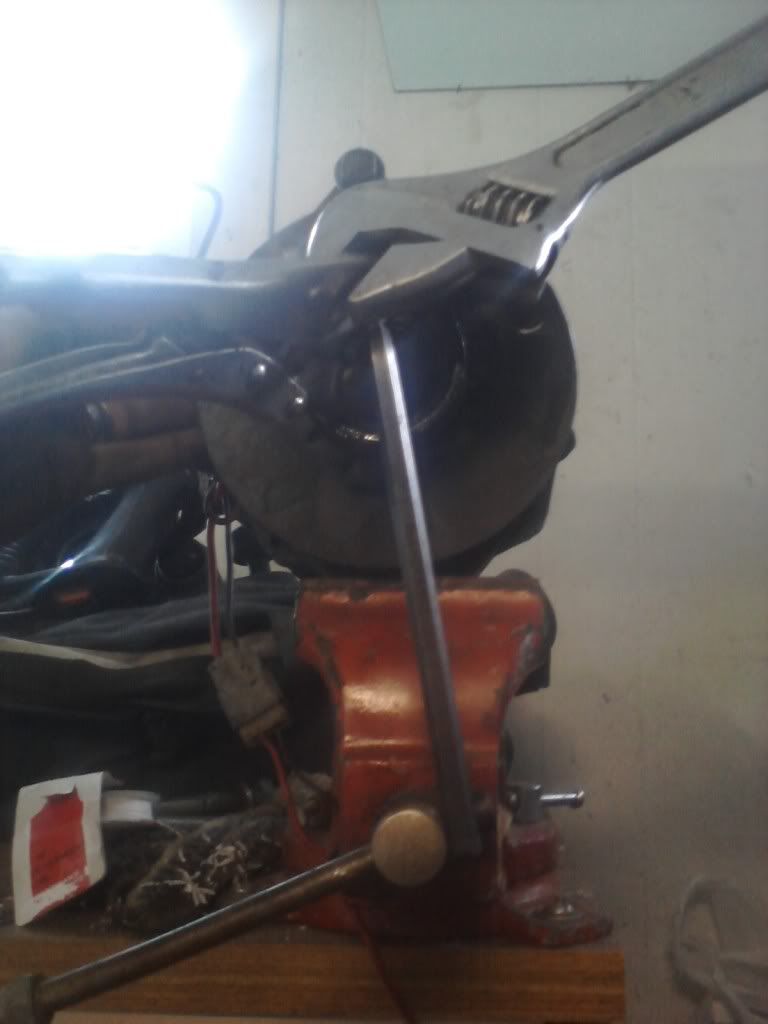
this was how I removed the old pulley. It has the allen head in the center but the socket obviously won't fit over the allen head... So I used a vice grip to bite the nut, then a cresent to turn the vice grip, the allen wrench hit the vice I was holding the alternator in so it held itself...
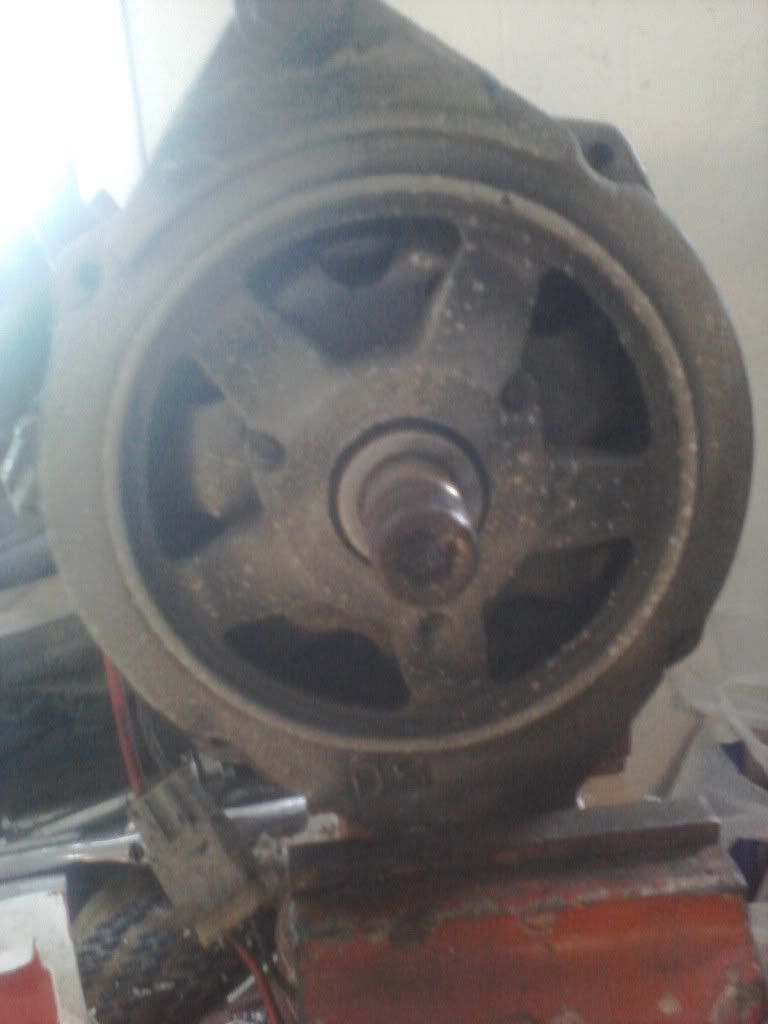
after I got that off, it was time for a break..
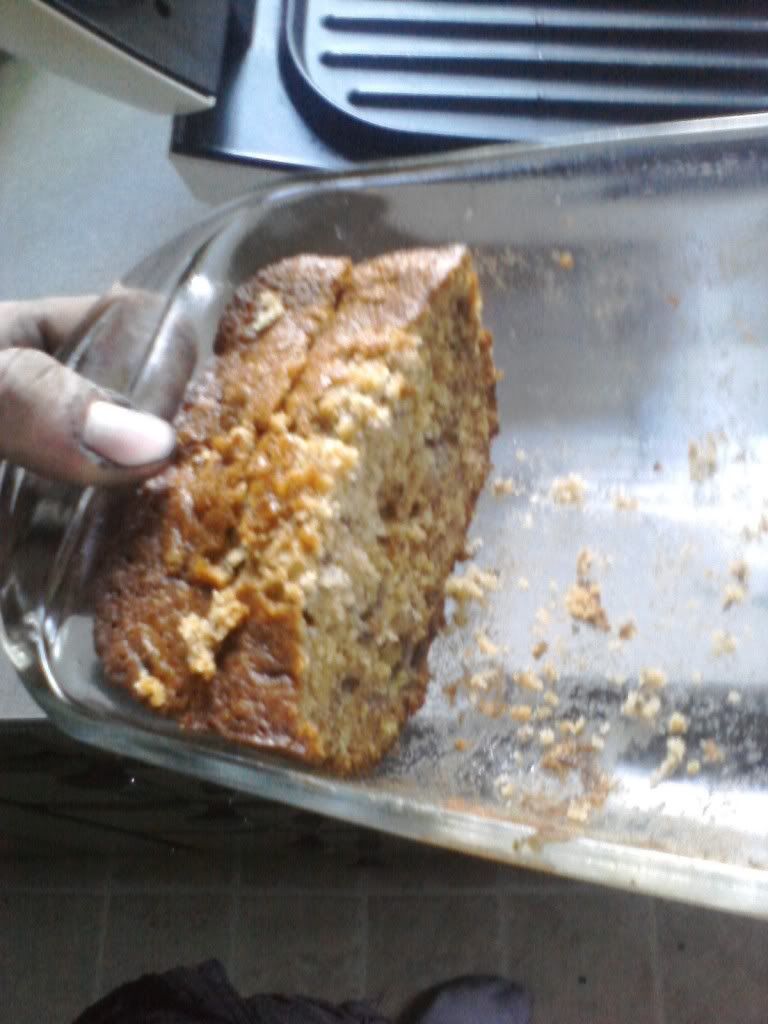
Most important thing about doing any sort of work is the food that keeps you going. GOT TO LOVE BANANA BREAD!!! (this dude looks like some banana bread... a loaf at least)
Got the pulley off both alternators and did the switch.
The GM alternator had some bushings in it. A large one that spaced the fan out from the casing, and another that spaced the pulley away from the fan. I didn't have to change anything with this setup, I just installed the yota pulley and it worked just fine. I might say that I could use maybe 1/8 or so extra spacing, but that would leave less for the nut....
Everything fit pretty good, so I thought that I would get lucky and be able to use the same belt...

Close but not close enough, so after several trips to autozone I got the right length...
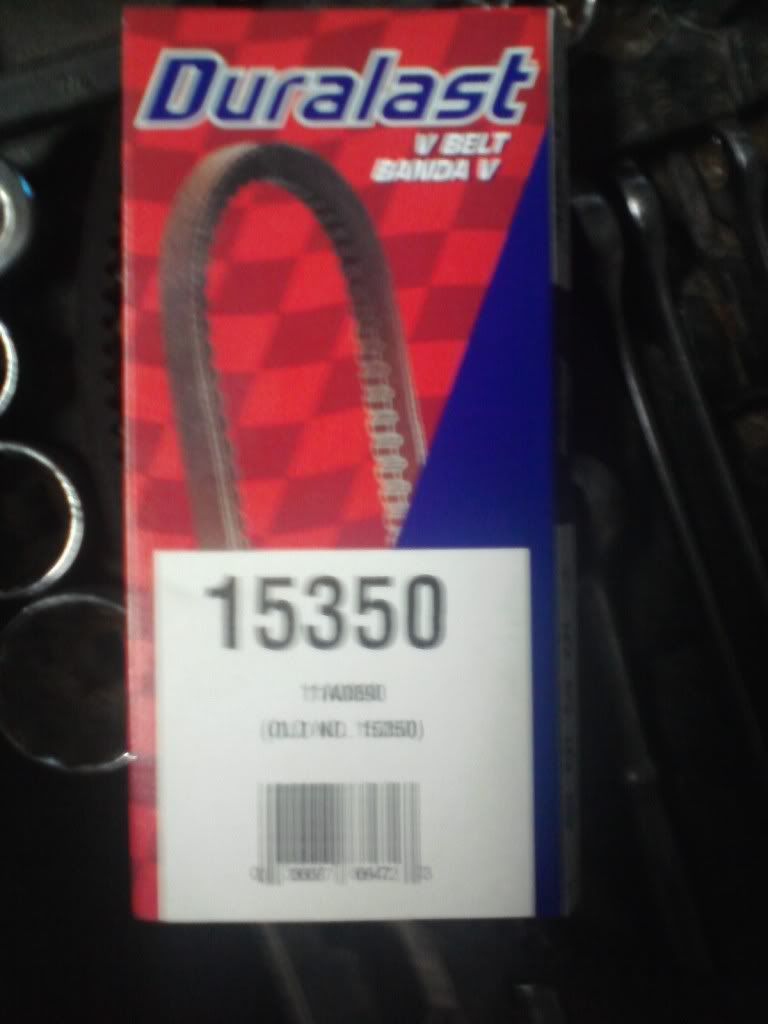
It was still tight getting it on, but adjusted to dead center in my range of adjustment. It doesn't make any noise or look funny. the alignment like I said could use a little more spacing, but going to check in on it later and see if there are any signs of unusual wear going on.
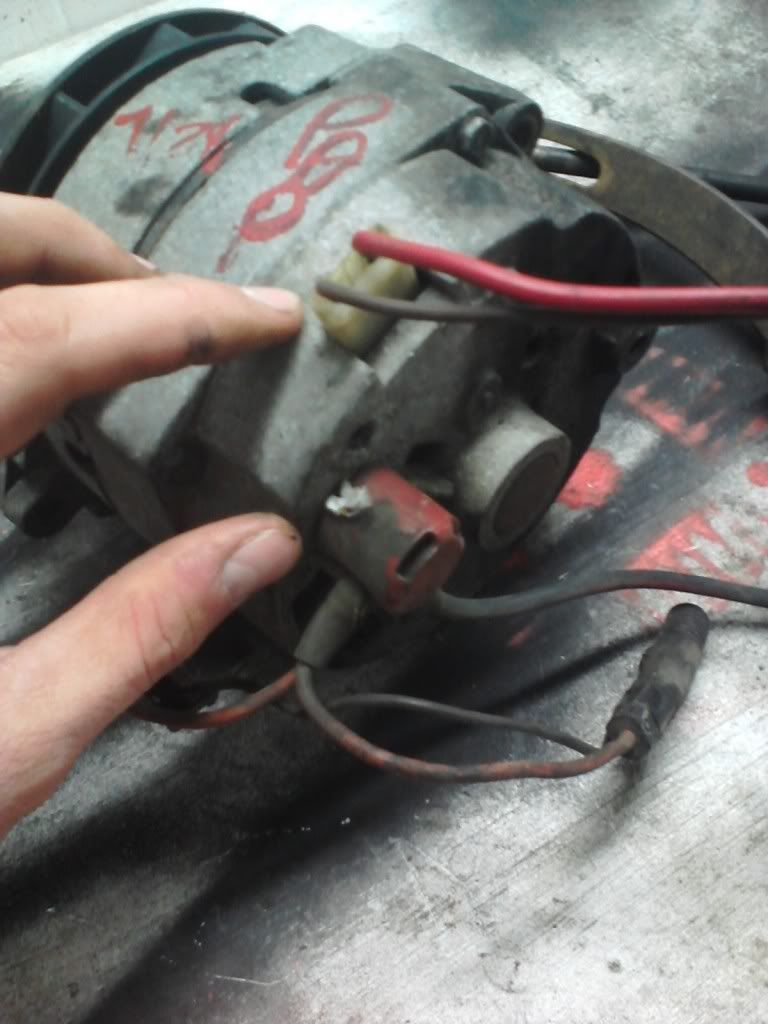
now it got to the hard part... I couldn't remember how to hook up the stock harness to this alternator. I couldn't find any information that gave me the warm and fuzzies. But, I did find these two sites that gave me great info.
http://www.expeditionlandrover.info/...elcoWiring.jpg
and this one from pirate
http://www1.pirate4x4.com/forum/show...php?p=11538803
Combining these two I got the information needed to wire it up.
I took the #1 Terminal that was completely by itself and hooked it to the "Idiot Light" Terminal. Which, when looking at the Terminals
--
I I<-- is this one.... The other is the Ignition and the upper one is
the Source. The source also is the largest wire in the harness....
Terminal #2 that had a jumper going to the back of the alternator on the single post, I hooked that to the Ignition part of the wiring harness.
NOTE: my "idiot light" does not work any more, I think it is because I don't have the "Sense" wire hooked up to anything.... The light just doesn't come on anymore.
I think I might be able to jumper a line from the rear alternator terminal to the Sense and get it to act right... Don't know.... Going to read some more before I take a leap. It is the beefiest wire in the pack so I would think it could take the current.
Also, my ammeter works great! I mainly worried about that, I check my gauges regularly, and wanted it to work. From the way I wired it up it worked great.
Remember how your turn signals drop the needle way down, or the wipers make the needle jump around.... Not anymore!! It doesn't make any noise or look funny. Going to check in on it later and see if there are any signs of unusual wear going on.
Don't get me wrong, it still moves, but barely!!!
I would recommend anybody to do this swap. The fabbing was not hard at all. I don't have a ton of tools. I am kind of a pack rat so I did have that wrench in my tool box that I wasn't using. But if you just had a bit of spare metal around you could easily fab up an extension. Just took a few bolts and washers besides that...
For the amount of work that was involved, and the gain in usable electricity, it is a no brain'r
Hope this helps you guys that wanna switch.
I can understand wanting to get the bracket for the swap, but the 12si fit so well, I wouldn't see the need to get one.
The next thing that you have to think about is the pulley alignment. The hardest thing about that was getting the pulleys off each alternator!
Years of rust....
this was how I removed the old pulley. It has the allen head in the center but the socket obviously won't fit over the allen head... So I used a vice grip to bite the nut, then a cresent to turn the vice grip, the allen wrench hit the vice I was holding the alternator in so it held itself...
after I got that off, it was time for a break..
Most important thing about doing any sort of work is the food that keeps you going. GOT TO LOVE BANANA BREAD!!!
(this dude looks like some banana bread... a loaf at least)Got the pulley off both alternators and did the switch.
The GM alternator had some bushings in it. A large one that spaced the fan out from the casing, and another that spaced the pulley away from the fan. I didn't have to change anything with this setup, I just installed the yota pulley and it worked just fine. I might say that I could use maybe 1/8 or so extra spacing, but that would leave less for the nut....
Everything fit pretty good, so I thought that I would get lucky and be able to use the same belt...
Close but not close enough, so after several trips to autozone I got the right length...
It was still tight getting it on, but adjusted to dead center in my range of adjustment. It doesn't make any noise or look funny. the alignment like I said could use a little more spacing, but going to check in on it later and see if there are any signs of unusual wear going on.
now it got to the hard part... I couldn't remember how to hook up the stock harness to this alternator. I couldn't find any information that gave me the warm and fuzzies. But, I did find these two sites that gave me great info.
http://www.expeditionlandrover.info/...elcoWiring.jpg
and this one from pirate
http://www1.pirate4x4.com/forum/show...php?p=11538803
Combining these two I got the information needed to wire it up.
I took the #1 Terminal that was completely by itself and hooked it to the "Idiot Light" Terminal. Which, when looking at the Terminals
--
I I<-- is this one.... The other is the Ignition and the upper one is
the Source. The source also is the largest wire in the harness....
Terminal #2 that had a jumper going to the back of the alternator on the single post, I hooked that to the Ignition part of the wiring harness.
NOTE: my "idiot light" does not work any more, I think it is because I don't have the "Sense" wire hooked up to anything.... The light just doesn't come on anymore.
I think I might be able to jumper a line from the rear alternator terminal to the Sense and get it to act right... Don't know.... Going to read some more before I take a leap. It is the beefiest wire in the pack so I would think it could take the current.
Also, my ammeter works great! I mainly worried about that, I check my gauges regularly, and wanted it to work. From the way I wired it up it worked great.
Remember how your turn signals drop the needle way down, or the wipers make the needle jump around.... Not anymore!! It doesn't make any noise or look funny. Going to check in on it later and see if there are any signs of unusual wear going on.
Don't get me wrong, it still moves, but barely!!!
I would recommend anybody to do this swap. The fabbing was not hard at all. I don't have a ton of tools. I am kind of a pack rat so I did have that wrench in my tool box that I wasn't using. But if you just had a bit of spare metal around you could easily fab up an extension. Just took a few bolts and washers besides that...
For the amount of work that was involved, and the gain in usable electricity, it is a no brain'r
Hope this helps you guys that wanna switch.
07-26-2011, 11:14 AM
#19
Registered User
Thread Starter
Join Date: Feb 2011
Location: Sellersburg, IN
Posts: 58
Likes: 0
Received 0 Likes
on
0 Posts
Oh, forgot to mention, The Jeep wagoneer upper bracket that I got...
I used it..
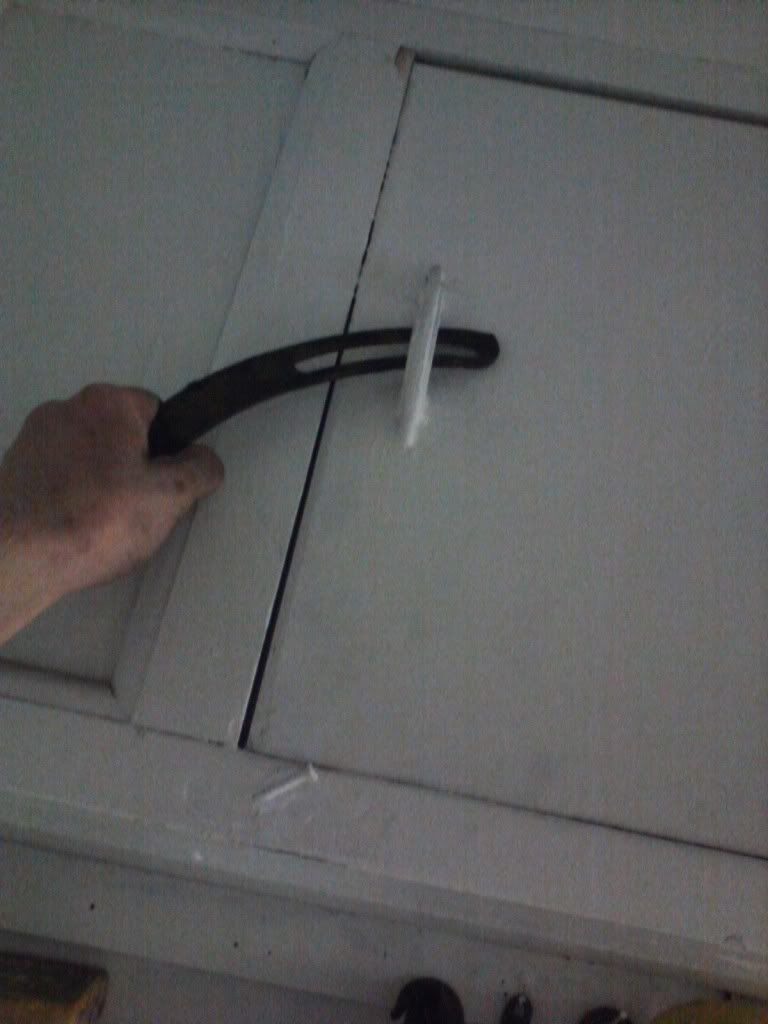
Opening this cabinet was all that it ended up being good for.... its a paper weight now.
I used it..
Opening this cabinet was all that it ended up being good for.... its a paper weight now.


