When you click on links to various merchants on this site and make a purchase, this can result in this site earning a commission. Affiliate programs and affiliations include, but are not limited to, the eBay Partner Network.
The firewall had no holes ready to go from Toyota so I made some.
Toyota did put dimples in the firewall where the holes for the AC lines are supposed to be so a couple of properly sized hole saws later I had holes in the firewall.
Now that the holes are where they need to be, I have to get the proper blower because the old non AC blower has the same kind of mating joint that the AC box has and the two can't mate.
It looks close but, it is not close enough to mate.
Putting the compressor bracket on was the easy part.
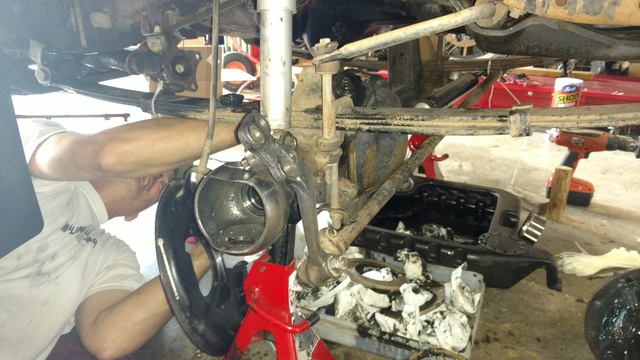
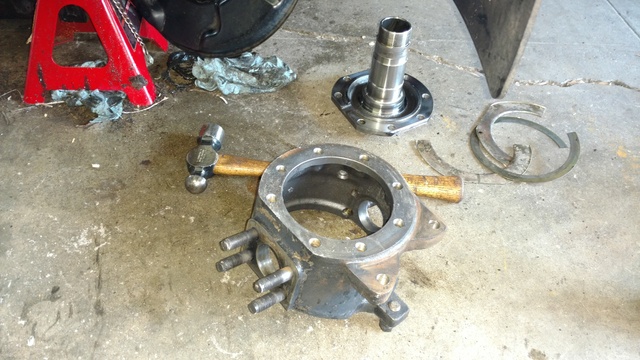
It wasn't just air con my rig is getting, I also rebuilt the live front axle and my back is killing me now.
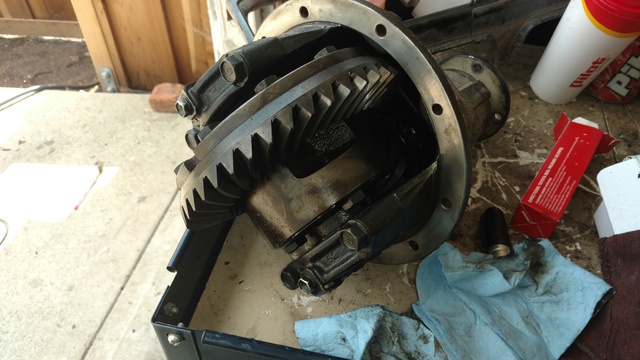
I also put a V-6 3rd member in with a limited slip locker so I will be able to steer while still having traction.
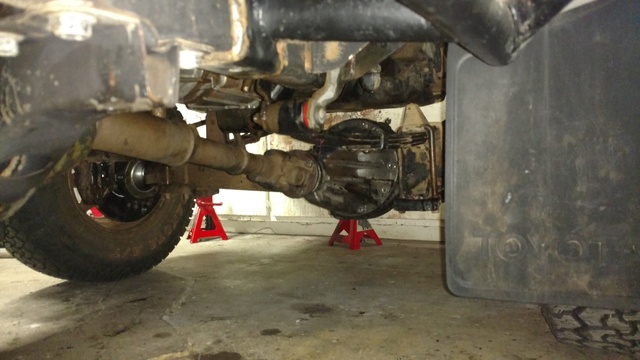
This was a big dirty job that took me and s friend 6 hours to get done and she is now back on her wheels with the brakes bled.
Are you sure you have the evaporator box from a 84-88 ? Because the compressor and condenser you are using are from a 89-95. The evaporator box should just slip into place between the blower and heater box. Also don't forget to drill the hole for the evaporator drain.
I just got home with the full AC system from another Yota and this one has grommets for the firewall, 3 lines, 3 boxes and the complete system wiring harness because who ever owned my truck in the past went crazy with wire cutters trying to wire in a sound system. I already have a condenser mounted up, just need to go rip the dash out again. Doh
It is a True-track or True-Lock, I do not know which is what.
I have the air boxes bolted to the firewall now, it took finagling but, I got the heater core box bolted up to the evaporator which I couldn't do before because I didn't do all the steps required to get there. Foolish and stubborn but, I learned quick.
I need to get some foam stripping before everything gets socked in tight, a blower will work but, if it is not ducted properly, I will not feel it where I want to feel the air.
Keep at it with pictures. There are no good write ups on installing A/C. I can't imagine driving in L.A. with no A/C. I think you can get foam strips at Home Depot in the weather stripping area.
For $8.00 we can get Viton rubber o-rings in a kit from eBay, this little o-ring kit will fix your existing leaky AC system and make it hold that charge you keep going to the auto parts store for.
I found some good adhesive backed foam stripping and am almost done wrapping all the duct joints.
This center duct is actually two pieces snapped together and it was loose and deformed but, a little Gorilla glue and the foam stripping will hold it together.
Anyway, things are progressing slowly but, surely. Stop calling me Shirley.
Awesome job so far! The foam strips look good and will probably do a much better job of sealing the ducts than the deteriorated originals. I will hopefully be installing Air Conditioning in my truck if I can locate all of the parts I need.
My buddy gave me a clock to plug in next to the knobs for the heater but, a P/O cut the connector off the harness when he tried to wire in a stereo. I have a spare connector but, I do not know how to get the brass connectors out of the plastic.
I put enough of the dash together today and drove the truck to get something from the auto parts store but, I am still not finished with the AC install yet. I still need to fix that clock connector and I need the exciter wire to the compressor and the hose from the evaporator to the compressor my buddy is bringing me tomorrow to get the system closed then I need to go back to the auto parts store and buy a new belt I wasn't slick enough to remember today.
I had another problem show its face with this AC install, she developed a nasty vacuum leak that turned out to be a broken valve behind the carburetor, PITA.
What sucks is, the vacuum leak led me to find the broken valve and then the negative terminal fell off the cable so I got to do a few other fixes and will be replacing every single vacuum line as soon as the new 3mm vacuum line arrives.
It turns out that valve had been broken for a very long time and was "repaired with J-B Weld but, it never sealed all the way which caused an idle issue I couldn't figure out until the final failure. I replaced the valve and now all of a sudden she idles like a 22R should.
Anyway, she is running smoothly and is awaiting g a freon charge ASAP.
Another setback; this truck really wasn't meant to have AC, even the wiring harness says no by not having a pigtail to plug into the compressor never mind all the holes I had to cut in the firewall and expand by the condenser to get the lines to fit through.
So my buddy came over again and has to go back to his parts rig and figure out what parts of that harness can be used in my rig because we are tired of messing around.
Today I take the compressor to get rebuilt or replaced and fit the new suction line to the system which finishes off the assembly of big hard parts but, I still have to come up with a way to get a signal to the compressor from the on off switch being there is no accommodation in the harness for me to plug in to naturally.
 04-11-2016, 04:03 PM