1985 XtraCab new DD- lot of pics
 09-05-2014, 05:09 PM
#1
Registered User
Thread Starter
1985 XtraCab new DD- lot of pics
It was sitting for 5 years, when I bought it and it came in on a trailer.
I paid too much for it and I had to winch it up the driveway and into the garage BUT its mine.
This will be my new DD. My plan is to make it as comfortable to drive as I can, keep it stock and rebuild it as reliable as Toyota would. I also want it to look cool.
The paint was in bad shape. The motor would not start, 2 stuck valves, clogged fuel lines in the tank, stripped exhaust bolts and spark plug threads in the head, broken timing guides and cylinder walls that were in very bad shape. The front axles were thick with crud from the leaking gear oil. But the body was straight, minus some rust and the interior was in fair shape minus the cracked dash pad.
The previous owner sold it to me with a brand new head loaded with new valves, cam and rocker arm assembly. He also threw in a new rebuild OEM Asian carburetor from National Carburetor.
I started In November 2013 and finished in July 2014, I have put 500 miles on the truck and I must say I am very happy with how it is so far.

 09-05-2014, 05:21 PM
#3
Registered User
Thread Starter

Digging into the motor...

Bad looking cylinder walls.

Out with the short block. To the machine shop you go.

Store the parts in some kind of order.

New head meet fresh short block with .030 overbore.

New carb, belts and A/C compressor.

Motor in.

Fuel supply.

Lines cleaned and new filter.
09-05-2014, 05:44 PM
#4
Registered User
Thread Starter
Motor runs! All emissions crap out and only Toyota drivability systems in place. At this point timing needs to be set but only after a real test drive.
I move on and start looking at the body.

Rust! Windshield needs to come out.

Rust sucks!

Windshield out and interior stripped.

Dash pad prepped for overlay.

Interior pieces ready for paint.


Deck light to become new third brake light.

Teaching myself how to do bodywork.

Every bit of rust had to come off.

Every dent had to be fixed.

Interior bed panels came off.

Big dent here.

Dents were all over.

more rust...
I move on and start looking at the body.
Rust! Windshield needs to come out.
Rust sucks!
Windshield out and interior stripped.
Dash pad prepped for overlay.
Interior pieces ready for paint.
Deck light to become new third brake light.
Teaching myself how to do bodywork.
Every bit of rust had to come off.
Every dent had to be fixed.
Interior bed panels came off.
Big dent here.
Dents were all over.
more rust...
09-05-2014, 05:59 PM
#5
Registered User
Thread Starter

This area needed lots of attention.

I used 3M plastic metal to fill the holes and dents.

Bed is off for paint.

At this point I had parts everywhere. I was using a spare bedroom to store interior pieces and misc. parts.

Prepping for paint.

Everything in the garage.

Primer!

Last edited by Terrys87; 05-11-2015 at 02:06 PM.
09-05-2014, 06:11 PM
#6
Registered User
Thread Starter

...the bed got a coat to.
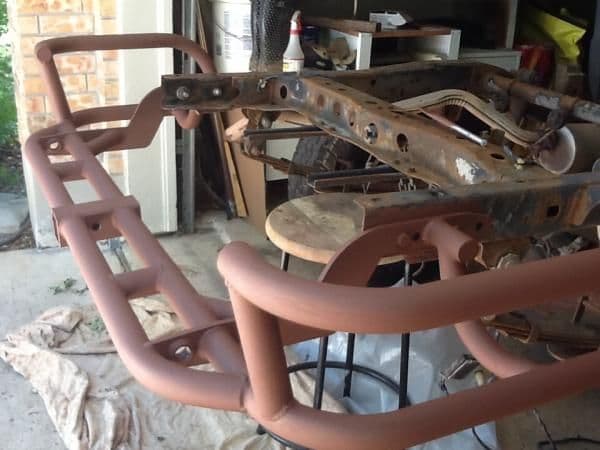
New TG bumper needs primer to.

dash pad overlay is in and setting up.

Monstaliner...

Pyroclastic MONSTALINER
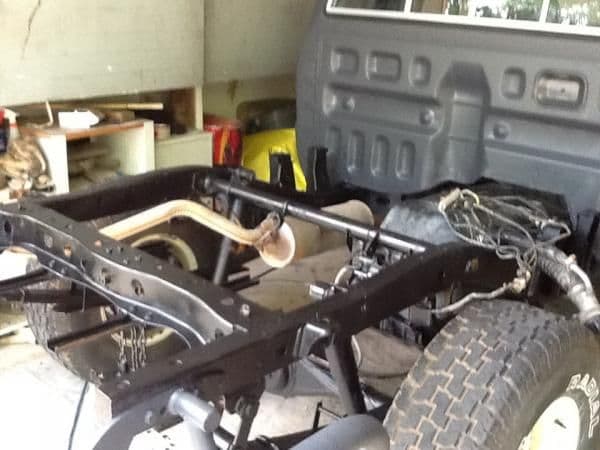
Chassis Saver on the frame and wire harness gets new loom.

Bed panels in with new hardware.

Ready for new glass.
09-05-2014, 06:46 PM
#7
Registered User
Thread Starter

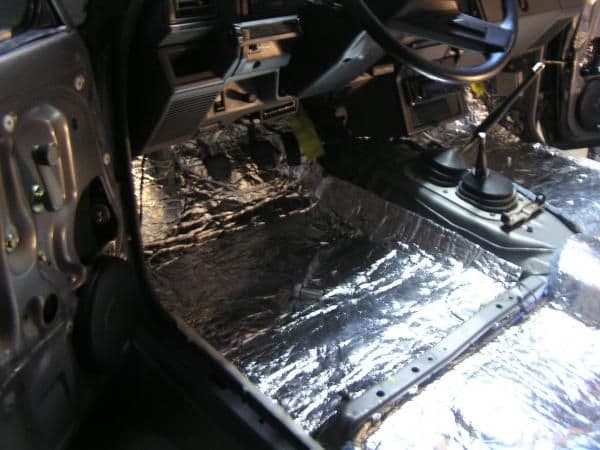
I used UltraTouch radiant barrier, acoustical and thermal insulation through out the cab's interior.

This stuff was easy to work with.

It paid off, the cab is quite as can be. Just wind noise through the windows.

Road noise is muted.

Windshield is in.

Interior in...
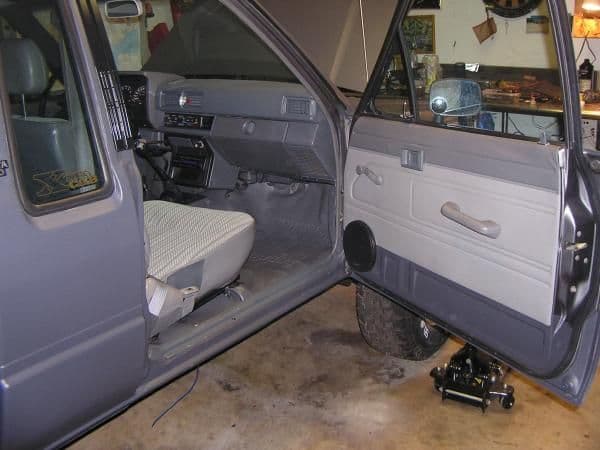
Door panels needed a bit of work but still have the original vinyl.

New dash turned out nice.

finishing touches for under the hood.
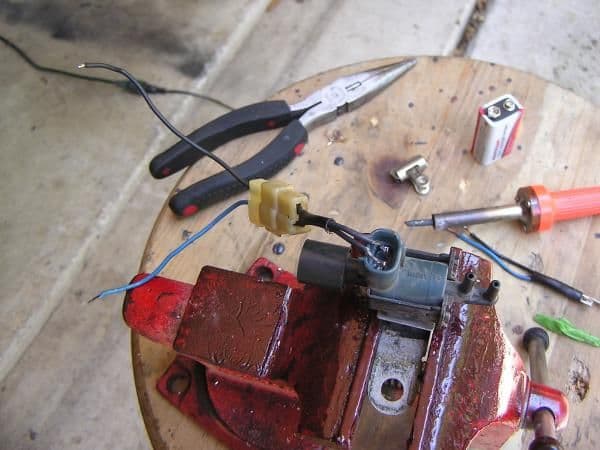
Putting on a new pig tail for the A/C VSV.


I really like the way the Monstaliner turned out.


Notice the third brake light...


Trending Topics
09-05-2014, 06:54 PM
#8
Registered User
Thread Starter
The truck has a new set of wheels for the "modern look", 17" 6 spoke FJ Cruiser wheels with 245/70 17 Kenda Kevlar AT tires. I will post pictures of that setup this weekend. It drives so much better with new tires compared to the 14yr old tires that were sitting for five years.
 09-07-2014, 05:59 AM
#11
Registered User
Thread Starter
1985 XtraCab with 17" FJ Cruiser wheels
Taken with the iPad, a few driveway shots with the fancy wheels. I may need to tone them down with some gun metal Plastidip.
Comments on the wheels?


Comments on the wheels?
09-07-2014, 06:20 AM
#12
Registered User
Thread Starter
Here is a shot under the hood.
After a few test drives the brake master cylinder had to be replaced then timing was advanced a bit.
I wanted to make sure the air fuel mixture screw, on the carb, was set properly at 4 turns out, it was at 3 1/2.
Looks like the front main seal has some seepage, not enough to drip but enough to get things dirty.
The A/C blows cold 38* when it's 100* all original parts! I'm very happy about that!
Last edited by FrankTorres; 09-07-2014 at 06:24 AM.
09-07-2014, 09:40 AM
#13
Registered User
Join Date: Sep 2012
Location: iowa
Posts: 618
Likes: 0
Received 0 Likes
on
0 Posts
09-07-2014, 05:31 PM
#14
Registered User
Thread Starter
Anyone know how many cans it takes to paint 4 wheels, I'm guessing 3?
09-09-2014, 06:33 AM
#16
Registered User
Thread Starter
Much better and not as flashy, I used 2 complete cans of PastiDip.
I wanted more contrast so I decided to used black instead of gun metal. Never used PlastiDip, I found it easy to use doing 4 or 5 light coats.


I wanted more contrast so I decided to used black instead of gun metal. Never used PlastiDip, I found it easy to use doing 4 or 5 light coats.
09-18-2014, 06:42 PM
#17
Registered User
Join Date: Jul 2014
Location: Tulsa, Ok
Posts: 26
Likes: 0
Received 0 Likes
on
0 Posts
How is it handling as a daily driver?
Inspiration!

Last edited by BillyJack; 09-19-2014 at 07:31 PM.
09-19-2014, 09:14 PM
#18
Registered User
Thread Starter
Thanks.
The flooring is the original vinyl, PO used floor mats. All I did was to give them a good wash.
It drives nice as a DD, nice and smooth even at 75mph. The tires are 245/70 17 Kenda Kevlar AT, they are narrow at 9 1/2" wide and they are quiet. The insulation keeps the road noise way down in the cab.
Steering is nice and tight, I did adjust the slack in the gear box while the motor was out, feels perfect. I think I'll keep the original push pull for a while.
I haven't replaced the steering stabilizer yet, the original one was bent and I removed it. Funny thing is I don't miss it.
The down side is that it doesn't take corners very fast and the suspension isn't very plush, maybe a set of OME springs up front to replace the factory originals could fix that.
I have been looking into new bushings all around, does anyone make a OE rubber bushing kit?
10-05-2014, 08:28 AM
#19
Registered User

Join Date: Oct 2014
Posts: 2
Likes: 0
Received 0 Likes
on
0 Posts
Amazing job on your truck. Absolutely beautiful, bringing a classic back from the dead! Thank you so much for taking the time to post your build! The anthracite Monsta just looks killer on your rig. Please let us know how it holds up. Being UV stable, it should look great for a long tome to come. How did you decide on using the Monsta? Also, can you give me some info on what you used for your windshield gasket?
Thanks!
Thanks!


