Solid Axle rebuild..w/pictures :)
 04-25-2009, 08:24 PM
#21
Registered User
Join Date: Oct 2008
Location: Corvallis, OREGON
Posts: 189
Likes: 0
Received 0 Likes
on
0 Posts
Thanks for all the guidance, you guys are awesome. I was wondering about the cone washers, and I'll def give you a PM when I'm there. I think I'm going to start this pretty soon, got to buy tools this weekend, and from there I'm taking it slow and easy, this is my first real technical mechanical adventure.
 04-25-2009, 08:31 PM
#22
Registered User
Thread Starter
Be patient, be confident! When you are done with this you will see the world in a new light. You will be like "dude, that was so easy and now my truck steers like a Ferrari 599 
As for the cone washers, the FSM has the best procedure as far as I am aware. DON'T half ass them with a flat head screwdriver! This is a recipe for disaster. You must secure a tapered punch and put it in the little slit on the cone washer and tap it till it breaks free. Study the cone washer before you start so you get an idea of what it looks like and where it lives. PB Blaster is your friend! Use it liberally on and around the cones. I would go so far as to say use a touch of Anti Seeze on the old or new cone washers going back in so next time you confront them you don't have to roll around awake at 3am worrying about setting them free!
Seriously dude, read, comprehend, follow, execute! If you are stuck PM me.
Godspeed my friend! That axle is your oyster!
04-25-2009, 08:57 PM
#24
Registered User
Thread Starter
use the search or google
here is a start
http://www.4crawler.com/4x4/CheapTri...eRebuild.shtml
http://www.birfield.com/~morgan/tech/axle/index.html
here is a start
http://www.4crawler.com/4x4/CheapTri...eRebuild.shtml
http://www.birfield.com/~morgan/tech/axle/index.html
04-25-2009, 09:14 PM
#25
Registered User
Join Date: Apr 2009
Location: clinton, louisiana
Posts: 101
Likes: 0
Received 0 Likes
on
0 Posts
so let me get this right........... the cone washers are on the top of the stud holding the plate/steering arm in place? so there is 8 of them. 4 on top 4 on the bottom? or just one on top and one on bottom? sorry for so many questions. im an ol chevy guy. this is my first yota SA. what a differance it is between the trucks
04-25-2009, 09:34 PM
#26
Here is one I have posted before
http://www.functionalfab.com/resourc...%204runner.pdf
and here is a sticky I just recently found myself with lots of great links including the one I have above. It puts us all just a couple clicks away from fantastic help.
https://www.yotatech.com/forums/f120...s-info-175794/
On the cone washers, yes, 8 on the knuckles. There are also 6 smaller ones (per side) on the locking/freewheeling hub. I've had good luck getting them out by using a brass drift on the studs that the washers are placed on. Like one of these
http://www.sears.com/shc/s/p_10153_1...0070921x00003a
The brass being softer than the stud, you won't damage the stud, but the cone washers generally pop loose with a couple solid taps. Once in a while you get a stubborn one.

 04-25-2009, 11:01 PM
#28
Registered User
Join Date: Apr 2009
Location: clinton, louisiana
Posts: 101
Likes: 0
Received 0 Likes
on
0 Posts
thanks guys. yall have been a big help. i recon wabfab will be getting an order from me tuesday, and ill be changing my axle assem and rebuilding the knuckle when i get home from puerto rico in a week or so. thanks again
04-26-2009, 07:46 AM
#30
Registered User
Thread Starter
so let me get this right........... the cone washers are on the top of the stud holding the plate/steering arm in place? so there is 8 of them. 4 on top 4 on the bottom? or just one on top and one on bottom? sorry for so many questions. im an ol chevy guy. this is my first yota SA. what a differance it is between the trucks
The difference between the trucks is one is a nightmare and the other is a truck!
I own an International (not too different than a Chevy) and it is a nightmare to work on.
05-11-2009, 04:51 AM
#32
Registered User
Join Date: Apr 2009
Location: clinton, louisiana
Posts: 101
Likes: 0
Received 0 Likes
on
0 Posts
Thank you to the OP and the other fella's that have helped this thread. i got my front left axle assemly changed with no problems. took me about 2 hours to break the knuckle down, rebuild it and put a new axle in. The problem i found was the birf cup was shattered into 3 pieces, but got it done. Thanks again

 02-26-2010, 09:39 PM
#36
Registered User
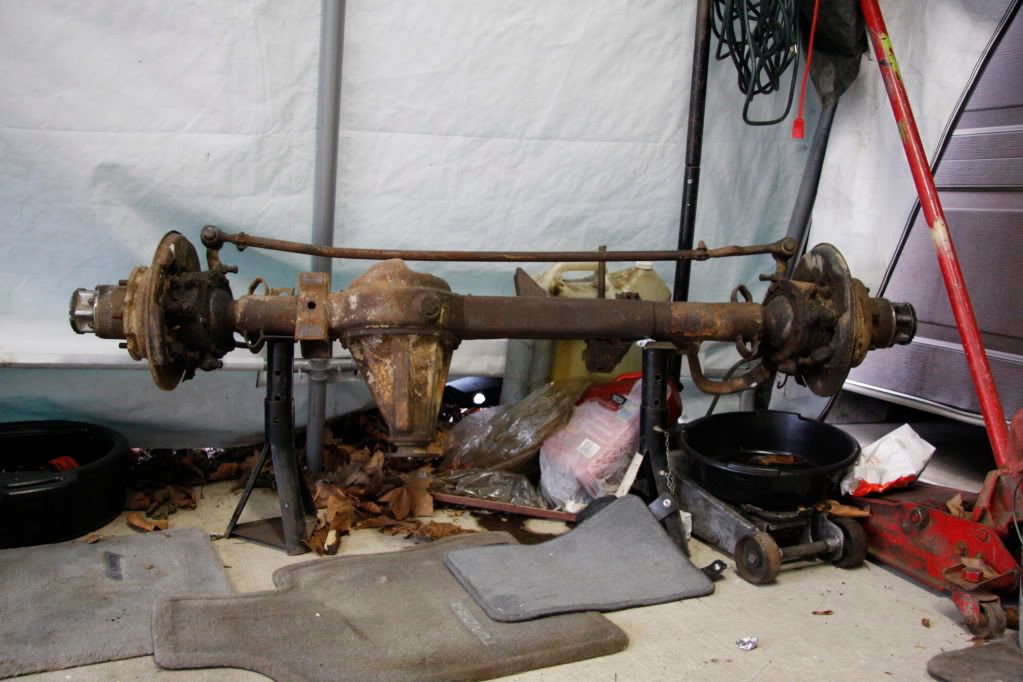
I will, I got that axle from a neighbor for free, his farm burned down, 1996< and his 85 woods beater was kinda toasted, so in 2001 he gave it to me, been hangin around since. That was the last thing I put aboard this boat, moving to Ca. I'll take a million pics though. Thanks
 11-09-2010, 05:40 AM
#38
Registered User
Toyo & Others,
Thanks so much for this great thread I just picked up two 85 SA's and will be rebuilding one or both excited to get started and this thread is already helping me understand things.
Thanks
Catcher
Thanks so much for this great thread
I just picked up two 85 SA's and will be rebuilding one or both excited to get started and this thread is already helping me understand things. Thanks
Catcher
11-09-2010, 07:15 AM
#39
Registered User
Thread Starter
11-09-2010, 07:30 AM
#40
Registered User
its easier then it looks !
I put it off for a long time, to make sure I would have enough time to complete the rebuild before I would need the rig. I should have done it sooner.
I put it off for a long time, to make sure I would have enough time to complete the rebuild before I would need the rig. I should have done it sooner.


