Easiest Projector Retro Kit!!!!
 02-14-2010, 01:48 PM
#41
Contributing Member
Join Date: Mar 2003
Location: COTKU,Ontario,Canada
Posts: 11,334
Likes: 0
Received 0 Likes
on
0 Posts
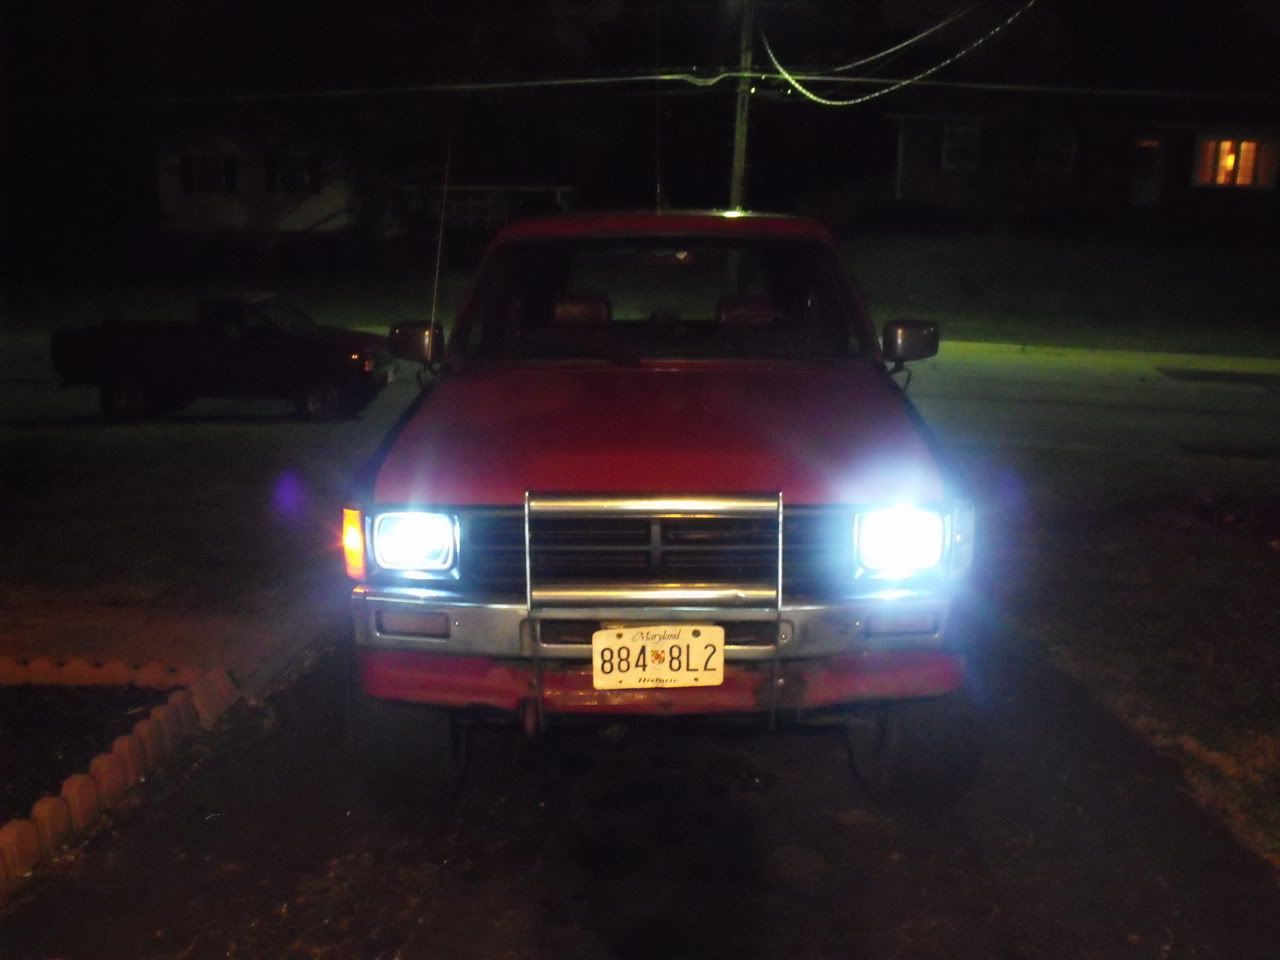
The angel eyes look nice but be careful as bright as they appear you can count on a lot of attention from the John Q. Laws hassling you about them.
 03-06-2010, 04:43 PM
#42
Registered User
Join Date: Feb 2006
Posts: 6
Likes: 0
Received 0 Likes
on
0 Posts
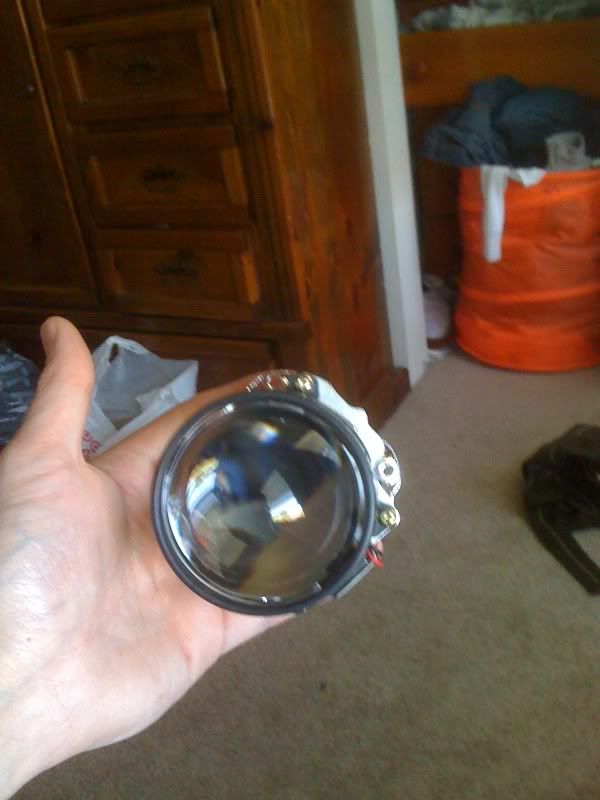
Just finished this upgrade. Got the AutoPal 200mm H4 conversion housings, Angel Eye kit and ballasts off ebay for $130 total (after shipping). While the more expensive lens/projector combinations might (will) give you a better final product, this kit provides an amazing upgrade from stock and the cutoff is fantastic for the cost.
I recommend!
I recommend!
03-16-2010, 07:40 PM
#46
Registered User
Speaking of wiring, I am very curious as to how these wire into the existing wiring harness that is in our trucks. Could someone that has done this please give me some insight?!
03-21-2010, 04:04 PM
#47
Registered User
Thread Starter
Join Date: Sep 2006
Location: Portland Oregon
Posts: 309
Likes: 0
Received 0 Likes
on
0 Posts
These wire up just like any HI/LO HID kit. It is all plug and play, each wire only has one plug it can fit to so there is no way you could mix anything up. The wiring hooks to one head light plug from the truck, the battery, the ballasts and then the HID bulbs that fit into the projector. The wiring harness also has 2 extra wires to hook the halo up to what ever you want, but I don't know how well it would work as a turn signal. I noticed when I hit my alarm (the driving lights flash) one halo doesn't seem to want to turn fully on when the lights flash but it works fine when I have my lights on.
03-22-2010, 09:14 AM
#48
Registered User
These wire up just like any HI/LO HID kit. It is all plug and play, each wire only has one plug it can fit to so there is no way you could mix anything up. The wiring hooks to one head light plug from the truck, the battery, the ballasts and then the HID bulbs that fit into the projector. The wiring harness also has 2 extra wires to hook the halo up to what ever you want, but I don't know how well it would work as a turn signal. I noticed when I hit my alarm (the driving lights flash) one halo doesn't seem to want to turn fully on when the lights flash but it works fine when I have my lights on.
When you say it has 2 extra wires for the halo, do you have your halos on as driving lights, or do you have a seperate switch in the truck for when you want them on? I would love to have mine so that the halos are on when i want them to be, but do not turn on automatically when i turn the truck on.
03-22-2010, 04:23 PM
#49
Registered User
Thread Starter
Join Date: Sep 2006
Location: Portland Oregon
Posts: 309
Likes: 0
Received 0 Likes
on
0 Posts
That's the best part of them being completely separate wires, you can wire them however you'd like. You can run a separate wire to a power source with a switch inline and have them on whenever the switch is flipped or you can wire them directly to the driving lights. The wires are open ended, meaning they arent hooked into the HID ballasts or to the harness, so you can do what you'd like with them.
Last edited by SigEp4Runner; 03-22-2010 at 04:24 PM.
08-09-2010, 04:24 PM
#50
Registered User
I know this is an older thread, but how did everyone heat up there headlight bulbs to seperate them?
The instrucions that came with mine want you to put it in a box with a hole in it and then shoot a heat gun in there. It dosen't seem to get them hot enought to seperate. I am trying boiling some water to 200 deg and see if that will work. The problem I have is the back part of the bulb housing is plastic and I don't want to melt it.
The instrucions that came with mine want you to put it in a box with a hole in it and then shoot a heat gun in there. It dosen't seem to get them hot enought to seperate. I am trying boiling some water to 200 deg and see if that will work. The problem I have is the back part of the bulb housing is plastic and I don't want to melt it.
08-10-2010, 09:57 AM
#51
put it in your oven...
a baking sheet or similar over the metal grate and place your headlight assembly on top of that (the bare metal would burn char marks on your headlight) (I've used cardboard before, but I wouldn't recommend it for safety reasons)
if you have an AWESOME heat gun you can use that but an oven works WAY better...
I've never done this with Toyota headlights but I have done it about a half dozen times with other vehicles... Subarus, Nissans, Audis, etc.
usually temp somewhere between 250 and 320 bake for 5-10 minutes and the two halves should just pull apart easily.
really you just need it warm enough to soften the glue and do so evenly around the lens. I usually air on the side of caution in terms of heat and as soon as the glue is soft enough to move it around I just muscle it off.
-----------
I've been thinking about installing PJs on my truck but I like the look of the factory hallogens. I'm thinking I might install the PJs to look like fog lights on the lower bumper and then making the headlights more just like driving lights... especially with a lifted truck having the PJs lower wont blind people or attract undue attention, and there's nothing to retrofit either.
Last edited by twistedsymphony; 08-10-2010 at 09:59 AM.
08-10-2010, 12:35 PM
#52
Registered User
Thanks, yeah I tried the oven at 225 for over a half hour and nothing. I was able to get one of them by putting in boiling water at 225 for about 30 mins and kept pulling out every 5 mins or so and cutting away with a razor blaze. The problem I think that I am having is that I am trying to seperate H6054 H4 conversion housings Like the OP used, and not factory lens housing like say a 3rd gen has. I think the glue is much stronger on the conversion housings.
The problem that I ran into now is that when the housing is split and I insert and attach the projector into the back it sticks out so far that I can't glue the front glass back on. It gets in the way. It would have to be atleast 3/4 inch less deep to get the glass front back on and sealed.
I have now ordered up a new set of eBay cheapy housings in hope that they will be deeper and accomodate the projectors. Wish me luck.
12-29-2010, 12:55 PM
#53
Registered User
Join Date: Nov 2007
Location: Gilbert, Az.
Posts: 680
Likes: 0
Received 0 Likes
on
0 Posts
Bump...
So I'm curious if some one is willing to do a write up on this..? It seems it's drawn enough attention that it should be done. I guess maybe I just dont want this thread to die....
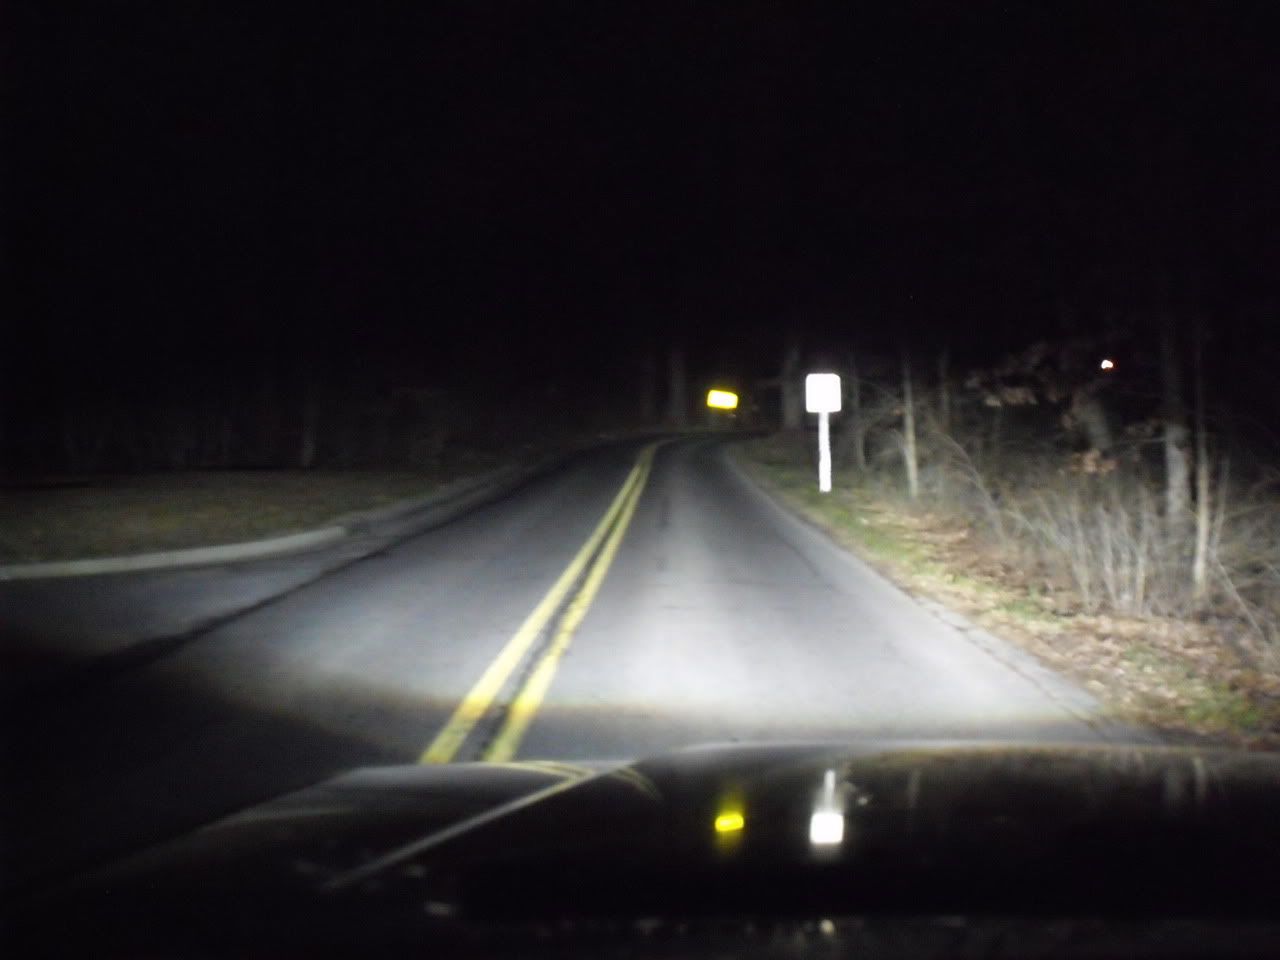
I'd like to see more pictures of the housings that everyone who's done it has used. Also, the light spread down a street...not in a garage or parking structure. So if who evers done this already wouldn't mind posting more pic.s of the lights aimed down the road please.
Thanks-
-Ted
I'd like to see more pictures of the housings that everyone who's done it has used. Also, the light spread down a street...not in a garage or parking structure. So if who evers done this already wouldn't mind posting more pic.s of the lights aimed down the road please.
Thanks-
-Ted
01-11-2011, 07:18 AM
#54
So I'm curious if some one is willing to do a write up on this..? It seems it's drawn enough attention that it should be done. I guess maybe I just dont want this thread to die....
I'd like to see more pictures of the housings that everyone who's done it has used. Also, the light spread down a street...not in a garage or parking structure. So if who evers done this already wouldn't mind posting more pic.s of the lights aimed down the road please.
Thanks-
-Ted
I'd like to see more pictures of the housings that everyone who's done it has used. Also, the light spread down a street...not in a garage or parking structure. So if who evers done this already wouldn't mind posting more pic.s of the lights aimed down the road please.
Thanks-
-Ted
06-09-2011, 04:53 PM
#55
Registered User
Thread Starter
Join Date: Sep 2006
Location: Portland Oregon
Posts: 309
Likes: 0
Received 0 Likes
on
0 Posts
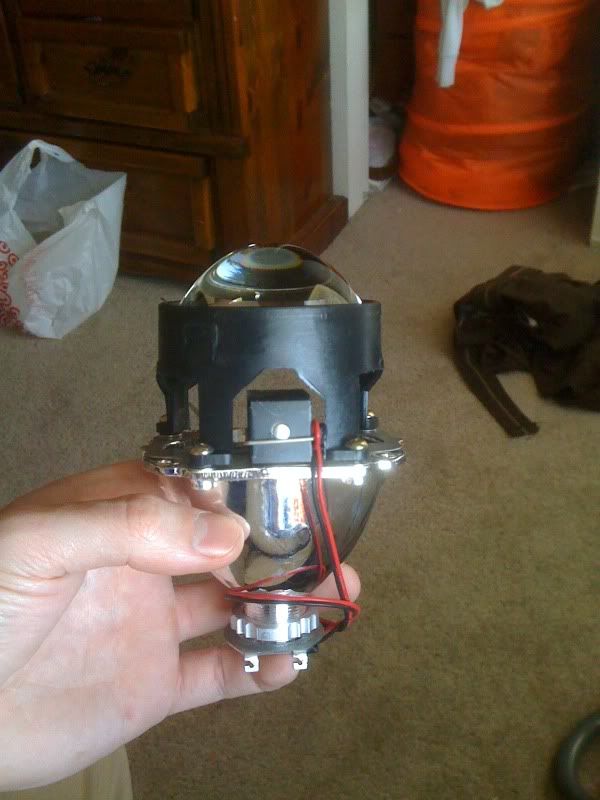
Joeynational, I just got the mini H1s in the mail today. They will be going on my RSX though, I'll stick with the "Projector Len" for my 4Runner. As for anyone wanting to do this to their truck, I highly recommend getting the mini H1's from theretrofitsource.com from here on out. The cut off is much higher quality and the set up is just way better. These things already come with the clear lens retro so you will get the nice color change and TRS has the best customer service I have ever dealt with. I asked a question before I purchased the projectors and I got a full on how to and recommendations for the exact set up that would work best for me. The customer service was amazing and I hadn't even spent a penny with them yet.
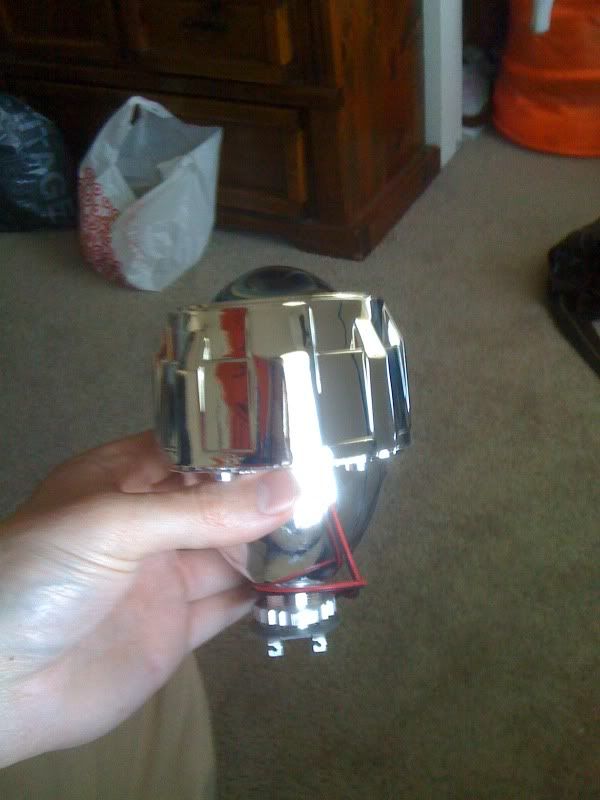
The kit was $120, not including the HID kit, but that is what I paid for my original "projector Len" kit, which isnt bad but the cut off isn't amazing. The TRS mini H1 kit is pretty much PNP with the H4 adapter washer, pretty much like the kit I installed in this thread. The only difference is the projector is bigger. Being a bigger projector, this kit may require some cutting of the sealed beam housing to get it to fit with the lens on, but it is worth it.
As far as a How to for you guys, I will post up as much as I can when I do my RSX headlights as soon as I get the cheapo head light housings in the mail (don't want to ruin the stockers).
Here is a link to the How To TRS sent me;
http://www.preludepower.com/forums/s...d.php?t=332861
This will show you how good the cut off is and how easy the kit is to install.
Here is what I got in the mail today;

Projector, second projector is in the box if you were wondering.
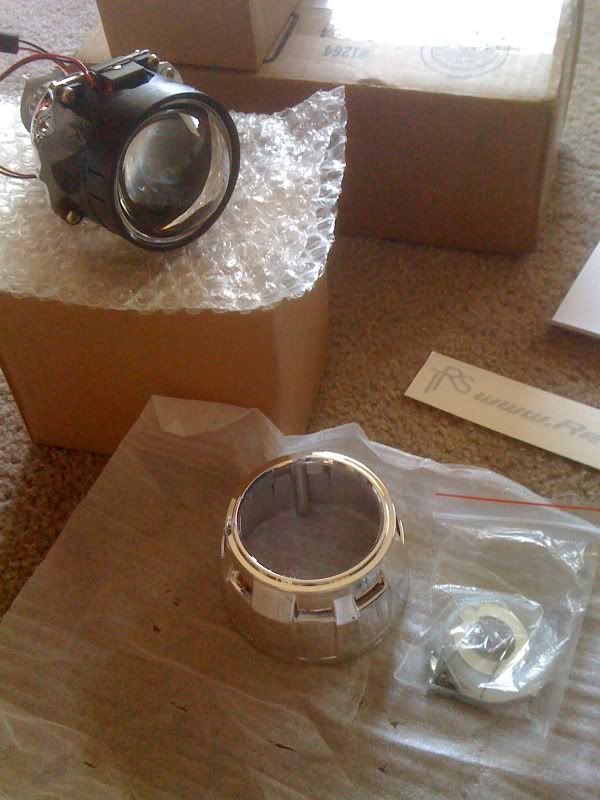
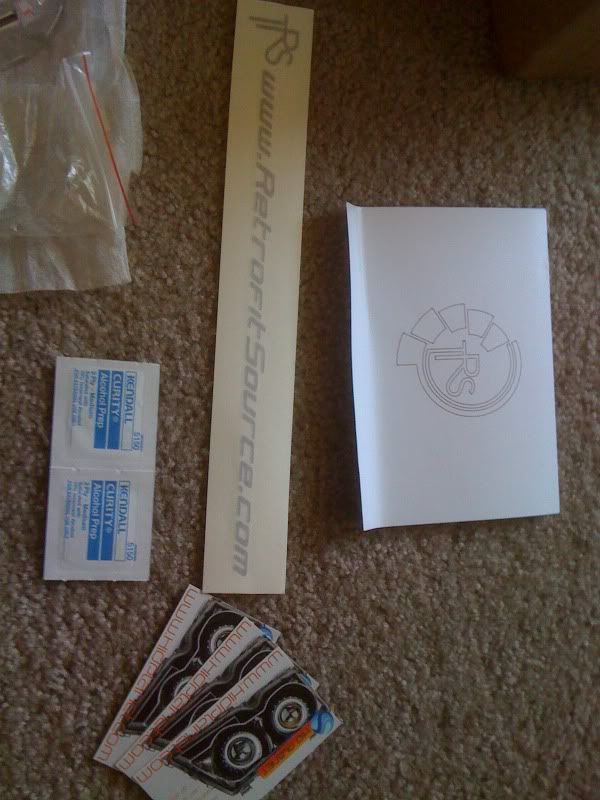
Extra Goodies! Decal, alcohol wipes and some cards
Cutoff pic from the link

Joey, if you got some pics of your install post them please. Did you have to modify your housing to get these to fit?
Although it wont be an exact how to for the truck housings, I will post my process as soon as I get my RSX headlights in the mail and start working on them.
The kit was $120, not including the HID kit, but that is what I paid for my original "projector Len" kit, which isnt bad but the cut off isn't amazing. The TRS mini H1 kit is pretty much PNP with the H4 adapter washer, pretty much like the kit I installed in this thread. The only difference is the projector is bigger. Being a bigger projector, this kit may require some cutting of the sealed beam housing to get it to fit with the lens on, but it is worth it.
As far as a How to for you guys, I will post up as much as I can when I do my RSX headlights as soon as I get the cheapo head light housings in the mail (don't want to ruin the stockers).
Here is a link to the How To TRS sent me;
http://www.preludepower.com/forums/s...d.php?t=332861
This will show you how good the cut off is and how easy the kit is to install.
Here is what I got in the mail today;
Projector, second projector is in the box if you were wondering.
Extra Goodies! Decal, alcohol wipes and some cards
Cutoff pic from the link
Joey, if you got some pics of your install post them please. Did you have to modify your housing to get these to fit?
Although it wont be an exact how to for the truck housings, I will post my process as soon as I get my RSX headlights in the mail and start working on them.
Last edited by SigEp4Runner; 06-09-2011 at 05:08 PM.
01-03-2012, 09:33 PM
#56
Registered User

Join Date: Jan 2012
Posts: 1
Likes: 0
Received 0 Likes
on
0 Posts
Dont mean to bump an old thread, but i am trying to decide which set of projectors to order...
Just to be clear.... the basics to the install is to remove the headlights from my truck, separate them.... then insert the projector and screw the ring onto the back of the projector.... then reseal headlights and wire everything up?
The mini H1's from theretrofitsource are also just screw in projectors?
Are you able to replace the hid bulb?
Also my 4runner is a 93 with the sloped edge on one side of the headlight case.... will the projector still work with using the glass front of the OEM lights? (the lights pictured before have a clear front piece)
Thanks!
02-02-2012, 05:07 AM
#57
Registered User

Join Date: Feb 2012
Posts: 3
Likes: 0
Received 0 Likes
on
0 Posts
I just did a retrofit with the Morimoto Mini H1's and Morimoto 3five hid kit. I had to modify the aftermarket headlight buckets to get the projectors to work but it was pretty easy with a dremel. I made new headlight lenses out of lexan. Here is my build thread http://www.hidplanet.com/forums/show...Toyota-4runner
Here are some pics
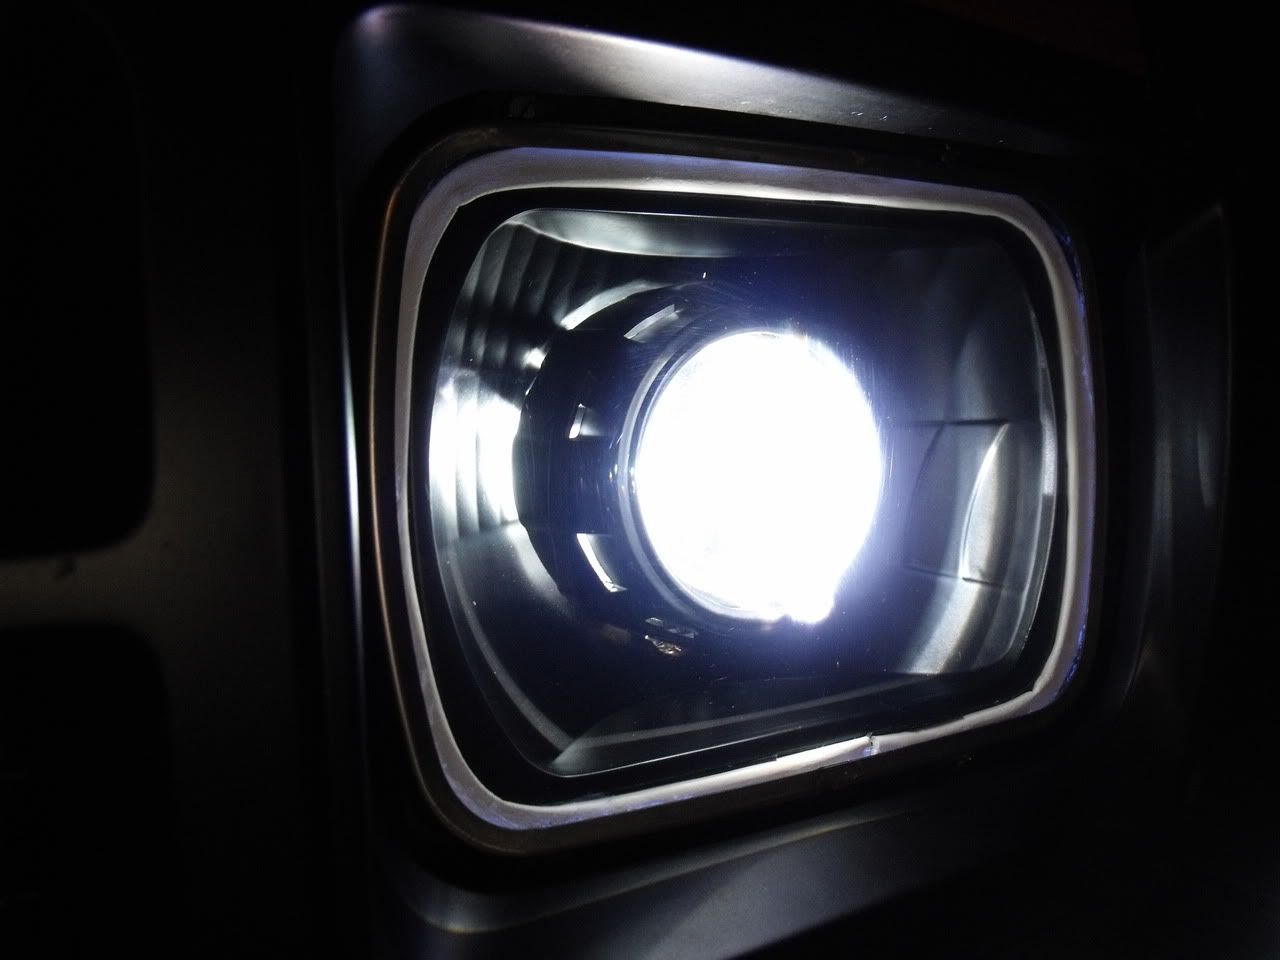

High beams
Here are some pics
High beams
02-02-2012, 07:31 AM
#58
Contributing Member
Join Date: Mar 2003
Location: COTKU,Ontario,Canada
Posts: 11,334
Likes: 0
Received 0 Likes
on
0 Posts
wow that is a nice crisp cut off... what is the road appearance in low beam?
read your hidplanet link... not clear why you had to modify the housing if it was already a "projector" style bucket...
lexan lens looks good...
read your hidplanet link... not clear why you had to modify the housing if it was already a "projector" style bucket...
lexan lens looks good...
Last edited by aviator; 02-02-2012 at 07:35 AM.
 02-04-2012, 10:13 AM
#60
Registered User
Join Date: Feb 2012
Posts: 3
Likes: 0
Received 0 Likes
on
0 Posts
http://www.hidplanet.com/forums/show...tro-with-MH1-s


